Mirrors

quattrojames

Moderator
Staff member
Moderator
Joined
Mar 28, 2008
Messages
14,078
Reaction score
599
Points
113
Location
Dorset
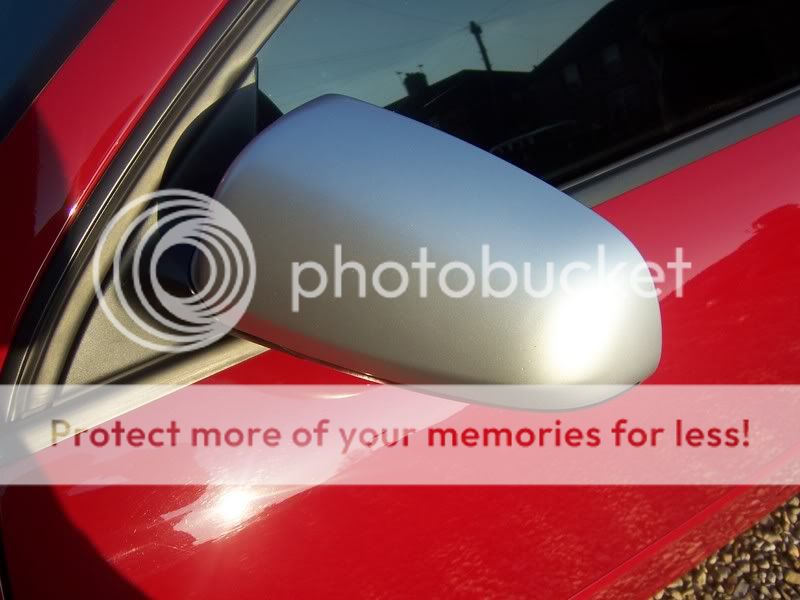
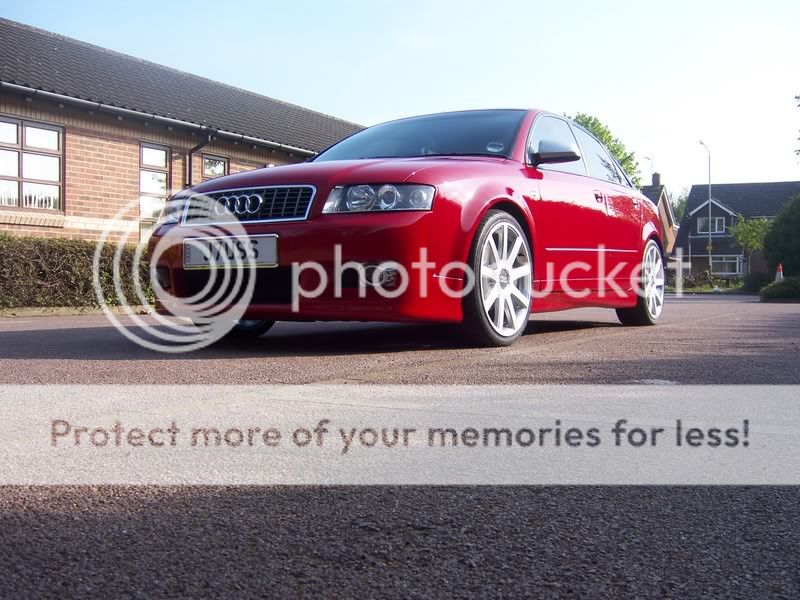
I have bought a set of cheap oem mirror caps from ebay and am going to spray them up Avus silver (Audi wheel colour) as I can't justify mirror caps right now, and don't much fancy someone beating my mirrors off to steal them which sadly seems to be happening more and more :no:

Today I have been rubbing them down and getting some primer on them. Anyway I thought I would take the old caps off to see what's involved. The two screws underneath were both corroded into the aluminium mirror base and the heads snapped off :wtf: Not a huge problem as I could still get the black part underneath off, and thus the glass, to undo the crew to remove the cap.

Hindsight I would have removed the mirror completely and soaked it in WD and had a better grip with the screwdriver, but they probably still would have snapped off :uhm:

Now I can take the whole mirror assembly off and attempt to drill out the broken screw (drilling steel out of aluminium :( ) or shall I just not worry? I have clipped it all back together for now and the mirror seems pretty firm without the screws.

Surely someone else has had the screws break as I imagine the corroded aluminium is a common problem, how did you get round it? Try and drill them out or just not bother replacing the screws?
 
A couple of pics:

Flatted down the mirrors with 1200 paper prior to primer:

Mirrors004.jpg


I have used some special flexible primer especially for plastic surfaces, bizarrely it is clear - but I put them in the oven to bake them. Three coats of primer to make sure ;)

Mirrors005.jpg


Hopefully the weekend will allow me the chance to the silver top coat on.
 
...Must admit I had a chuckle seeing those mirror caps in your oven :laugh:

...incidently.......what Oven setting did you use (or gas mark hehehehe)
 
...Must admit I had a chuckle seeing those mirror caps in your oven :laugh:

...incidently.......what Oven setting did you use (or gas mark hehehehe)

I know it looks funny but worked a dream, the paint has baked really hard. I put them in for 30 mins at 80deg C for reference!

Anyone got any suggestions for the broken screw dilemma in my first post??
 
isnt there anything left of the thread at all to get some grips on or something, if not mate youve got to drill it out, unless your happy with how secure it is without the screws.
i once had some very strong velcro strips, what about having something like that inside the case.
 
There is about 2 mm of screw showing, I tried to get some grips on but no joy, but that was working upside down with the mirror on the car still. I will have to drill it out I think, just not too sure how I would get on drilling a steel screw out of an aluminium housing :notme:

It's tempting to use velcro pads or something, but I'm a fussy ****** and I would know the screws are missing which might bug me :crying: The annoying thing is I only took the lower part off cos i was so scared or breaking the glass!

We'll see, will have a fiddle when it's time to put the new caps on and I will take the mirrors off totally and have a proper go at it.
 
Yeah thanks for the thought, I have got a set like that but the smallest one (4mm) is still bigger than the screw thread :3sadwalk:

Will have to drill it and retap I think.
 
Hi James,

Just thought I would throw my experience into the mix!. I took my drivers mirror off. And what a ****** is was to get back on!! Still need to take it off and refit it again with the peice of foam that was between the mirror and door as get a lot of wind noise.
Once I figure out the easy way!

I think the velcro idea would be your best bet. Im guessing the screw metal is harder that the alloy so could be a bit of fun trying to drill it out
 
I think the velcro idea would be your best bet. Im guessing the screw metal is harder that the alloy so could be a bit of fun trying to drill it out

My worries exactly :wacko:

I virtually took my drivers one off today, but couldn't be ***** to sort the wires out, so I know what you mean about the foam pad and getting it under the window rubber was a sod too, but it seemed to go back ok. Not driven it yet though .....
 
Will be interested to see how this one turns out.

If they're nice.. you can do mine! :D
 
you could try flat-ground side cutters, if the bottom of the head of the cutters are flat you could get an excellent grip of 2mm of screw thread, ive used it a million times to get ******** screws out, its a good sparky trick ;)

Hope you know what I mean, cant do a pic....
 
you could try flat-ground side cutters, if the bottom of the head of the cutters are flat you could get an excellent grip of 2mm of screw thread, ive used it a million times to get ******** screws out, its a good sparky trick ;)

Hope you know what I mean, cant do a pic....

Hmmmm do you mean like wire strippers? Or have I misunderstood :uhm: Surely you would get better grip from the gnurled end of some mole grips or similar? Find a link for me mate ;)

Meanwhile, I have decided to go for some grey primer prior to the top coat as I don't want to find the red shows through under the Avus silver :no:

Mirrors006.jpg


There was some slight crazing on one mirror, maybe caused by too think a coat of paint? Or too warm an oven? Anyone a bodyshop expert? What temp is a paint oven? Not a huge problem, just means I will have to flat it back before the second coat of primer :keule:

Mirrors008.jpg
 
That crazing is usually caused by dissimilar paints in contact mate, like acrylic over cellulose etc, but anyhoo you will have to wait till the primer is hard then use a degreaser and fine emery sponge to cut the surface back to matt then prime again, and dont bake the primer.

Acrylic Primer doesnt like being ****** in the oven, it prefers to air dry and it could shrink, it probably isnt an etch primer like cellulose, but a high-build acrylic one or summat. The factory paint will be cellulose or cyano-acrylate (2-pack)
 
Ok thanks, the strange thing is the other mirror has come really good :think:

It's easy enough to flat it back and keep my fingers crossed for some sunny weather this weekend!
 
yeah use many thin light coats of primer, giving 10 mins between coats and resist the temptation to overspray or rush it cos the primer builds fast and takes longer to dry in thick spots, which means it has different rates of expansion as it dries, try to maintain light even coats from at least 12" away, seems wasteful but it does make the eventual coating better. Flat between coats with a light scrub over using a fine sanding sponge and each coat will bite into the previous one.

If you get the same result again you may need plastic prep / barrier spray to seperate 2 paints that dont like each other.

Oh and commercial paint ovens run from 30oC to 93oC at 2% relative humidity to flash off the base coat before glaze or laquer is applied. The low end is called gentle-dry and the top end harsh-dry, depends on application where you set it, so you were near the harsh end. I reckon 40 to 50oC is probably best myself.
 
I flatted it right back with 1200 paper until it felt smooth, there was still some crazing visible but it felt really smooth all over, and then I degreased them and gave them a second coat of primer. There is still some kind of surface reaction going on (no oven bake this time!) but it is not as bad, so i will give them 24 hours and flat them back again. I will see how that looks and go for a final coat of primer and make a decision from there.

Have you found a link for those side cutters yet Evil? ;)
 
Yeah that's what I thought, I have a set I will try. Gut feeling is that the screw is so well rusted into the ally that the 'squeezing force' I will need to grip it will just cut through the screw! But I will give it a go, thanks :hi:

Is etching primer not the same as the special plastic primer I used first off?

I used THIS:

77397_m.jpg
 
What size is the screw? you could try drilling it and tapping a smaller size the winding it out, or if you know the correct size of screw then driil it about 0.3/0.4 mm smaller and the pieces should come out when you screw the next one in (on the working that it's a through hole!)
 
its only 3 or 4mm self tappers innit? Not enough meat to drill out.

The cutters shouldnt cut the screw but will bite into it. Ive gotten lots of headless screws out wi them :)

And the primer, it is plastic primer but perhaps isnt compatible with the paint underneath, I would maybe use holts auto-primer for instance.
 
What size is the screw? you could try drilling it and tapping a smaller size the winding it out, or if you know the correct size of screw then driil it about 0.3/0.4 mm smaller and the pieces should come out when you screw the next one in (on the working that it's a through hole!)

As Evil says it's a max 3mm self tapper, so while I could drill it possibly i would never be able to drill into it and wind it out :notme: It's a blind hole so as long as I can drill the old screw out I will just wind a larger self tapper in again :icon_thumright:

And the primer, it is plastic primer but perhaps isnt compatible with the paint underneath, I would maybe use holts auto-primer for instance.

Yeah maybe, I am still hopeful I can rectify it yet, having to start from scratch again will be a right ballacher :aggressive:
 
Success :yahoo:

Flatted right back and had another go with some Halfords own make grey plastic primer (first clear stuff was Plastikote :think:)

Going to go for a second coat tomorrow, but looks promising!

Mirrors020.jpg
 
Thats some tidy work there James. Looking good sir, Looking Good :photo:
 
After some opinions......

My original plan was the Avus silver and lacquer to match the wheels and roofbars with a nice shiny finish - but having seen them I am wondering if I should just leave them the satin colour they are now? If I didn't lacquer them would they be protected well enough if I just polished them well? Or could I get some clear lacquer so the satin look would remain, but they would be better protected?

Or would they look better if I stuck to my original plan? :uhm:

Any thoughts?
 
Hmmm... I like the satin look (which I did on my red one once before they changed to black) but that was just the mirrors alone!

IMO the only shiney ones that look good are the original ally mirrors, having yours nice n shiney in the Avus might make them look a little out of place BUT if they were the Brushed look (...the Satin effect your talking about) I think they would look better.

Its a 50/50 mate. Suppose it wouldnt hurt to just lacquer them whilst satin look and try them.

I had mine satin look with a coat of lacquer, they still matched the alloys very well considering they wasnt the same colour if you get what I maen :
100_1293.jpg

100_1377.jpg
 
plus without the lacquer they wont be as hardened to chipping :(

I thought the first primer was acrylic, plastikote is defo acrylic poly. Good to see the cellulose halfords stuff worked fine! Looking good bud :thumbsup:

You can get satin laquer, its called eggshell yacht lacquer, try it on a test piece first. I did a chess board I made with this stuff, and even boiling cups can't mark it. Its 15 years old now and looks as good as new.
 
Ok I am going to go with the satin look I finish, the Avus silver comes as a twin pack with a clear lacquer anyway so I will try that out. I just hope it doesn't make the current satin finish look to glossy - but there's only one way to find out......

It's all going to be on hold for a few days while work gets in the way .....:blahblah1:
 
Top job there James. I agree with the satin look too. I'm not big on the shiney look, but then again your's are Avus silver not chrome, so would probably look good either way. Difo need the lacquer though, you wan them staying in pperfect condition.
 
Hi

I am new on this forum and my english is not perfect but i would like to ask you is any of you know where can i get right mirror cover to audi a6 1.9 tdi reg 1999 ? The best if i could get colour blue. Another question... how can i check what the code colour of my car is?


thank you very much
 
Hi

I am new on this forum and my english is not perfect but i would like to ask you is any of you know where can i get right mirror cover to audi a6 1.9 tdi reg 1999 ? The best if i could get colour blue. Another question... how can i check what the code colour of my car is?


thank you very much

The paint code would be on a sticker, either in the front of the owners manual or maybe in the spare wheel well. Maybe try ebay for the mirrors?
 

Similar threads

Replies
2
Views
760
Arf
Replies
7
Views
722
Replies
14
Views
1K
Replies
9
Views
1K
Replies
17
Views
2K