I used a steak knife to remove mine, literally used it like a saw and it came off easy. I then gently sanded it so it wasn’t sharp and felt smooth to touch.
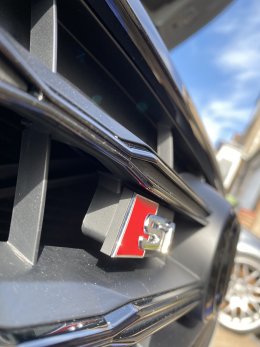
I haven’t even been able to get the S1 red square off the front of the grill yet. But looking closely you can see that once it is off it will leave a square plastic bracket behind which hangs down and is actually part of the front grill. Is this what you cut off and sanded ?
Many thanks
Well I managed to remove the front grill S1 badge without removing the complete bumper. As mentioned before the actual S1 badge is attached to a black plastic rectangular support which is part of the front grill. So I taped up the surrounding grill for a bit of protection and used a hacksaw blade and carefully sawed through the plastic support. Took a couple of minutes and then filed and sandpapered the remaining edge for a flat smooth finish. Came out really well.
Although I realise it’s not everyone’s taste, but I like the de-badged look.
Well I managed to remove the front grill S1 badge without removing the complete bumper. As mentioned before the actual S1 badge is attached to a black plastic rectangular support which is part of the front grill. So I taped up the surrounding grill for a bit of protection and used a hacksaw blade and carefully sawed through the plastic support. Took a couple of minutes and then filed and sandpapered the remaining edge for a flat smooth finish. Came out really well.
Although I realise it’s not everyone’s taste, but I like the de-badged look.View attachment 253038View attachment 253039View attachment 253039View attachment 253037View attachment 253036
This site uses cookies to help personalise content, tailor your experience and to keep you logged in if you register.
By continuing to use this site, you are consenting to our use of cookies.