Goodbye Vauxhall (sort of), well hello Audi S3

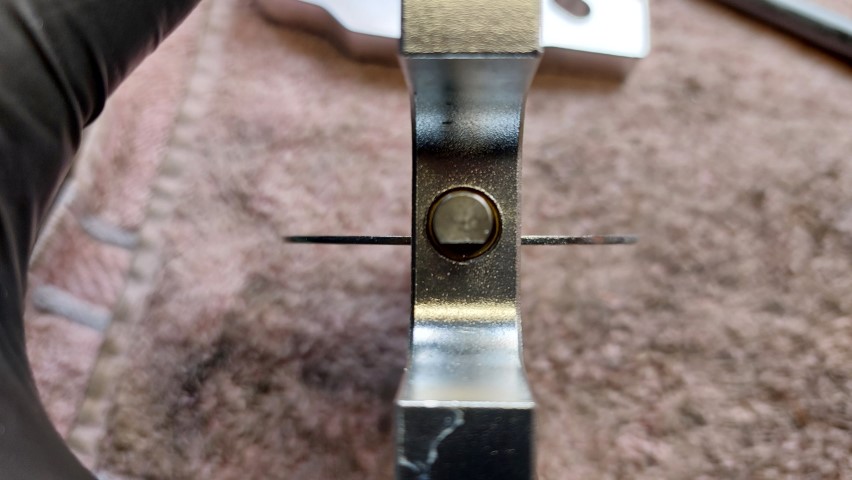
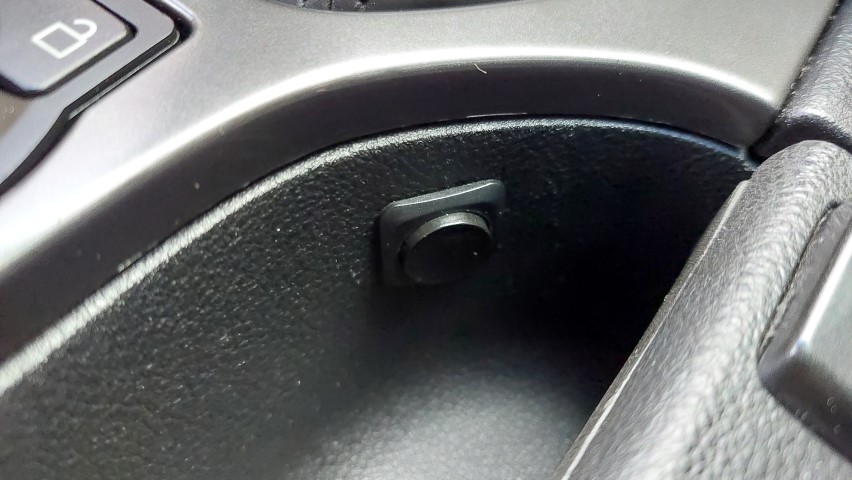
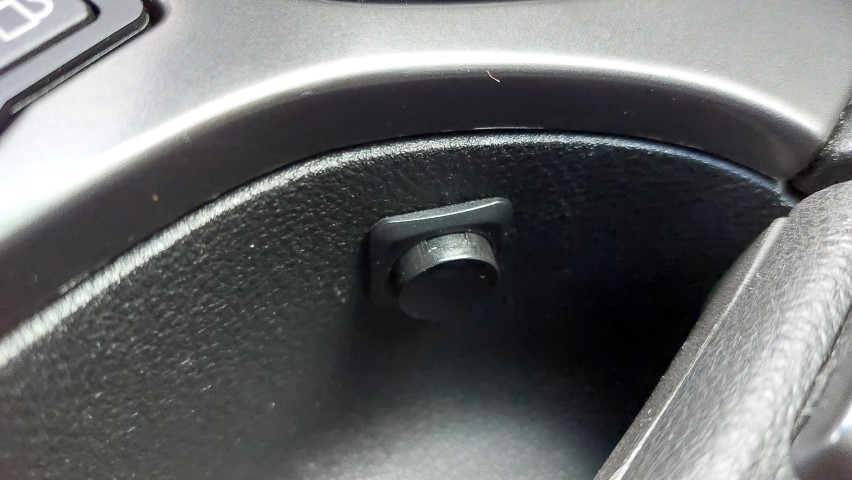
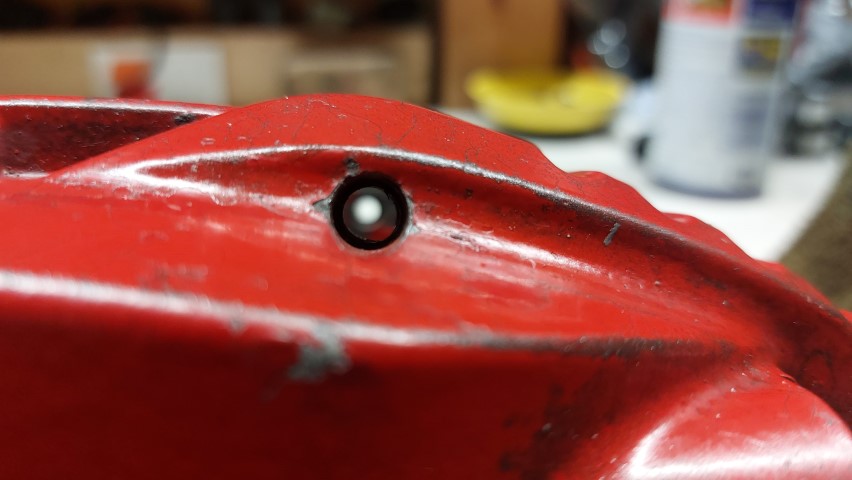
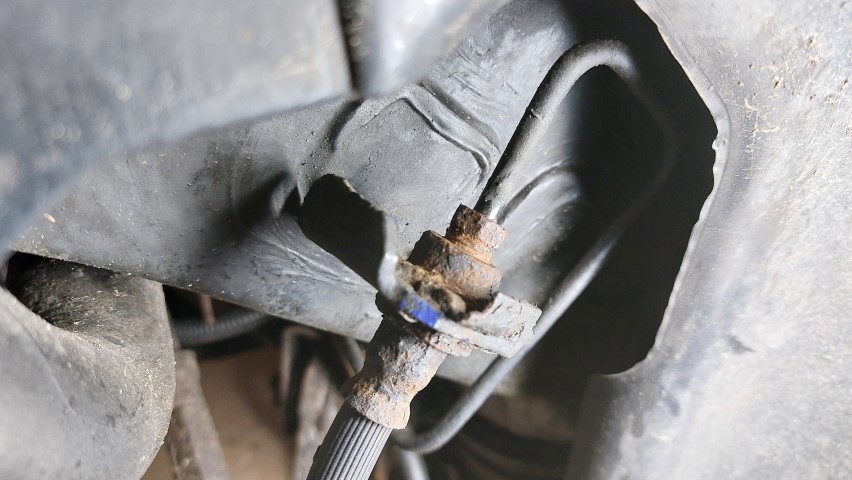
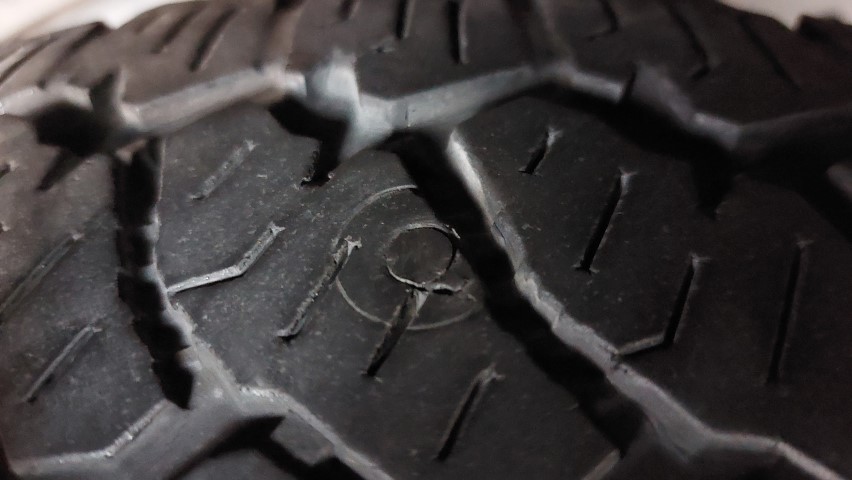
The other month the Amarok TPMS light came on and I noted this screw where it shouldn’t be.

20240202_132508Small.jpg


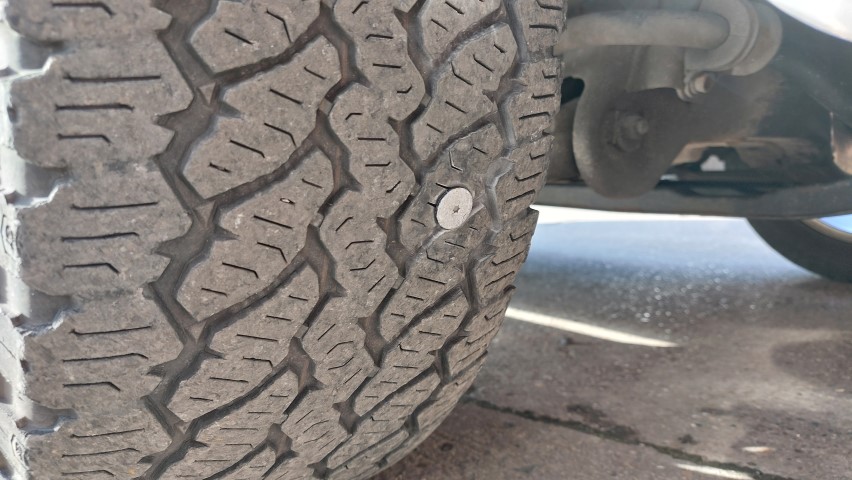
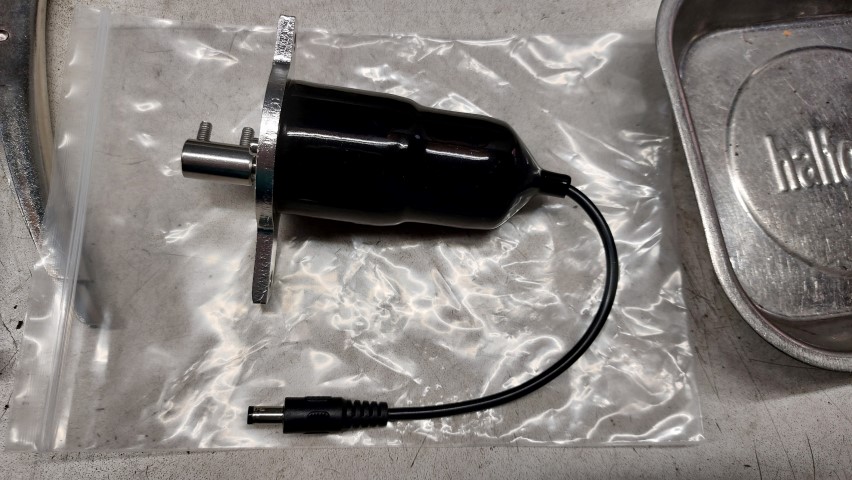
So promptly went to my local friendly tyre shop and got it sorted for pennies with a plug. I’m probably going to replace the rubber on the truck this year with new so happy it could get repaired.

20240203_080826Small.jpg


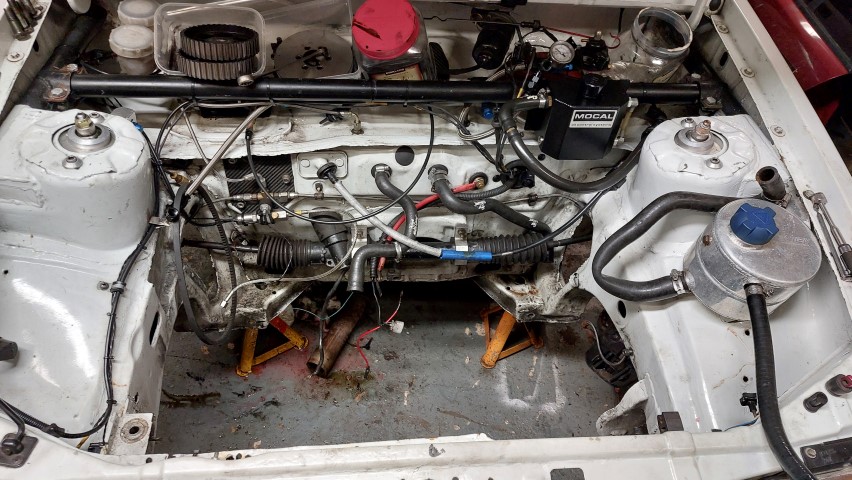
Went over to my mates to assist with engine removal from his Nova as it’s a 100-a-day smoker and was still as bad after a head refresh. Our initial suspicions were bottom end but the head was ready for a freshen up so that got sorted first, slapped together for a few more track day jollies and now time for the bottom end.

Head removal which made the tight bay a little less tight.

20240223_201001Small.jpg


20240223_202355Small.jpg


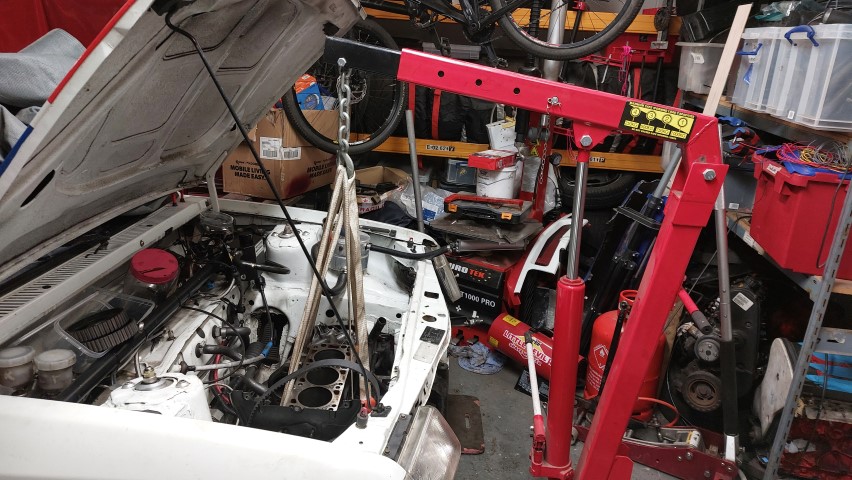
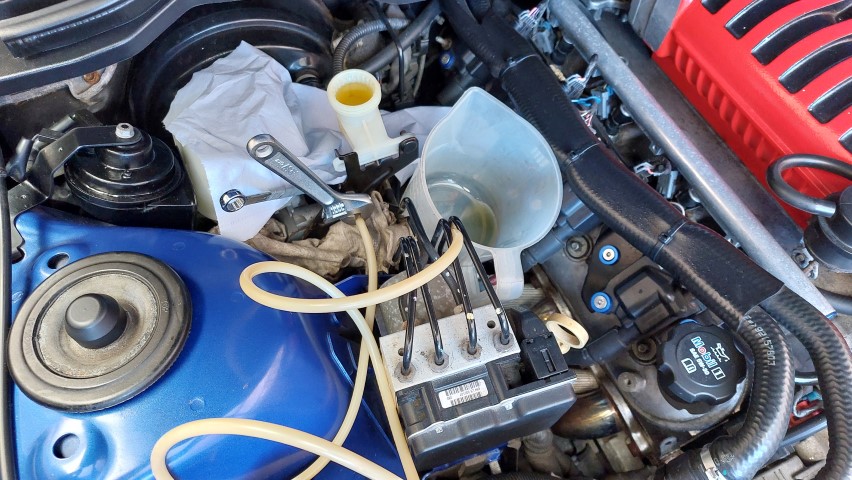
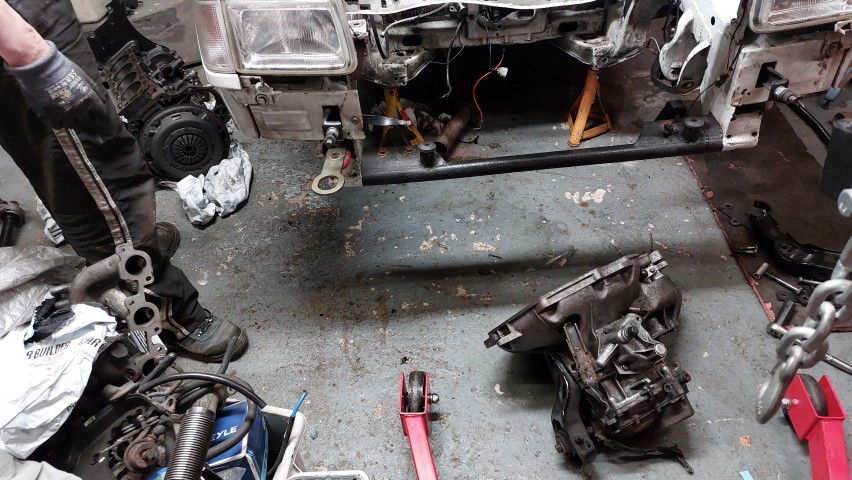
Block and box split and stuff everywhere. We suspect it was the piston oil rings but noticed the block had a bit too much piston slap so he’s got another block and new pistons being outsourced for a bottom end refresh as we don’t have time to tickle it ourselves.

20240223_202403Small.jpg


20240223_202407Small.jpg


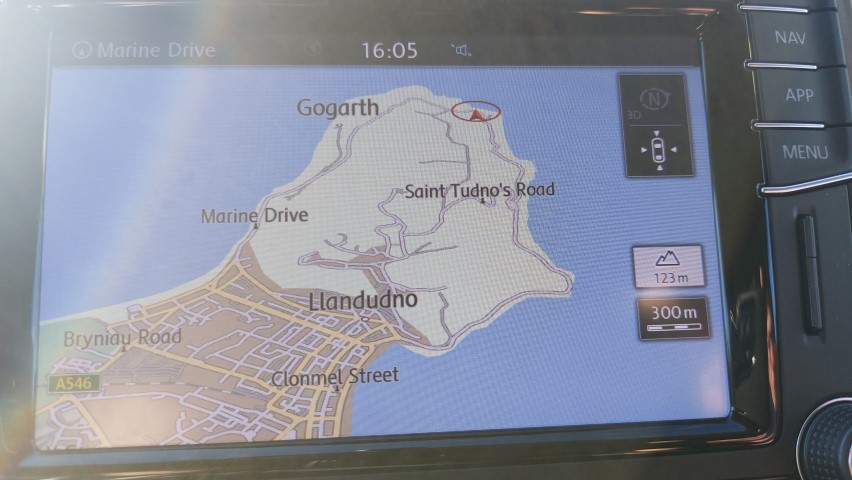
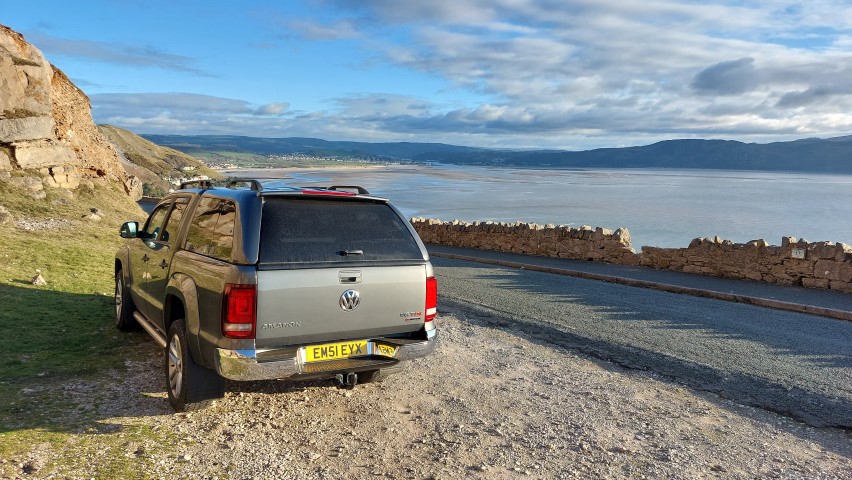
A recent holibobs over to Llandudno in the truck lead to some extreme parking!

20240228_104100Small.jpg


20240226_154454Small.jpg


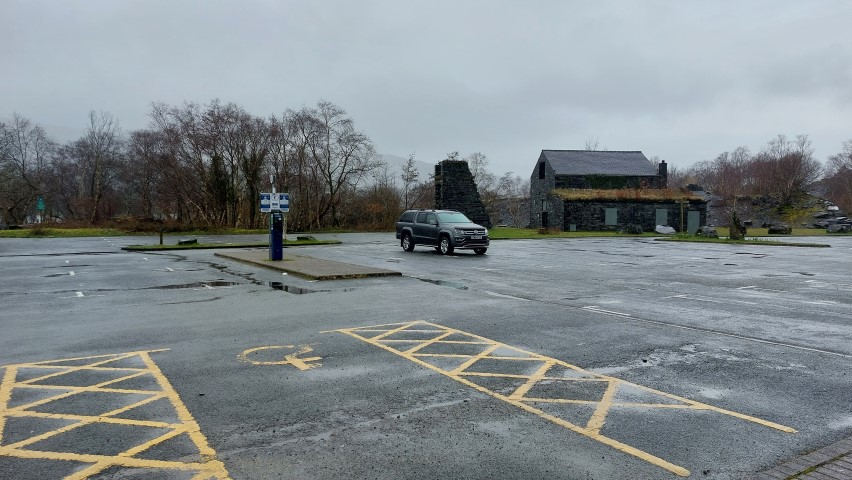
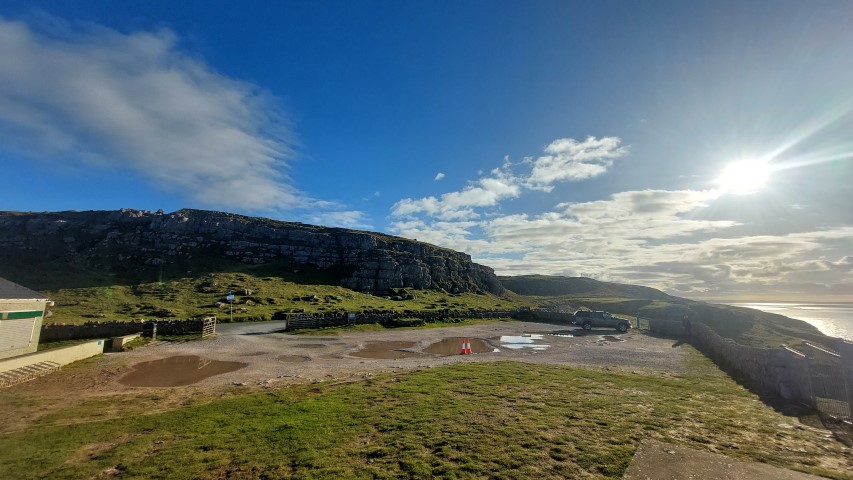
Walked the Great Orme and then decided to drive it the following afternoon as the weather was amazing.

20240226_160419Small.jpg


20240226_162451Small.jpg


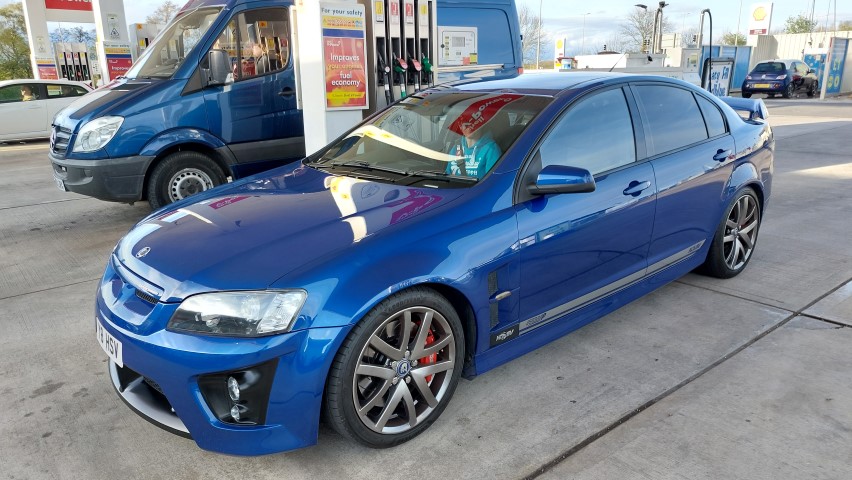
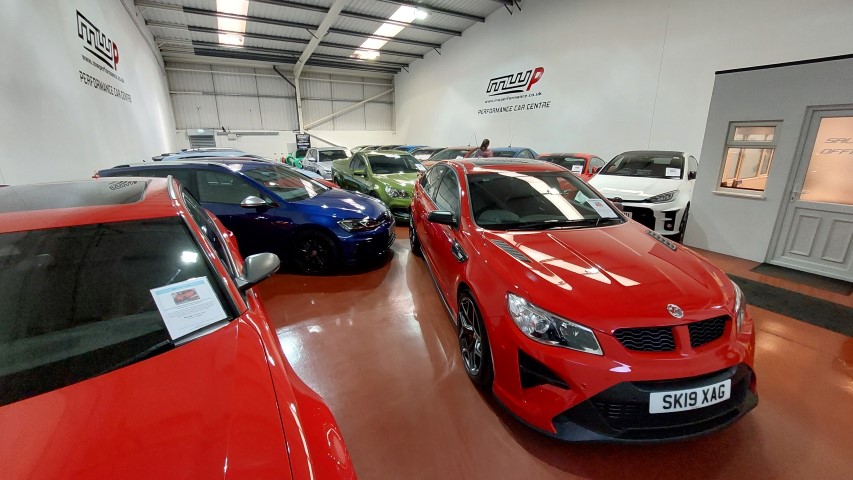
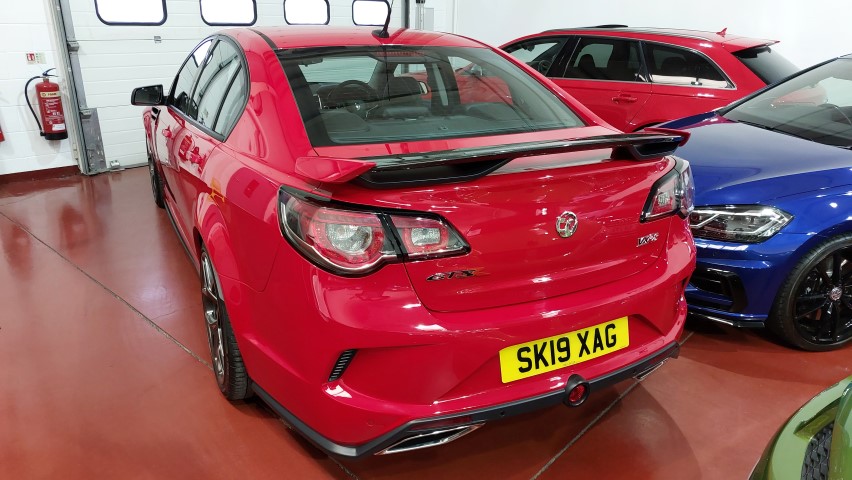
On the way back I thought I’d pop into MWP for a nosey at what they had in.

20240301_120313Small.jpg


20240301_120317Small.jpg


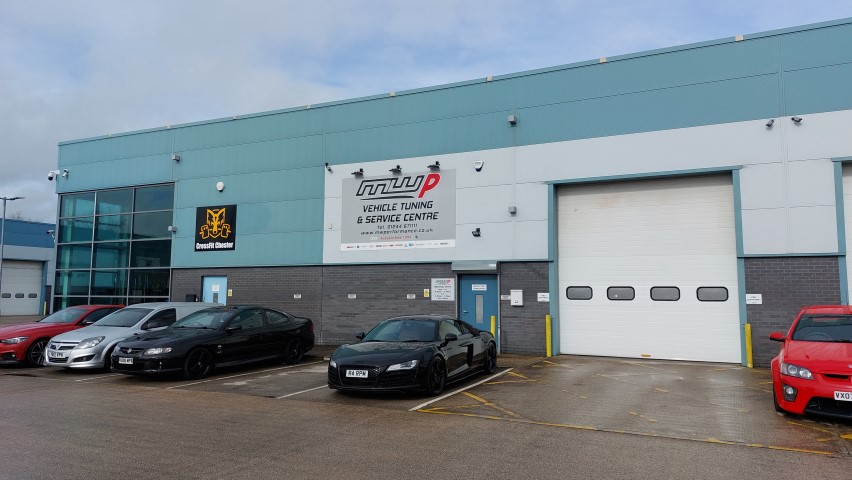
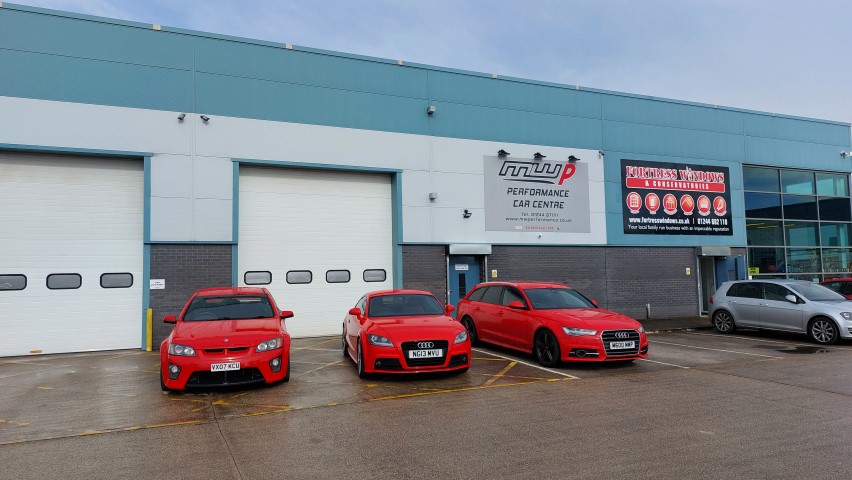
Had a chat with Mike in sales and a poke around. The 3x Maloos were lovely and if you’re in shopping mood why not buy an ultra-rare and mint 2019 VXR8 GTS-R for £89,995 mwhahaha

20240301_114402Small.jpg


20240301_114928Small.jpg


20240301_114758Small.jpg
 
  • Like
Reactions: ahtcap and northpole
The VXR8 front bumper had a very noticeable paint lift next to the top right grill so I took the decision to take it to my local paint shop who does smart repairs. Bumper removed along with grill inserts.

20240106_161344Small.jpg


Difficult to picture but this looked nasty.

20240106_161802Small.jpg


I wasn’t initially going to but decided the satin black lower center panel wasn’t looking great so opted to have that painted while it was away getting spruced up.

20240106_162853Small.jpg


Left it like this looking very mean.

20240204_110331Small.jpg


It’s a huge front bumper so I was very relieved when it just squeezed into the back of my truck for dropping at the paint shop.

20240106_162559Small.jpg


I decided to remove the Walkinshaw shark fin aerial as it’s not exactly my thing and had been rattle can painted with no lacquer so popped it in with the bumper for a waft over. Fortunately, the OE aerial base was in fine fettle so I’ve sourced a mast and it’s back to stock for now.

20240109_095430Small.jpg


While the front bumper was away I sourced new stainless top side fittings and bzp lower to replace the crusty removed items.

20231126_160730Small.jpg


20240302_163927Small.jpg


As the headlights and front fogs/driving lamps were removed it was primetime to replace all bulbs with Xenon cool white from a seller I’ve used previously on eBay Argo City LTD. Kept to OE bulb wattage but it should bring the car up to a more modern look and improve visibility a smidge at night.

20231126_162017Small.jpg


As the front fogs/driving lamps were removed it would be rude not to get the brackets refurbed so they got carefully stripped and sent to my local powder coaters.

20240211_111340Small.jpg


Next job replace the weak and original boot and bonnet gas struts/springs or whatever you want to call them. A bit of research in the Magneti Marelli catalogue and I ordered the following which are the exact spec required for the VXR8, fitted perfectly and work wonderfully.

Part no.GS0169 which are for a BMW 3 Series E36 1990-99 tailgate without rear wiper, used for VXR8 boot

Part no.GS0158 which are for a Lancia Y11 1995> tailgate, used for VXR8 bonnet

20240204_094004Small.jpg


20240204_094528Small.jpg


20240204_095217Small.jpg


20240204_101414Small.jpg


I noticed the PAS reservoir always look a horrible colour on the VXR8 so sourced a brand new replacement which looks way way better.

20240218_113000Small.jpg


20240218_122000Small.jpg


With the front bumper still in rehab it gave me the opportunity to inspect the air filter which wasn’t looking great condition. It had been washed/cleaned/reoiled a few times in the past from the service history but I bought a new exact replacement K&N which I traced to part no.RU-1008. It’s a huge filter which the pics don’t really show.

20231128_132815Small.jpg


Next up refit the freshly polished headlights and the new air filter.

20240218_100518Small.jpg


20240218_102030Small.jpg


I then had a call to say the bumper was ready so popped and collected it. Huge thanks to Ben as Fleets Ahead a sterling job as always.

20240209_092701Small.jpg


20240209_092938Small.jpg


20240209_180529Small.jpg


Also collected the front fogs/driving lamp brackets after a lovely powered coating job by Morton Industrial Coatings.

20240223_151819Small.jpg


All rebuilt using stainless steel fittings where I could including the bumper fixing screws.

20240302_171302Small.jpg


20240302_171313Small.jpg
 
  • Like
Reactions: Mr Freeze and northpole
When I purchased the VXR8 the first thing I noticed was the supplied keys were looking very tired so I popped onto Aliexpress and a short time later found this seller click me offering replacement keys along with a cutting service. I took a punt and they arrived a couple of weeks later being OE quality and the key blade fitted all vehicle locks perfectly. I had tried ordering flip keys from another seller but they supplied incorrect non-flip version and gave me a full refund. The VXR8 uses GM45 key blades where Vauxhall UK use HU43 so sourcing from UK suppliers is tricky but possible and can prove expensive.

Lots of keys and time to get circuit boards and immobiliser chips swapped over.
20231217_103126Small.jpg


Carefully split old keys and found the battery to be a CR1220 but was expecting a CR2032 so think the boards might have been replaced in the past.

20231217_102848Small.jpg


20231222_125202Small.jpg


20231222_113733Small.jpg


20231222_113831Small.jpg


The new keys ready to receive the remote board from the old keys.

20231222_114902Small.jpg


Next up swap the immobiliser chip which is housed in the flip part of the key and requires very careful removal or you’ll need to get a new blank programmed.

20231222_125338Small.jpg


20231222_125556Small.jpg


20231222_130501Small.jpg


Chip inserted in the new key and all done with old on left in the bags and new on right.

20231222_131019Small.jpg


20231222_115337Small.jpg


Wifey got me a funk keyring for Christmas but I have to say the keys are really confused “Am I a Holden or Vauxhall…no wait I’m a HSV…oh heck”.

20231227_103720Small.jpg


20231227_103737Small.jpg


Thanks to the wonderful world of the interweb I’ve since sourced some lovely HSV gel coat key badges but not got round to installing them.

20240319_120033Small.jpg


The wife had mentioned about seatbelt pads so I sourced a full set off Aliexpress as a stocking filler for her. As with the keys the interior is also confused, HSV or VXR8 now it’s both!

20231230_093653Small.jpg


20231230_103238Small.jpg


Got hold of a spare front driving lamp as they are prone to stone chips and one of mine is starting to blemish on the inner chrome reflector so stashed this away for a rainy day.

20231202_090804Small.jpg


Sitting in the drivers seat you could feel the seat base r/h bolster was a tad saggy along with the centre armrest padding which had an obvious elbow dent. Seat and armrest cover removed.

20240215_132545Small.jpg


I contacted Steve at Classic Car Services enquiring about a repair to which he said “No problem” so I dropped them with him. He kindly sent me these action pics.

20240212_104558Small.jpg


20240212_104600Small.jpg


20240212_104601Small.jpg


20240212_104604Small.jpg


20240212_104606Small.jpg


All done and back in the car.

20240215_133206Small.jpg


20240217_090913Small.jpg
 
  • Like
Reactions: ahtcap
While sourcing VXR8 parts I decided to continue with the HSV exterior themed rebadge already running on the car and as per the VXR8 equivalent at the time, the Australian 2007 HSV Clubsport R8. My plan was to remove the V8 lower front wing badge and replace. My initial purchase was metal Chinesium (top two) but I managed to find ABS plastic (bottom two).

20240320_163612Small.jpg


OE “V8” front lower wing badge on the VXR8 being the only one not replaced thus far.

20240329_123617Small.jpg


Freshly installed HSV with the continued nod towards its Aussy roots.

20240406_120000Small.jpg


During my inspections I noted the RH front drop link boots were looking sad so removed it for closer inspection and found the ball joints in perfect condition so measured up and replaced both boots.

20240319_071051Small.jpg


20240321_162144Small.jpg


20240321_163005Small.jpg


Also found a split boot on the LH TRE and again the ball joint was perfect so dug out a universal boot from my stock.

20240331_092239Small.jpg


20240331_093257Small.jpg


20240331_094549Small.jpg
 
  • Like
Reactions: northpole
As part of the Walkinshaw performance package my VXR8 got back in 2008 a Wortec switchable exhaust system was installed. This is the electric motor flap version and not vacuum operated so it has two motors either side just before the rear silences which allow it to go from loud to LOUDER. However, I found both motors had the wiring cut and were set to LOUDER and after checking the button, controller and wiring it all worked so I hatched a plan.

The flaps off the car were looking rather sad with the RH already looking to have been replaced and the LH an original that came with the Wortec.

20240114_105406Small.jpg


20240114_140902Small.jpg


20240114_145528Small.jpg


20240114_145544Small.jpg


20240114_151346Small.jpg


The exhaust is a 2.5 inch but expands to 3 inch where the flaps are fitted so 3 inch exhaust flap motors were ordered from Aliexpress see here.

20240116_143929Small.jpg


The replacement flap motors had a rewire with the correct waterproof plug ends prior to a final test on the car…or so I thought!

20240304_172016Small.jpg


20240304_173148Small.jpg


During testing I noticed the flaps weren’t opening a full 90 degrees so I modded the cast alloy casing and also opened up the ID from 65mm to 68mm.

20240309_120605Small.jpg


20240309_120616Small.jpg


20240309_124656Small.jpg


20240309_124932Small.jpg


20240309_152041Small.jpg


With the flaps now where I wanted them I rebuilt each one using thread lock and high temp grease wrapping each motor and cabling in alloy tape to help protect them from exhaust heat.

20240309_164528Small.jpg


20240309_171734Small.jpg


It was a major headache aligning the gaskets and flaps to get them opening correctly within the exhaust but in the end, I won and they are both working lovely. Purchased new stainless steel M8 nuts/bolts/washes to hold them in place.

20240314_174545Small.jpg


20240314_174606Small.jpg


It’s now a case of pressing the infamous button next to the handbrake level to make the V8 go from a grumble (loud), button in…

20240409_172429Small.jpg


…to a bark (LOUDER), button out.

20240409_172438Small.jpg


As a precaution I also purchased a spare flap motor just in case as it is possible to swap the motors without having to remove the flap from the exhaust system.

20240320_163929Small.jpg


While checking underside I noticed an OE front exhaust rubber was looking tired so replaced both and added my patented extra support, a huge zip-tie around the outside of the rubbers.

20240409_170441Small.jpg
 
  • Like
Reactions: northpole
I've had a few people asking me about the VXR8 exhaust flaps so hopefully this will help explain it as the rear boxes have two flow paths through them. The picture below shows the LH exhaust gas flow "in" with the RH being an exact mirror. The blue line is the primary feed from the engine, it can then take the red flow if the flap is open and thus passes straight through the box/muffler with next to no silencing roughly 102dB. When the flap is closed the exhaust gasses route through the yellow path with silencing and roughly 92dB.

With the flaps closed you still get a lovely chunky V8 grumbly/growl being less ASBO like and more acceptable on my very quite street. However, with the flaps open it's more a bark and a proper V8 noise that shouts "HELLO" at the top of its voice. I've driven with both settings at the designated speed limit and neither are intrusive when inside the car, the same can't be said from the outside mwhahaha ;)

Power wise you don't notice any difference under your right foot in either exhaust flap setting but the same wouldn't be true on a rolling road which I'm planning on doing later this year as a general heath check.

20240114_145545Small.jpg
 
My last major job on the VXR8 prior to being unleashed from its Winter slumber were to sort the brakes, sit back and relax as this is a big update.

When I got the car I checked all pistons were moving freely and during this noted a few issues one of which being a front brake pad coming unbonded from the backing plate, eek! The sales company where I had purchased the car were great and simply sent me a free set of new front pads.

20231104_175826Small.jpg


20231130_114145Small.jpg


As it was Black Friday around the time I bought the car there were a few deals to be had so bought a set of HEL flexi lines as I noted it was still on the OE rubber and felt it was about time they were replaced.

20240128_112602Small.jpg


On the previous two MOTs the inner face of the front disc had been noted as advisories. Having removed a front disc I can see why and measuring they are below spec at 28mm worn, the new measurement is 32mm so they had been used to the fullest extent.

20240319_070732Small.jpg


20240319_070737Small.jpg


After visually checked the rear disc the decision was made and I bought new DBA (Disc Brakes Australia) discs all round from the main European distributor Ozparts. Opted for the 4000 Series cured slot and this is what the price of a small hatchback buys you with free next day delivery and some discount as I got chatting with the sales chap.

20240406_094853Small.jpg


With the discs sorted and new matching DBA Xtreme Performance front pads I x-referenced and noted Mintex sell a pad that fit the rear caliper which are the front pad on a few sports models (Lotus/Morgan/Seat/Renault) so found new/old stock rear pads for the price of a medium sized pizza, yummy.

20240406_094847Small.jpg


20240406_094836Small.jpg


The front calipers weren’t too bad but the pints and anti-rattle plates looked in poor shape. However the rear calipers had seized pins so a call to Walkinshaw and new parts arrived the next day.

20240127_173159Small.jpg


NOOOOOOOOOOOO!!!!!!!!!!!!! Is what went through my head regarding the seized pins but once again I hatched a cunning plan and this happened using a grinder, WD40, mole grips, centre punch, 2mm/3.5/4.5/5/5.5mm drill bits, a punch, hammer and finally a bent punch to get the collet out with lashings of patience thrown in for good mix. What a mission that was and the other side was the same and equally as torturous , m’eh.

20240120_112552Small.jpg


20240121_120658Small.jpg


20240121_121635Small.jpg


20240121_123832Small.jpg


20240121_184111Small.jpg


20240121_184908Small.jpg


20240121_184914Small.jpg


20240128_104911Small.jpg


As I was in the thick of it I removed all calipers and checked/cleaned all threads along with decal removal as my sticker man made me some posh new ones.

20240320_174637Small.jpg


20240320_174550Small.jpg


20240320_180134Small.jpg
 
  • Like
Reactions: northpole
HEL braided flexi fitting, rear relatively straightforward with careful use of mole grips to ‘crack’ the pipe joins as the solid pipe union were never going to spin freely due to how long they had been on the car. The fronts were less easy as the OE are press fitted into a bracket so you have to grind and drill them out, again unscrewing the flexi from the join. Brackets were them etch primed and painted in satin black and new flexi clips used. Note my patented anti-drip bungs.

20240128_105917Small.jpg


20240128_105930Small.jpg


20240323_111146Small.jpg


20240318_185532Small.jpg


20240318_185539Small.jpg


20240318_161829Small.jpg


20240331_113949Small.jpg


20240323_154229Small.jpg


20240318_162215Small.jpg


While fiddling I noticed the car was running lots of poly bushes including the rear diff mounts and had King SL springs with the OE HSV/Monroe shocks. King also make SSL and SSSL springs but the heigh is perfect on the SL without going silly low which for street use would compromise both the handling and ride quality.

20240128_130258Small.jpg


All wheel nuts had seen better days and kept sticking in the socket due to impact gun abuse over the years so more spending and replacement nuts sourced being M14 / 60 degree / 22mm socket. Wheel nut torque is a hefty 170Nm.

20240127_104259Small.jpg


Back to the brakes and having rummaged in my shed I found some ancient red gloss enamel paint I must have had for 20+ years so boshed a couple of coats on each caliper to tart them up before adding the new HSV stickers. I left the old discs on during painting to save me masking everything.

20240324_110609Small.jpg


20240324_170631Small.jpg


It was then time for the best bit, get the new discs and pads fitted and re-bleed all brakes. Caliper mounting bolt torque is 110Nm, should anyone need it. All slipped together with ease thankfully before they got hidden behind the wheels.

20240320_165141Small.jpg


20240323_135325Small.jpg


20240329_094422Small.jpg


20240405_170956Small.jpg


20240329_102500Small.jpg


20240329_131031Small.jpg
 
While bleeding the brakes I noted the clutch hadn’t been done at the last service so having a remote bleed next to the clutch reservoir makes it so easy. Thank you to whichever previous owner had that installed.

20240324_093921Small.jpg


You have to setup the handbrake which involves loosening the cable yoke at the lever but I explored further in the console and found it has a Walkinshaw Performance Shirt Shifter, bonus. Back to the h/brake, shoes had a clean prior to fitting the new rear discs then tighten the bottom adjuster until the disc won’t spin then loosen 3 clicks, same on opposite side. Inside the car tighten the cable in the centre console and should be holding tight at 4 to 6 clicks of the lever.

20240120_113039Small.jpg


20240120_113044Small.jpg


20240313_164932Small.jpg


20240120_122515Small.jpg


20240120_121901Small.jpg


With the centre console stripped I removed, disassembled and cleaned the skid control switch as it felt sticky when pressed, not that I’ll ever be pressing it but who knows!

20240313_165418Small.jpg


20240313_165658Small.jpg


I found the gear knob a tad wobbly left to right so carefully pulled straight upwards (no wiggling) and off it popped. I used duck/gaffer tape on the end of the stick and it’s feeling much better now.

20240313_181429Small.jpg


20240313_181559Small.jpg


20240313_182143Small.jpg


I also found a random boot net in my shed which fitted lovely and will save me clambering inside to grab the small items that have slid all the way in.

20240408_181551Small.jpg


20240408_181558Small.jpg
 
  • Like
Reactions: northpole and ahtcap
With all this V8ness going on in my life I haven’t forgot my VAG motors as the S3 and Amarok both had the native satnav maps updated yesterday.

Amarok now has the 2024/25 maps after the SD card was updated.

20240418_162918Small.jpg


With the S3 having it’s MMI tweaked long ago (FF peeps) I’m able to update the maps myself and it now has the 2024/25 (P370 release) churning away.

20240418_170415Small.jpg


20240418_170430Small.jpg
 
  • Like
Reactions: northpole and alpesh26
Earlier this month I sold a lung and taxed the VXR8 with my first drive after owning it 6 months being everything I expected. What a car and so easy to drive with so much road presence and the Impulse Blue looking stunning in the sunshine.

20240406_135839Small.jpg


20240406_135905Small.jpg


During my first shakedown I popped to grab fuel and smiled to myself while paying knowing I’d be visiting here again sooner rather than later.

20240406_141630Small.jpg


With a few more local trips under my belt and the wife (a fellow petrol head) also having a blast we felt everything was good with the car so popped up to The Motorist near Leeds as they had a Vauxhall gathering. It’s a spec list in the front side window before any comments.

20240413_103013Small.jpg


Oh, look, another fuel stop lol. With 232 under its belt I calculated it achieved the dizzying heights of 22.45mpg (dash says a smidge more), lets just hope the V-Power continues flowing for a while yet as it’ll need it to keep the ultra high smiles per mile going strong :)

20240413_182806Small.jpg
 
  • Like
Reactions: northpole

Similar threads

Replies
32
Views
5K
Replies
14
Views
2K
Replies
15
Views
2K
Replies
4
Views
1K