Been really lazy with the updates here (as usual

), all work is finally done, at least for now...
So with the ic and all surrounding parts off I had lots of room to fiddle with the intake manifold and carbon clean. Manifold came off quite easily, hardest part was an electrical connector with a broken release clip, took a few hours of cursing before I managed to pry the clip from behind with a dental scaper.
View attachment 114345
Carbon buildup on cylinder 1, was expecting more after 130k km but still worth cleaning for sure.
View attachment 114348
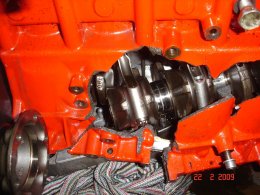
buildup on the dividers
View attachment 114349
after first round with dry scraping
View attachment 114353
Soaked with carb cleaner, let it sit for about 20 minutes, then scraped with various picks and plastic brushes, used the same dental scraper around the valve seats and guides, repeated this two times on each port
View attachment 114356
Final result after two rounds with carb cleaner and a final clean with brake cleaner, not perfect by any means but still a massive difference! Took around 2 hours for each port.
View attachment 114358
Continued with the injectors, they all stayed in place when pulling the manifold but had already purchased new seals and the injector tool kit so decided to remove and clean them while having access
dirty injector with old teflon seal
View attachment 114360
Cleaned the injectors with brake cleaner and petrol and installed new seals and support rings
View attachment 114363
all injectors back in place, spent a lot of time cleaning all accessible electrical connectors to avoid future issues, also did a quick engine clean while having access
View attachment 114364
cleaned the throttle body...
View attachment 114365
Removed and cleaned runner flaps, cleaned the manifold and all associated parts, then installed new gaskets on both manifold and throttle body
View attachment 114366
Was then ready to reassemble everything, really surprised everything went so smoothly considering my first time doing a job like this. On to the intercooler, oem vs wagner, this is gonna be a tight fit
View attachment 114369
Wagner claims 100% perfect fit, this is true to maybe 90 %, had to enlarge the mounting holes a few mm on both the ac condenser and radiator to get a perfect fit, also had to cut down the brackets on the fan shroud to be able to fit the silicone hoses without rubbing. With these simple mods fitment is as good as oem with no rubbing at all, just a lot tighter! The fans clear the ac pipes just by a few mm!
View attachment 114370
Startup and first test drive indicated no issues, read a lot about people getting fault codes and misfires after a carbon clean (due to small amounts of chemicals or carbon deposits getting in the combustion chambers when cranking the engine). Logged with vcds when starting up and didn't get a single misfire or fault code so guess I can call the job a success
Will be interesting to see what performance gains I get from this!