Audi A4 restoration-rebuild thread

B5NUT

Well-Known Member
VCDS Map User
Joined
Feb 6, 2010
Messages
5,560
Reaction score
1,606
Points
113
Location
Darlington
So, figured I would do yet another rebuild thread. This one is for my 1996 Audi A4 with a 1.8 ADR engine. So for people wondering why I’m chucking a shed load of money at this somewhat worthless car, here is the answer. It’s basically the time I’ve had it and the memory’s it holds. I got the car back in 1999 from my local Audi dealer, back then the 1.8 non-turbo engine was all I could afford, and in the 21 years we have owned the car I have put over 216,000 miles on the clock and been all around the country, and to Europe in it. My wife and I have had a lot of good times and fell it was worth restoring the car and seeing it back on the road.

I started the restoration of the car many years ago, unfortunately it all stopped due to illness, work, wife, kids, house, etc etc. So back in march I made the decision to start it up again as it was either chuck the car in the bin or get it finished, and the hole COVID thing allowed me some time to work on the project, seeing as you could not go out during the day, evenings or the weekend… I was still working during the lockdown but had a hell of a lot of time on my hands so it's been an ideal time for a project!

Upload 2020 9 25 12 54 1

Upload 2020 9 25 12 54 30

Upload 2020 9 25 12 54 57

So this is the car after it was rolled out of the garage after been suck in there for many years. I’d already done some work by removing the rust from three of the wheel arches and having some work done on the engine. So the starting point this time was the rear-end. The only real option for most or the rear drive train was to chuck in the bin and buy new, the rear axle was saved and was shot blasted and poweder coated, also saved the springs as there was very little surface rust on them. For the rest, fuel tank straps, heat shields, exhaust brackets, exhaust, brakes, brake pipes, hand brake cables, calliper mounts, callipers, shocks, disk guards, fuel filter bracket, axle brackets, nuts, bolts and rubber hose’s all went in the bin.

This was the state of the rear-end, what your seeing is all just surface corrosion on the body work but it took a few weeks to strip it back as I’m leaving the good underseal and finding the rust under the bad section of underseal.
Upload 2020 9 25 12 57 31

Upload 2020 9 25 12 58 1

Upload 2020 9 25 12 58 24

Upload 2020 9 25 12 58 54
Upload 2020 9 25 12 59 20


The callipers do look in good condition, but they has seized solid rust had crept into the piston and cylinder so in the bin they went

Few images of the stripping process, I hope to never have to do this to a car again, but I'm sure I will as at some point I'm planning to buy an S2 coupe, and I'm sure it will need the same treatment.
Upload 2020 9 25 13 2 31

Upload 2020 9 25 13 4 19


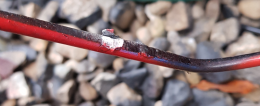
Fuel hose on the tank were rock hard, so were all binned.
Upload 2020 9 25 13 5 17


Removing the stub axles was a bit of a pain, hard to use a lot of heat & penetrating fluid to get the remainder of the bolts out.
Upload 2020 9 25 13 11 8


Stub axles had the rust removed from the base using this stuff, it does a far better job than any of the rust removal solutions you can buy and it's a hell of a lot cheaper.
Upload 2020 9 25 13 21 5


Both stub axles and ABS rings were cleaned up with it. took about 2-3 hours to remove most of the rust and 4-5 hours to clear it all.
Upload 2020 9 25 13 23 55

Upload 2020 9 25 13 25 16


No after pictures, but there are a few good videos on youtube showing how good oxalic acid is as a rust remover.

Will post the after pictures later this evening.
 
  • Like
Reactions: Jcbmally, Jack_TQS, mister.c. and 1 other person
Congratulations for taking on this restoration project and saving another B5 from the wrecking yard! I totally understand your sentimental attachment to this car. I purchased my 1997 A4 quattro in 2001 and have 249,000 miles on it now. I've spend the past couple of years diving into restoration work on it although not nearly to the extent you are doing on body work.

It's wonderful to have my B5 running and handling like a new car again. I'm sure you'll experience the same and feel the reward for all of your hard work. Keep us posted!
 
  • Like
Reactions: B5NUT
@B5NUT im so looking forward to following this rebuild. :)
 
  • Like
Reactions: Jcbmally and B5NUT
I was surprising by the amount of rust under some of the underseal, so a lot of it was cut away before the rust was removed using flap disc's, twist knot wire wheel, drill based wire brushes, air powered belt sander and DA air sanders. I was not able to removed 100% of the pitted rust so what was left I used a molecular rust converter as below.
Upload 2020 9 26 10 46 42

Their products do work very well except their "safer rust remover" it's absolute rubbish and one to avoid, I put some rusty bolts in the solution left them for 24 hours and it barely touched the rust, left it for a further 24 hours and still the same result. You are far better off getting Oxalic Acid and mixing up your own solution.

So once the converter had done it's job on the pitted rust it was time for the seam sealer, this stuff is ****** awful to work with but it does a good job
Upload 2020 9 26 10 53 42

Would love to have applied the spray seam sealer but the equipment to do that was just too expensive, so the only option was the brush-able stuff.
Next was to apply a coating to the car. Now years ago I would have used Por-15 but I really don't rate that stuff anymore, it's kind of like hamerite all the good chemicals were removed years ago due to various regulations. So I've move to epoxy mastic paint. It's a bit of a pain to mix up and it's not cheap but it's an excellent product and does the job covering various different surfaces from metal, sealer and 2K paint.
Upload 2020 9 26 11 0 53

Under the car Audi have used different products, but it's mainly sealer, some patches of primer, cavity wax and overspray from painting the body. so colour wise there were various different colours, but I decided to go black. Point to note is you must remove any cavity wax before applying any underseals or paints as it just won't stick and will separate.

These were the results after apply a couple of coats of epoxy mastic, make sure you have some fans available as the mastic dry's so much quicker with air movement.
Upload 2020 9 26 11 9 5


Final coat for the underside was a coating of 3M schutz gun, and again make sure you have fans around as it dry's so much quicker.
Upload 2020 9 26 11 13 33


I'm replacing all the brake lines so was not bothered about them getting covered
Upload 2020 9 26 11 15 53

Upload 2020 9 26 11 17 54


Once all the dirty & messy job was complete it's time for more "fun" jobs like putting the backend together with new and shiny components

Rear axle came back from the shot blasting and was given a nice thick powder coating.
Upload 2020 9 26 11 23 13


Fuel tank was drained of any remaining fuel as it's been in there for years, new fuel pump, sender and seal was fitted along with new rubber hoses and pressure release valves.

Old fuel tank seal had started to melt!
Upload 2020 9 26 11 25 38

Tank cleaned ready to refit.
Upload 2020 9 26 11 31 18


All bare metal components were painted with a 2K Clear Etch Lacquer same stuff you use on diamond cut alloy wheels, even the nuts and bolts have been painted once fitted and torqued up. Now I know the coating will be damaged when I come to remove the bolts again, but they will be soo much easier to remove, than when they have rusted solid and the head has rusted away.
Upload 2020 9 26 11 39 52

Handbrake cables were also coated
Upload 2020 9 26 11 40 47

Along with the brake flexi ends
Upload 2020 9 26 11 42 46


Once all the component parts had had a coat of epoxy mastic (new shocks, springs, dust shields and mounting brackets) I could put the backend back together.
Upload 2020 9 26 11 44 27


Upload 2020 9 26 11 46 22

Upload 2020 9 26 11 47 9

Upload 2020 9 26 11 47 37


Brakes were then painted again with epoxy mastic and 2k clearcoat.
Upload 2020 9 26 11 48 35


Brakes refitted
Upload 2020 9 26 11 49 40


Fuel tank refitted, and have to say it was a difficult job to refit as the tank straps were soo tight. The old tank straps had just about rotted away, so new ones had to be purchased, and to protect them I sprayed them with epoxy mastic to try and stop the rot!

New heat shield, were also purchased as the old ones had all rotted away around the mounting point and were over all in poor condition
Upload 2020 9 26 11 54 41


Note that most of the parts on this age of car have long since gone obsolete, so the only option is to buy from Audi Tradition in Germany, and there is no discount....
 
  • Like
Reactions: Jcbmally and S4 Muzza
All the brake lines on the A4 were showing signs of corrosion at various section in the pipe work, they are alloy pipes with a very thin layer of protection. Looking back through the MOT history of the car the brake pipes corrosion had come up on the last two MOT's so there was no chance of the old pipe straying on the car. Also VAG no longer make made up section of brake pipe so the only option was to make your own.
Upload 2020 10 2 9 29 54

Upload 2020 10 2 9 30 10


If the corrosion had been minor then I guess they could have been rubbed back and recoated but these were well passed that point.

So I needed tools, you got to love buying new tools!

Pipe benders

I stared with these but found they were stripping the coating off the pipe
Upload 2020 10 2 9 34 42

Upload 2020 10 2 9 35 5


So I went an purchased the Bluepoint pipe benders, lot more cash but looked like they would do the job! However if your trying the replicate the OEM brake pipe this tool won't work the radius of the curve is far to big
Upload 2020 10 2 9 38 54


So it was back to the cheaper pipe benders, I modified them slightly by grinding the rear so it was more curved and then covered it in fabric wiring harness tape which stopped the coating being scraped away.

Next up was a pipe straightener, as the VAG brake pipe comes in a 4.7M coiled sections
Upload 2020 10 2 9 44 34

You try and straighten it by hand but one of these made the job a lot easer and quicker
Upload 2020 10 2 9 46 26


Final required tool was the flaring tool. I started off with one of these. Sometimes it would work well other times it was poor and I was starting to waste a lot of pipe due to this. It's a one shot deal, as you cannot go back and re-flare the end you have to cut the pipe back to were the tool had gripped the section of the pipe and start again...
Upload 2020 10 2 9 48 27


So I gave up on that and got one of these it was about £50 more, but it did the job first time every time, and no more wasted pipe.
Upload 2020 10 2 9 53 31


Upload 2020 10 2 9 54 50


Not one of the easiest job on the car, and it was a job that I kept getting put off... This was the first of six pipes that had to be made with the longest pipe being over 3 meters in length and had around 30 bends in it.
 

Attachments

  • upload_2020-10-2_9-30-56.png
    upload_2020-10-2_9-30-56.png
    1.2 MB · Views: 289
  • Like
Reactions: Jcbmally
Good job on the tube bending! I looks like a pro job and super clean. I've had good luck using my "On the car" type flaring tool but your vice mounted tool looks like it really does the job!
 
  • Like
Reactions: B5NUT
Wow, fair play to you! I just strayed from the B6 & A3 8P forums.. glad I did, love seeing older cars being restored.
Excellent work
 
  • Like
Reactions: B5NUT
Good job on the tube bending! I looks like a pro job and super clean. I've had good luck using my "On the car" type flaring tool but your vice mounted tool looks like it really does the job!

I could have just got a bad tool, or I was not using it correctly! either way it was hit or miss if it got a good flare as a lot of the time the flared end was very small so it must have been pushing the pipe back in the tool.
 
So time to rip the engine out again! I took the engine out years ago and had all the top end rebuilt as the valve stem oil seals were knackered along with all of the other engine seals. I had also refitted the old clutch & DMF they looked Ok, but wanted to fit a new DMF/clutch setup.

Upload 2020 10 5 23 52 3


With the engine out the subframe was also removed, it was shot basted and powder coated years ago but the company I used back then did a **** job and it had to be redone. I also wanted to rebuild all the front suspension and fix a lot of mistakes I'd made years ago.

First mistake was the the transmission tunnel, I did a bad job of removing the rust as it was coming through again. I also just over painted with schutz, so it all had to be scrapped away and cleaned of with plenty of solvent a ****** awful job I never want to do again.

From this
Upload 2020 10 6 0 9 54

Upload 2020 10 6 0 10 35


To this
Upload 2020 10 6 0 11 9


Then the same process as the rear strip back the rust, epoxy and 3M schutz.
Upload 2020 10 6 0 14 42


Next up new rack time, not sure why I refitted the old rack it was in a bad state, corroded pipes, and leaking fluid. Got lucky with a replacement on ebay, old stock new VAG/ZF rack for £60 delivered.
Upload 2020 10 6 0 22 56

Upload 2020 10 6 0 24 22


All the metal on the PAS pipe work was also stripped back, as for mad reason I had used plasti dip to paint them with! May as well coved them in chocolate... so stripped back to bare metal and epoxy coated.

With the subframe out the suspension came out. yet again I'd done a poor job in the prep work on the uprights also the choice of paint (hammarite) was also bad idea.
Upload 2020 10 6 0 50 47


So all suspension components and drive shafts stripped and rust converted applied to the pitting
Upload 2020 10 6 0 52 52

Upload 2020 10 6 0 53 34


While the above the was being stripped and repainted the subframe came back and was aligned and reinstalled.
Upload 2020 10 6 1 4 21

Upload 2020 10 6 1 4 50


The brakes on the front are from the 1.8T setup. The original setup on the car was just about scrap, the calliper mounts were very warn and as much as I tried I could not buy replacement parts for that setup. They were made by Girling and were only used on the A4 for just over a year. Girling had long made the parts obsolete and there were no other companies making replacement parts, so they were chucked in the bin and were then replaced by the ATE vented setup used on the 1.8T and all later A4 B5 models with 4 pot engines. Parts for the ATE setup were very easy to get hold of.

Other than the above parts and the spring that were stripped and repainted everything else was replaced, all new Lemforder arms, upper & lower rubber spring mounts, shocks, CV joints, disc shields, disc's, pads, calliper mounts and wheel bearing.

Upload 2020 10 6 0 59 4

Upload 2020 10 6 1 0 23

The green rapping around the drive shafts is just bubble rap to stop them damaging the paint on the subframe and the drive shafts until the engine was refitted.
 
  • Like
Reactions: Jcbmally
When I had the engine worked on years ago I stripped the rust away and give it a coat of hammerite, and again either my prep work was rubbish or it's just the paint is! So decided to strip the engine back remove and treat and rust and repaint with epoxy as it's good for up to 300deg so will easy handle the engine temperatures.

Top tip, if you want to remove hammerite use Oven Pride does a great job.
Upload 2020 10 6 12 57 36


Block stripped next up rust converter for the remaining rust.
Upload 2020 10 6 12 59 11

Upload 2020 10 6 13 0 29

Upload 2020 10 6 12 59 44


Once painted new Sachs DMF & clutch
Upload 2020 10 6 13 2 39


Gearbox was cleaned up and refitted, I used the clamps while I sort and cleaned up all the bolts.
Upload 2020 10 6 13 3 53

Upload 2020 10 6 13 4 39


Once the bolts were refitted the engine went back in, and some of the ancillaries were bolted on.
Upload 2020 10 6 13 6 49


before any further work was started I setup a PC running a few programs like elsawin, there was no way I could rebuild this car without these sort of programs. I'd started ripping this car apart may years ago, and I'd lost a lot of the pictures of the strip down. So it's like putting together a jigsaw with no picture and pieces missing, damaged, dirty or in need of fixing. So if your going to do this take plenty of photo's and label stuff.
Upload 2020 10 6 13 11 38
 
  • Like
Reactions: Jcbmally, DieselJake and Gops
Looks Amazing bud! Im restoring mine but not to the extent as you are! Amazing!
 
So with parts on order for the engine, like new injectors, seals, hoses etc. I started cleaning up the boot. Over the years it seen a bit of damage and there was a small amount of rust on the spare wheel well and a lot of scratches on the back.
Upload 2020 10 8 17 26 49

Upload 2020 10 8 17 27 16


I was thinking about leaving the boot area, but what was the point of doing all the work I've already done and then leave the boot in the state it's in.

So the wheel well had it's rust removed and the hole boot area was rubbed down and masked up ready for paint.
Upload 2020 10 8 17 30 15

Upload 2020 10 8 17 30 43


First two coats sprayed epoxy which was a "bright red" and not that far from laser red which is the car's OEM colour.
Upload 2020 10 8 17 33 39


Car was then sprayed in two coats base coat then two coats of 2K clear.
Upload 2020 10 8 17 35 3


Once the paint was dry new cavity wax was applied in the inner wheel arch area, the old stuff had gone very hard and cracked up.
Upload 2020 10 8 17 37 59

Also if you what to dry cavity wax you need air movement, so stick a fan in the area (if possible) and it gets the stuff to dry in hours.
If you don't it will still look like this even after 24 hours.
Upload 2020 10 8 17 41 52


Side panels cleaned up and repainted fuel tank cover fitted.
Upload 2020 10 8 17 42 55


Next up was to replace the plastic boot trim, the old one was well passed it..
Upload 2020 10 8 17 45 16


So another new trim was purchased from Audi tradition https://shops.audi.com/en_GB/web/tradition along with a new boot seal.
Upload 2020 10 8 17 47 3


Final to do on the boot was the hinge. The struts were leaking and it was all covered in dirt & excess grease.
Upload 2020 10 8 17 51 41


Also the strut mounting point were starting to rust so they were stripped back and painted, and new struts fitted.

Boot complete.
Upload 2020 10 8 17 55 46
 
  • Like
Reactions: Jcbmally
Amazing work, I had a 1.8t of similar vintage in Laser red, that was a great car.
 
  • Like
Reactions: spartacus 68
Brilliant thread, and attention to detail is top notch. Please tell me you're not putting in halogen projector headlights when you get to that stage. Did the car have xenon headlights as an option?
 
The car had factory halogen and new halogen lights are going back in as the coating on the old ones was in a poor condition. I'm aiming to put the car back to factory so almost all retrofits are out..

This was the option list for the car, still surprised you could by an A4 without a radio..

X2B = National sales program Great Britain
B0A = Component parts set without country-specific design requirement
C0V = Steel wheels 6J x 15
G0C = 5-speed manual transmission
H6S = Tires 195/65 R15 V
J1P = Battery 220 A (44 Ah)
M51 = 4-cyl. gasoline engine 1.8 L/92 kW 20V with MVEG 2 base engine is T0V/T5Z
Q1A = Standard front seats
1AC = Anti-lock brake system (ABS)
1G2 = Steel spare wheel with original equipment tires
2PG = Steering wheel
3AE = Right exterior mirror: flat, electrically adjustable and heated
3BF = Left exterior mirror: convex, electrically adjustable and heated
T5Z = 4-cylinder gasoline engine 1.8 L unit 058.B
3S0 = Without roof rails/roof load rack
4UC = Air bag for driver
0G1 = Gearshift lever
8AA = Without radio
8GM = Alternator 70 A
8RM = 8 speakers (passive)
1LH = Disc brakes, front
3FE = Electric slide/tilt sunroof with sun screen/sunblind
1BA = Standard suspension/shock absorption

Modifications so far will include an Audi Chorus radio & 16" OEM alloys. The steel wheels went many years ago and could not face buying 15" steel wheels and wheel trims you can no longer buy.
 
  • Like
Reactions: Jcbmally and spartacus 68
Found some old images of the original engine removal. No idea what camera they were taken on that many years ago so excuse the image quality...

Upload 2020 10 16 20 37 19


Engine covered in rust, oil & dirt.
Upload 2020 10 16 20 37 51

Upload 2020 10 16 20 38 36


Gearbox was the same seals & bearing not in the best of condition
Upload 2020 10 16 20 39 26


Upload 2020 10 16 20 40 13


Subframe was in good condition this was manly due to the amount of oil it was covered in.
Upload 2020 10 16 20 42 33

Upload 2020 10 16 20 43 12
 
  • Like
Reactions: Jcbmally
Well impressed. You certainly have done a good job there. I would love to have space, time, and a missus who doesn’t mind, to begin doing this to my TQS. I’ll be keeping my eye on this thread.
 
Further updates to come, but today the car went for it's MOT and passed with no advisories, still got the body work to finish but that will be done over the winter months
Upload 2020 10 26 16 36 31
 
  • Like
Reactions: Jcbmally and Jack_TQS
I'm still no where near finish got a lot of body work still to do and a good few updates to the thread.
 
Been a while since I updated this thread, not much work was done of the car over the winter months, but from my last picture to getting the car through it's MOT there was a lot of work done, so I'll start with the engine bay and front-end

The manifold on the car was in good condition but needed a little clean up. I was going to get it ceramic coated but the cost was around £200 and was told the coating is easily chipped and I felt it was just not worth the expense. So for under £50 I had the manifold shot blasted and then I painted it with Eastwood high temperature paint which got good reviews.
1617811543069

1617811564331

I wanted to cure the paint as best as I could as I was going to be a good few weeks before the car was started so I got the blowtorches out for around 20 minutes
1617811823943

Even after 20 minutes with blow torches, once it was on the car and I finally got the car started it still stank like hell for about 30 minutes as clearly torches were nowhere near hot enough to completely cure the paint.

Next up was to add the rest of the heat shield for the engine bay. Have to say the parts on this car are getting more difficult to find, sure there is Audi tradition but that is limited. in what they have left

This shield was absolutely rotten and fell apart when removed from the car, I managed to find the last one in the country at a VW dealer is Scotland
1617812259617


Also some parts that Audi are supplying these days don't fit first time! This shield for example was made obsolete and replaced with the A4 B6 version, however the top bolt holes on the B6 are M6 where the B5 A4 are M8, so had to be drilled out. It's not a big problem but I was finding issues like that more and more on revised parts.

1617812591049

Other than the transmission tunnel shield this was the only other heat shield I was able to clean-up and reuse.
1617812740955

Next up was starting to put the engine ancillaries back on. One of the biggest problems I was having hears was perished rubber hoses. Some had been almost cut through from rubbing over the years

1617813652684

1617813776846


These pipe are no longer available, so just had to replace with similar demission pipework, one thing to note is that rubber fuel pipe is dam expensive...

So with new pipe work and gaskets the inlet manifold, and alternator were refitted, the manifold was shot blasted and I purchased a new alternator was a smaller 70A and could I hell as like find one so ended up with a 90A version. I would have refurbished the old one but the COM on the alternator was ground down to the bone so it was just not worth salvaging.

1617814365921
 
  • Like
Reactions: Jcbmally and RS5 JON
On a side note does anyone know if oil filters have a shelf life.. I've got a genuine Audi oil filter that I must have had for the last 10 years, it's still sealed in the box.
 
I would have thought that would be fine so long as the box is sealed/closed
 
  • Like
Reactions: Jcbmally and B5NUT
I would have thought that would be fine so long as the box is sealed/closed
I used the words sealed which was a bad choice of words as audi filters are just stored in a cardboard box so air and moisture can get in. Had a look inside the filter and it's clean and the element looks OK, but to be fair most of its hidden behind the metal filter body.
 
What another great B5 thread.
 
  • Like
Reactions: B5NUT
While I was waiting on a replacement viscus fan, and power steering pump. I started working on the slam panel. The original was was in good condition but had plenty of rust on the rivet nuts, and on a couple nuts the screw thread was snapped off and left in the nut. Only way to remove the old nuts is to drill the top of the head off.
1617978954185

So I ordered replacement rivet nuts which are designed to be used on plastic
1617979016958


These were just going to rust again so I gave them a coating of epoxy
1617979084536


This was the rivet tool I used, unfortunately none of the rivets that come with the tool were useful on plastic, as when the rivet is pressed in it starts to snap the plastic.
1617979207629


New nuts pressed in
1617979376929

New radiator also purchased, the old was was OK, but the alloy fins around the bottom were starting to corrode.
1617979765326
 
  • Like
Reactions: Jcbmally
Few further minor jobs done on the car fitted an new bonnet release cable, the old one looked OK but was concerned about it snapping and having to damage the car to open the bonnet.

Also fitted the front engine support and lower timing belt cover.
1617980621176


Finally got the parts so all fitted along with a new crank pully and new belts.
1617980697669

Airbox fitted along with the painted manifold
1617980827507

Next was to fix a harness issue looks like it was damaged at some point
1617980899138

Cut the harness at the damaged point and crimped on new pins and refitted the original plug, there was ample length on the cable so not worried about losing 10mm.
1617981034111
 
  • Like
Reactions: Jcbmally
So I have a choice to make on the wheels that are going on the car. From factory the car came with 15" steel rims with trim covers, and the first owner of the car changed then for a set of 15" wolfrace alloys that looked awful and fitting a set of factory 16" wheels was the first mod I made to the car.

So I have choice of 2 sets of wheels of which both need refurbishing, I just cannot decide which set to get refurbish. I will most likely have both sets done and store one lot away.

Option 1
1617997702404


Option 2
1617997975892


What I really like is the S4 alloys, but the car is not an S4 and it's on a standard ride height so would look a bit silly.
 
  • Like
Reactions: Jcbmally
Final few jobs to do before the slam panel went back on. Found the plastic inserts that go into the bumper carriers were cracked, and they are no longer available so found a used pair on ebay
1618049345101

Gave them a coat of epoxy along with a few other parts.
1618049489615

Fan fitted along with the slam panel.
1618049592286

Radiator and PAS cooler fitted, had to source a new cooler as the metal clips on the factory cooler had rotted away and the new revision were plastic
1618049845003

New air guides fitted along with new Hella headlights, got them 10 years ago and just been sat in a box.
1618049672153

Next to fix was the horns, they were well past their best.
1618050089610

Audi tradition wanted over £250 for the two horns, so I got a set from a FL A4, but they had to be modified so they would fit correctly, the plastic case had to be prised off the main body and rotated to they were facing the correct direction, it was worth the time and hassle as I got the FL horns for £25.
1618050331828

With the rad fitted the rest of the coolant system hoses were fitted along with a new coolant reservoir also filled the engine with oil at this point. Still could not start the car at this point as I was missing the bracket that holds the throttle cable to the throttle body and the entire exhaust system is still missing.
1618050839592
 
  • Like
Reactions: Jcbmally
I have to say, your attention to detail is absolutely outstanding. Having just had the front end off, I can appreciate all these little bits and pieces you have found issue with and have rectified. Brilliant work.

Out of interest, how are you getting parts off of Audi Tradition? I tried to make an order a few weeks ago, as they have a lot of new parts I wanted, and when it came to shipping they had a notice stating they are not currently shipping to the UK. Which annoyed me greatly, but I did sympathise with them due to this brexit madness.

Keep up the good work, always enjoy viewing your progress.
 
  • Like
Reactions: B5NUT
All of my orders were placed before Brexit! It's annoying to know we can no longer get parts from them.

Quote from the front page of their website. Fing Brexit... The gift that keeps on giving.
1618055823578


I've also noticed that that some of the parts I was looking for on ebay have also gone up in price.
 
  • Like
Reactions: Jcbmally
Next problem was the throttle cable bracket. For the life of me I could not find the original bracket off the car. I had shelves in my workshop with all the stripped off parts of the car and a fair few were missing, cannot believe it that rusty that I would have binned it so the only option was to by a replacement, which proved difficult as it's no longer made, and there were none on ebay. Only option I found was someone selling a hole intake manifold which included the bracket.

So purchased this
1618065480366

So I could take off this part
1618065527003

So final jobs in the engine bay area were to strip & paint the bracket, and replace the brake fluid reservoir. It was in a bad way and there was no way the system could be blead with the old reservoir fitted.
1618065748729

Took almost no force to put a hole in it
1618065796412

New reservoir fitted.
1618065827029

At this point I fitted all new brake lines to each wheel, I cut the old line off at the ABS attachment point as I did not what the ABS module to run dry as I heard they can be a nightmare to blead once air has got in.

Two rear lines
1618066027904

1618066146597

Two front lines
1618066178464

1618066207171

1618066237561

I never bothered replacing the pipe going to the clutch as it was in excellent condition with no signs of corrosion.
 
  • Like
Reactions: Jcbmally
So I have a choice to make on the wheels that are going on the car. From factory the car came with 15" steel rims with trim covers, and the first owner of the car changed then for a set of 15" wolfrace alloys that looked awful and fitting a set of factory 16" wheels was the first mod I made to the car.

So I have choice of 2 sets of wheels of which both need refurbishing, I just cannot decide which set to get refurbish. I will most likely have both sets done and store one lot away.

Option 1
View attachment 235122

Option 2
View attachment 235123

What I really like is the S4 alloys, but the car is not an S4 and it's on a standard ride height so would look a bit silly.
Option 2 for me.
Been a great read this thread mate, inspiring me to do a restoration myself. :thumbs up:
 
  • Like
Reactions: B5NUT
Well this time last year I was reading other people threads, and what with lockdown it finally gave me the kick up the backside to start the work again. :whip:

Option 2 wheels were the ones I purchased for the car 21 years ago, so I think I'm going to stick with them.
 
  • Like
Reactions: Jcbmally
Option 2 wheels for me as well, I think they knock a few years off the car
Like you say S4 wheels would probably look pretty good but not at the standard ride height.
A set of bolero’s might look decent too!
Nice work:icon thumright:
 
  • Like
Reactions: Jcbmally

Similar threads

Replies
9
Views
851
Replies
4
Views
1K
Replies
26
Views
5K