Audi sportback s3 sideskirt guide

MAD_Adamski

Registered User
Joined
Jan 5, 2009
Messages
344
Reaction score
20
Points
18
Location
NULL
Hey guys well I thought I would start a thread about fitting s3 sportback skirts onto a tdi....

There seems to be a lot of posts but not much real info or guides....

So here's where I am so far, going on past posts I saw the parts/part numbers I needed so here's the numbers you require.....

You'll need the skirts, front caps, door trims and plastic sills.... Some. People cut corners and trim parts and try and reuse the sill scuff plates etc, I won't be doing that I do things properly... Here's the numbers....


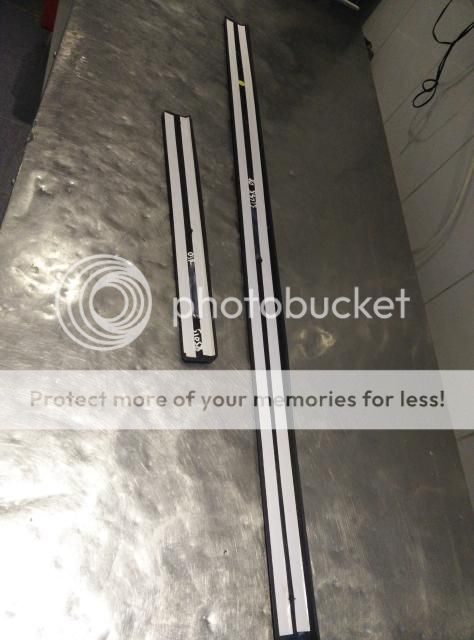
OK so I struck lucky and picked up 2 skirts for 100 quid.... I have all the front caps and screws etc and the door blades and sills have just been ordered through tps so I haven't got a pic of them right now but here's what I have got....


OK so luckily one of my customers is a painter so he ordered the door trims for me and he will collect the front caps and skirts this week and prep and paint them for me then I shall go and pick them up and show you lot how to fit them.....

So for now that's where I am, altho here's a couple of pictures of the backs of the parts to give you a idea of what they are like behind to clip in.....


So to start you will need to remove the 2 front and rear trims as pictured below....


The front you will need to remove part of the arch liner and feel behind and squeeze the clips to remove the trim...

The rear I believe will pull off with a heat gun and trim removal tool from past posts......

Next the door Trims these are simple, the 2 torx screws on each door need to be removed as pictured below, then slide the trim to the rear of the door and should come away from the door.....

The new ones should fit the reverse to what I just said....



The next is fiddley and again I will be actually doing this when the parts arrive you'll need to use and heat gun and a plastic trim removal tool and carefully remove the sill scuff plates again as pictured below.....


OK so that's it for now when the parts are painted and here I'll put the rest up for you!

Adam.
 
  • Like
Reactions: dk1234, B30villain, voorhees and 1 other person
I will sticky this when finished,cheers MA
 
Adam hope your well!

Long time since I seen you from Sheady days lol! Good write up my man!

G997 OKW Petes saff old owner !!!!!!!!
 
The prt number list is awesome. But maybe say what part each nunber corresponds to? :)
 
Brilliant man good job on doing this thread I'm in the process of ordering the skirts and bits from the dealers to blend in with my rear end
 
which part numbers from the first picture correspond to the 4 x door blades please mate?
 
8P0853579GRU �7.73 o/s wing skirt
8P0853580GRU �7.73 n/s wing skirt
N90821401 (2) �0.54 each nut
N90775001 (2) �0.37 each screw
8P4853859GRU �147.71 n/s skirt
8P4853860GRU �147.71 o/s skirt
8P0853802A (10) �0.54 each rivet
8P0853802 (2) �0.54 each rivet
8P0853585 (2) �0.90 each clip
8P4853959G GRU �44.02 door blade
8P4853696G GRU �44.02 door blade
8P4853960G GRU �61.40 door blade
8P4853970G GRU �44.02 door blade
8P4853557J 01C �42.61 sill trim
8P4853492J 01C �85.98 sill trim
8P4853558J 01C �42.61 sill trim
8P4853491J 01C �100.88 sill trim
 
OK so today my painter dropped in the skirts and a fantastic jib he did too!

Here's a couple of pics , I won't be able to fit them due to time till next week but I shall picture as I go....

 
OK so had 30mins before work today so I went out and removed the door blades, very quick and easy job as mentioned unscrew the 2 screws on each door and slide it to the rear and slide the top downwards and it comes off....

I recommend you have a hose or dirty wet rag and gently wipe away and dirt and mud behind them before refitting the new ones.... Then you fit the new ones in the reverse way you took the old off.... Very simple and took me as said about 30mins to do it....

Here's some pics notice the difference of the old vs new OK the freezer pictures the old ones slope inwards towards the car the new are straight and meet the skirt....


Also ignore the scrape on the car that's not compulsory when fitting the skirts, thats when someone decides to park in your car park at work bash your car and drive off......

Next I will be removing the sill trims and front wing trims and look at fitting the rear skirts as I believe they should be fitted first by the looks of it....
 
Nice one thanks for the write up again will make it easy fir when I get round to putting the skirts on 👍👍👍
 
The new s3 door blades don't stick out as much as I thought will LOOK good when done mind get lots of pics 👌
 
OK so today I thought I'd have a go at making a start unfortunately rain stopped play half way but I managed to get half way.... I removed the front wing trims which was very easy as previously discussed new ones just clipped in but make sure you clean the old surfaces up! I found mud behind mine so I washed it out throughly then dryed it with the heat gun and fitted the front skirt trims.....

Next I cleaned the rear sections that were also sticky so the new skirts seal well..... Then i started to remove the plastic sill trims quite easy just heat up and gently prise up the trim and again clean all surfaces well leaving no residue..... I only got half way then rain stopped play as said.... So I went back inside and following someone else's comments I had bought some 1/2" tap washers and a cheap glue gun and I basically used the washers as spacers for the skirts for the underside.... As pictured below..... So basically when I fit the skirts all I will need to do is blob bonding on the rubber washers and clip the skirt in and jobs good with no movement and saves screwing the skirts on... Here's some Pics


OK salmost night and today I did the sill trims and skirts, not a hard job just time consuming..... I suggest you get a rubber drill attachment that bodyshops use for removing the double sided tape or you'll end up with blisters like I have! Ha

Anyway so with the dirt cleaned and the tape gone you should look like this.... Oh and also clean the underside of your sills ready for the bonding, I used a wet rag and then dried it with a hot air gun after...


Ok next thing make sure your sills are straight! I had the issue the first one I did had been slightly bent on the ramp so when I fitted the skirt it sat odd... So I had it back off and got some wood and a Hammer and straightened it up. Then the skirt fitted mint......

Blob a good bit of tiger seal or bonding on the washers as previously discussed


Ok so for the next part I'm gonna go back on myself, remove the door trims from the side your going to do as they will foul the skirt slipping on...... Open both doors wide open get the skirt your going to fit up from the centre line up where it should go and basically you want to put the underside part in place first then slide the top section upwards towards the doors and the skirt should slide up And almost clip into place..... Make sure the white clip clips into the hole in the rear and get your orange clips and place them as pictured... You want to then leave the car for 12hrs minimum to let the sealer go off before you drive it encase it's wet etc...


The small round black clips go into the back round holes 1 on each skirt..... Now I was left with 2 orange clips only 8 was needed so not too sure where they go..... But I've looked Dover other threads and it looks like they used 8 too... Anyway for now that's all I'm doing I will be adding the sill trims in a few weeks when I can afford them but at 200quid I'm in no rush for the minute as I just paid for the paint and the door blades! So for the meantime stand back and appreciate your blisters and where near 700quid goes!!

 
  • Like
Reactions: BIFCAIDS, martinivw and voorhees
top job mate and good write up again

appreciate you taking the time to type it up and take pics,

get the car a wash
get matching alloys
get a photo of the cossie

;-))))
 
Car was clean last week, just can't keep it clean, I have matching wheels just wanted to use the rubber on the fronts as they had brand new good years on worth over 200quid!

And here
 
  • Like
Reactions: Lee+Ash_a3 and Jet2004uk
Slight bump for this.... Today I got hold of a second hand set of s3 sills at a very good price. So upon receiving there was still some old foam on the back so I used this double sided tape and stuck one side straight to the old tape and offered them upon the car....

The REARS need to be fitted first and there are tabs built into the plastic sills that fit into the holes in the skirts so basically it's a no brainer where to fit them.... Then the fronts after....

Couple of prefitting pics I'll post afters tomorrow when it's light...

But all in with paint I think the whole thing cost me... 350ish... Which I'm happy with rather than paying out over double....


OK so today I thought I'd have a go at making a start unfortunately rain stopped play half way but I managed to get half way.... I removed the front wing trims which was very easy as previously discussed new ones just clipped in but make sure you clean the old surfaces up! I found mud behind mine so I washed it out throughly then dryed it with the heat gun and fitted the front skirt trims.....

Next I cleaned the rear sections that were also sticky so the new skirts seal well..... Then i started to remove the plastic sill trims quite easy just heat up and gently prise up the trim and again clean all surfaces well leaving no residue..... I only got half way then rain stopped play as said.... So I went back inside and following someone else's comments I had bought some 1/2" tap washers and a cheap glue gun and I basically used the washers as spacers for the skirts for the underside.... As pictured below..... So basically when I fit the skirts all I will need to do is blob bonding on the rubber washers and clip the skirt in and jobs good with no movement and saves screwing the skirts on... Here's some Pics


Hi, how do the skirts fix on underneath on an original S3?