

consilio
Up the owls!
So ive been trawling the net researching the possibility of upgrading the stock sound system with an aftermarket subwoofer. It took me ages to find out all the little nuggets of info that I needed, and even then there were still some blanks, so I thought I would make a build thread for others to follow.
For reference this is for the 2010 onwards Audi A4 / S4 with the standard stock stereo (so NOT B&O)
I picked out a suitable amp and sub for the install, going for the following Sony XM-2002GTW 1200 Watt Amp and a suitable 10" subwoofer.

Now the good news is that the battery on this car is in the boot (well on the S4 anyway) so getting a power feed for the amp was going to be easy. Also the car already comes with a small sub in the roof of the boot space, and as the new amp includes a high level input, I planned to use this connection to supply the audio signal for the new amp and sub, and also as a method for getting the amp to detect power up / switch off.
Heres a pic of the stock subwoofer

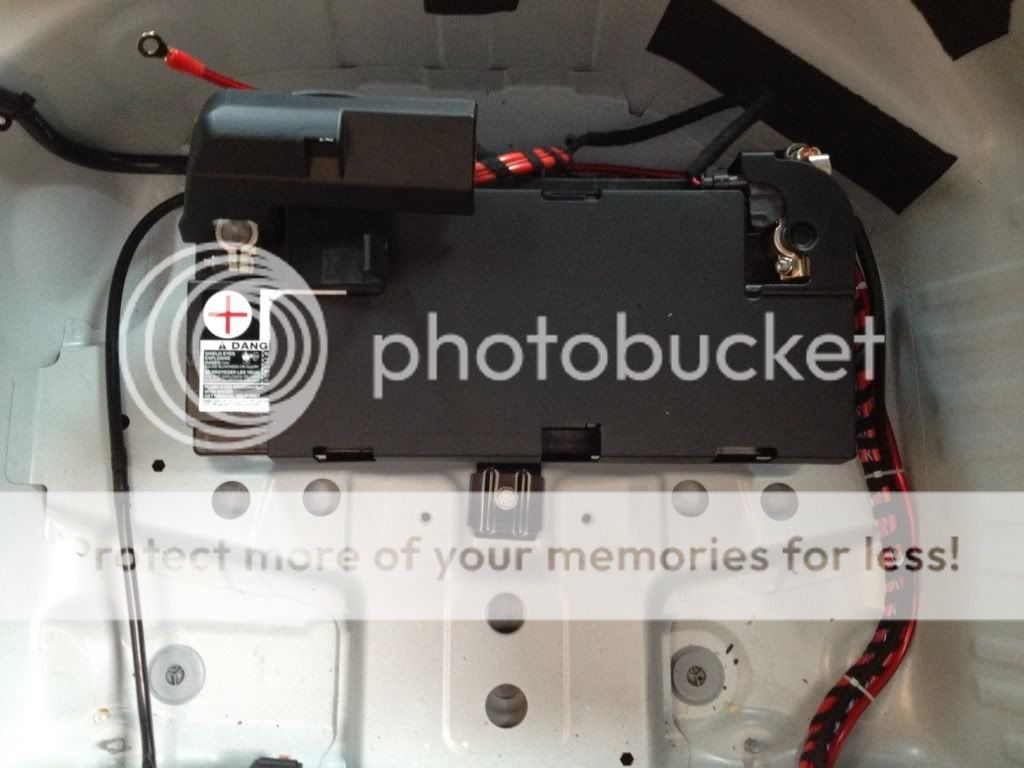
I planned to mount the new amp to the roof of the boot, to the right of the standard sub as shown above, so the first job was to get some power to that location. After removing the spare wheel, accessories, and a metal clamp around the battery bolted to the floor, I ran a power cable to the positive terminal, cable tying the new cable to some existing ones running around the floor of the boot. I ran the cables up towards the right hand side of the boot, under the sill and up into the access hatch where there are some fuses.
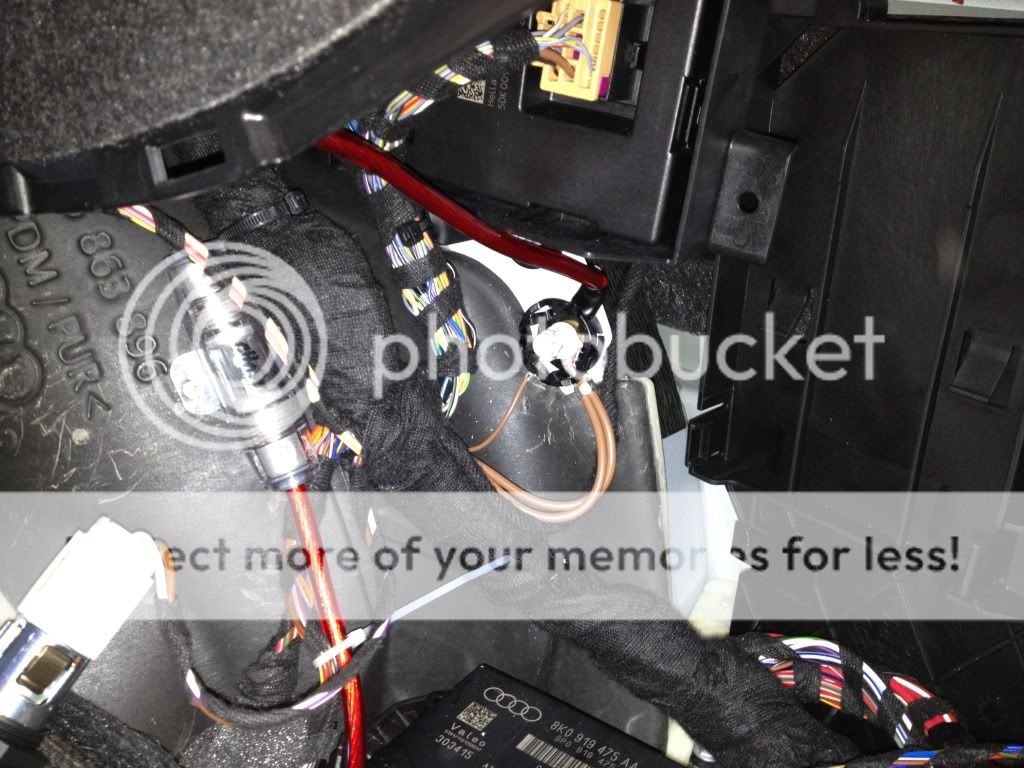
Inside the hatch, I ran the live feed up the side of the boot behind the trim, and up towards the roof of the boot. You can see the fused live cable in the pic below (left), and also the negative cable which I secured to an existing bolt which already had some negative electrical cables attached to it (centre of the pic) OK I shouldn't be using red coloured wire for this, but the length of negative cable in the pack I bought was nowhere near long enough.
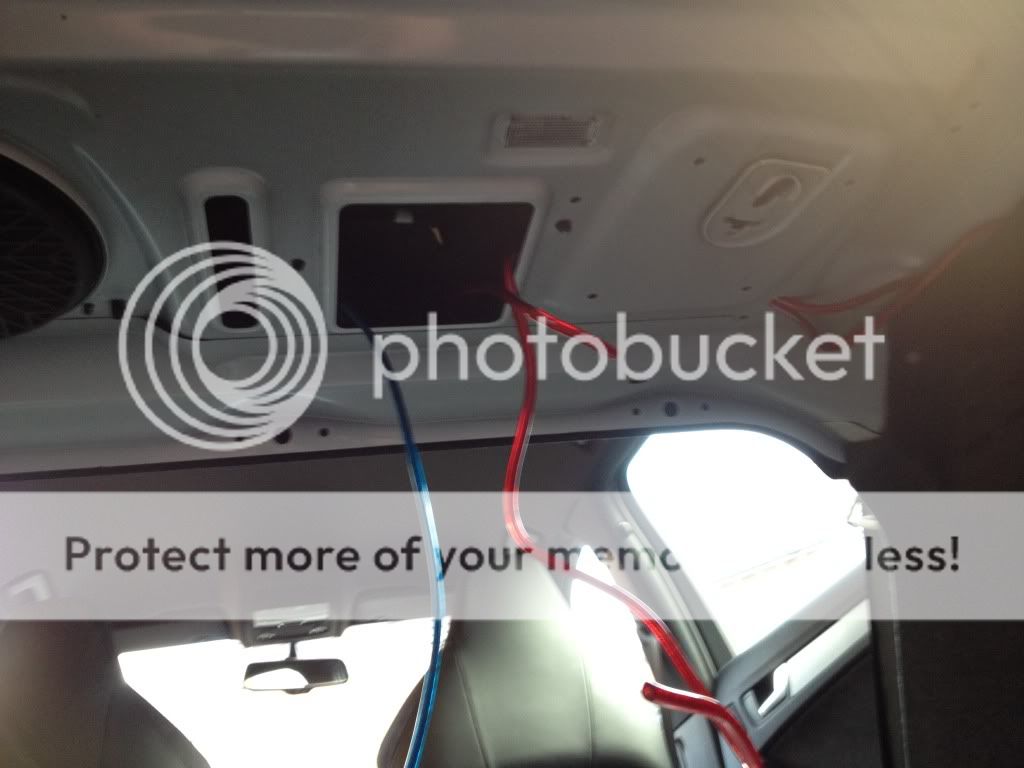
The image below shows the new cables running up and through the hole in the roof of the boot. The blue cable is the audio cable running to the new sub, which I intend to install into the space behind the access hatch on the left of the boot. I used a coat hanger to feed the wire through here
Next up was the audio and switch on/off feed for the amp. This was obtained by unplugging the existing sub by sticking your hand up through the hole. I cut off the existing connector block and attached the adapter plug which came with the amp

After getting all the cables in place, I was ready to plug in the new amp. I measured up the 4 fixing screws and drilled 4 small holes into the roof of the boot. Pretty scary but I figured if it went wrong, you would never see it. Here is a pic before adding the amp cover showing the cables exposed

And one with the cover installed, no cables visible at all now. The amp is also rock solid in its new fixings and it was probably a good idea to drill holes much smaller than the screws supplied.

Now for the sub, here is the access hatch I intend to use (sorry for the poor pic) you can see the blue audio cable which i pulled through to the amp earlier

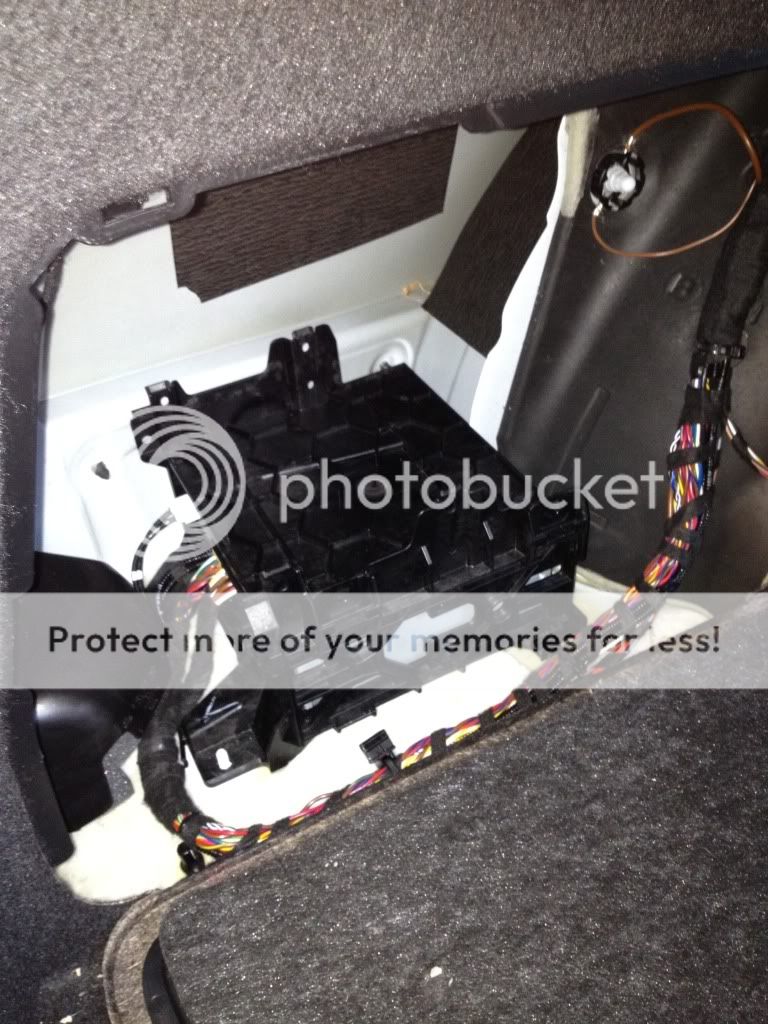
Here's inside the hatch, which on the stock A4 contains the radio module. I believe the B&O specced cars also contains an amp. First job was to remove the black plastic bracket and relocate the electronics. There are plenty of alternative places to put this as there is lots of space for a small rentangular unit
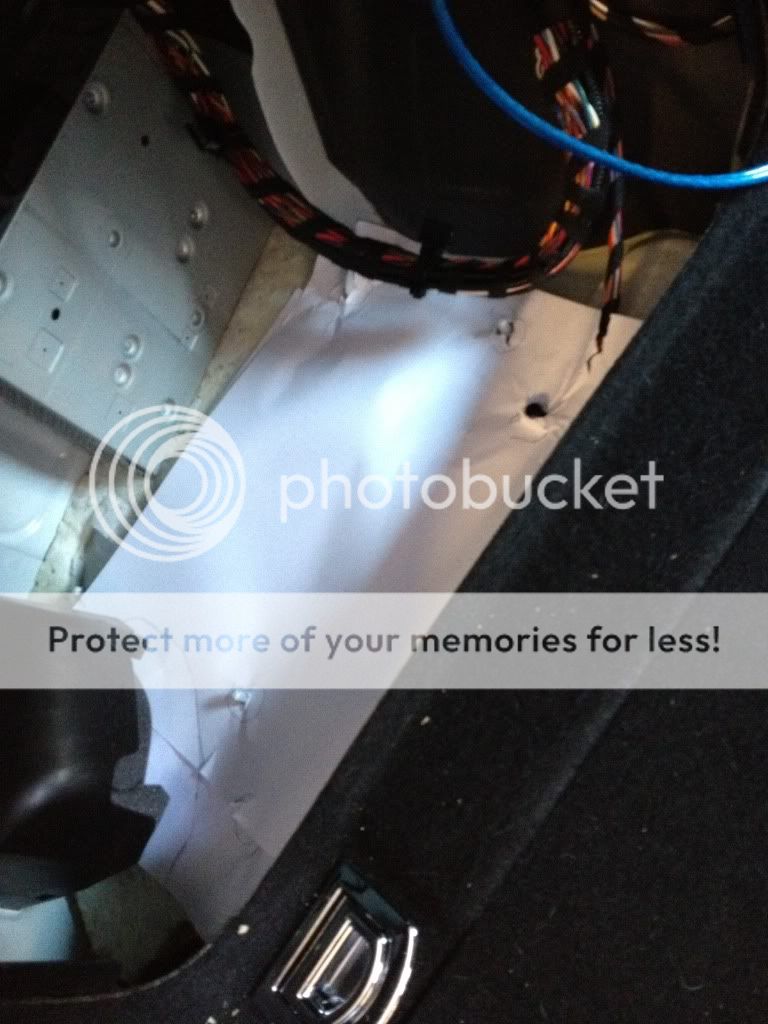
I trimmed off the access hatch cover with a stanley knife (scary moment number 2) and used some paper to map out the general shape for a custom sub box. There are a few screws and fixings popping out from the chassis so I pushed these through the paper so I could makes holes in the base of the box and use these as a way of keeping the box in place.
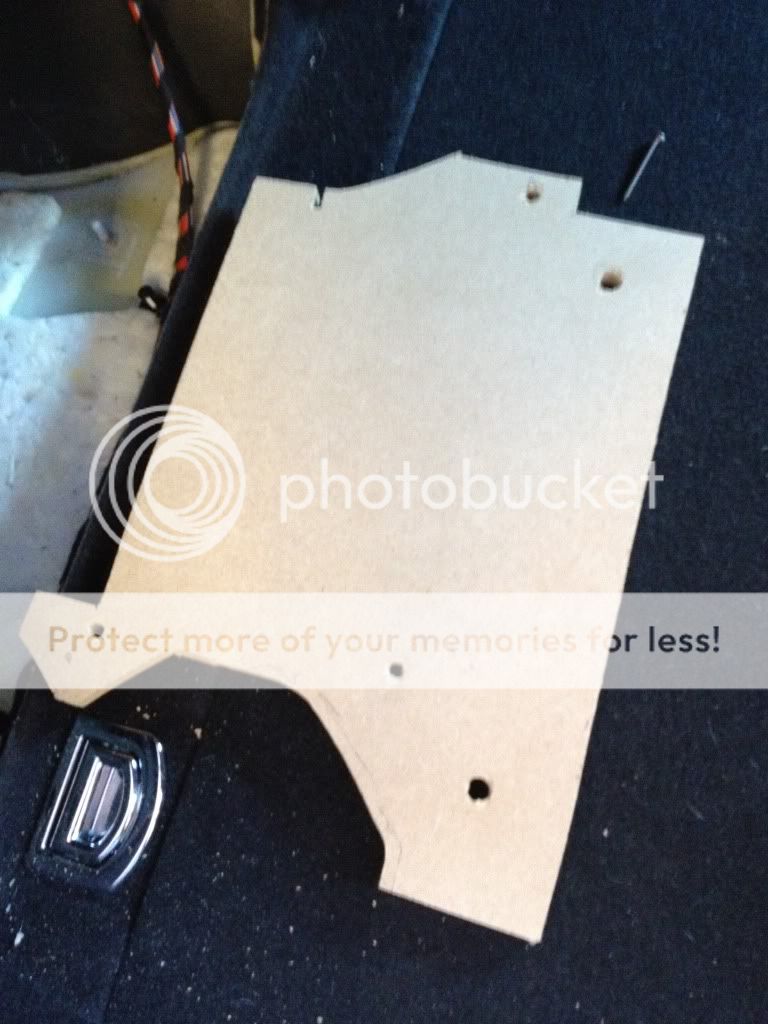
Here's the base of the box, made with 12mm MDF. The shape of the base is quite complex so to include as many fixing holes as possible, however the box which sits on top of this was much more rectangular in shape
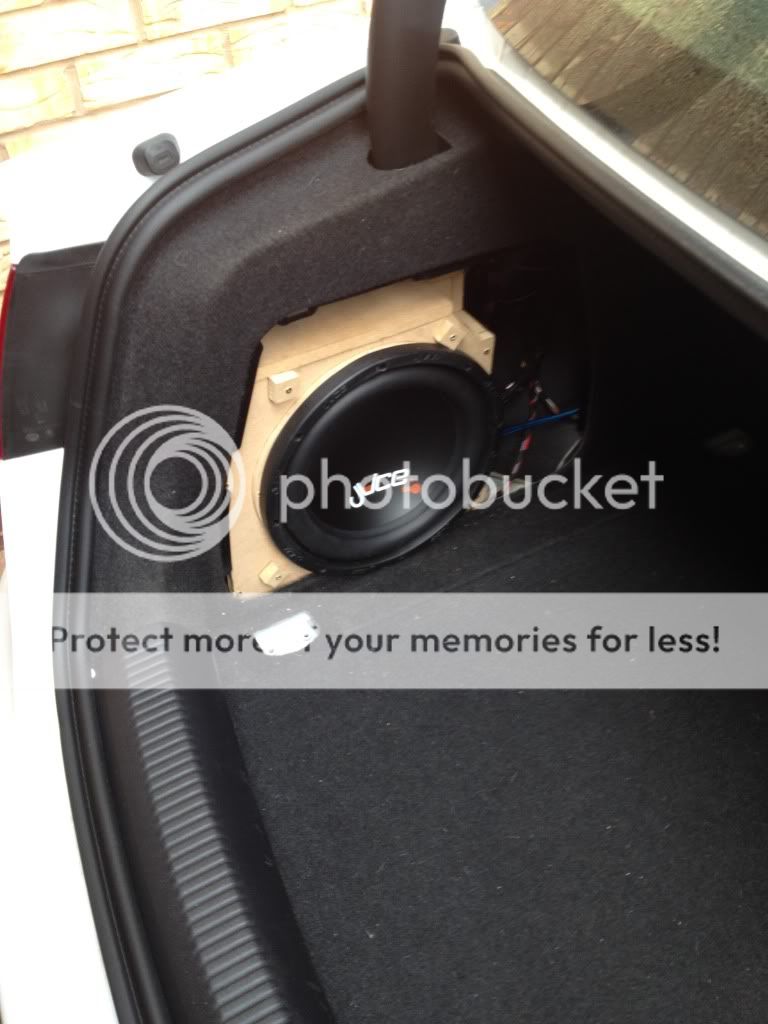
Heres the finised box, which was a complete pain in the backside to build and took a lot of time tweaking to match the exact shape of the very tight space inside the hatch. I filled the joins and holes inside the box to make it as air tight as possibe. TIP: Dont forget to cut a notch out of the top of the box to allow for the boot lid arm to pass through when closing the boot
Finally, I cut a cover out of 5mm MDF roughly following the shape of the original hatch, and wrapped this in accoustic cloth, using spray glue on the other side to secure the cloth to the MDF hatch cover. I also cut a sub sized whole in the MDF cover to allow the sound to pass through the cloth cover easily. The cover itself is attached to the face of the sub both by vecro pads for easy removal and re-fitting in future. That is why there are 4 square blocks on the face of the sub box above

and thats it. It took me just over a day in total. The wiring was surprisingly easy, the custom sub box was surprisingly difficult. The sound is now much improved when compared to the stock sub
Hope you enjoyed my build thread
For reference this is for the 2010 onwards Audi A4 / S4 with the standard stock stereo (so NOT B&O)
I picked out a suitable amp and sub for the install, going for the following Sony XM-2002GTW 1200 Watt Amp and a suitable 10" subwoofer.
Now the good news is that the battery on this car is in the boot (well on the S4 anyway) so getting a power feed for the amp was going to be easy. Also the car already comes with a small sub in the roof of the boot space, and as the new amp includes a high level input, I planned to use this connection to supply the audio signal for the new amp and sub, and also as a method for getting the amp to detect power up / switch off.
Heres a pic of the stock subwoofer
I planned to mount the new amp to the roof of the boot, to the right of the standard sub as shown above, so the first job was to get some power to that location. After removing the spare wheel, accessories, and a metal clamp around the battery bolted to the floor, I ran a power cable to the positive terminal, cable tying the new cable to some existing ones running around the floor of the boot. I ran the cables up towards the right hand side of the boot, under the sill and up into the access hatch where there are some fuses.
Inside the hatch, I ran the live feed up the side of the boot behind the trim, and up towards the roof of the boot. You can see the fused live cable in the pic below (left), and also the negative cable which I secured to an existing bolt which already had some negative electrical cables attached to it (centre of the pic) OK I shouldn't be using red coloured wire for this, but the length of negative cable in the pack I bought was nowhere near long enough.
The image below shows the new cables running up and through the hole in the roof of the boot. The blue cable is the audio cable running to the new sub, which I intend to install into the space behind the access hatch on the left of the boot. I used a coat hanger to feed the wire through here
Next up was the audio and switch on/off feed for the amp. This was obtained by unplugging the existing sub by sticking your hand up through the hole. I cut off the existing connector block and attached the adapter plug which came with the amp
After getting all the cables in place, I was ready to plug in the new amp. I measured up the 4 fixing screws and drilled 4 small holes into the roof of the boot. Pretty scary but I figured if it went wrong, you would never see it. Here is a pic before adding the amp cover showing the cables exposed
And one with the cover installed, no cables visible at all now. The amp is also rock solid in its new fixings and it was probably a good idea to drill holes much smaller than the screws supplied.
Now for the sub, here is the access hatch I intend to use (sorry for the poor pic) you can see the blue audio cable which i pulled through to the amp earlier
Here's inside the hatch, which on the stock A4 contains the radio module. I believe the B&O specced cars also contains an amp. First job was to remove the black plastic bracket and relocate the electronics. There are plenty of alternative places to put this as there is lots of space for a small rentangular unit
I trimmed off the access hatch cover with a stanley knife (scary moment number 2) and used some paper to map out the general shape for a custom sub box. There are a few screws and fixings popping out from the chassis so I pushed these through the paper so I could makes holes in the base of the box and use these as a way of keeping the box in place.
Here's the base of the box, made with 12mm MDF. The shape of the base is quite complex so to include as many fixing holes as possible, however the box which sits on top of this was much more rectangular in shape
Heres the finised box, which was a complete pain in the backside to build and took a lot of time tweaking to match the exact shape of the very tight space inside the hatch. I filled the joins and holes inside the box to make it as air tight as possibe. TIP: Dont forget to cut a notch out of the top of the box to allow for the boot lid arm to pass through when closing the boot
Finally, I cut a cover out of 5mm MDF roughly following the shape of the original hatch, and wrapped this in accoustic cloth, using spray glue on the other side to secure the cloth to the MDF hatch cover. I also cut a sub sized whole in the MDF cover to allow the sound to pass through the cloth cover easily. The cover itself is attached to the face of the sub both by vecro pads for easy removal and re-fitting in future. That is why there are 4 square blocks on the face of the sub box above
and thats it. It took me just over a day in total. The wiring was surprisingly easy, the custom sub box was surprisingly difficult. The sound is now much improved when compared to the stock sub
Hope you enjoyed my build thread
Last edited:

