Custom laser engraved centre switch pack

jrumball

Registered User
Joined
Apr 8, 2018
Messages
776
Reaction score
399
Points
63
Location
Bedfordshire
Firstly thanks too SDB for the recommendation of this company in his very handy thread about hacking a garage door opener.

https://www.audi-sport.net/xf/threads/how-to-blank-dash-button-mod-for-garage-remote-control.336027/

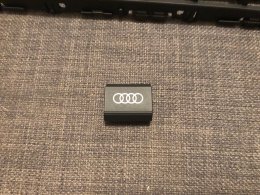
I just got back in the post today my custom engraved button for my centre switch pack and also had additional LED indicator widows engraved too! They are going to be part of a custom exterior lighting project that I am working on, and a complete set of working switches with LEDs. Most impotency this will be the first car i have had where every possible button has been used =)

They cost £33.50 including postage, they will do a button for £15
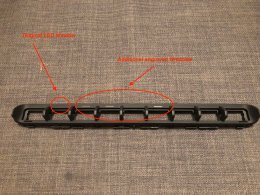
IMG 4334 IMG 4335
The button looks factory, the windows look slightly different in the picture but virtually identical in person.

I had them done by a company called

Laser N Creations
36 Townlands
Willand
Cullompton
Devon
EX15 2RR
United Kingdom
Telephone: 01884 34678
Email: info@laserncreations.co.uk

They did an amazing job quickly and were very professional with lots of communication. Would highly recommend them if anyone needs anything like this done.
 
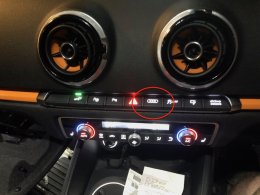
Switch pack populated with new switch. I haven't done any of the wiring yet. I intend to add a white backlight LED , and white indicator LED to differentiate it from the EV Button in green and the parking buttons in red.
IMG 4338 1
I am at the moment looking for a solution to turn the momentary switch into a latching switch, as I can't seem to find a latching one in the same package.

To save me designing a bespoke circuit is there an off the shelf little black box that does this kind of thing for automotive applications ? It only need to drive a relay which will power the external lighting .
 
Looks good!
Unless someone comes up with a better solution, I think what you may be looking for is a Latching Relay. It needs a momentary input to change its state and the same again to switch back.
In the past I've used one on a '67 TR4a headlight stalk to swap low beam to high beam rather than use the foot operated switch.

Thanks had been looking at various relays and missed that option ! I believe they are called dual coil latching relays, I was going to do a flip/flop circuit but I guess a really is probably a lot easier .
 
Back light and indicator led soldered, just waiting for some bits to complete the mod ......

IMG 4458
 
  • Like
Reactions: DeadxDawn and oli356
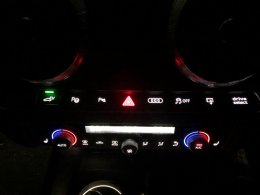
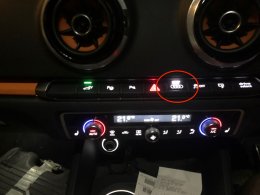
Got the whole lot working together. I now have a custom engraved switch that works as a latching switch with an indicator LED... Now turns on and off LED Audi rings

IMG 4810 IMG 4812 IMG 4814
 
  • Like
Reactions: Pook, Khufu, mfl and 1 other person
Always thought those illuminated rings looked kinda cool.

Do you have a picture from a distance showing the whole front of the car in the dark ?


Sent from my iPhone using Tapatalk
 
I have led Audi rings but need to replace as the weather took its toll on the cheap set I got. I would love to have them controlled with a switch.

About how much did the whole project cost?
 
There are a lot of parts ... Will write the whole thing up soon but you need

Switch engraving
  • Second switch pack to harvest LEDs and resistors and a switch £15
  • The engraving itself was about £15 a switch delivered
Control Box
  • Relay board £5
  • Plugs I got an assortment for £10
  • Pins for the switch pack plug £3
  • Old fuse box to harvest pins for a feed £10
  • Cable £10
  • Box to put it in £10


It’s juat a lot of parts probably can get all cheaper than me or may have some of it lying around ... and you will have lots of spares as you can buy 1 or 2 of somthing and all the other little bits to make it neat solder heatshrink cloth tape etc
 
@jrumball You may be aware of this already but I believe the Audi switches all provide a momentary contact from switch input to OV (Earth).

The relay in the above link appears to require a volt free contact on the small white connector so you may have to modify the Audi switch tracks and use 2 pins on the 20 way connector to give you a momentary switching contact free of OV(Earth).

Just had another look and I think the relay unit is designed to run on a 5V DC supply so you may have to take that into account as well.
 
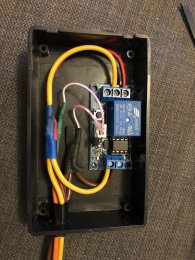
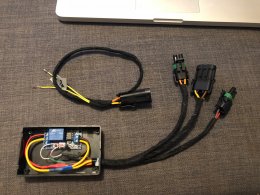
I have the system working now. I intend to write a proper how too once I have some time. You are correct in the link above is for a 5v only version the seller had the wrong details when I ordered it and has since corrected them after I pointed it out to them (I had to add add the voltage regulation myself, luckily I noticed before I plugged it up for the first time !). It seems to work without any modification of the switch pack.

This is all I did nothing fancy ....
Image1 Image2

Yellow - switched live back to a free way on the fuse box
Brown - Ground
Red/Black - Switched live
Yellow/Red - Switched live for Indication LED in switch pack pin 20
Orange - position 6 switch pin 9


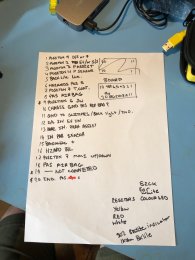
Pin out need to check this I did it a while ago and remember there was something I had to change....
Image3
 
I have the system working now. I intend to write a proper how too once I have some time. You are correct in the link above is for a 5v only version the seller had the wrong details when I ordered it and has since corrected them after I pointed it out to them (I had to add add the voltage regulation myself, luckily I noticed before I plugged it up for the first time !). It seems to work without any modification of the switch pack.

This is all I did nothing fancy ....
View attachment 167792 View attachment 167793

Yellow - switched live back to a free way on the fuse box
Brown - Ground
Red/Black - Switched live
Yellow/Red - Switched live for Indication LED in switch pack pin 20
Orange - position 6 switch pin 9


Pin out need to check this I did it a while ago and remember there was something I had to change....
View attachment 167794
Did you ever get the write up done? Looking to do this.
 

Similar threads