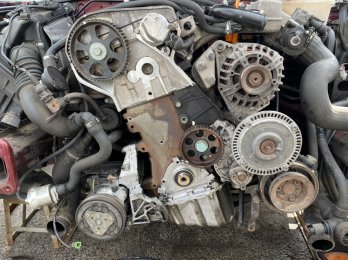
Hibiscus Red TQS - New Car, New Project, cars been here before though.

Big day ahead tomorrow.........collecting Recaro interior, collecting replacement lumbar for drivers seat, plus collect an RS4 grille.

Something to mull over tonight and on the journey down. Guys got a set of OEM Valeo factory Xenons I can have. Not sure if this is good, or just inheriting a headache. From what I can see, they will work (ie switch on and off) straight away, but with no levelling at all. Converting the manual levelling from Auto levelling looks a pain. So I’m unsure wether to get them, or leave them.
 
Hope this all fits in as researched

CB5EC619 9645 46F3 BA86 9E8EF9DC9886
7073B74B 25FD 4100 8C5A 33AFC8860CBF
 
  • Like
Reactions: B5NUT
Trim looks in good nick - what model was it out of RS4? As for headlamps - yes a lot of hassle to make them legal and insurance friendly should you have an RTA. With the improvement in halogen bulbs id stick with standard lamps and upgrade the bulbs. Spend the cash saved on other maintenance/upgrades. Hows the thumb?
 
Thumbs better, healing well. The trim is out of an S4, no RS4 logs. Plus it’s saloon specific too, so fits straight in.

Biiiiiiiiiig day today. I fitted the trim, whilst also assisting my mate do the timing belt, water pump, auxiliary belts and tensioners, oil pump, sump pan, oil level sensor, crank oil seal, together with all new bolts, new bottom balancer pulley, new bottom timing sprocket, plus new thermostat and radiator. And breath...................
 
Trim is in, all 4 door cards with carbon trim swapped over. Plug and play front seals. Rear seats were easy once I figured out how the split centres came out.
Figured out why my stereo sounds rubbish too. Somebody has removed the original woofers, and replaced with some really scabby co-axials. Not good. I’ve not even bothered putting front speakers back in. The good news is, I’ve already got speaker adapters. Just need to buy some decent quality components now, and replace everything and start again.
Really happy with these seats, really comfortable.

6AA9E68C 45C6 404F A795 D785888510DA
07182598 7DD0 4E6E B57A 235B26071E1A
C94EACCA 6E6B 4290 B0BD E4E48AC12530
 
Stripped the front off the car, then got cracking removing the timing components.
I bought a tool that would hold the bottom sprocket still whilst we swung on a scaffold pole to undo the bottom crank bolt. But.......my mate got hold of my ‘big boy’ M18 gun out, and with one strike, the bolts was out. No need for my tool then. Once the crank seal was out and the journal cleaned, the new crank seal was installed using the installation tool I bought from ECS Tuning in the states. Timing belts and pulleys etc all installed, spun the engine over twice, all marks lined up. Great, now time for the hard part.
Sooooo, all front engine mount bolts removed, rear trans mount nuts loosed to the last threads. A jack was put underneath the a/c compressor housing and the engine was lifted up until the gearbox pretty much hit the firewall. The engine mount console was then removed from the engine block. All bolts removed from the sump (that sounds really easy but it’s not) and the sump comes away with a light hammer tap. Removal of the baffle, then realise that the oil pump still won’t drop down as it hits the subframe. Solution, I bolts the lower half of the oil pump from the upper half, and drops straight out. Reinstall action is a reversal of removal. (I say this tongue in cheek, as anybody who has done this job knows it is not that simple.)

The oil pickup didn’t look as bad as I expected at first glance, but on closer inspection, was not in great shape. Glad it was changed.
I’ll attach some images in my next post.
 
A669F5B8 5D42 42B0 9773 D204C987F133
59931426 BE1B 47E5 BF89 BAD4C33DBB16
2CB2E2FC BE68 4599 9B11 B0499EE8FAB0
0EA1B9B2 E3EC 4368 87C8 C34DEA08066E
00E3055A BA67 4BEC A0B7 F6C703486304
7FB9784E 8036 42C5 866F E175E2587DB8
CEB6E1F0 FF15 4704 B617 CC689CA8DD42
57025381 29D0 4BEA BA21 0697FC47C9B7
7C3F42F8 2143 4070 AADC 277AD7570CC8
9E2BD3A2 67E7 4373 B9A7 8CAFAC5333A7
C7015121 32A7 47A9 95FA D49E46E469DD
DDB91BA5 925F 4A2A B958 45E0305A9A36
159FB5DA E4E5 4DC1 A654 EDB06CD86B1F
A891128A B71D 4BAA 96B5 486F3A51B2B2
B2397AF4 F56C 4EEE B026 CD22F18B744E
 

Attachments

  • 55026497-3F7C-4FB5-839B-A49EEC5100BD.jpeg
    55026497-3F7C-4FB5-839B-A49EEC5100BD.jpeg
    504 KB · Views: 146
my apologies one of the images has rotated 90 degrees, it wouldn’t turn the correct way.

The only 2 bad things that occurred, were when we jacked the gone up, we managed to break one of the temp sensor clips on the bulkhead. I’ll order one from VW tomorrow.
The other bad thing.................when trying to get my seats out of the car, I heard and felt a popping sound in my right lower leg. After investigation it turns out of pulled my calf muscle. The pain........I honestly thought I’d torn it. I’m now limping around the house. Definatly no car jobs for the foreseeable until this has healed.
Drove the car home, and guess what..........the oil pressure light is still on. I think the oil pressure switch could now be contaminated and faulty. So I’ll have to change that over the weekend, then that really is it for me, until I’m healed.

Finishing on a better note though, I also got an RS4 Genuine grille off the guy I bought the seats from. Well happy, looks great. Really wants the Quattro badge on the grille though.


5C342D5D ECA2 45E1 B098 54E206FD9F9B
 
Great work. All i can say is that this car is going to be the end of you with all the injuries! LOL. Yes pick up pipe does look somewhat clogged. Peace of mind for you now though with oil pump and belt changes all done. Keep up the good work.
 
Hmmmm, would you believe the oil pressure light is still coming on. Journey home was just a dismay for me.

Also, because we cracked the plastic temp sender clip when the engine was jacked up, this failed on the way home also, so coolant just ejected itself. It was only a 5 mile journey Luckily. So at work on Monday, I’ll source 2 clips, plus the bung and rubber seal that got ejected also. I’ll fit those, plus a new oil pressure sender. I’ve got a funny suspicion there’s a wiring fault to the sender somehow. I have read about this on another forum.

In any case, I’m glad this job was completed as I know this is no longer part of the problem. I’m awaiting a Oil Pressure Test Gauge this week too. When we’re back up and running going to conduct some tests. I expect them to be inline with manufacturer specs hopefully, which will point towards a wiring fault. We shall see.

Currently looking at component speakers for the front, to replace the horrendous coaxial I found in my door panels.

Got a oil pressure sensor adapter today, plus my turbo boost t-piece arrived on Friday. So I’ll order my dual function gauge in the next week too.
 
Only just got the car back up and running today. Unfortunately when we jacked the engine right up, tried one last notch on the jack, and heard the crunch of plastic. Which was the plastic clip holding the temp sender in at the back. Found a metal clip to do a job temporarily while I got it home last Friday, but unfortunately didn’t realise that the one on the bung had gone too. So the pressure promptly spat the bung out on the way home. New genuine bung, seal, and 2 genuine clips later, and a full bleed of the cooling system again.

As previously said, the oil pressure warning still comes on. Oddly at about 1800rpm. Doesn’t come on above that. I honestly feel it’s a electrics fault now, probably even a dodgy sensor. I’ve now bought a Genuine VAG sensor. But before I fit it, I’ve also got hold of an Oil Pressure and Oil Pressure Sensor test kit. So......... what I really need to know, is what are the upper and lower oil pressure limits. So I can run a proper test and eliminate a mechanical fault.
 
Oil Pressure Test dial rigged up and working. I have a M10 male to M10 female adapter now with a 3/8 take, for when I eventually get my in car oil pressure / boost pressure gauge. Did some static tests, then went for a run in the car, checking the oil pressure on the gauge all the time. The 3 beeps and the warning light came on, but the needle on the test gauge did not move at all. It comes on at revs between. 1500-2100 rpm. Goes out on e the revs are up. But the needle never even dips.

conducted This test when the engine was at operating temperature (rough figures below)

Idle - 1.3 bar or 20psi
2000rpm - 2.9 bar or 36psi
3000rpm - 4.9 bar or 50psi
4000rpm - 5.5 bar or 80psi
5000rpm - 6.1 bar or 85psi
Excuse the bar/psi comparisons, these are from the gauge mounted on the windscreen. So I may be off slightly.

So I’ve showed some friends already who are mechanics, and they say these figures are representative of a good engine, as it’s maintaining good pressure.

I have some ways ahead now to try and resolve this issue. Start with the obvious.
- Genuine Oil Pressure Sensor (replace previously fitted Topran unit)
- check wiring from sensor to ECU
- Go back to previous oil filter supplier of Purflux, as opposed to Mahle.
- Change hockey puck oil PSV back to original item
- Change PCV out for a February Bilstein unit, (replace previously fitted Stark unit)

Hoping at some point that we will have no more oil pressure warning. I’m going to do one task at a time, so I will know which one is the culprit.

89435750 D025 4773 8042 F602D898AB5F
B85D3D1B 4360 49EB 81FE 1D57DC545847
 
Think I would start with the sensor first. If that is not working then I would be looking at temporary wiring bypass to see if that cures the problem as from the looks of your pressures you don't have a problem. Have you at any point remove the hole oil filter bracket assembly and given it a good clean out? It's unlikely but there could be some sort or flow restriction (gummed up with crud) unlikely but for the cost of a few new gaskets it could be worth a look.

Not related but I would also look at the larger oil filter as in this thread https://www.audi-sport.net/xf/threads/that-bigger-oil-filter.124567/ I run the F revision as 3.5 litre of oil is not very much of the size of the engine
 
Halleluja!!!! Swapped over the Oil Pressure Switch last night to the brand new Genuine sensor I bought last week. Went a quick ride out and got up to temps, and no warning. So tried it to work today, asp did then home again.......lol.no warnings. God that feels good to be driving and not hearing any beeps. Thank goodness. Oil Pressure Sensor was the favourite since I knew everything else mechanical had been attended too. It could have been the sensor in the first instance of course, but I’m glad the oil pump job was done as it definatly didn’t look to clever. So now I have piece of mind going forward.

Sorted, moving forward, start focusing on the next jobs.

incidentally, yes, I already use the larger filter that Audi recommend, as opposed to the older tiny filter. I may well put the transporter sized filter on next time.
 
Next job.........sell the old interior, and then send the alloys to be refurbished. Tyres were removed last week by Geoff from Chorley Street Garage, he’s still ribbing me about BBS lookalike alloys. I’m not too bothered, they were cheap enough, and have all the hallmarks of Genuine ones. I know once these are fitted, I’m going to want it lowered pretty quickly! Lol.

C361BB8D BB8E 4300 AF74 8E31D767786E
EE041595 195F 4B51 B19A 8F72C578B54C
 
Hi there, lots of work done again and glad you got to the bottom of the oil pressure issue. Nearly spat my tea everywhere laughing at the temp pressure gauge taped to the windscreen - but whatever works right! Do you think the pressure switch was knackered by the slick 50 treatment?
 
Yeah, lol, the temp pressure gauge served a purpose. I could have possibly just about got it to sit inside the car, but my mate who has used one of these before, recommened keeping it outside, just in case a seal failed or what have you and oil ended up everywhere.
It very well could be the Slick50 that knackered the switch, unsure, or could just have been a duff switch. I work in the trade at General Traffic, so I know this happened all the time. Just been on a decent run out to Blackpool and back, and definatly no more beeps. Feels good now, and so quiet.
.............apart from, I’m sure I can hear a wheel bearing noise now. It just never ends does it lol. At least it sounds like a rear bearing, and I’ve got uprights to have powder coated and rebuilt soon, including new wheel bearings in the rebuild. So that will cure that.

ive just ordered a new crank sensor, as my next mini mission is to try and stop the car from doing its warm start thing. Doesn’t do it all the time, but when its warmed up, or even if it’s just a warm day, it will take a few turns to get it started. Already got a new temp sender, so 90% sure it’s not that. My gut feeling is either crank sensor, or fuelling. If it’s fuelling I’m feeling it’s got something to do with the carbon canister system, as there is always a burble coming from that area and I’m sure that’s not ‘standard’.


Just a big game with these B5’s isn’t it, solve one problem, move onto the next, and then the next............
 
Hahaaaaa Sandip, not selling just yet. I’m just getting started, can’t sell it yet. Lol.
 
Rectified a few jobs this evening. My power steering had begun to leak for the last week or so. Noticed the pools of oil on the driveway. Then Thursday night with the Mrs in the car, it made a god almighty noise, which I knew meant the fluid had fallen too low, even though I’d been checking it daily. So I filled it up again and got it home. Had a feeling i knew what it was. When I fitted the new rack, no washers were supplied, so I ignorantly fitted the old washers. Schoolboy error tut tut. So pulled the plastic inspection panel this evening, and sure enough the supply union was leaking. Took both unions off, new sealing washers I’d bought this week, back together. Made sure I bled the rack and then checked for leaks......no leaks. So, see how that goes this week.

Depending how my,leg is healing this week, my intention is remove all the brakes, and paint the calipers and carriers, plus new stone guards I’ve got. Sick of looking at manky brakes behind the wheels now.
 
Have you now got your 18's on? Be nice to see some pics of it on the BBS. Been following a few TQS on ebay - they're definitely on the up.
 
Have you now got your 18's on? Be nice to see some pics of it on the BBS. Been following a few TQS on ebay - they're definitely on the up.

No not just yet. Still deciding which powder coating company to use, and also importantly colour. I wanted to go a darker shade of silver with a polished lip as a nod to the TQS wheels. But that’s a big thing for me, as I’ve always hated black or almost black wheels. Which is why I say a shade darker than silver. So still deciding. Plus need the TQS interior to sell, plus the armrest and trim pieces to free up some funds to get them done.

I managed to get my self a Stainnards Gliptone kit last week, with dye matched to onyx black. So over the weekend I was applying dye to the TQS interior. Really pleased with how it came out. Just need to sell it now. When it stops raining I can get some decent pictures.

Before:
772C997E 36ED 4244 9B0C 0EC3F74D3483


After:

EC2CB030 6B50 45DC 8D99 DA41656F57B0


372BC816 BAC5 4080 A810 00A16CC6DCC0


Plus the centre console is done too.

52A3214C 5EB8 441C 947B 4A0403FA774D


Ill list them in various places this week, and hopefully they sell soon. The send the wheels to be done.
 
As always, nice work Midas.

I’ve got the same interior but it’s Recaro.

Thanks for the interior dye colour tip, mine is needing some TLC!


Sent from my iPhone using Tapatalk
 
As always, nice work Midas.

I’ve got the same interior but it’s Recaro.

Thanks for the interior dye colour tip, mine is needing some TLC!


Sent from my iPhone using Tapatalk
I’m doing my Recaro next. They don’t need much T!C in the way of dye, just a few bits. But the Gliptone Cleaner and the conditioner is one of the best in my opinion. When the leather is matte when your finished, you know it’s decent product and applied correctly.
 
This weather is totally, utterly annoying. Got a list of jobs as long as my arm to get done. Nothing as big as the engine job, it need to get through it. Difficult when the amount of rain is causing ‘a lot’ of flooding local to me. Ah well.
Happy to report that the oil pressure warning has never been seen again since firing the Genuine Oil Pressure Switch.
Also happy to report that the Dual Gauges are ordered. But…..unhappy to report that they’ve been on order for 3 weeks now, the factory are waiting for sensors apparently.

Got up early today, I have been fitting an active subwoofer from Pioneer since Wednesday. (Juggling with the weather). I like my Hertz components now in the front, that sound great. But they cannot ever deliver the bass a modern car stereo can deliver. So I’ve seen an active sub in a friends car and liked it. I just didn’t want to lose the space, subtlety was key with this install.
The pioneer I’ve got is designed to go under a seat. Definatly not a B5 Recaro seat though lol. So I’ve turned it upside down, and mounted it to the rear shelf. I made an MDF board on which to mount it, I had some sound deadening from another vehicle, stapled that to the lower side then covered in acoustic cloth. Once the subwoofer was mounted, the entire assembly i fitted to the rear shelf on rubber spacer washers. All wiring is in loom conduit, just wanted it neat and tidy.
So finally got the earth and live connected today, and yeah, it sounds how I wanted it. Not in your face, not vibrating the entire car, just enhances the base of the music in a subtle way. Plus I can tune the bass out of the fronts now with the cross overs in the Alpine. So sounds really good.

Also jacked the car up today, undertray back on. Jacked the passenger rear wheel up too, as I got a pry arm and checked all the bushings that there are. There is a lot of movement on the rear diff carrier, not sure if there is meant to be a lot of movement here, considering what it’s holding up. All wishbone bushes are ok though. Moving the hub though, there’s definatly a good amount of ply in the drive. Cant quite see if it’s in the driveshaft joints or the diff. The clunk on changing gear/acceleration/deceleration is really annoying now. I actually though it could be subframe mounts, but the are solid really.

Sub install for reference.

3668627B B7A1 4A4C A0D3 B28400FF9EE4
 
I know one thing I’ve found out with the Recaro interior. My God, does it squeak against the centre armrest when your driving along. With a passenger in its horrendous. Anybody else had this issue? Fixed this issue?

Ive actually temporarily bonded some acoustic cloth to the side of the centre console currently, to see if that cures it at all. Haven’t really tested it with 2 passengers yet. See how it goes.

Yup same here in the S4. Tried the same as you and it mad a difference but still annoying.

I’m hopefully going down the recaro PP route this year which by all accounts are a bit narrower width wise.


Sent from my iPhone using Tapatalk
 
These better weather ‘intervals’ are definatly better for getting jobs done. Fist time I’ve cleaned the interior of the car in about 8 weeks I think. Interiors been in about 6 weeks and hasn’t been cleaned. Good to get the door cards cleaned etc, so now everything is the same colour etc. Quite happy with the way the interior is coming along. It’s where I spend most of my time, so I like a good interior.

Got to say, I’d prefer it if the indents in the leather would come out. I believe a heat gun (hairdryer) can get them out, but haven’t tried yet. Anybody else had this problem and successfully got rid of them?


AAA485B0 65E5 414B A249 58C67B565F95
DEE4DC71 4127 4C5B 9DAD B7C6687FBFBB
21028EF0 7C36 4207 A8EE 369EF7990C02
 
  • Like
Reactions: S4 Muzza
Out of interest do the Recaro's sit any higher or lower than the standard seats?
 
Out of interest do the Recaro's sit any higher or lower than the standard seats?
Ermmmm, I’d be inclined to say higher. Not a massive amount though, but definatly higher.

I always remember with my first A4, a basic 1.6 with no electrics, and they could be made to go really low. Then I fitted early sports seats and I remember they wouldnt go as low.
Now with this TQS with electric lumbar, they definatly wouldn’t sit as low at all. And with the Recaro, we’ll, they are higher.
Its a laughable situation, you would think it would be the other way around. Lol.
 
That’s interesting. I’m always keeping my eye out for a set of these, even just the fronts, but if they sit higher I probably shouldn’t bother. Not much room to spare at 6’4” as it is!

I’m sure the seats in pre-facelift cars are lower too, mine certainly were in previous B5’s. When I first bought my facelift S4 I was convinced there was something under the seat preventing it from going lower!
 
You can steam leather to shrink it, may be a bit safer than a heat gun - and helps to clean as well :)
 
You can steam leather to shrink it, may be a bit safer than a heat gun - and helps to clean as well :)
One of the jobs this weekend is to completely clean the seats with my Stainguardz kit. See how they look after that.
 
Weathers still a bit dreary up here in the North West. So just did a couple of jobs that have been niggling me.

As much as the Red sections on the rear lamps looked good I thought, they allowed the reverse lamps to light up red also, not good. So off with them, and attempted to fit some darkened sections instead. Didn’t go completely to plan, the tiny film I’m using isn’t too great. They’re ok temporary, but I’ll try and replace them with some better film.

Bought some Passat B5.5 wipers arms this week, they’ve been rubbed down and repainted, then installed with brand new Bosch blades. Reason for this is, I really don’t like the way retro fit aero blades have a big hump right in your field of vision. These fit a lot better, and sit a lot lower so you can’t really see the too much through the windscreen.

Fitted my brand new ‘T’ badge on the back, old one was all faded.

Had a brand new Audi emblem for the grille, as the one that came with the RS4 grille was broken in many places, rattled when you shut the bonnet. Dissappinted this one isn’t quite the correct fit. Again temporarily it will do until I get one that’s the correct shape. I plan to eventually paint it light grey anyway together with the grille surround.

New Quattro badge on the grille. Cant get the chrome Quattro badge to fit the RS4 grille correctly. Definatly not cutting it up, they are like rocking horse doo doo. I’m not really liking the bare grille approach, prefer the badging. Just undecided on wha badge I want, lol.

Anyway, better weather on Sunday, so my plan is to fit my diff mount and rear suspension links. We’ll see. Fingers crossed for some good weather.

356FF74D 6C6B 4F20 97DB 839431A577E1
F920D13F 7FF8 4AE9 B308 F2A22A29FA29
ABAF2EDF 0226 4F14 8F7E 76B036E7C2C7
B7A86533 F348 4118 A8A8 85A8DB6C2D2D
4E07F7EF E9EA 4E73 8721 343D24D911EB
87D9F9B7 6ACB 4AAC 8EAF E61ECA747EBA
 
  • Like
Reactions: Simon
Bank holiday weekend, weathers good, missus has to self isolate, so that jobs on the Audi good to go then.

Had some new back plates and Caliper carriers ready to go for a while. Was going to paint them red, well the carriers. But decided on gun metal grey. So managed to spray them and lacquer them today, and then get them fitted after I’d done messing about with everything else.
Ill paint the calipers at a later date, planning on brand new rear calipers anyway.

97321D9B E4F3 494D 990E 162F0CE5F2EB
404DCB55 3A62 4CD0 9AD2 FC134C9867B2
B0D1FD4D 5479 4A1B B2E8 62899D548CB4
 
Checked the rear diff oil today, really not happy with the diff. Think I’m going to have to get the spare one I have in the shed rebuilt. Very noisy on the rear end, whirring, and also I think the bad knocking is ultimately coming from there.

There is a definite leak on the drivers side rear diff seal. Extracted a bit of oil, I’ll check for metal filings in this oil tomorrow when it’s settled. I put a diff treatment in, and also topped up with the correct grade of oil.
I also removed the front diff mount. The ECS tuning mount I installed I was always sceptical of. When it’s torqued up and becomes compressed, I noticed that the central core contacts both the chassis and the diff itself. So there’s a direct metal core joining the too. Now if that’s not acting like a tuning fork I don’t know what is. So today I have cut 2 templates of thin rubber material. And put one on eac end of the mount. So now when it’s torqued up, the central core will not be in contact with either the chassis or the diff. So I’m hoping any extreme noise being transmitted by this mount, will now not be occurring. We shall see.

I also made an attempt at removing the rear diff cross member so I can fit my refurbished unit. What a pig of a job. I’m trying to do this without dropping the exhaust or removing the driveshafts. Well………..one of those jobs I have up and I’ll come back to tomorrow. I’ve watched the vid on youtube of some guy fitting Apollo ones. I’ll try again with some more energy tomorrow. My exhaust mount seems to be missing from my cross member though, odd.

F452F3A7 78A0 42A2 85EB 2E1EF382AFB1
 
Also managed to change one droplink on the passenger side. Removing the bottom nut became more of a headache than I imagined. Drexel, nut splitter, mole grips and blood sweat and tears later, and the new one was fitted, strange how the new ones are steel not plastic now. I got these using the Genuine number so…….
I’ll change the drivers side link tomorrow. The bushes were shot, so just getting through the jobs.

Also noticed my lower arm inner rear bushes are looking decidedly past retirement. That looks like a lovely job as well. My plan ultimately was to get 2 lower arms from somebody breaking a B5 Quattro, have them refurbished and fit new bushes to them. Them fit the whole lot with new brake lines etc.
The jobs list should be getting shorter………but I feel it’s just getting longer, lol

CF879A14 0D49 4346 91F1 F9DEDE66DA9B
3B9BC361 753A 4608 8332 868588534A1E
 
One job I can’t do this weekend, is fit my new Dual Gauges. Waited 3 weeks for it to arrive, as they were waiting on the sender units, and……….they sent the wrong colour gauge. I ordered white to match the clocks, and they sent black. So that’s on its way back to SPA-Technique. Hopefully get it back by the end of the week. I hope!

0A37405A 10A6 4A5D 97D8 92BF196E46B7
 
Those bottom nuts on the rear droplinks are ridiculous. Fortunately when I changed mine I was also fitting a bigger arb, so I just took everything off as one. To this day the old plastic drop links are still bolted to the standard rear arb!