Hibiscus Red TQS - New Car, New Project, cars been here before though.

Those bottom nuts on the rear droplinks are ridiculous. Fortunately when I changed mine I was also fitting a bigger arb, so I just took everything off as one. To this day the old plastic drop links are still bolted to the standard rear arb!

Yeah the ball joint nuts are a bit of a joke. I went ahead and did the other side today, and again the ball joint nut decided it was going to be an ***. I thought it was coming off, and then it just cross threaded itself. So, once again the nut splitter was put into action. I’m just glad all nuts and bolts are going back on again.
 
Managed to finish off today, as well as fitting the drivers side droplink, I went back into bat with the diff crossmember bolts. Managed to get good purchase this time, and got it out by winding the bolt out of the nut, not the other way around. Have to say it would be a lot easier without the exhaust on………but not on my driveway, on my back.
Got the diff supported with a jack, and actually jacked it up as well, which then allowed the crossmember bolts to come out.
Getting the refurbished diff mount back on was a slight pain, as the new bushes are a snug fit. Bit of leverage with a pry bar, and a bit of persuasion with a long extension bar and a lump hammer, and all was well. Brand new bolts going back in, not mucking about with old stuff. So glad I got all the lengths so bolts etc, and ordered them from a fastening company, making life a lot easier.

Went out a test drive with it all installed, and I have to say……………it’s about 110% better than it was. Not really any knocking on gearchanges, or heavy acceleration changes. And the one thing to test, press up and down quickly on the Accelerator……..no knocking. Very very shocked. I expected if I’m honest there to be knocking, but more than likely worse, going off others who have changed these mounts to poly etc. I do think what I’ve done to the front mount has also made a difference.
There was some ever so slight knocks, very very slight. But I think on a 15-20 minute test drive there was maybe 2 thuds that I heard/ felt. Big improvemeant.
As I’ve said before, I think a diff refurb would be a lot better on the diff I have in the shed. But for a bank holidays work, I’m happy. And the pile of brand new parts in the conservatory is going down at last. Lol.

Just need to sell this TQS interior now, and the missus will be happy-er. (Can they ever be totally happy).


DE8AB8E1 B074 4261 A109 FAB45885FC2E
36A20522 775C 4AF3 84C3 D452157AB530
A42ADFE6 E3CD 46F9 A236 05F173E3CA56
EFCA9316 B938 4FBB B83E 97EE0DECD049
204E6064 C9D5 4374 A1B8 B10F6729266D
A00B985B 1702 4765 9ED4 28FAB53BDF3C
 
  • Like
Reactions: Simon
This weekends job would have been installing the boost/oil pressure gauge. Unfortunately, it has arrived back from the supplier looking decidedly second hand after having its white face installed. So not putting that in just yet, have a conversation on Monday about what they intend to do to sort that. Cant believe Ive been waiting nearly five weeks now for an item I can install.

I have had a go at a spare vent I obtained though. Carefully cut the vanes to fit this morning, plus recessed it slightly. I think it looks pretty good really. My other option was a 3D printed job from ECS Tuning in the states, but thought I’d see what my cut one looks like first. Plus the ECS one isn’t recessed.

So, looks like it might just be a wash and polish this weekend. I’ll get out on the Mountain Bike instead.


FD314EB7 5C7B 40E1 ABE1 633388560608
D41A9CC8 1B2A 4F52 8063 DB25F259F9A9
 
Well, gauge still hasn’t arrived back yet.
But, a new box from AUTODOC has arrived. With Inner rear CV joints, rear wheel bearings. 4 rear brake hoses, and 4 rear lower hub bushes. So……time to get rebuilding the rear hubs and shafts.

BF797388 6E6F 46FE A138 B0CB4C50AB32
7D84CE00 C774 49AE 92DE E0674FB375F8
 
Bit of a pause from for a while. It’s been a difficult few weeks. I’ve been caring for my Nan, who I was close to, for the last 15 months. Diagnosed with cancer of the eosphagus last March. Add she passed away 3 weeks ago. Grief is a hard thing to get passed. But I’m trying my best.

I’ll make an attempt to try and fit this boost gauge this week. Just not had the concentration levels required to fit that.

Went out this morning, raining, and my wipers have suddenly become extremely slow. I’m taking it this is the mechanism seizing up? Think an order from AUTODOC will be made this week for that.

Has anybody ever used any thicker oil in the rear diff? Getting a noise much like a wheel bearing now, which comes on once everything is warmed up. So I’m thinking when the oil is cold, and it’s thicker, there’s no noise. Once it’s thinned out at temperature, the noise occurs. Sounds so much like a wheel bearing though, i though diff whine/drone sounded different. Using a thicker oil would only be temporary in any case. I’ve got a spare diff now, so looking to have that overhauled.

Anyway, onwards and upwards. Just glad the Audi had been reliable this last 3 weeks, as my head wasn’t in the right place for that.
 
This car bolton based ? Sure ive seen it knocking around ?

lovely read

currently looking to get back into a TQS myself as a project car and keep my DTM as my daily !
 
Yes Bradderz_1988 we’re Bolton based. I use it as a daily driver at the min, as I only work about 3 miles away from home.

I do love driving it as it is, everybody always compliments it, which they didn’t with my Alfa 159 which I polished constantly. Haven’t even polished the A4 yet.

Your DTM is lovely mate, always fancied one of those myself in honesty.
 
So…………….something happened today.

View attachment 240370View attachment 240371

ive taken the entire mechanism out of the scuttle. Interesting in itself, as you need to remove both wiper arms, luckily I’ve had them off before, and I had a wiper arm removal tool from working on the Alfa, so they easily came off (relatively). With all the Scuttle trims off, it was apparent that the ECU box was going to go have to move. So unbolt the box cover, remove ECU, move the wiring loom where it enters the box, unbolt the box and ’shimmy’ out of the way. Once the wiper mech was unbolted, it was then able to slide past the ECU box.
Im currently overhauling the spindles, which in hindsight if I’m honest, I should have done a few months ago when they first started going slowly. I personally think the crack has been making its presence for a while as I can tell with the 2 different shades of metal within the broken metal.
Anyway, I’ve removed passenger spindle, really easy, cleaned it out, pasted with copper grease and refitted, with a new o-ring. The drivers side…….. it do good. It was solid. Surprised it’s not stripped the motor in fairness. After removing the circli, which was so corroded it disintegrated, I had to put the whole lot in a vice, and use a drift and big hammer to eject the spindle. Let me say that was easy to say and extremely hard to do, as it did not want to move. When it did eventually come out it retained the bottom brass bush.
I ground all the excess crap off the spindle in the middle area, and then managed to drift the brass bush off, which did crack when it finally came off. After cleaned everything, and grinding the spindle as best I could back to round, I pressed the rads bush back in, pasted everything with copper grease and put it back together.

As for the cracked casting, I have used Quik Steel to piece the casting back together. I’ve left it in the vice currently to cure. So tomorrow I’ll get some JB Weld from work, and fill the cavity with it, plus it some around the Quik Steel. Trying to go belt and braces here.
Some new 10mm circlips on order for tomorrow from amazon so I can secure the drivers side spindle.
I am overhauling this now, as I just need it to be able to refit it tomorrow. I know it’s a lost cause, I just need it to work for the next 10 days. I have ordered a brand new mechanism from AUTODOC, so I’ll wait for that to arrive and get it fitted.

2F55CA8D 307C 474A A721 3600390A53DA
D51ED467 F951 44FE A4E7 E1218BC96B5E
CC772C8B 5A20 4381 AFE5 FE642E592401
96AA9348 D4E5 404A A7A8 DFDEAF2CFFFC
00F8707D 8DEC 45D7 8AA1 0896CE48D5B1
AA819F91 8007 4D07 A0F8 A0B7347B8D00
976F8BFF 6407 487A BF20 3FFE9C469A70
62964B2F 1BA9 471C 8F28 709DABAB682A
4D867308 7E98 4D2E 8D13 3AE22137FB24
3F430367 7678 49C7 8DE4 58C7B89DDD2E
 
Last edited:
I truly wish I knew, why my images are the right way up in my images folder, the right way up when I choose the images and size it, and then the completely wrong way around when I upload and add to my feed. ‍♂️ Oh well. Not important in the grand scheme of things.
 
  • Like
Reactions: Simon
Well, excalated quickly this evening. Trying to get my wiper mechanism back In, and clumsily I managed to snap the mechanism whilst trying to pop a ball joint back on. Expletives aside, I should have left it overnight to cure, but I was trying to get the car back in use for tomorrow. So I took this opportunity to lay the wiring for my gauge. Threading it though 2 firewalls, and into the cabin is a bit of a nightmare. But going through the ECU box makes it a lot easier, as does removing the clocks. So……I’ll try and complete this tomorrow or Saturday morning. It’s a bit frustrating as I was going to get all the dents taken out on Saturday morning, but I don’t think that will be happening now.

I was going to tap into the live and earth going to the vents for the gauge, but I’ve had second thougths now, and I’m going to thread a live and earth over to the fuse box area, use the earth over there, and find an ignition live.

I just didn’t expect my car to be such a state of disassembly at this point on a Thursday evening. Hey ho.

EE1610C7 D4A4 4385 AE68 8E93C58E7E30
A23AA03C 5ADB 4417 9609 7C0696B04F4B
4652FD70 EC26 458F BF68 9D7BA974546D
 
  • Like
Reactions: S3 Rav
I couldn’t be ***** working on the car yesterday, some really bad news regarding our wedding, so out it off until this morning.

Forst thing this morning, checked the mechanism had bonded and set correctly. It had, so fitted that back in the car, got everything in, set the motor position to fit the wiper arms………..and the damaged spindle that was seized, has now got buckled threads courtesy of my hammer. Tried to use a thread chaser in situ, but wasn’t happening so had to remove everything so I could get the spindle in a vice and use force. Quick file of the threads, thread chaser engaged, spindle rethreaded and off we go to refit again. Wiper arms on this time, everything works great. I had half a mind that the mech would just snap again, but it hasn’t. My wipers haven’t been this smooth since I bought it. Anyway, least when the new one arrives i have the sequence down to a fine art now.

Actually got my gauge installed now as well. The oil pressure gauge is functioning. Got a t-piece installed, bit of aggro getting it in correct position so my gauges pressure sender would fit in the right orientation, really tight for room down near the oil cooler. Unfortunately boost pressure isn’t working yet, as the t-piece I bought is too big a diameter to piece into the hose at the fuel pressure regulator or the hose for the recirc valve. Annoying.

Read through the instructions online for my SPA gauge, it’s actually quite a complicated, in depth gauge. Can set hi and low alarms, low battery alarms and all sorts. What I really need to know it what Audi have the oil pressure warning beeps set to on this car. Plus what is considered a high oil pressure reading. After the engines warmed up, my car is sitting at between 19-22 psi.

I have also been busy using the JB Weld to repair my centre armrest top cover. Usual problem, hinge snapped. The bond s good though, and seems strong.

All good for a mornings work. This afternoon is to wash the outside hopefully, and also clean the inside. Hasn’t been cleaned since early June now, not been on my A-game since my relation passed away,
Ill hopefully be going to Oulton Park to watch the BTCC tomorrow, always like whatever car I have to look it’s best there lol.


7C7F182A 8E00 4256 838B A052F214B107
FDDF91B7 FD33 4C41 908F 88555E7B2DED
0AD31599 FB9C 4B0A 8623 C08E75781EE5
8AE6F849 E828 4F06 9E4A 0659469DF5FD
 
Oh………nearly forgot. I have a new acquisition, not purchase. Courtesy of James Plant on the B5 Quattro Facebook forum, i now have a full set of FK Coilovers. For no money changing hands, I couldn’t say no to these. I’ve looked them over, and there are no leaks, no damage. Yes the springs are a little corroded as they’ve lost their powder coating, but overall I think these will be great. Not sure if anybody has used these, and know what the ride quality is like? Anyway, hopefully in the months to come, I’ll get the BBS’s refurbished and get the suspension kit on.

928F5996 240B 4918 8E41 DEE9EC198874
A2425F0C A2BE 4ADE BE0E 76BC1C2FE06C
 
Always looks good under lights. Which is unusual as that’s normally worst place for pictures.

Had to polish the front wings and bumper as I made a faux pas whilst under the bonnet.

471AF8AB 4099 4AF9 8C1E D56EE0DEB78C
406C3AFA 08D8 4C2D B378 4AE5A751F818
 
  • Like
Reactions: Simon and Bradderz_1988
If your armrest repair fails, you can actually buy a repair kit from the US. About £15 delivered I think. Never tried it so can’t vouch for it though. Hopefully this link works:


Car looking good :thumbs up:
 
If your armrest repair fails, you can actually buy a repair kit from the US. About £15 delivered I think. Never tried it so can’t vouch for it though. Hopefully this link works:


Car looking good :thumbs up:

cheers, thanks

I have noticed those repair kits yes. The hinge had completely come off, armrest was walking about so figured I’d try this. Think I will order one of those repair kits though, so if it happens again I can correct it with that.
 
New wiper mechanism today, for this in the next couple days. Hopefully some Redline Gearbox oil will make an appearance in the next few days. Then all set for a Scotland road trip with my Dad a week on Friday.

F0396108 795F 4699 B5CA A11971E6EB04
 
Well, tried fitting the wiper mech today, and……….they sent me a LHD unit. I was dubious, but hey, it’s my first wrong part from them. The bodge/mend on my old one is still holding currently. Just annoying to remove everything again to find it’s the wrong one.

Demon Tweeks ‘still’ havent sent me the Redline gear oil. Was last Friday, then this Wednesday, still not despatched. Wanted it in for this weekend too, but that’s out of the window.

Bit of a test this weekend, road trip with my Dad up to Scotland, just past Edinburgh, so he how she holds up. Well I hope. My Dad is super anxious about a trip in a 20 year old car, lol. Need to prove him wrong.
 
Road Teip with my Dad was a success at weekend. Car drove faultlessly, running on super unleaded, the fuel economy was actually really good. Required the windscreen wipers on the way home, and my modded mechanism held up, so happy with that. Even managed to get a spare old pusher fan from Kevin in Glenrothes.
Had a bit of fun with an Octavia VRs on the way back from Glenrothes too, much better experience than with the Alfa!! Lol.

6ED0B3E7 9A61 4CFF 9FA1 43FBF6170653
9FF7C050 A72B 425C 8053 52DCA958C459
 
  • Like
Reactions: Simon, Bradderz_1988 and B5NUT
Got cracking on some maintenance jobs today. Was never happy with the gearbox/diff fluid I put in last year. So, invested in some Redline oil, MT90 for the gearbox, and MTL for the rear diff. Read about Redline oil a lot, and liked what I heard, so thought I’d try this.
First thoughts are good. A little too early really, only done about 6 miles with it in. But the shifts seem to be slicker, and there seems to be less noise from the diff. But as I said, only 6 miles done, the oils barely warmed up really. Hoping to drive to Suffolk on Sunday, so have a better idea then.

The oil from the rear diff when dropped was pretty much the same colour as when it went it, so positive really for the diff. The gearbox oil when dropped was black, which I know is not good. Looking inside the drain plug when removed, could see of shards of steel inside the plug. Not good. So the whine from the box will continue. Something tells me I may need a decent box in the future.

76D8F54F 95CD 4391 8285 E137737A844F
 
Oh dear……………..so the Audi survived the big trip to Edinburgh and back. But has stumbled at the lesser trip to Saffron Waldon. Probably a tad unfair that, as we have travelled to Diss, then Thetford and Ely day after, then Duxford today.

Noticed the low water light come arriving back to hotel, thought a bit odd, but temps were ok. Lifted the bonnet, no immediate leaking but header tank was practically empty. Poked round at the back and noticed coolant on the gearbox again. Good god, are these rear temp sensor housings a problem on these cars or what?

So, 210 miles from home, plus visiting Silverstone Museum tomorrow. I’ve got 16 litres of water in the boot. I’ll just go really easy, make sure I stop at good intervals to check and refill. See how we go.

My immediate thoughts go back to a fiend who has a Mk1 Focus RS, and they have this problem. The effective mod is to fit an aluminium housing with a decent seal between. So…….thinking I may acquire and fit an aluminium housing to mine. It can’t be any worse!

In pics, yes, my heater hose connector looks cracked, but the connector itself is ok, it’s just this spacer behind the connector which has cracked. If I can find one of those too, I’ll replace that as well.

And there was me yesterday planning my wheels colour, tyres, Samco hoses, Jetex system……… deary me.

D573F2F3 9DEF 4362 B7BB C2705CD701CB
CC852B83 95B3 47A7 BCA5 CBFDD98C915B
5C336D60 8319 4278 B14C C4CB3788A1FF
 
Put a Febi coolant flange back on now. But I’m ordering an aluminium housing from URO in the states, plus a couple coolant hoses I knew were suspect.
Also installed a second hand fan unit, which I got on my trip to Edinburgh the other week. That was a bit of a mission to get out without damaging anything. The wiring resides in these brittle metal clips, but got there in the end. Air Con now works at idle, which it didn’t before. And I’m sure the ECU enlists the fan to help cool the engine too, so that’s all good.

Just need to refit my reconditioned wiper mechanism now. I kept hold of the LHD fitment wiper mech I got the other month, too expensive to send back. So I stripped the second hand wiper mech I got last week, down to just the main chassis to which the motor bolts. I then swapped the linkages around and installed the new links and spindles into the used chassis. Plenty of lubrication on the spindles. Plus we get new mounting rubbers as well. I’ll get to work on that this week, just peace of mind really. My heavily bodged old unit is still surviving this far.

Have to excuse the state of my workbench. It’s also my ‘office’ as I run my mountain bike businesss out of here as well.


9FA1C26C B6FE 4311 BC7E 463AF65303AE
39705FD3 E197 4FD4 B403 AF3193CC4C7B
 
  • Like
Reactions: B5NUT and Simon
More bits arrived this week. Used to have the Silver/Chrome style mirrors on my Alfa Ti and quite liked them. So managed to get 2 door mirrors last week for £40 complete from an S4.
Having a look today and disassembling them, I’m thinking I’ll just swap the casings onto my mirrors. My mirror chassis units are in much better condition, as are the black parts also.
Managed a quick compound polish today, and the silver covers look pretty good to me. I’m hoping they look ok on the car. I have to say, if I put them on and they look ‘chavvy’ or out of place, they’ll be coming off.
I’ll get some new mirror glasses this week too. My glasses on mine arn‘t blue, but these are………was there a chassis break point for that does anybody know?

DC1F12D5 9645 4F94 B101 D6C8C63DFDCC
92D46991 CAD1 42E5 8DF5 4973073CF015
EF3FFD4B 07DA 4748 97F6 43E1F06223D5
 
One of these arrived today too. That will have to wait a few weeks though, getting married on the 25th so my times taken up with ‘a lot’ of things at the moment.


0E2D26E4 A4ED 4803 9005 57821579CBE6
 
Had to take the headlights out again today, had an intermittent flasher issue. So figured I’d taken them both out and do a better job of repolishing the lamps than last time.
The flasher issue ‘I think’ was down to poor connection with the bulb and the holder, was a carbon build up inside. So rubbed that down, and also bent the contact slightly inwards towards the bulb itself. Also replaced the LED bulbs with some Novtech units, which I hope will last longer and possibly be brighter.

Managed to get the headlamps sat in my Workmate, and then got busy with my mini-rotary. So much better to be able to use a rotary on these. Went a lot better than previously, I believe I got a lot of the little pit marks out, still not perfect. But 100% better in the direct line of the dipped headlight bulb. So I’ll see later on if there’s a pattern improvement.

Sooooooo, whilst the headlamps were out I thought I’d 3 stage the front bumper too. Clayed the bumper first and took all the plastics out. Got the bigger rotary out for this job. Tried to get down past the scratches I had with the first stage. Last stage I used Auto Glym polish for darker colours, then HD Wax on top, so suppose that 4 stages today actually. Lol. Plastics were then all treated as well.
I think it looks pretty good now. Could probably use a respray on the bumper in all honesty, some nasty stonechips really. But it’s as good as I can get it.
The lower spoiler really annoys me, there’s ,arks on the drivers side I just can’t get round. But, I’m thinking of swapping it out for a deeper lower spoiler, and keep it Matt black. Playing with ideas at the mo.

Just need to decide if the silver mirrors will suit Hibiscus Red now. Looked a bit better in daylight. Again undecided.

D3F2E8C0 157B 47BD BB6A 83DA550645C2
702E07E5 7EFD 4E26 B6ED 720026F0145D
16BEA3B9 A4FC 4F8A AE72 23C566D6AE5E
7C426972 C926 4381 B859 17669A314196
85441B43 5717 42B2 B188 1358D0F1F6DB
 
Oh, almost forgot, this week will be the week my BBS wheels are refurbished. Still got it coming from all sides on colour. Friends say go silver, as collectively we all dislike dark colours on wheels, especially black. My other half says gun metal grey. I’m really stuck. But think I’m going to go with a dark silver. As below. And I hope they come out well.

F51484CF 4915 4B9B A9E1 04094BD398F9
 
Quite happy with how these came out. I was bricking it for a bit that I’d be unhappy with them, but really happy. Cant recommend Wheel Works in Bolton enough, service was brilliant. And from a simple (not great) picture he got the colour spot on. Just need my locking bolts to turn up tomorrow and ill fit them on with spacers, see what they look like.

D4A5FC8A 71F6 415C B72D 4F72B5F84737
5E697567 2425 482F B7FC D25B75763F2C
 
  • Like
Reactions: S4 Muzza
Finally fitted my wheels. Pretty happy with those. But I know I’m going to want it lowering now.

126A078E F72A 4B60 9D76 D05824DA65AB
 
  • Like
Reactions: Bradderz_1988 and S4 Muzza
I think I must just like making things complicated, lol.

Got a lost as long as my arm now of all the individual bits to put this conversion together. Hangers are a fortune compared to other brake sets. I’ll probably just by brand new, so I know it’s right.

6605C0DC 8C77 4DD1 8846 17A6224D7389
C831EC88 99F3 4D3B 9CBE 7F393584BDD2
 
  • Like
Reactions: Simon
Finally fitted my wheels. Pretty happy with those. But I know I’m going to want it lowering now.

View attachment 243113

Wheels and colour look great, I like the centres too, but as you say it needs lowering just a tad to really pull them off. In fact as much as the CH is one of my favourite wheels, I think the OEM wheels might actually look just as good at standard ride height! You planning to drop it a little or just leave as is?
 
Wheels and colour look great, I like the centres too, but as you say it needs lowering just a tad to really pull them off. In fact as much as the CH is one of my favourite wheels, I think the OEM wheels might actually look just as good at standard ride height! You planning to drop it a little or just leave as is?

thank you, I’m reall6 happy with them Overall.

Yeah definatly intend lowering it slightly. The plan was always to get an Eibach/Bilstein kit. But I’ve acquired some free coilovers, so I’m in 2 minds now. Hopefully in the months do come it will be lowered. Only a bit though, definatly not wanting it too low. I’ve been there and always regret it.
 
Yep, I’m definatly liking these wheels, quick wash before big day tomorrow. Was very dubious on the colour, but I’m happy it was the correct decision for me.

Might even get some pics wearing it’s bows tomorrow lol. My wedding tomorrow.
7ECEC7E3 EFE6 4913 940A 2FB5DF29A2A4
77B29969 8CAF 41DE 9DBD D062B05DABC9
34C5D645 3721 40A3 9961 1C74EE5C484A
A637E8C4 4002 4DDA A2C8 4B77FA63C779
 
  • Like
Reactions: S4 Muzza and Simon
Couple pics from weekend. I’ll have to 3 stage the bonnet now, ****** ribbons made some lovely scratches. It was nice to include the Audi in proceedings though. The black car was a friends car, which my Best Man organised and drove us to the wedding, Original Roush Mustang, 750 horse power. The 2 mile journey from hotel to venue was ‘very‘ amusing lol.

3D43D22F B628 4FC2 9791 B523F19220D2
8E48698C D335 46A1 8C79 FF808D48545F
EADA3D55 A4B7 4D1B 8CA1 DCD35955C1C2
 
  • Like
Reactions: Simon
More goodies when I arrived home from the mini-moon.
Box one has prop shaft rebuild parts in it, managed to find the cv-joints for the ends finally at a more sane price. Can rebuild my spare prop now and swap over when we put the exhaust on next month.plus a Genuine fuel pressure Reg. Fault finding the hot start issue…….we’ll see.
Box two from UROTuning in America, contained my aluminium cast temp sender housing. Hopefully this will cure the coolant leak issue that pops up occasionally. Plus some Genuine VAG hoses, top hose, and heater hose connected to cooling flange. And, a new Turbo Intake Pipe. Mine has stretch marks, not liking that. I really wanted a black one, but due to stock issues with Autobahn, I get a blue one. Hopefully doesn’t look too over the top (chavvy).
 

Attachments

  • 88608FAE-8130-4C4F-8178-088932F10F90.jpeg
    88608FAE-8130-4C4F-8178-088932F10F90.jpeg
    370 KB · Views: 114
  • 9B6D3B6E-E036-40CC-8397-D79D9493C9EF.jpeg
    9B6D3B6E-E036-40CC-8397-D79D9493C9EF.jpeg
    388.7 KB · Views: 115
  • D4F78AE4-D015-473E-BABA-9F17F2C67653.jpeg
    D4F78AE4-D015-473E-BABA-9F17F2C67653.jpeg
    351.8 KB · Views: 115
  • C722FFFC-4CFE-4985-A507-CC9078A8CBC1.jpeg
    C722FFFC-4CFE-4985-A507-CC9078A8CBC1.jpeg
    412 KB · Views: 117
  • ED4E7322-9992-466E-AB04-EB0305039F93.jpeg
    ED4E7322-9992-466E-AB04-EB0305039F93.jpeg
    372.7 KB · Views: 114
  • Like
Reactions: B5NUT
Been busy this weekend. I discovered the Audi was leaking last weekend, when we got to our mini-moon hotel. And been noticing oil patches coming from under the car all week. So decided this weekend I needed to find where that was coming from. I’ve always had a few small leaks since we did the oil pump. I think we went to lean on the Dirko for the sump, based on people saying you can put too much on and it spews into the inside of the sump into the oil. not good.
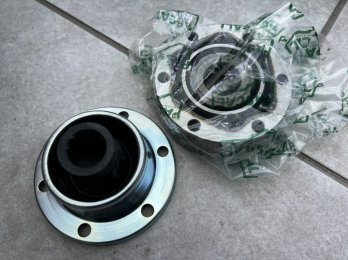
Anyway, once underneath, I spotted some green oil on the inner CV Boot. I’ve had a good look at the steering rack, and there is nothing coming out of the rack at all, so that’s all good. I have spotted some green fluid though, on the pipe supplying the rack. I did have some arguments with this pipe when installing the new rack. And the leak is now coming from where the metal pipe mates to the steel pipe. Soooo……..think I’m going to have to source a new p/s pipe. I know AUTODOC did them, but I bet they are for LHD cars. I know Audi Tradition do them, but they no longer ship to uk. ive cleaned the pipe off, just hope it passes MOT in a couple weeks time.
I also noticed……..an oil leak coming from my recently installed oil pressure setup. When I installed the t-piece for the gauge sender I knew at the time the seals were not fantastic. And sure enough, they’ve let go. So I’ve had all that off and reinstalled with fresh copper washers. I hope this is the last of oil leaks from this t-piece.
I was also doing an oil change today, since I’m now on the change every 6 months schedule. So whilst the filter was out of the way, I thought I’d install the crank sensor I bought a while back. East enough, just awkward to see the bolt head when your trying to get your hex socket onto it. Im really just eliminating things here that could cause my hot start issues.
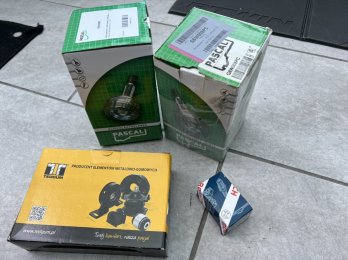
So whilst we’re fixing things for the starting issue, I also installed my brand new Bosch fuel pressure regulator. From the thread of the previous owner I thought they had changed it, but this was the original one.
Whilst underneath, I also wanted to double check the gearbox oil level, as I wasn’t happy with that the other day either. So I’ve now put in a LucasOil gearbox treatment, which it took plenty of. So I was a little low. I know, that this gearbox is past its best and needing a refurb really. So it’s just a case so trying to quiet it down and make it a little nicer to get into gear now.
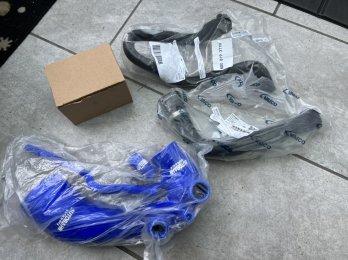
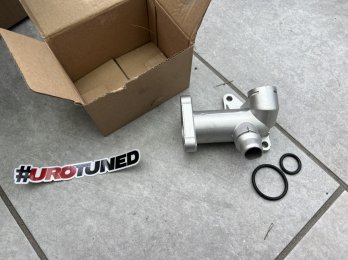
Dropped the anti-freeze whilst under the car as well. Made sure to keep hold of it as it’s new not so long ago. I could then replace the 2 pipes I ordered from UROTuning. The first pipe was the top hose, and the second pipe was the heater core input hose. The heater hose was a right pain to get back in. I also installed at this point my new aluminium temp sender housing, so I’m hoping this will now cease to be a cause of coolant leaks going forward.
So, big list of jobs ticked off today:
- oil change
- cure oil leak from oil pressure sender t-piece
- install Bosch fuel pressure regulator
- install brand new crank sensor
- check gearbox level, fill up with LucasOil.
- change top hose
- change heater matrix hose
- install aluminium coolant sender housing
- bleed coolant system

Think I need a beer and a rest now. Lol
I dont seem to take many pictures of these jobs, think I was just head down cracking on, thankful I wasn’t getting rained on.
9440E226 3348 47F2 95A6 218958F41966
AD587F06 EAE4 48B6 8BF4 94C18D03C186
 
Earlier this week, managed to get the other cv joint off the prop shaft, which had seized on. Plenty of meat, and freeze spray, plus lump hammer = prop shaft splines now in view again. I’ve checked the cv joints I’ve bought and they fit the splines. Plus the PCD is correct also. So now, the only job is to create a new tool using a 16mm spanner I order to remove the bolt holding the 2 prop halves together. I can then change the centre support bearing. The prop can then be sprayed black, and hopefully we can fit it when the new exhaust is going on later this month.
I’ve got all my rear suspension components out too, dropping them off at a friends garage this week, so he can remove bearings, remove bushes Etc. The people who refurbed my wheels, have said they can powder coat these as well. Fantastic.
Think I’ll concentrate on my bike business this week now, lol.


BB6D1E26 96B1 47F2 A289 54ECCD5A397C
B7010EA6 E88D 4163 833C 77B3ABA479A5
F4D8E202 B527 45C4 8A3B 39422C3721DF
19882CBE 82BB 476F 836C D2535AC2402D
4D967B51 3355 4CD9 AE97 4AF71542080F
CF4C2AB3 A6F3 4486 B5E4 0009F6972421
 
  • Like
Reactions: Simon
What a great read this has been and it’s been great to see an old girl regain her youth. You’ve had some ups and downs fella but car looks sweet. Congrats on getting ball and chained lol
 
  • Like
Reactions: midas
What a great read this has been and it’s been great to see an old girl regain her youth. You’ve had some ups and downs fella but car looks sweet. Congrats on getting ball and chained lol
Yeah, thank you very much, 1 week of married life, and I’ve managed a full afternoon on a Sunday working on the car, not doing too badly. Lol

Its great to get positive comments, so thank you very much. I bought this in the middle of a pandemic, so once it’s a little more sorted, and everything’s up and running again, will be great to maybe take it to a show.
 
  • Like
Reactions: Jcbmally
Another week, another issue, lol. ABS light came on today, but was then off when I next started it. Then came back on randomly on my drive home and stayed on. Annoying,

Plugged my scanner in, and it’s come up with the OSR ABS sensor. Not overly bothered about this, as the entire rear uprights will be replaced shortly anyway, with new sensors. It’s a coincidence I’d actually ordered rear ABS sensors yesterday, as I need the template to get the holes correct on the upright.
Also brought up another code as well for the engine - 00561, Mixture Adaptation. I’m hoping if I pursue this now and fix it, I might be able to address the hot starting issue I get occasionally.

Got my wishbones and uprights back this week, all bushes removed and ABS sensors. So now I’ll get them to the powder coating place, then I can get reassembling.

1D252181 C216 41FD BFB1 217FDADE1B9A
315E27EB 97AB 4E26 8954 AD3300F0FEAA
828B45E6 D48E 44C2 838B B8A1AA37B3BE
498A1AD5 2C34 4231 863B 89F96D246DFE
13D347DB ECEA 4BD7 90F2 0FF28970F2B1
 
  • Like
Reactions: Jcbmally
Anyway, whilst I was out there, decided to fit my turbo intake pipe I got in my box of goodies from the states the other day. If I’m honest, I really wanted a black one, for subtlety, but they had ran out, so I got a blue one sent to me instead.
What a pig of a job this can be, lol. Very fiddly, especially with big hands. But got it together. And with all the covers back in place, plus the headlamp of course, it’s actually not too bad visually.

4A9D28D3 873B 4FAE 9A9E BDB23F69949F
86B34F5E 1484 405E B340 73A671349898
22635A6C 56AE 4EEB BD59 074ACC118B9F
55A4CE90 5839 4BAB 90AB C72ED96C4AB7
8EA07A73 EEA3 419E 81E9 0C614850AF44
8B9A4434 5A1E 446E 8F54 A4E9C3D5DCB4
BBDE19E3 8634 4EE8 85E8 EC4C19BEBF5C
 
  • Like
Reactions: Simon and S4 Muzza