

Okay, so here goes....
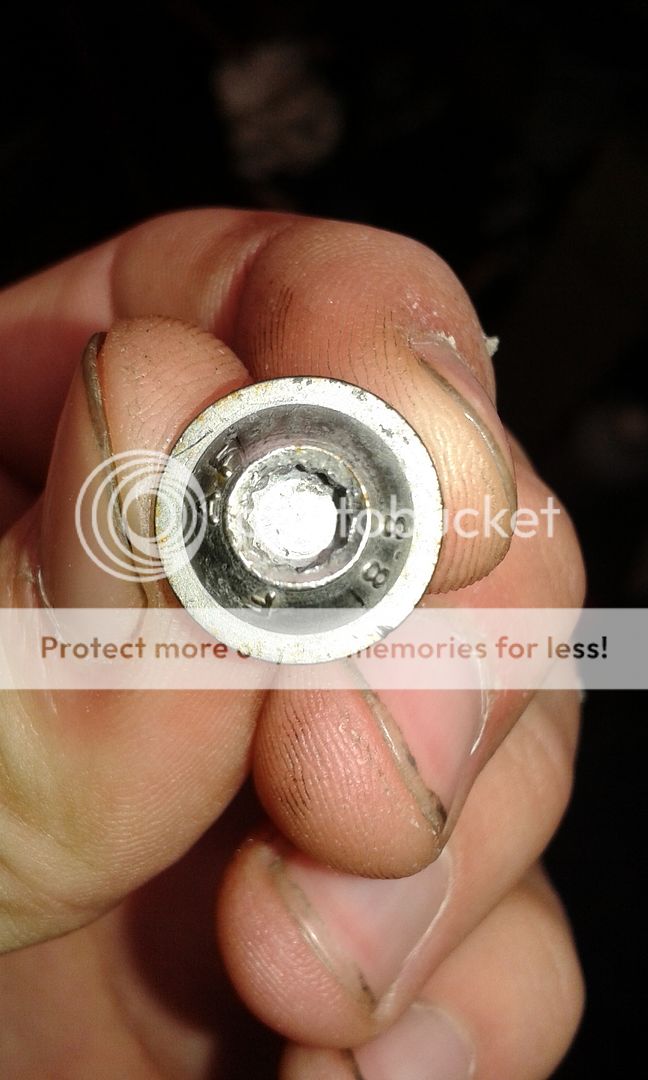
Two ways of going about this job. The first, and certainly easiest, is by removal of the camshaft adjuster. The danger of this method is stripping the bolt that holds the adjuster to the camshaft (which I ended up doing!! It was inevitable really). The second is by removal of the intake cam. This method is a bit more involved and certainly more time consuming.
But first, the obligatory disclaimer:
This post is intended as a GUIDE ONLY. In no way am I responsible for anything that may happen to your vehicle as a result of following it.
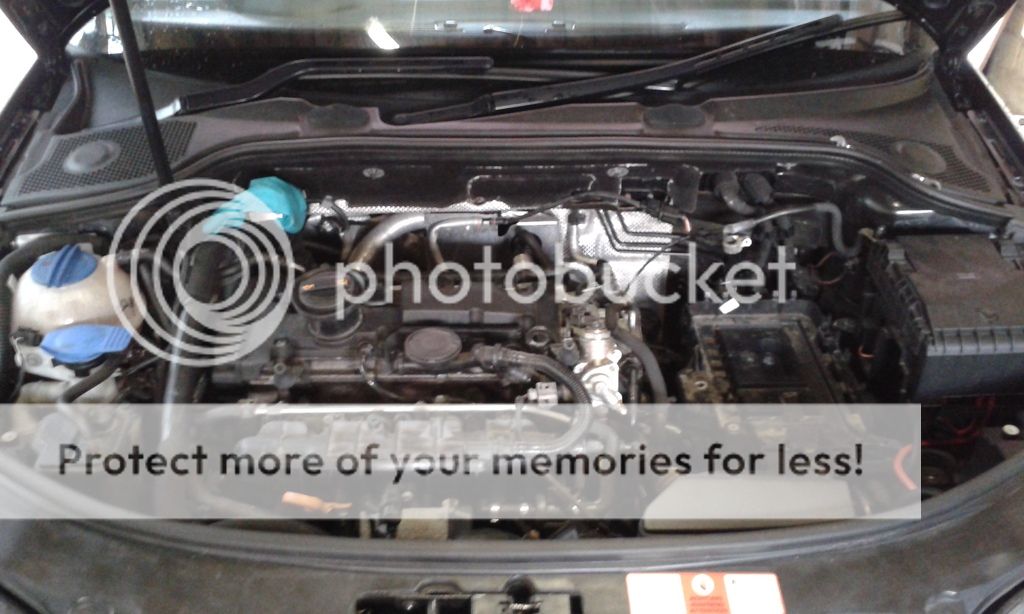
And now that that's out of the way.....Here she is:

Tools:
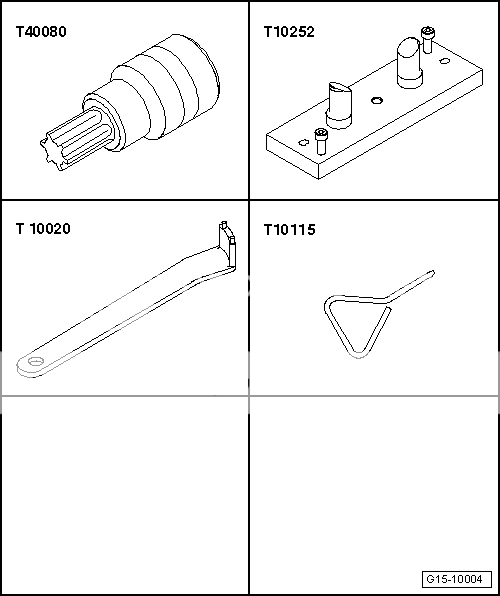
Here's what Elsawin suggests you'll need:
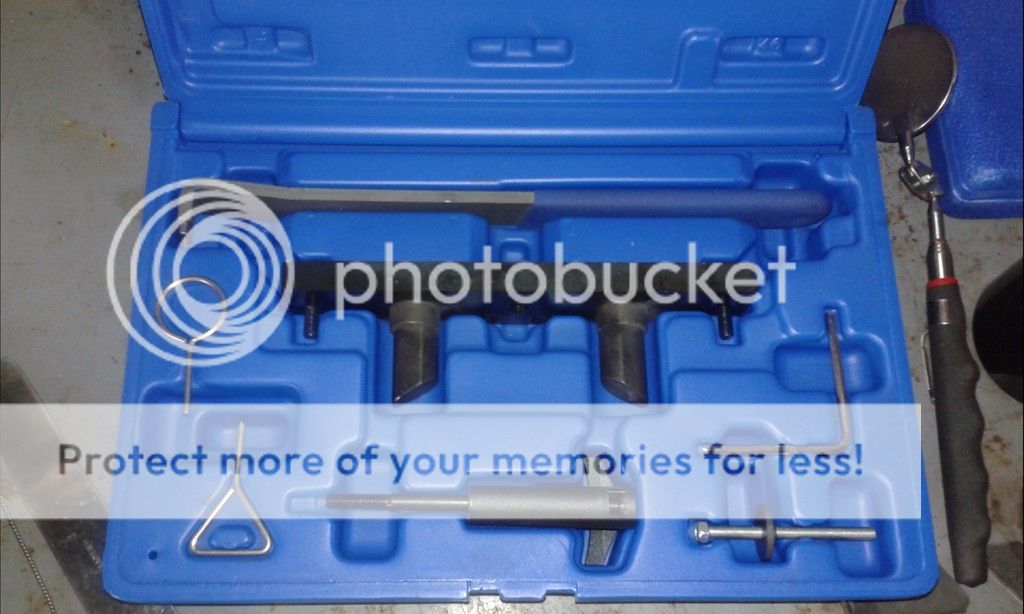
I decided to invest in a timing kit which includes everything (except the socket) that's needed for the job....plus a few extra bits. Found it on eBay (other on line auction sites are available ) for just under £50. It will be easy to sell on in the future!
The special tool (T40080) from what I could find out is just a Polydrive bit, size M10. I already had a Polydrive set that included this. Perhaps the official tool is slightly different, I'm not too sure, but the one I had seemed to fit perfectly snug after a little persuasive 'tap'.

The only other 'unique' tool required is a triple square to remove this fella:
Aside from those, you'll need a selection of Torx bits (ranging from T20 to T35), your standard sockets and an array of screw drivers & pliers. Oh and a torque wrench with a range of 4 - 30Nm.
Parts:
Timing Chain Kit. I got an FAI one from Euro Car Parts ~ £150:
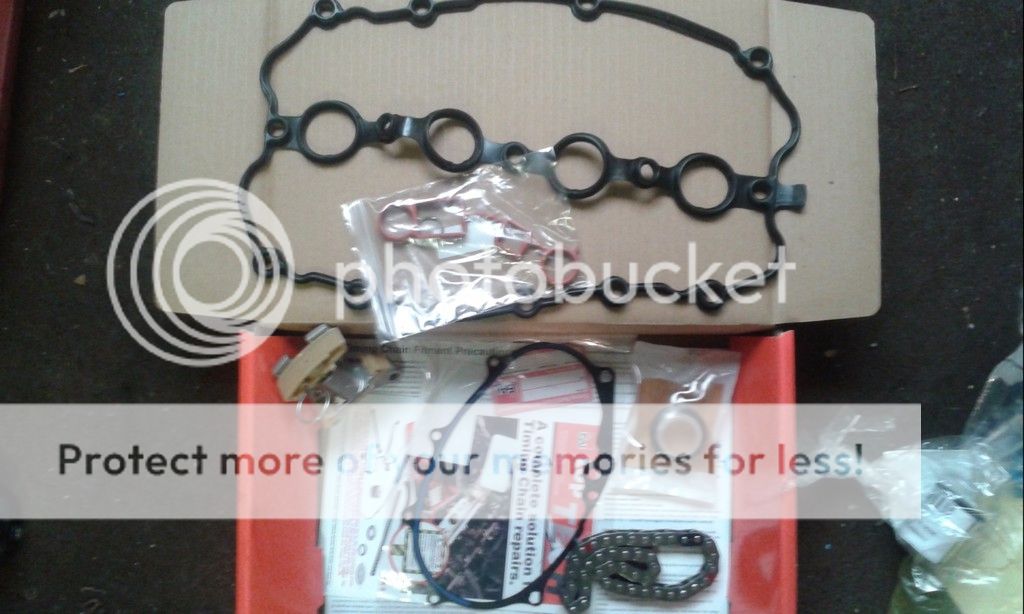
The kit included:
-Chain
-Tensioner (& locking pin)
-Adjuster Housing Gasket
-Head Cover Gasket
-Valve Housing Gasket
-Rubber O-ring for N205 Valve
May as well replace Cam Follower for High Pressure Fuel Pump whilst in there, so I picked up one of those and a replacement O-ring for the pump from Audi.......best part of £50 for the two!!! I'm sure cheaper will be available.
If you're able to remove the cam adjuster bolt, then have a new one of those ready too.
If, like me, you end up taking the cam cover off, you'll need 23 fresh bolts. (part no. N10554005). They're stretch bolts so almost certainly worth investing in a new set! Again, it was a visit to Audi for me (as this was unplanned) and set me back £40.
The Job:
Remove engine cover. Disconnect & remove battery including housing. This will give a lot better access to the adjuster housing later on.
With a cool engine, disconnect and remove HPFP. Rather than explaining that process, take a look here:
http://www.audi-sport.net/xf/threads/changing-hpfp-cam-follower-on-s3-8p.138827/#post-1417451
It's an excellent guide by Warren.
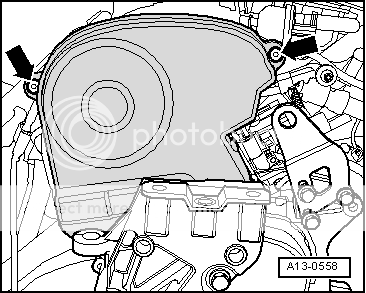
Next, time to remove the head cover. First, unscrew 2 bolts from the toothed belt cover:
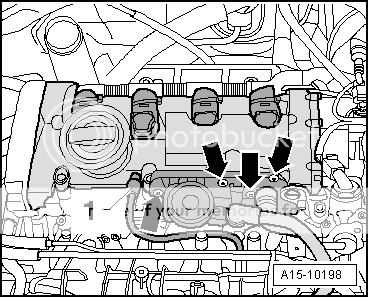
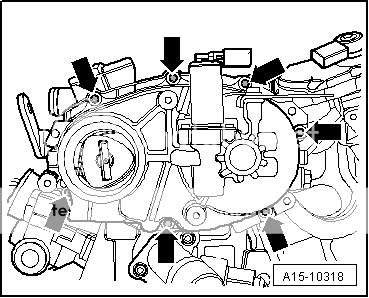
Detach valve housing from head cover (4 bolts, arrowed) and also disconnect ACF pipe (numbered 1) from cover.

Remove ignition coils. To do this, unscrew the 2 bolts on connector rail. Pull all ignition coils out ~ 3cm (speciality tool listed for this but a bit of gentle persuasion with a flat blade screwdriver worked wonders). Release all electrical connectors & pull off at the same time.

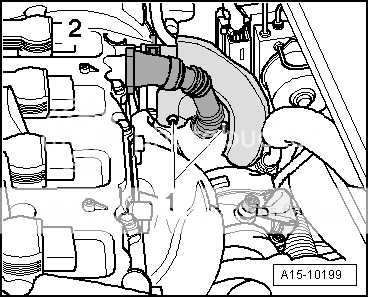
Unscrew crankcase breather line & heat shield from turbo (they're 5mm allen key bolts, not torx!) Number 1 on diagram below. Also note there is a metal gasket in between! It would be much easier to just disconnect the pipe where it attaches on to the head cover, but you'd probably need a replacement clip to hand. Disconnect ACF line going to turbo from head cover, Number 2 on diagram below.
Loosen cylinder head cover (14 bolts working outside to inside) & remove.

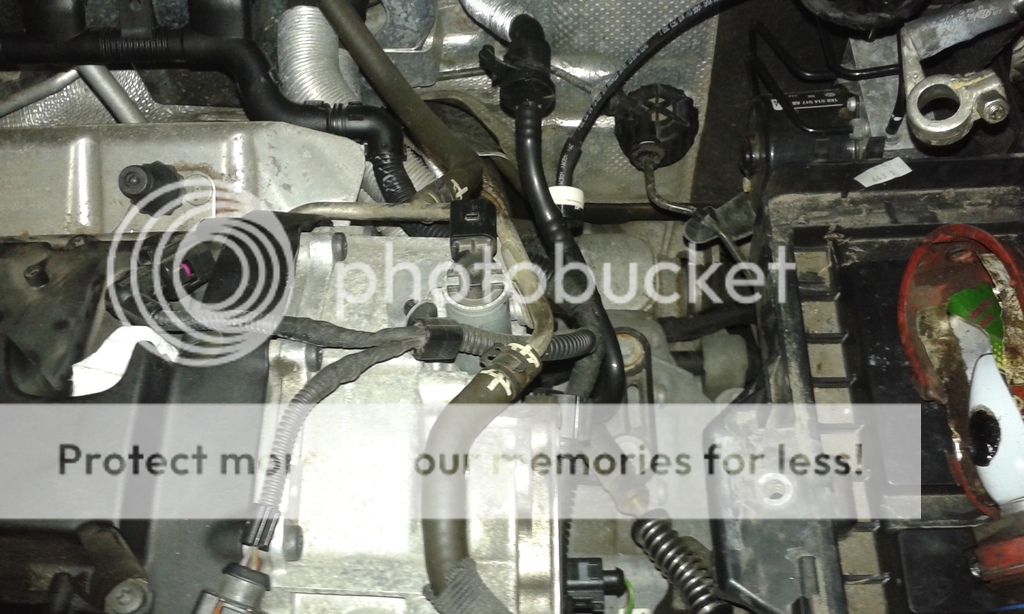
In the picture below you'll see a coolant pipe that conveniently (not) runs across the top of the adjuster housing. It's attached to the housing by just that one triple square bolt. Remove that and you'll be able to manoeuvre the pipe. Be firm but careful. Also un-clip the wiring loom from the housing and remove the N205 valve (2 small torx). With the valve removed and the coolant pipe pulled up, you'll have enough clearance to pull the housing off the adjuster.
Next, remove vacuum pump (3 bolts). This could stay in but there's a pipe plugged in to it that I couldn't manage to remove. Easy enough to just take out the pump!

And you'll be left with this.....

You're now ready to remove the adjuster housing (7 bolts):
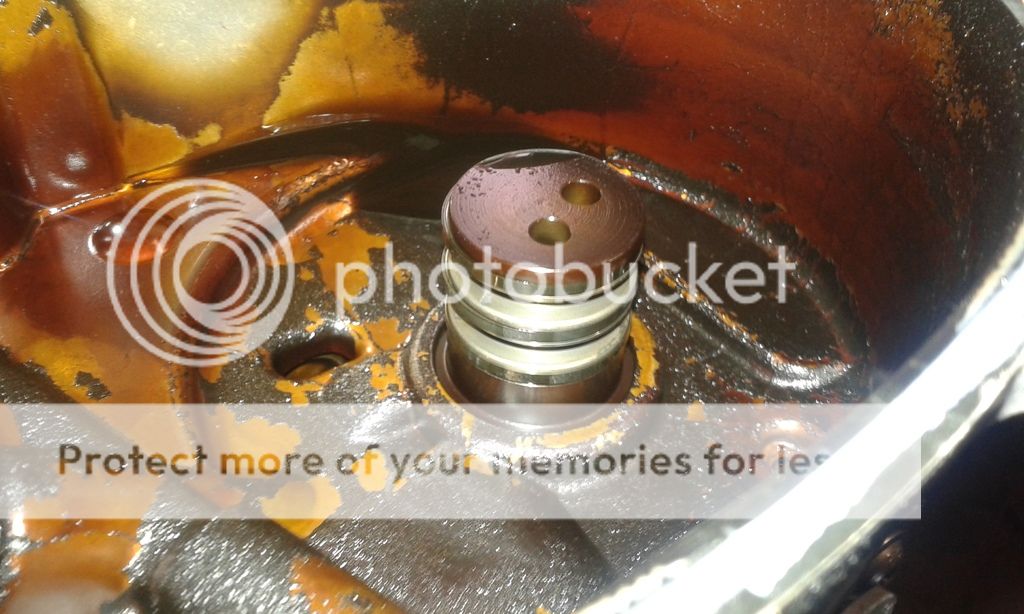
Be careful when removing (and refitting) the housing. There are 3 rings (some are plastic, some metal) that sit inside the adjuster and help regulate oil pressure in order to control the valve timing. Don't wiggle it about too much when trying to get it off, just gently persuade it to come straight back. Here it is:
Only allowed 20 images, so TBC below.....
Two ways of going about this job. The first, and certainly easiest, is by removal of the camshaft adjuster. The danger of this method is stripping the bolt that holds the adjuster to the camshaft (which I ended up doing!! It was inevitable really). The second is by removal of the intake cam. This method is a bit more involved and certainly more time consuming.
But first, the obligatory disclaimer:
This post is intended as a GUIDE ONLY. In no way am I responsible for anything that may happen to your vehicle as a result of following it.
And now that that's out of the way.....Here she is:

Tools:
Here's what Elsawin suggests you'll need:

I decided to invest in a timing kit which includes everything (except the socket) that's needed for the job....plus a few extra bits. Found it on eBay (other on line auction sites are available
) for just under £50. It will be easy to sell on in the future!
The special tool (T40080) from what I could find out is just a Polydrive bit, size M10. I already had a Polydrive set that included this. Perhaps the official tool is slightly different, I'm not too sure, but the one I had seemed to fit perfectly snug after a little persuasive 'tap'.

The only other 'unique' tool required is a triple square to remove this fella:

Aside from those, you'll need a selection of Torx bits (ranging from T20 to T35), your standard sockets and an array of screw drivers & pliers. Oh and a torque wrench with a range of 4 - 30Nm.
Parts:
Timing Chain Kit. I got an FAI one from Euro Car Parts ~ £150:

The kit included:
-Chain
-Tensioner (& locking pin)
-Adjuster Housing Gasket
-Head Cover Gasket
-Valve Housing Gasket
-Rubber O-ring for N205 Valve
May as well replace Cam Follower for High Pressure Fuel Pump whilst in there, so I picked up one of those and a replacement O-ring for the pump from Audi.......best part of £50 for the two!!!
I'm sure cheaper will be available. If you're able to remove the cam adjuster bolt, then have a new one of those ready too.
If, like me, you end up taking the cam cover off, you'll need 23 fresh bolts. (part no. N10554005). They're stretch bolts so almost certainly worth investing in a new set! Again, it was a visit to Audi for me (as this was unplanned) and set me back £40.
The Job:
Remove engine cover. Disconnect & remove battery including housing. This will give a lot better access to the adjuster housing later on.

With a cool engine, disconnect and remove HPFP. Rather than explaining that process, take a look here:
http://www.audi-sport.net/xf/threads/changing-hpfp-cam-follower-on-s3-8p.138827/#post-1417451
It's an excellent guide by Warren.
Next, time to remove the head cover. First, unscrew 2 bolts from the toothed belt cover:

Detach valve housing from head cover (4 bolts, arrowed) and also disconnect ACF pipe (numbered 1) from cover.


Remove ignition coils. To do this, unscrew the 2 bolts on connector rail. Pull all ignition coils out ~ 3cm (speciality tool listed for this but a bit of gentle persuasion with a flat blade screwdriver worked wonders). Release all electrical connectors & pull off at the same time.

Unscrew crankcase breather line & heat shield from turbo (they're 5mm allen key bolts, not torx!) Number 1 on diagram below. Also note there is a metal gasket in between! It would be much easier to just disconnect the pipe where it attaches on to the head cover, but you'd probably need a replacement clip to hand. Disconnect ACF line going to turbo from head cover, Number 2 on diagram below.

Loosen cylinder head cover (14 bolts working outside to inside) & remove.

In the picture below you'll see a coolant pipe that conveniently (not) runs across the top of the adjuster housing. It's attached to the housing by just that one triple square bolt. Remove that and you'll be able to manoeuvre the pipe. Be firm but careful. Also un-clip the wiring loom from the housing and remove the N205 valve (2 small torx). With the valve removed and the coolant pipe pulled up, you'll have enough clearance to pull the housing off the adjuster.

Next, remove vacuum pump (3 bolts). This could stay in but there's a pipe plugged in to it that I couldn't manage to remove. Easy enough to just take out the pump!

And you'll be left with this.....

You're now ready to remove the adjuster housing (7 bolts):

Be careful when removing (and refitting) the housing. There are 3 rings (some are plastic, some metal) that sit inside the adjuster and help regulate oil pressure in order to control the valve timing. Don't wiggle it about too much when trying to get it off, just gently persuade it to come straight back. Here it is:

Only allowed 20 images, so TBC below.....


