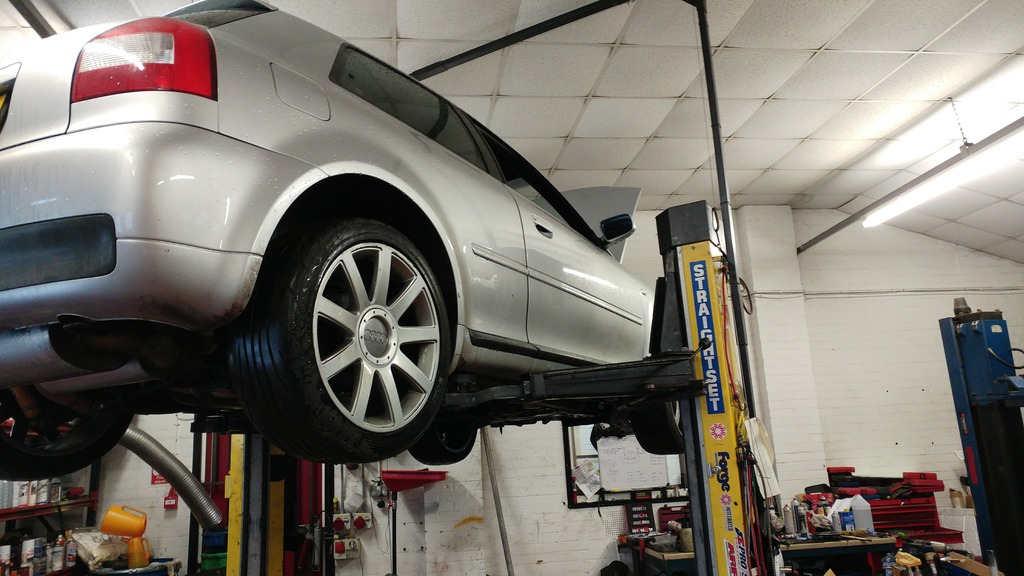
good job on the discovery, those CV joints look totally different, is it really worn that much.

Well one is missing the balls and the cage so not surprising they look different :)

General wear looks ok, nothing obvious but difficult to tell as its in pieces so can't check it easily

Is this general wear and tear of 500BHP wear and tear?

Drive train is essentially std and designed for around half the power I run so as with all things modded while it will handle power increases to a degree longevity window decreases substantially so who knows... the car has 130k miles on her on these parts so something was bound to go at some point

<tuffty/>
 
Been a car fixing kinda day... well... mostly at least... the fuel leak on the A2 is getting worse so started on that seeing its the daily only to find the gasket I had ordered for the tandem pump was wrong... disappointing

This left me essentially with no working car... so stuck the S3 on the ramp instead as all the parts for that had turned up too...
20170129_151259.jpg


20170129_151431.jpg


CV joint ready for greasing up...
20170129_152719.jpg


...and fitted
20170129_163919.jpg


New rear doughnut fitted...
20170129_163927.jpg


All going well so far... I had also bought some replacement number plate lights as the old ones were broken...
20170129_171216.jpg


Only problem was to fit the I needed to remove the boot trim strip and I honestly could not be ar5ed with that so cleaned up the existing holders and just fitted the lenses instead... will sort the full job out at a later date..
20170129_171740.jpg


Finished the day off helping Bill bleed the clutch on his Leon which was being particularly difficult...

Was nice to drive the S3 again after nearly two months off the road...

Will be at Bill's tomorrow to finish the A2 off as driving the S3 to work in this weather just fills me with dread lol

<tuffty/>
 
  • Like
Reactions: limbo118118, JOSE8LT and S3Alex
Change the pads and rotors today... I have been using 330mm rotors and Ferodo DS1.11's... love the pads and the confidence they give but hate the fall out on the wheels as its more than just dust... the stuff sticks like nothing I have ever seen before and makes cleaning my wheels mostly impossible without actual scrubbing and quite frankly I can't be bothered with that...

The other issue I have is the std size pad for my AP's needs a 60mm deep rotor and most are setup for 50mm deep pads... I can use pads designated to be rears though as these seems to be the right depth but its limiting the choice of pad I can use and the rears inherently seem to have less material depth meaning they don't last as long...

Our resident brakespert @Prawn suggested I tried some Mitex M1155's... boy did I struggle to get a part number though... my AP Racing CP6600 calipers (TVR branded) are the same pad pattern as the Mk4 Ibiza Cupras with the AP caliper option... this is my goto car when searching for pads but couldn't find a part number for that car... then I discovered the Clio V6 uses AP's with the same pad pattern so managed to finally track down a set of fronts... Part number was MDB2207M1155 (MDB2207 is the normal pad type)...

Left me with a bit of a problem... the rotors...

As luck would have it, Bill recently went to a fully floating setup and 'retired' his old set which are the same bells as I have but a 335mm x28mm rotor with 60mm pad depth... while they were not really going to be much use on a race car they would serve me for a while and at least meant I could try the rotors out to see if they would work with the pad size without committing to the billion or so quid they would cost to buy only to find they didn't work so big thanks to Bill as always for having my back...

So started by undoing the caliper mount bolts... was a little worried about them as they hadn't been undone since I fitted them some 7 years ago and bolts in alloy stuff in that environment tends not to end well when you undo stuff...
20170730_104443.jpg


Thankfully they both came out easily!...

Think I got the use out of the old pads :)
20170730_132822.jpg


So you know what I was wobbling on about earlier regarding the pad depth issue... here is the comparison of the pad depth between a 'rear' pad and the correct 'front' pad...
20170730_111636.jpg


Not much in it you may think but its enough that on a rotor designed for a 50mm pad it will over hang at the rear and wear oddly (plus it did cause unwanted pad knockoff on more than one occasion)... a pic of the larger pad on the old rotor... this is with the top edge of the pad flush with the outer edge of the rotor...
20170730_112114.jpg


...compared to the 335mm rotor...
20170730_112045.jpg


Much better... this did present a new issue which I anticipated anyway hence removing the caliper from the bracket...
20170730_112437.jpg


Larger rotor now hits the caliper... so I made some spacer plates up from 2mm thick ali...
20170730_115751_HDR.jpg


...and all is well again...
20170730_112934.jpg


All back together :)
20170730_123024.jpg


Now for the nearside.... this didn't go quite as well...
20170730_135949.jpg


B*gger!... 12.9 hardness bolt just sheared off!!... in fairness I was surprised only one did this but not surprised it was the side that spends its life in the puddles by the side of the road...

Never mind... drilled it...
20170730_142811.jpg


...helicoiled it...
20170730_151608.jpg


...all back together :D
20170730_155109.jpg


Initial thoughts are that they seem to have a nice bit of bite but I am still bedding them in and bearing in mind that they are previously used rotors so need to sort themselves out...

Hopefully they work as well as the DS1.11's but don't make my wheels un-cleanable (I don't mind a bit of dust)

<tuffty/>
 
  • Like
Reactions: Prawn, S3 Hilife, jojo and 1 other person
Just read this whole thread. Excellent amount of detail put in by you and Bill. Gave me plenty of ideas and its definitely a go to thread to find out how to do things.
 
  • Like
Reactions: <tuffty/>
Thanks... :)

I have to go through it again soon to replace all the image links thanks to Photobucket lol

Some more updates soon... some remedial work to do :)

20170821_172043.jpg


<tuffty/>
 
Bought a few bits off Shaun who was breaking his car (sadly :cry: )

One such part was the new front grille... seems this is the only way to get hold of a replacement facelift S3 grille badge these days as the original is now obsolete..

Mine is looking a little faded..
20171015-96dpi-20171015_171015.jpg


New one looks a little better...
20171015-96dpi-20171015_134458.jpg


...but obviously the chrome surround had to go... so removed it from the grille...
20171015-96dpi-20171015_134517.jpg


Keyed the chrome using 400grit wet n dry then gave it a couple of coats of etch primer... felt good to be painting stuff again lol...
20171015-96dpi-20171015_143102.jpg


And finally a couple of coats of matt black...
20171015-96dpi-20171015_161210.jpg


Will let that dry fully before refitting and give the rest of the grille a quick clean...

I then moved onto my wheels which I gave up with ages ago due to the fallout from the DS1.11's... have tried various fallout and wheel cleaner products but on advice from Fran of FM Detailing fame I gave Bilt Hamber Korrosol a go...
20171015-96dpi-20171015_161605.jpg


As you can see there is a lot of fallout baked on to the wheels...
20171015-96dpi-20171015_162013.jpg


Did an initial soak leaving it to dwell for 5 mins or so...
20171015-96dpi-20171015_162449.jpg


...sorta touched them...
20171015-96dpi-20171015_162551.jpg


So did a couple more applications agitating with a scrubbing brush... a bit more came off this time...
20171015-96dpi-20171015_163911_HDR.jpg


Has potential but clearly I need to put a little more effort in to get them clean so at some point they will need to come off and have a good day spent on them to get them sorted...

The todo list is starting to grow again lol...

I also acquired Shauns door and rear qtr blades plus front and rear bumper panels as he had them all painted... my passenger side door blade is starting to lift away do to corrosion so no doubt there will be some horror uncovered when I remove them... not ready to deal with that as yet :)

<tuffty/>
 
  • Like
Reactions: voorhees, Goubo1 and jojo
Small update...

I have a couple of weeks off coming up as I have been busy work wise so hopefully I will have most of the next round of tweaks and stuff done then... As a taster, here are a few bits I have got ready...

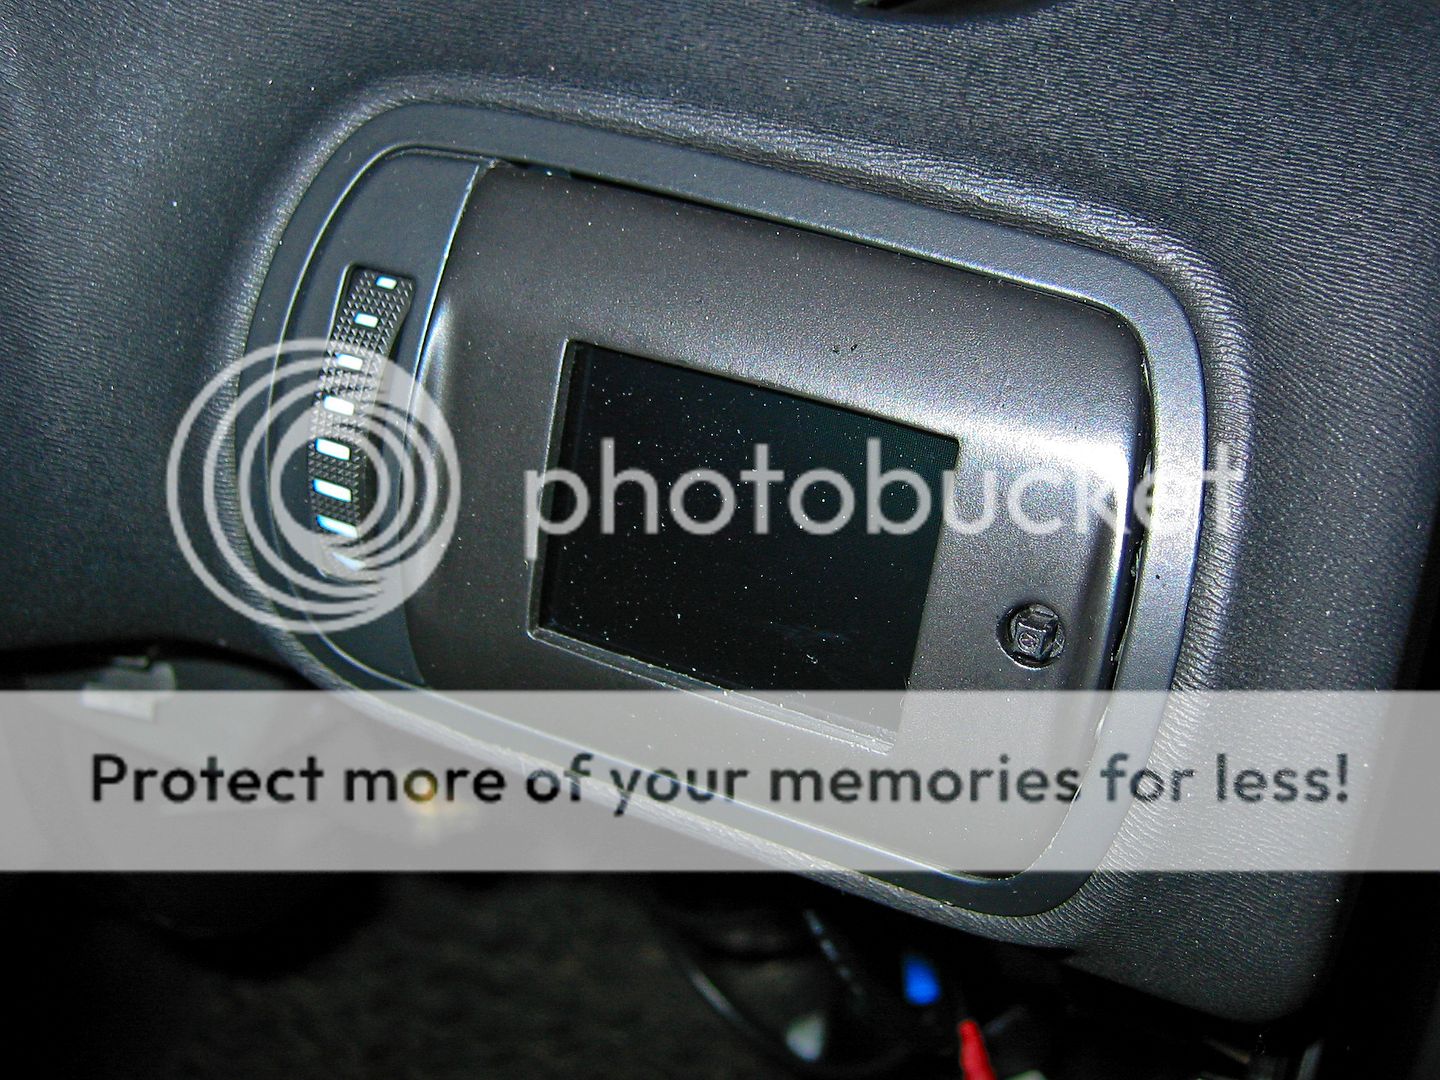
I have finally mounted the Liquid gauge in the drivers vent..

20100203_IMG_3976.jpg


...all thats left to do is wire in a bit of CAT 5 network cable to a switch to enable me to switch the K-Line on the diag socket so that I can switch between using VAGCOM through the socket or the Liquid gauge. As yo can see the vent mount isn't the best fit but does look better than that in the flesh. I may at some point spend a bit of time with it and make if fit better..

With the Liquid fitted in the vent I had to move the boost gauge. Inspired by s3_kev's boost gauge antics (http://www.audi-sport.net/vb/showthread.php?55649-A-pillar-gauges-finished) I got myself a Stack 2bar gauge and had a go...

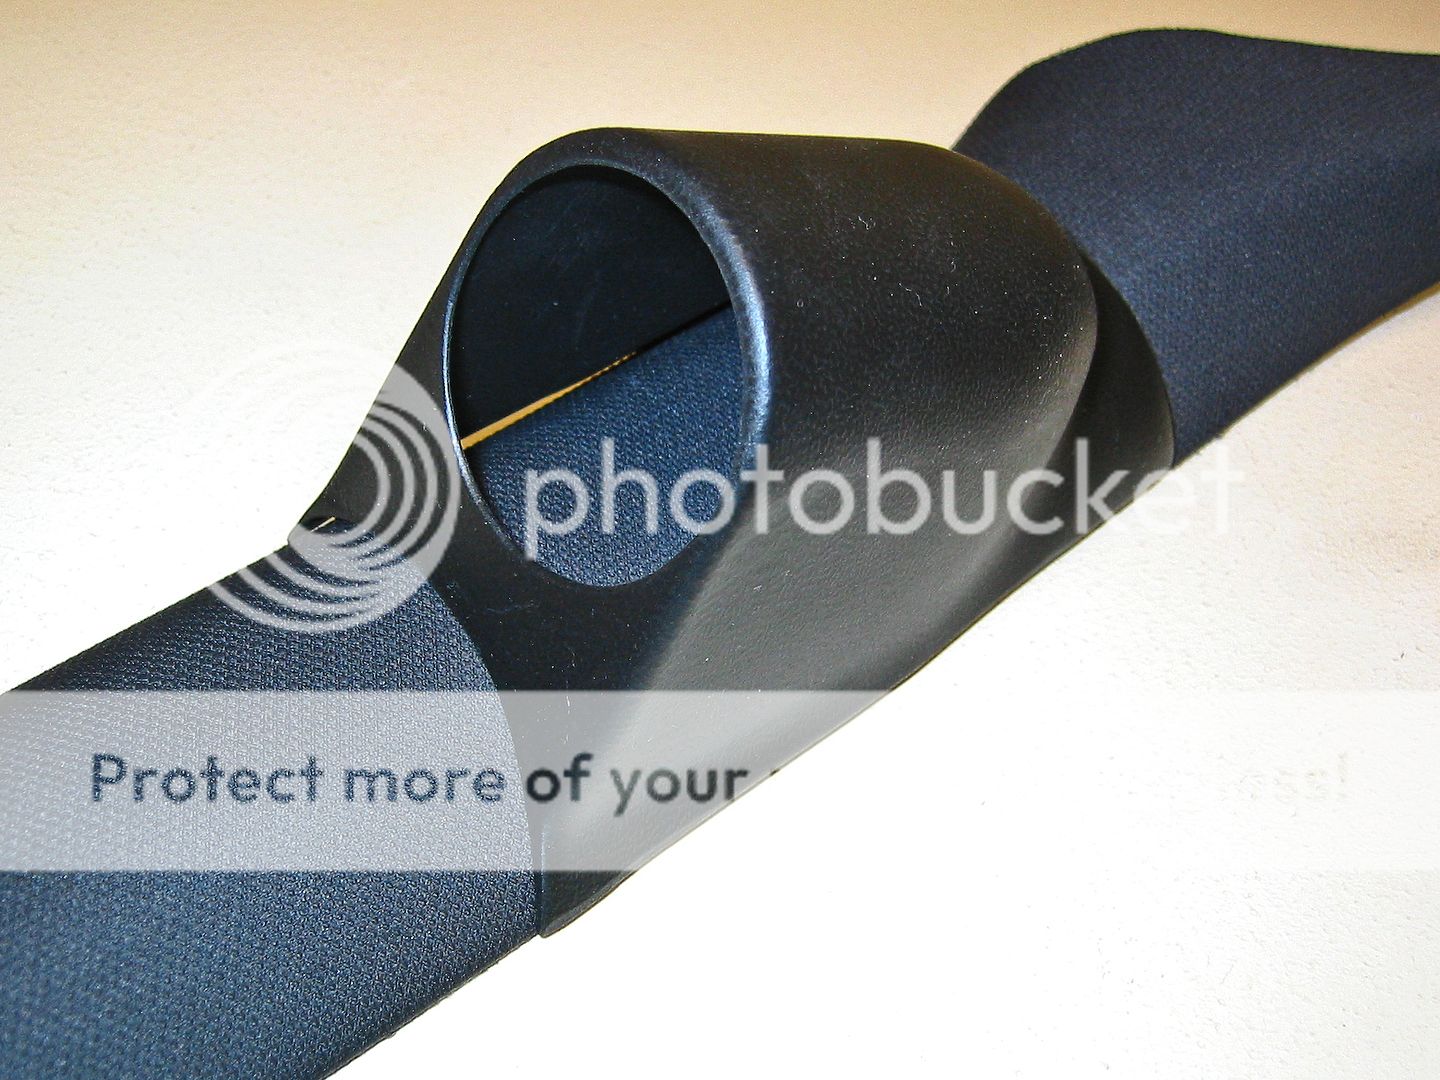
Only using a single pod as I only wanted the boost gauge there so got a pillar pod from ebay...
20100125_pillar_pod01.jpg


Needed some trimming so sorted that out and sprayed it matt black... I have some black speaker grille cloth which is close to the interior of my car so I will attempt to retrim the pod in that...
20100125_IMG_3956.jpg


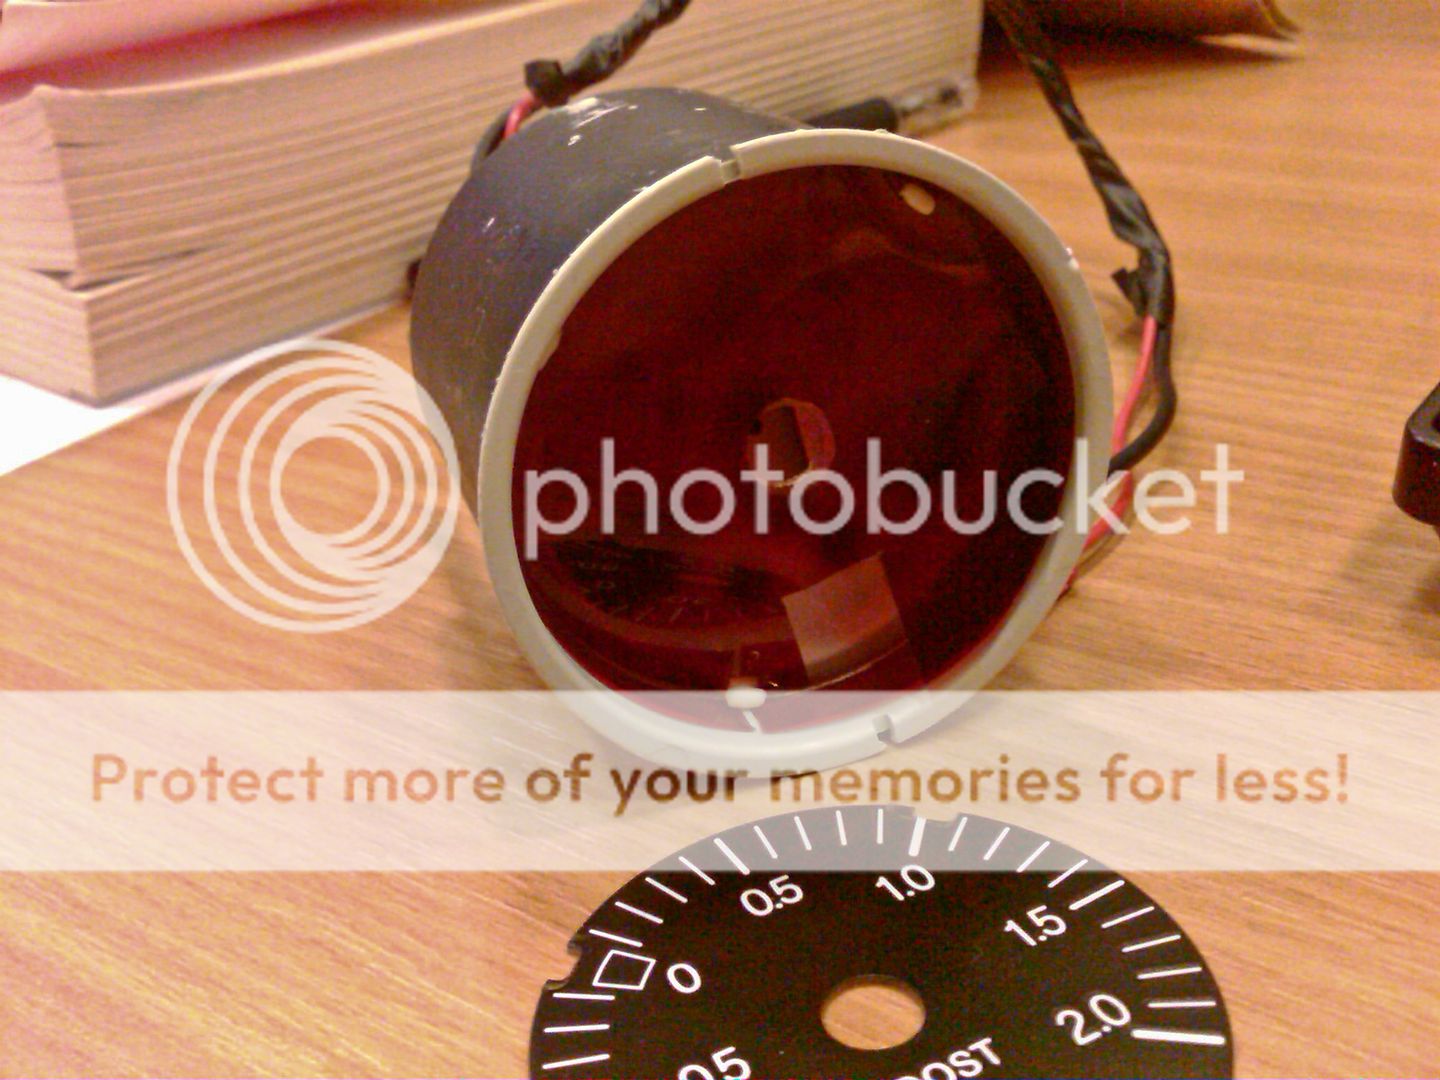
I didn't paint the back of my gauge like Kev did but sourced some of the red film used in disco lights...
20100204_IMG00046-20100204-1300.jpg


20100204_IMG00045-20100204-1259.jpg


...I threw it all in the car to make sure it was working ok and took a (crappy) pic of it all lit up
20100204_IMG_3983.jpg


...looking good so that will get finished off when I am off..

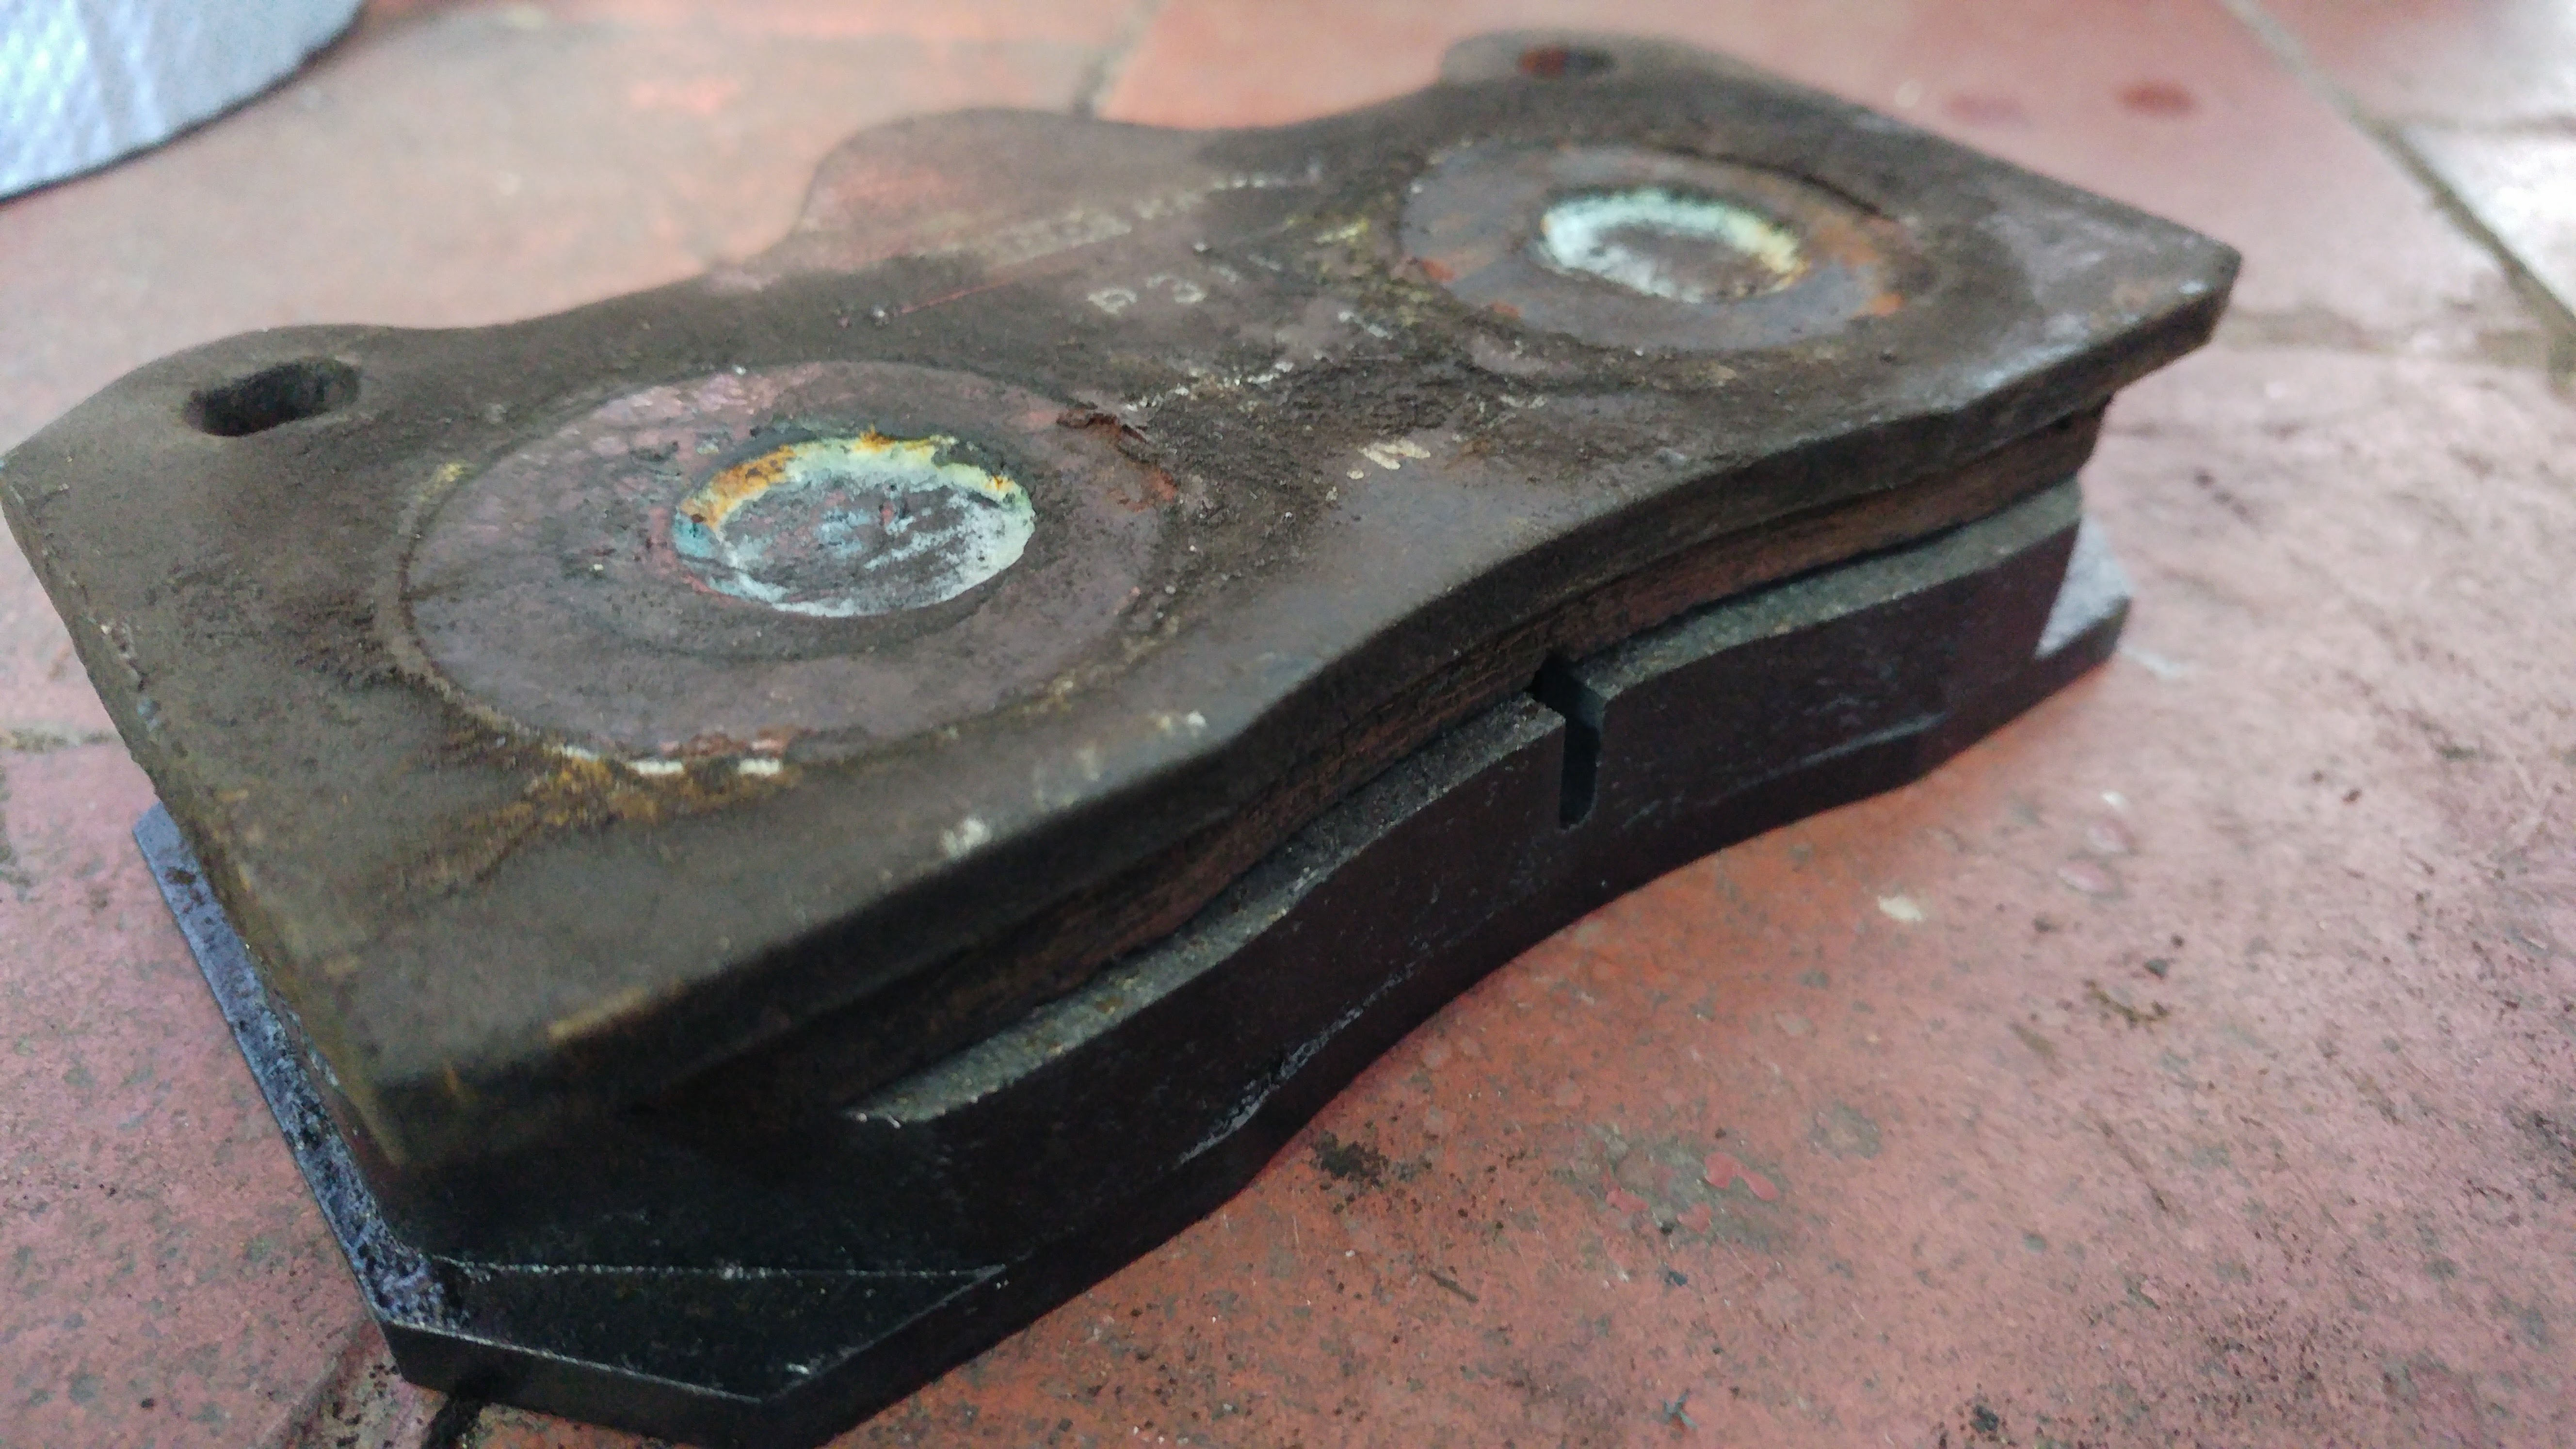
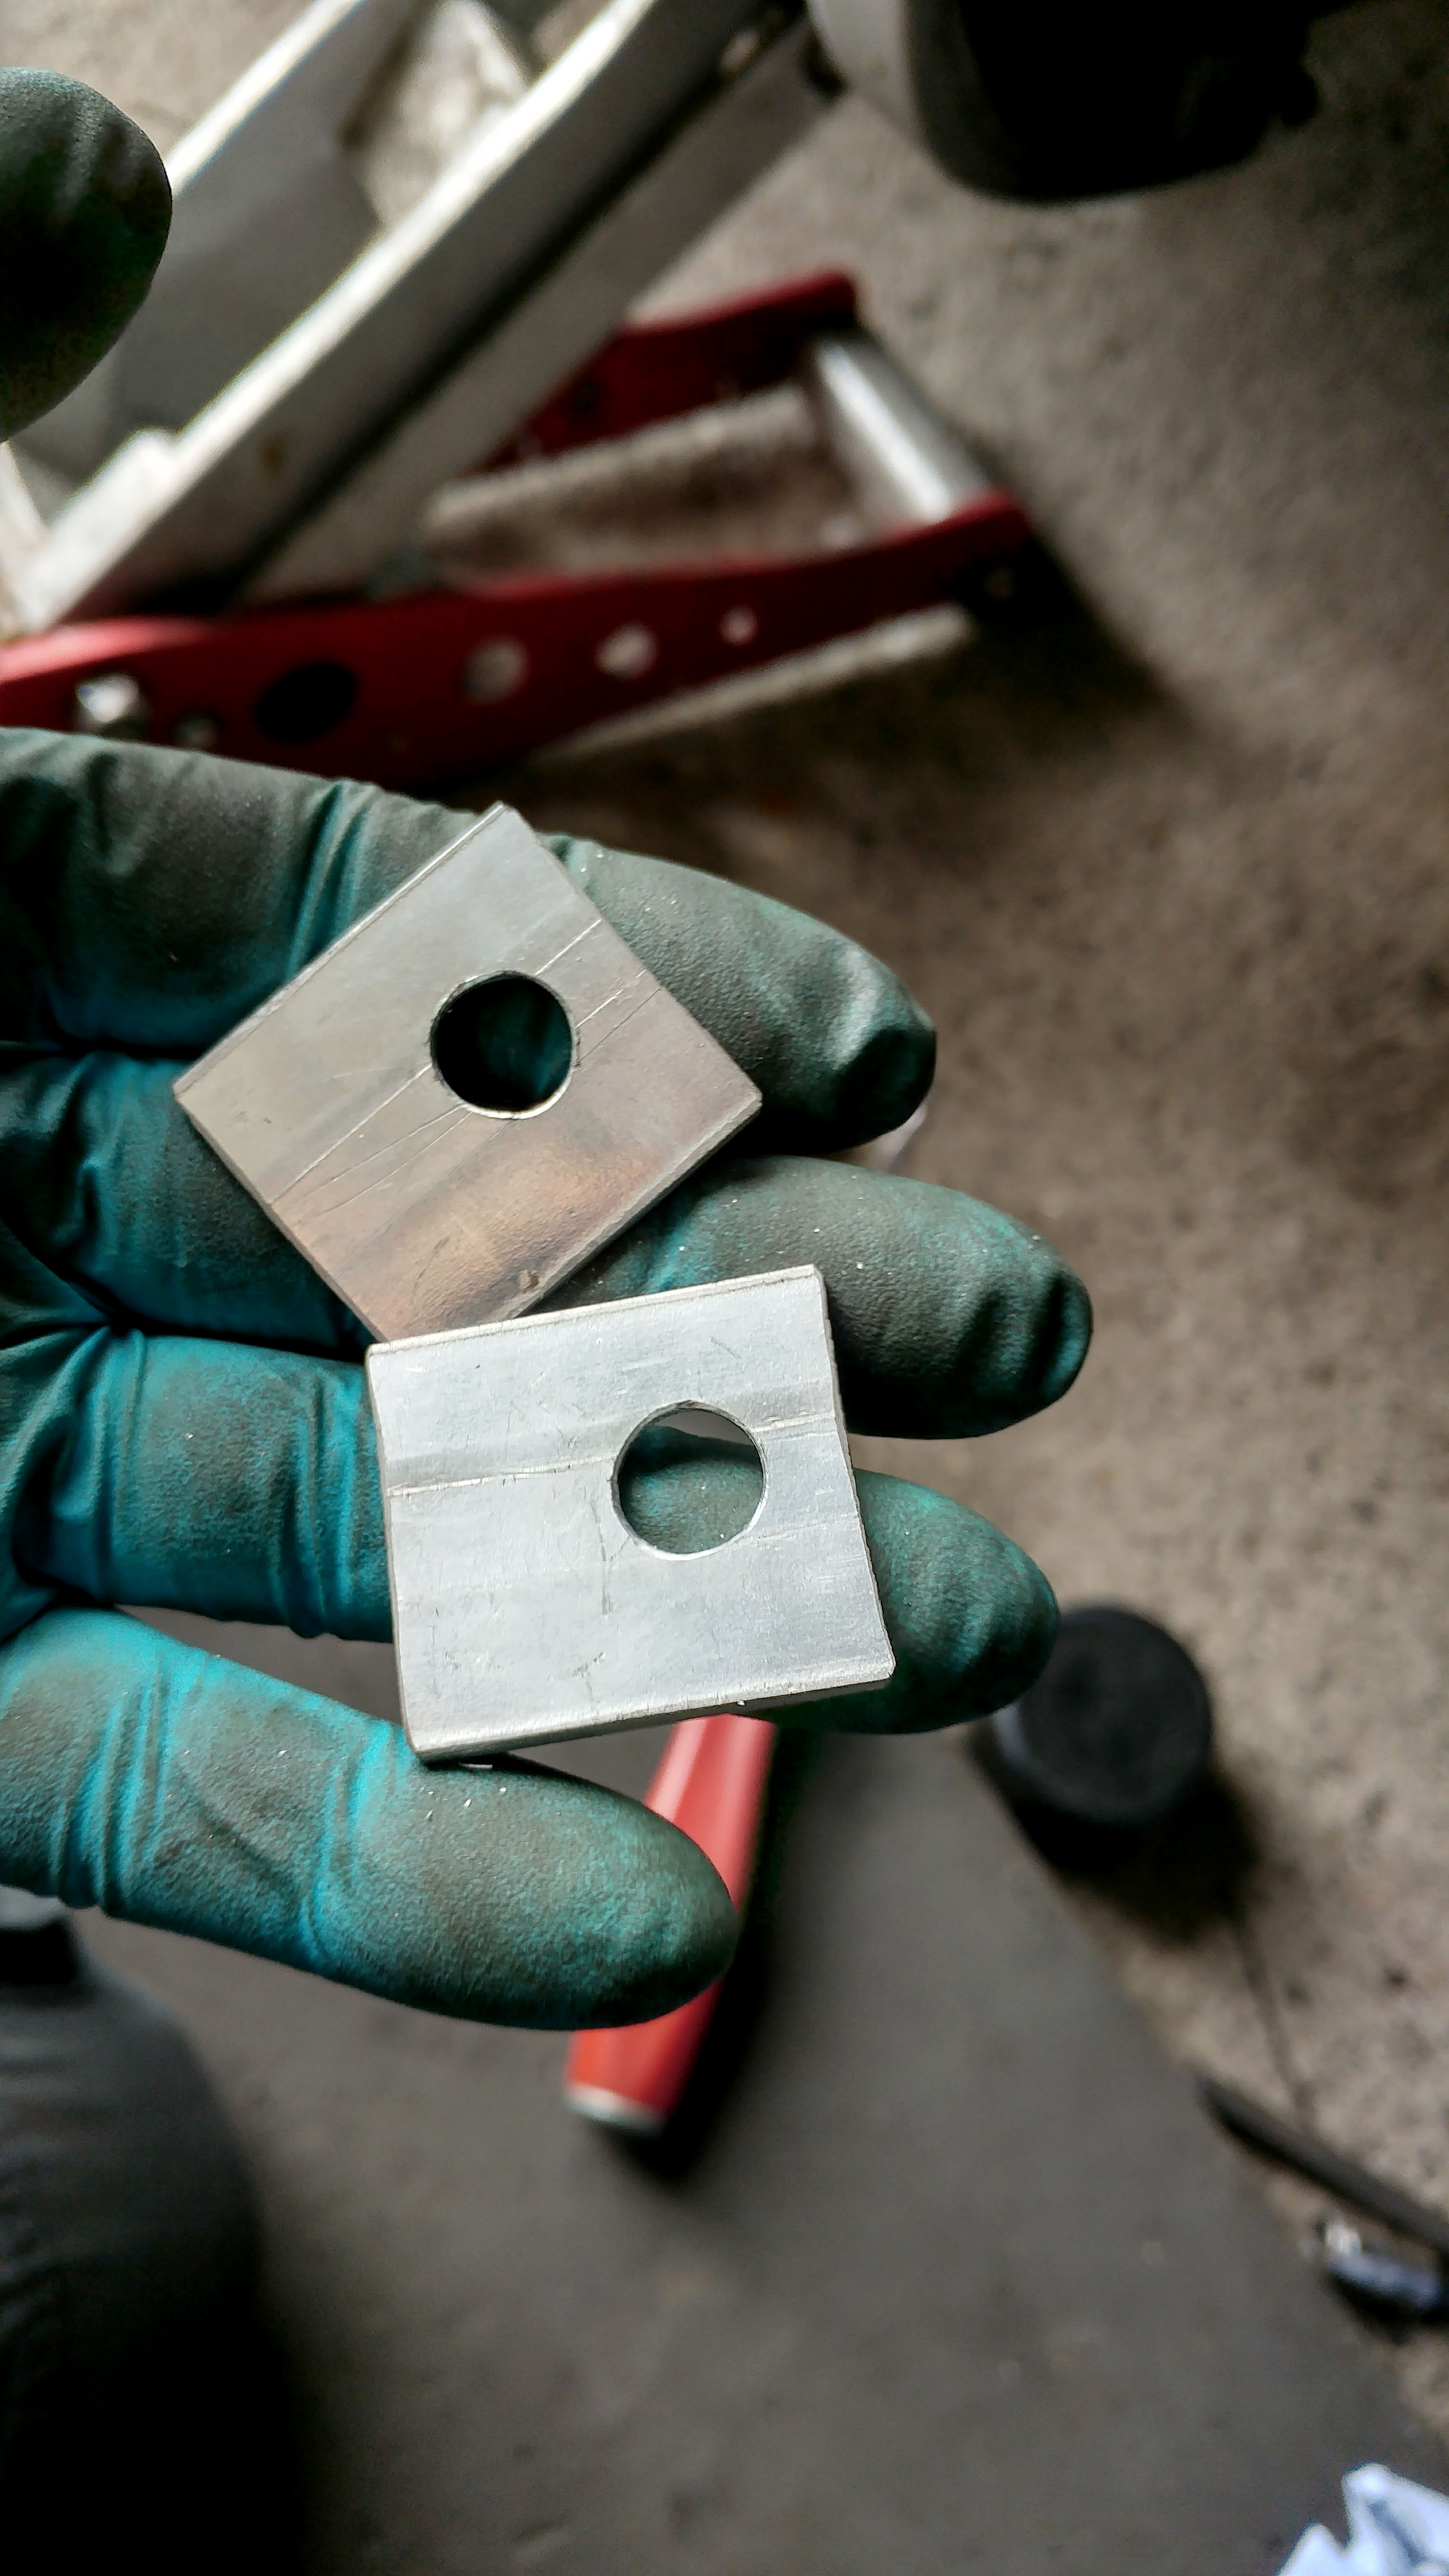
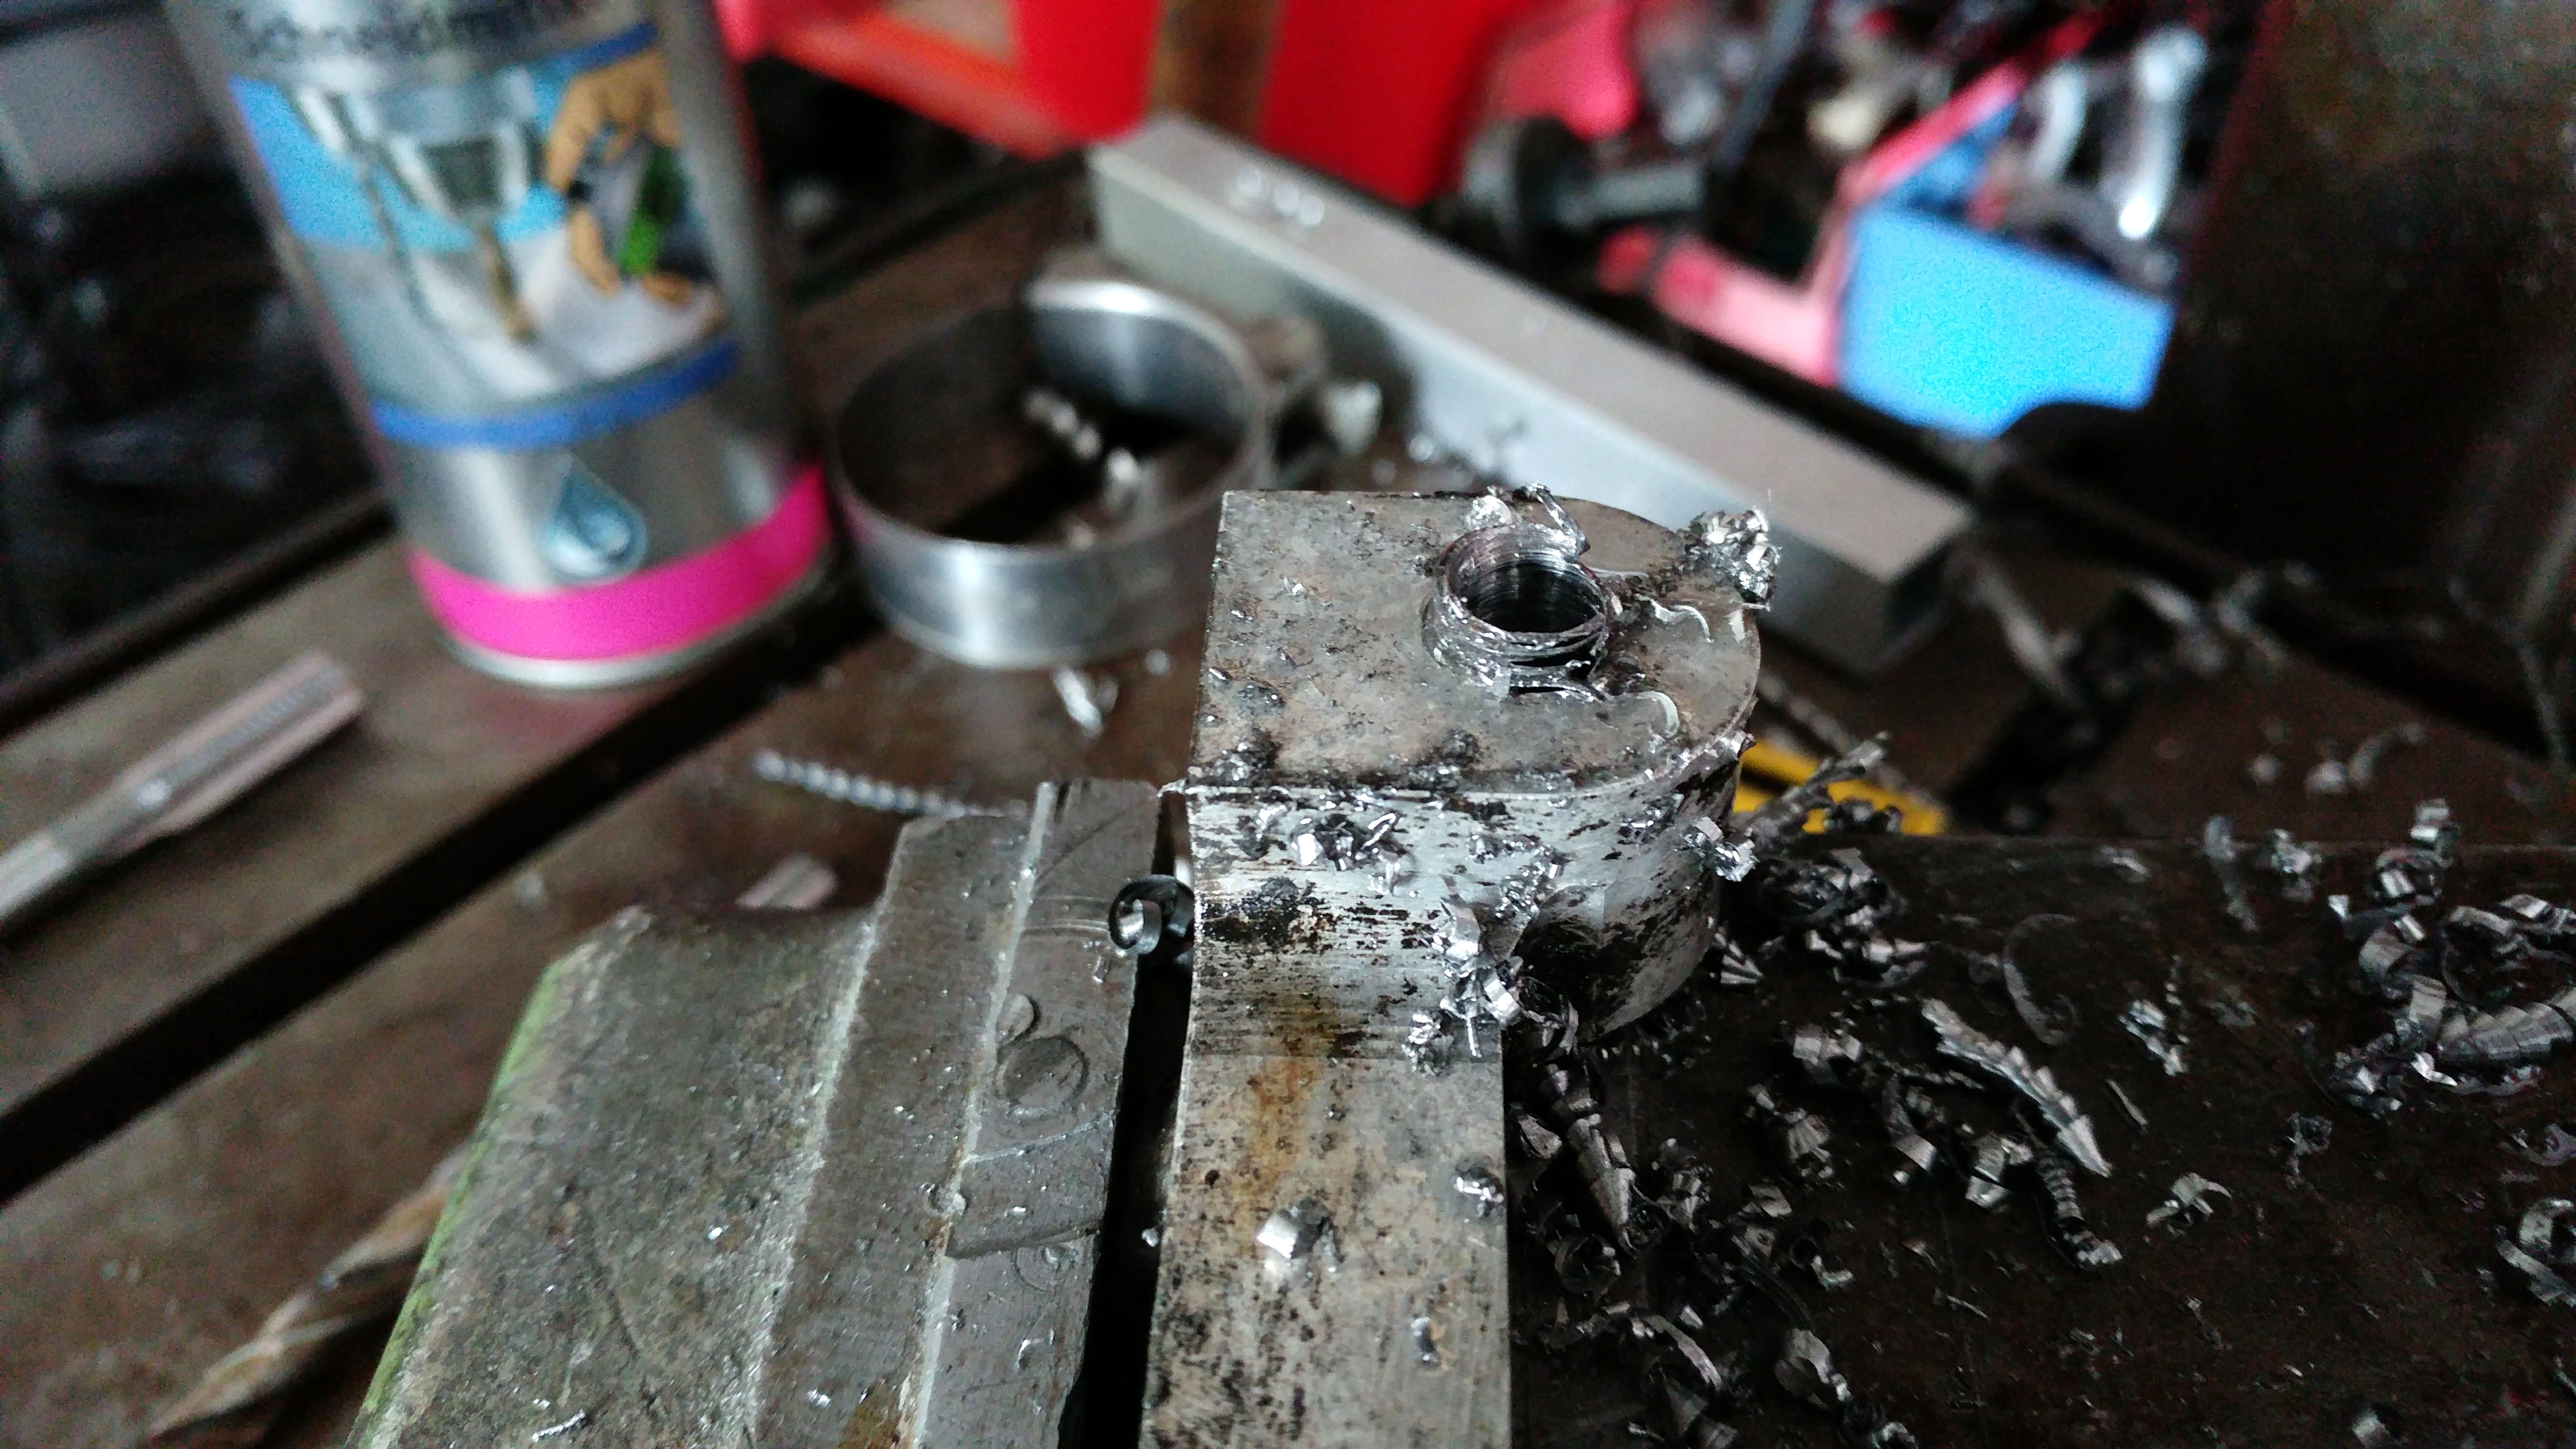
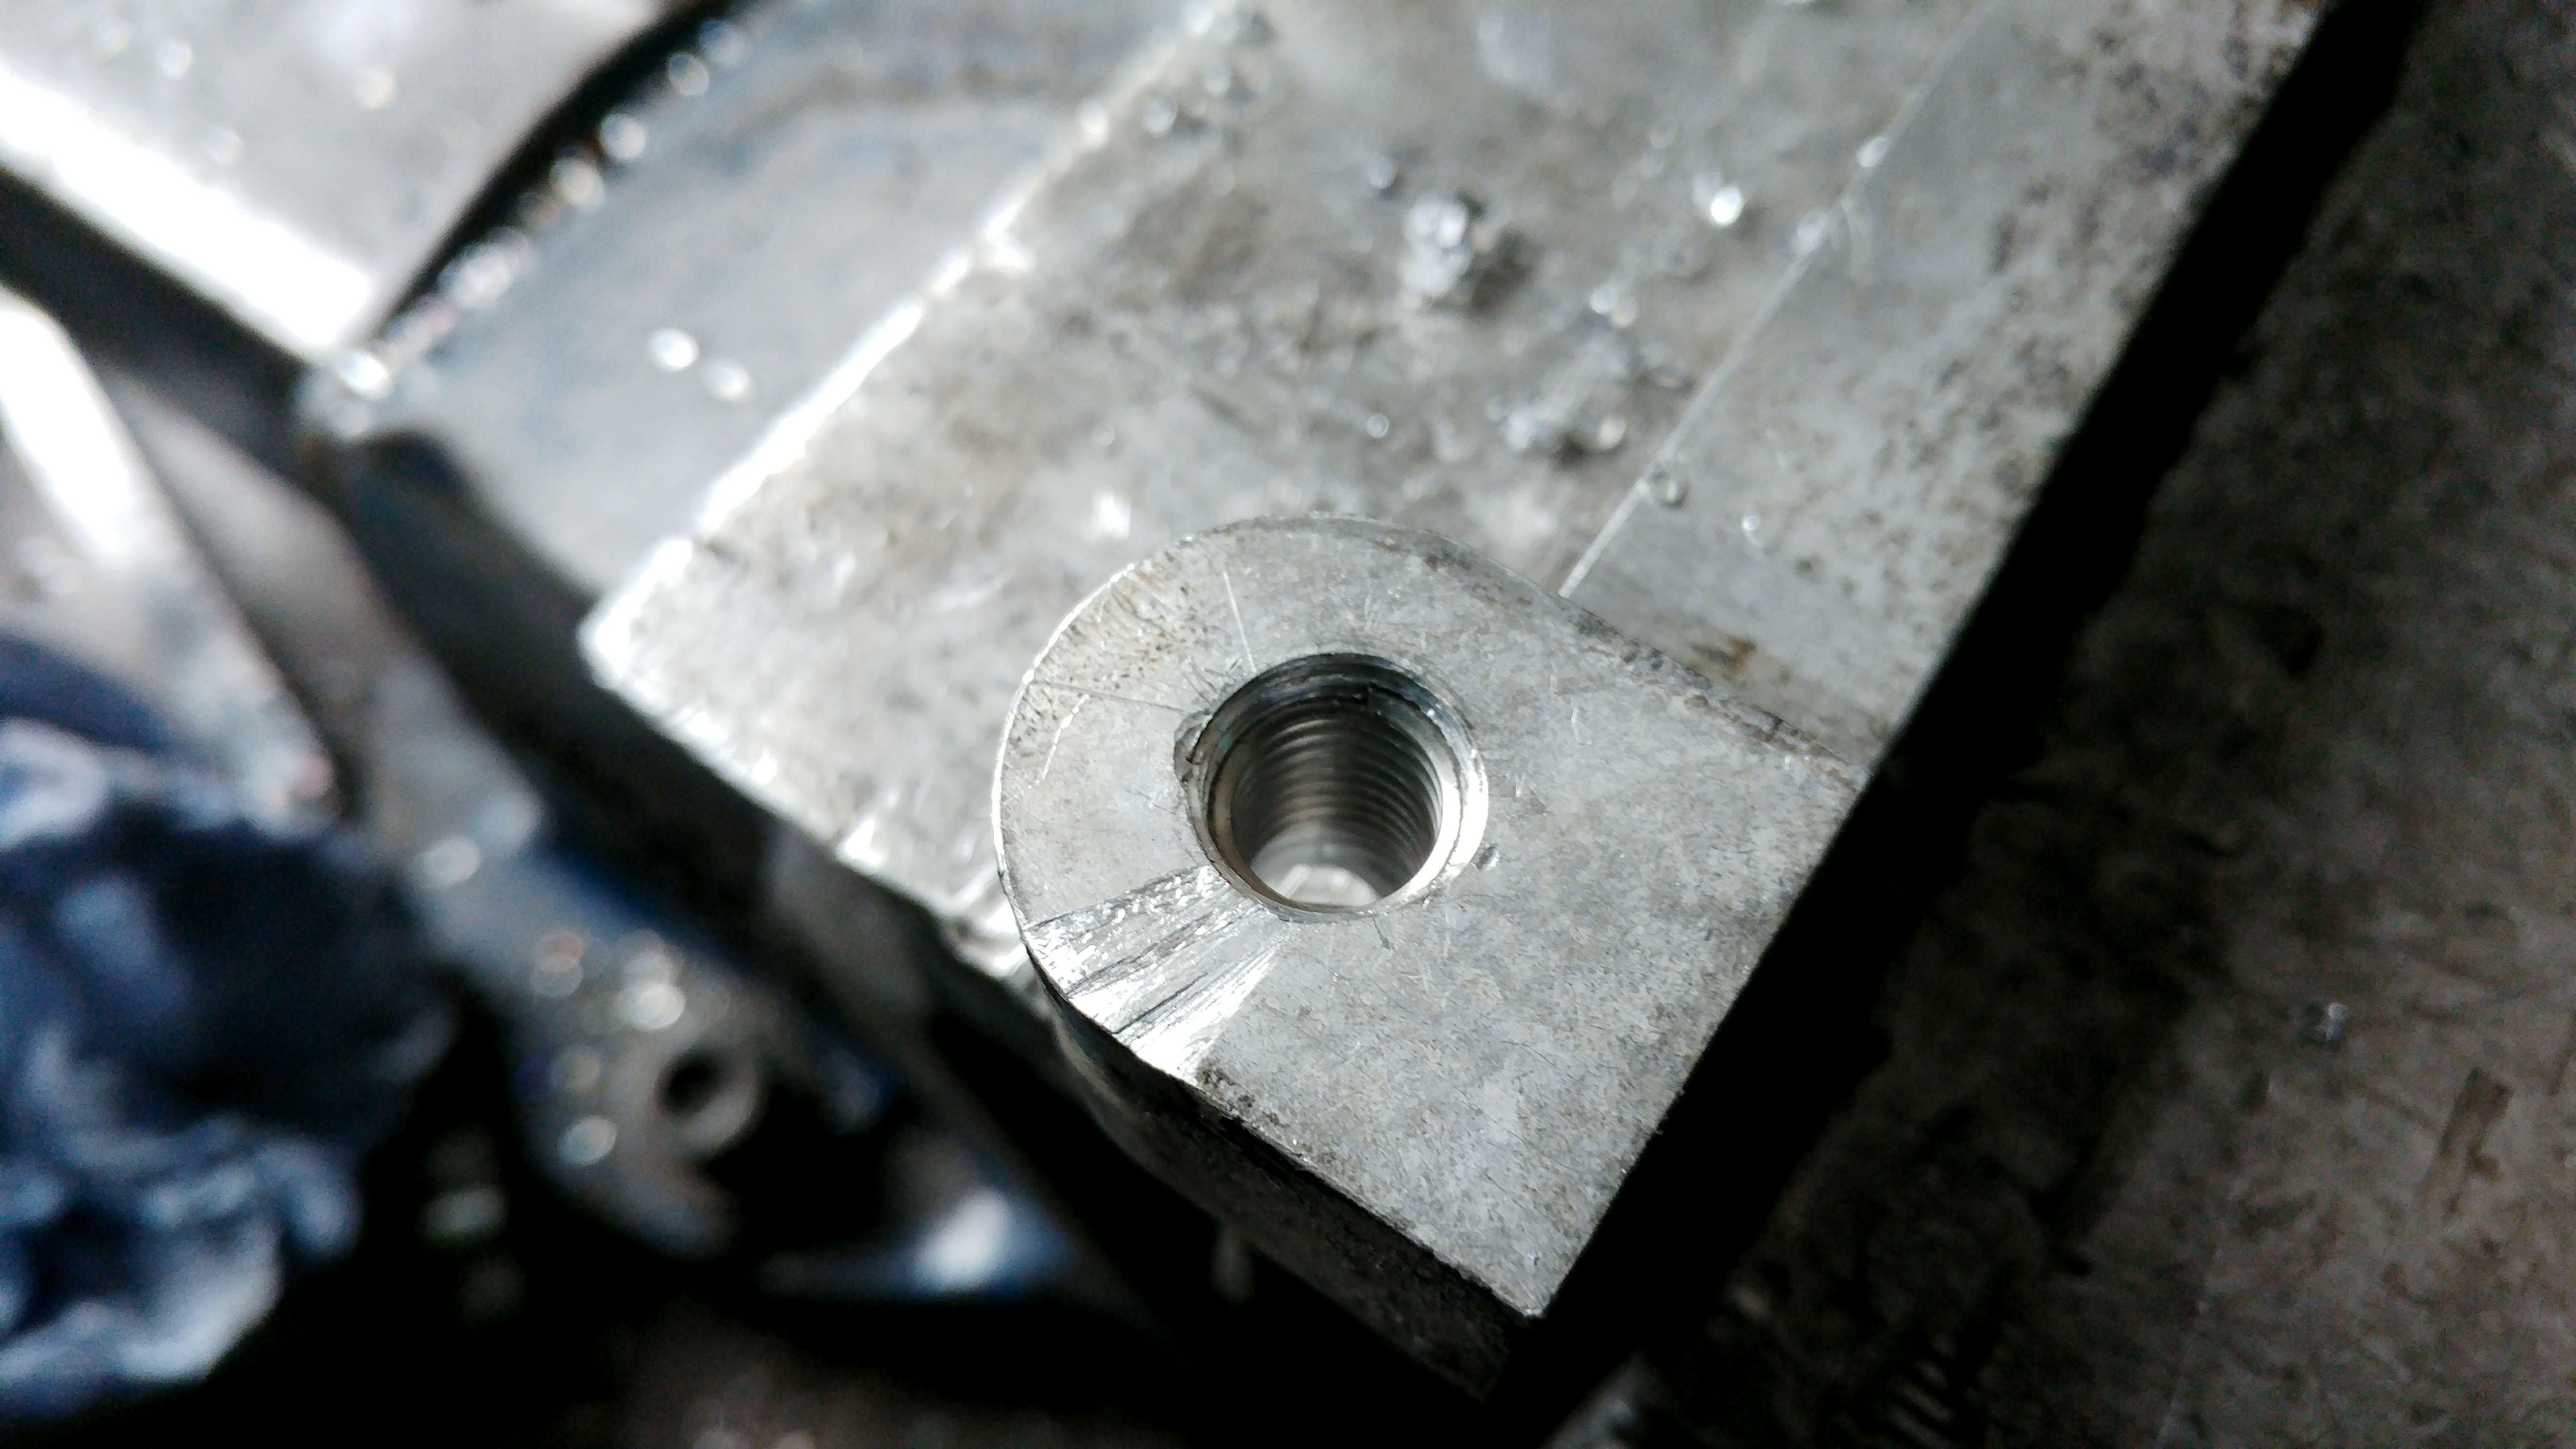
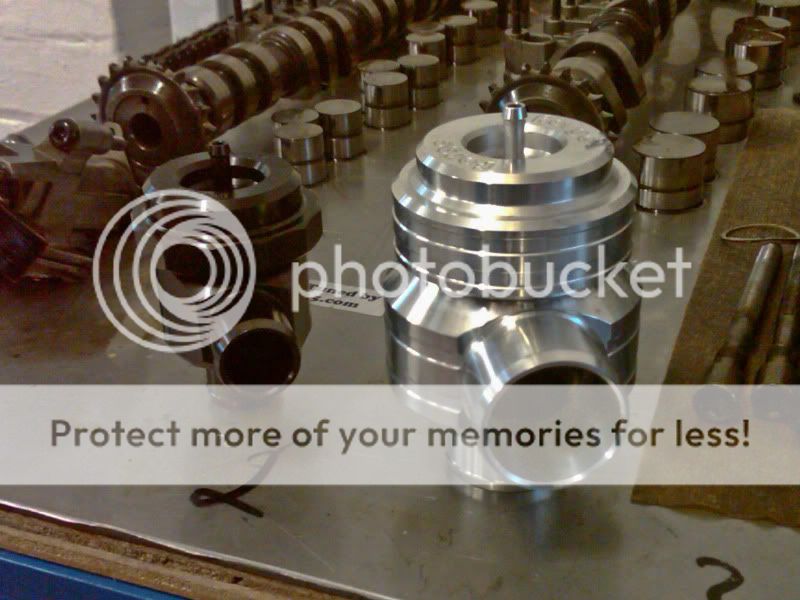
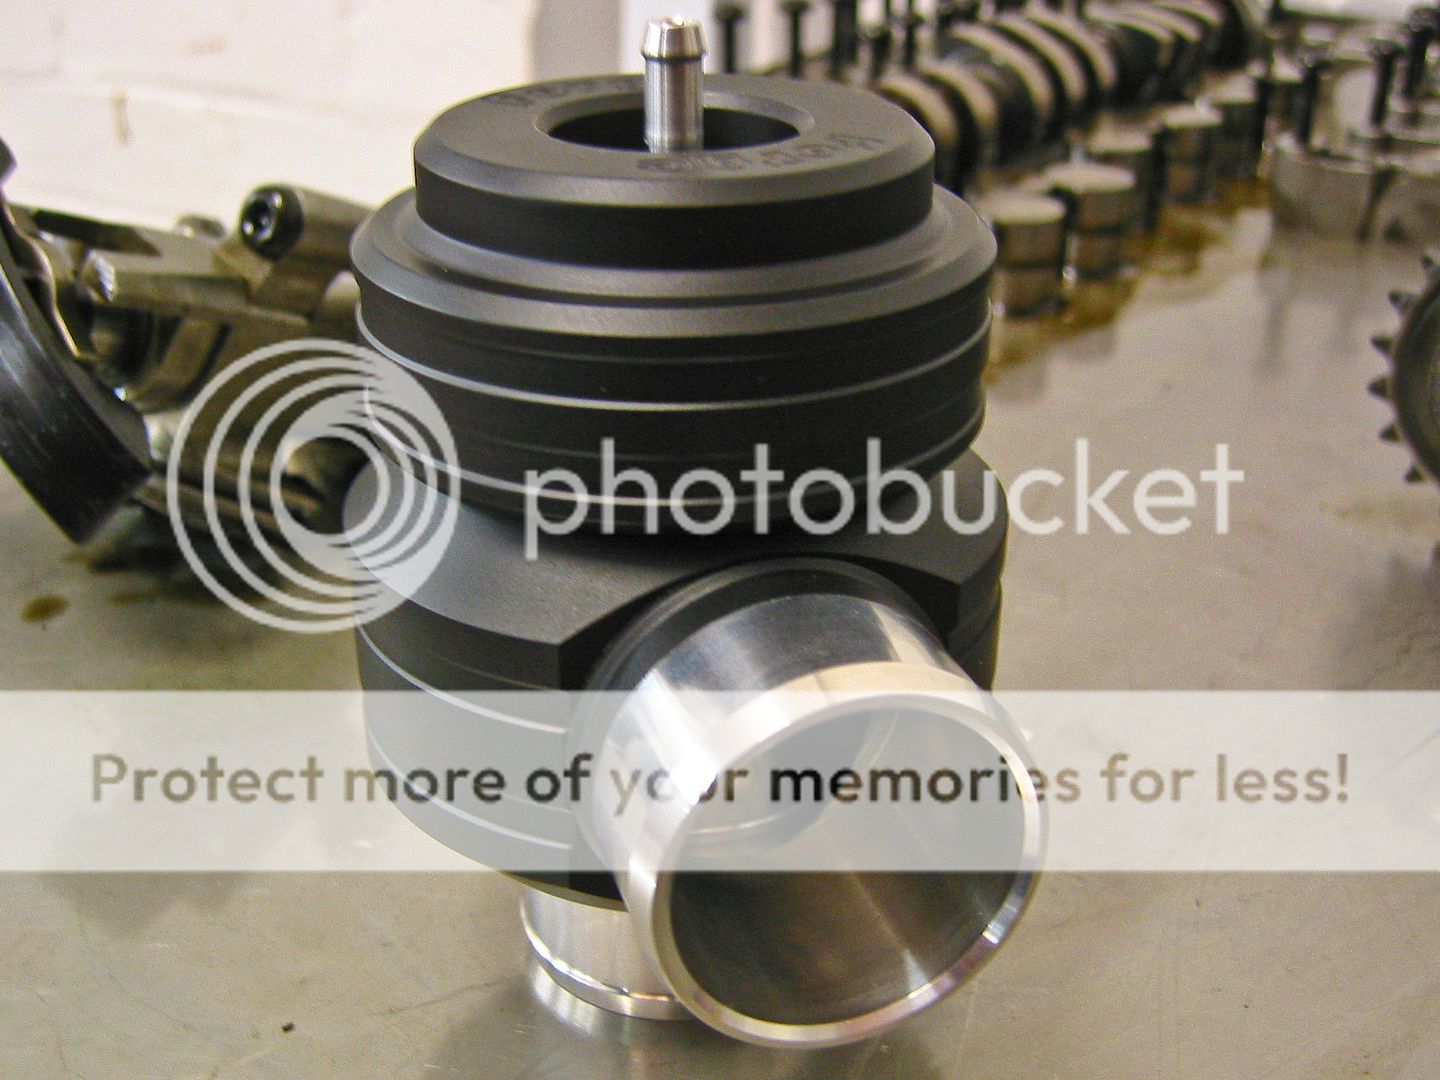
Another thing I am doing is changing the DV from a 007P to a Forge Super Size...

20100124_IMG00036-20100124-1335.jpg


A bit of de-blinging later....
20100202_IMG_3971.jpg


Plan is to create a 'cold side' style tap out of the hose going to the throttle body and the DV will sit under the TIP... I will sort out the build pics of that when I do it for a later post.

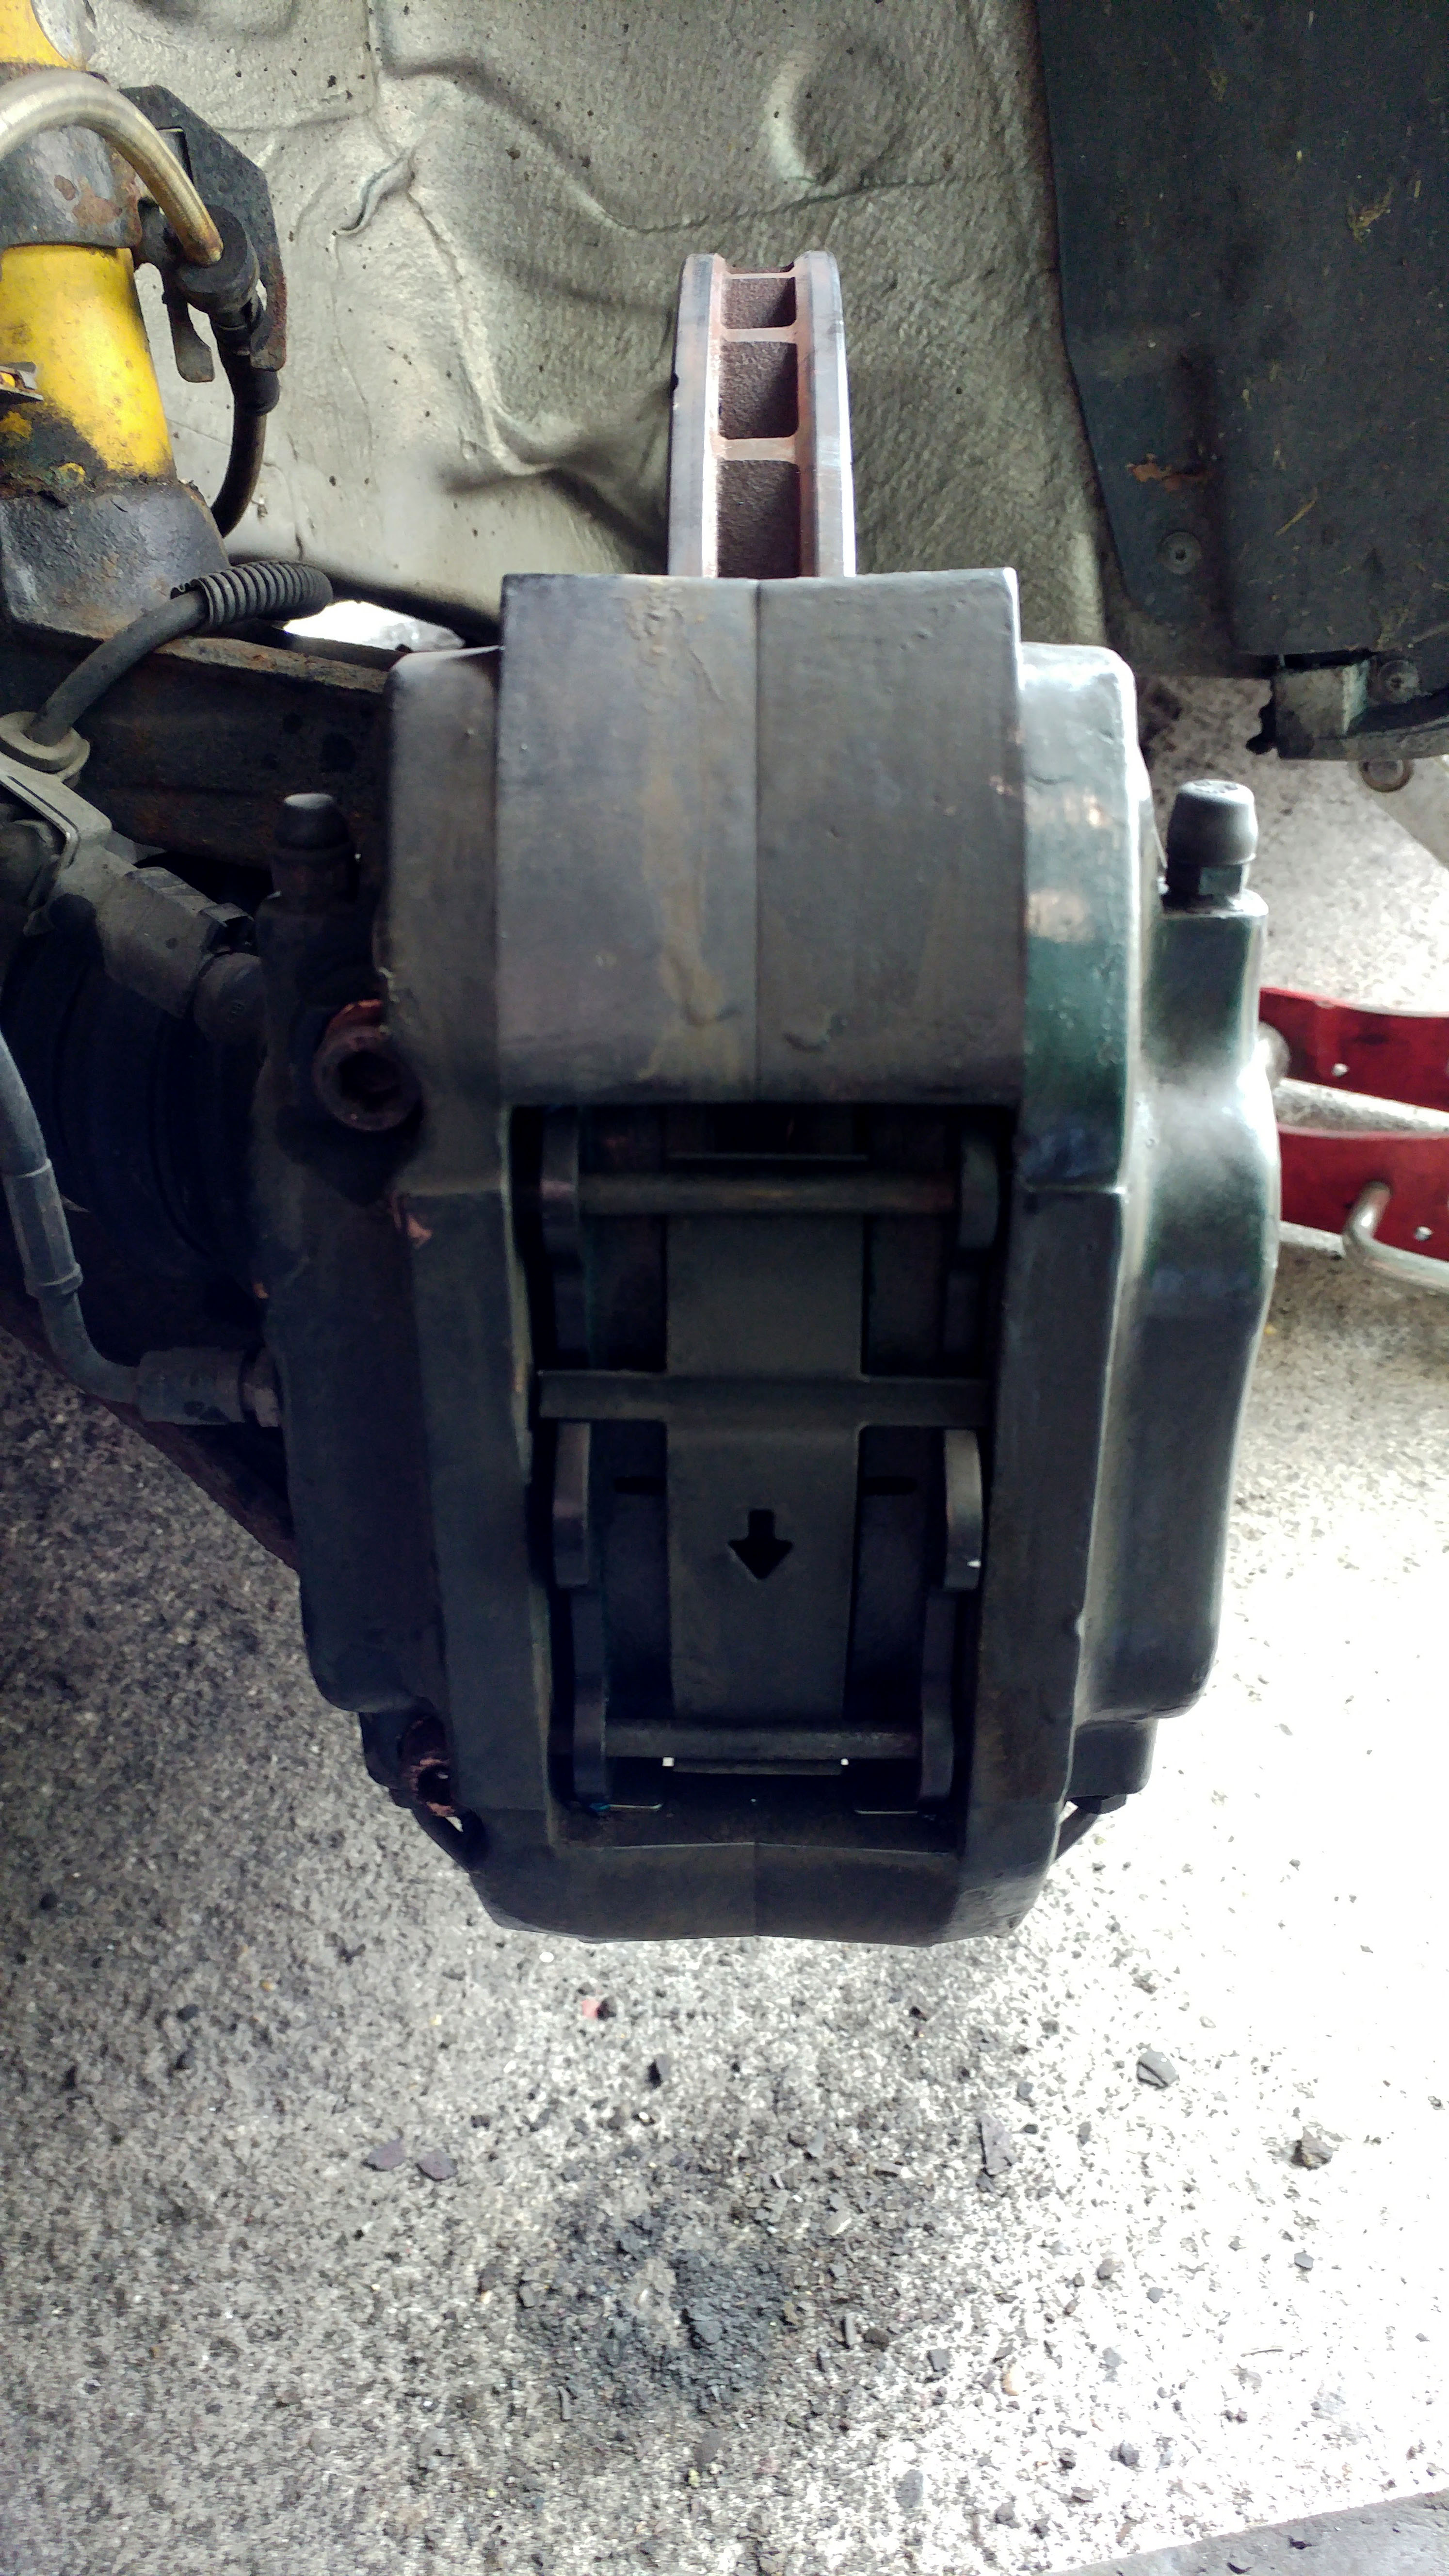
Last thing to look at will be the exhaust. I am not happy at how much drone my current setup as... its a shame as it sounds fantastic under boost when I go for it but as I drive much more sensibly than that on public roads I am going to have to tone it down a bit... to do that I am getting a chambered box from magna flow which should make it a lot quieter and not hurt the flow that much. The layout will look a bit like this 30 second photoshop hack...
S3-exhaust-01.jpg


...and I plan to get hold of a twin 3" slash cut tailpipe...

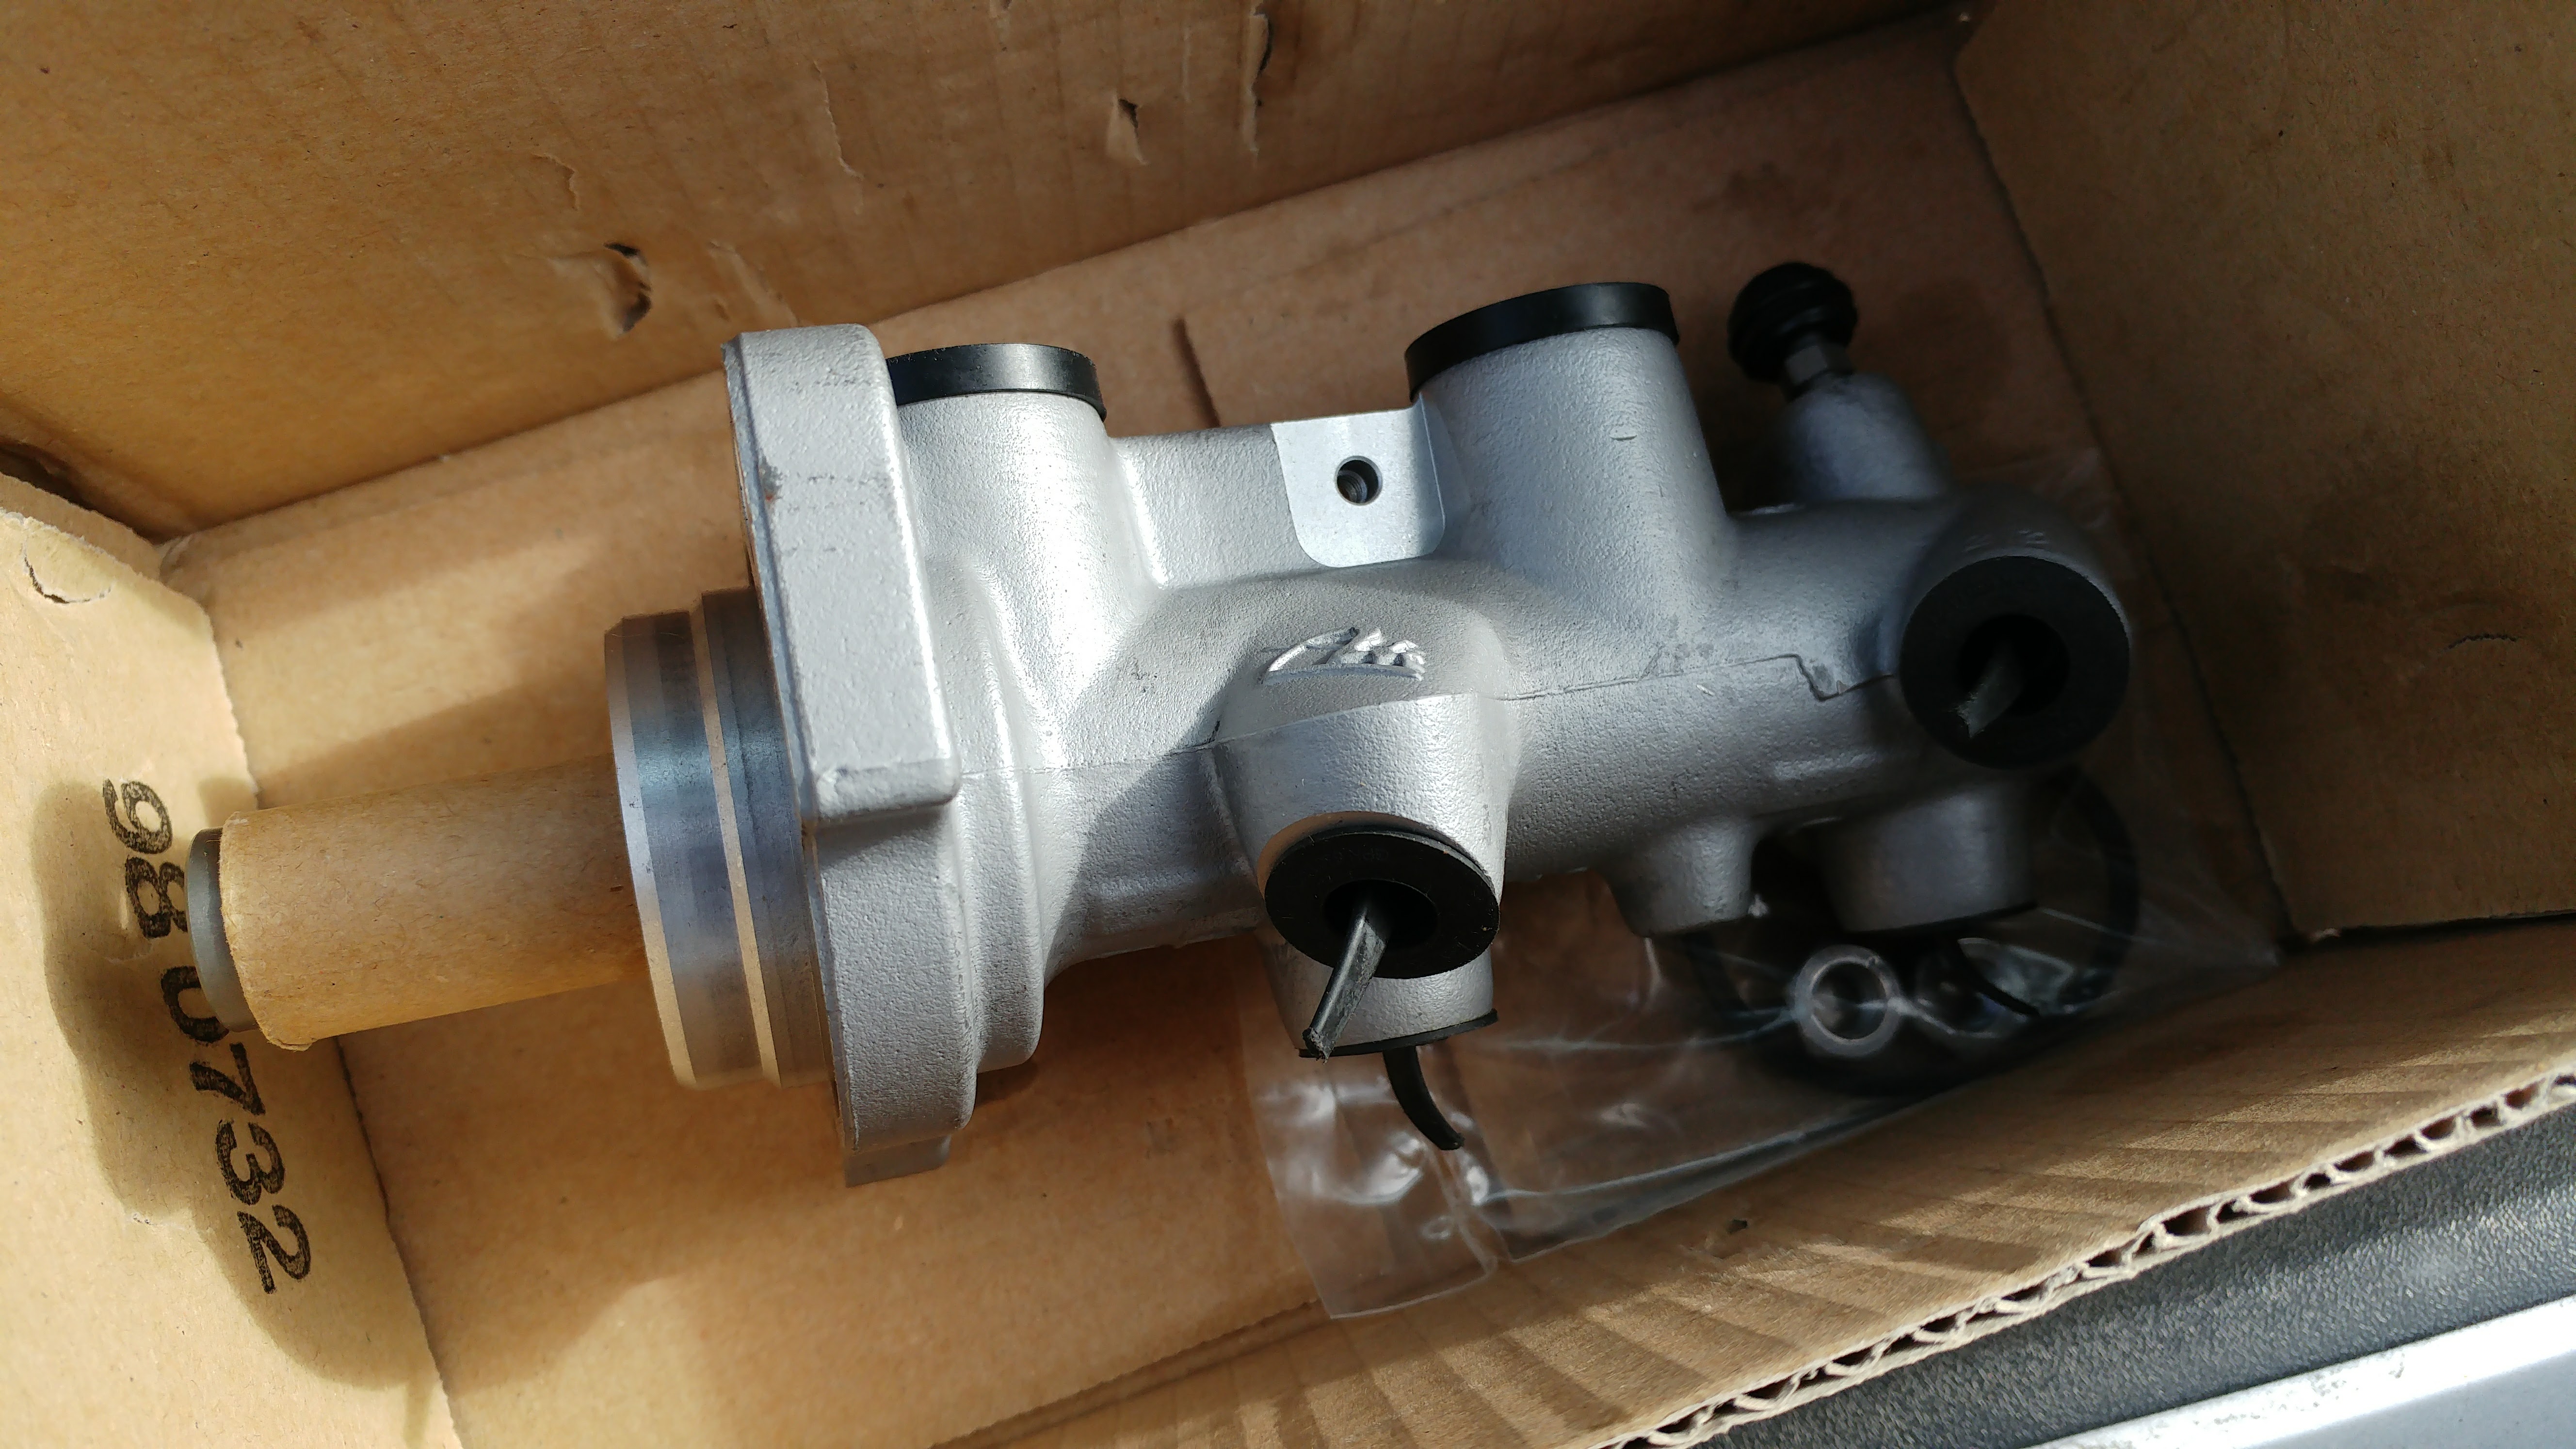
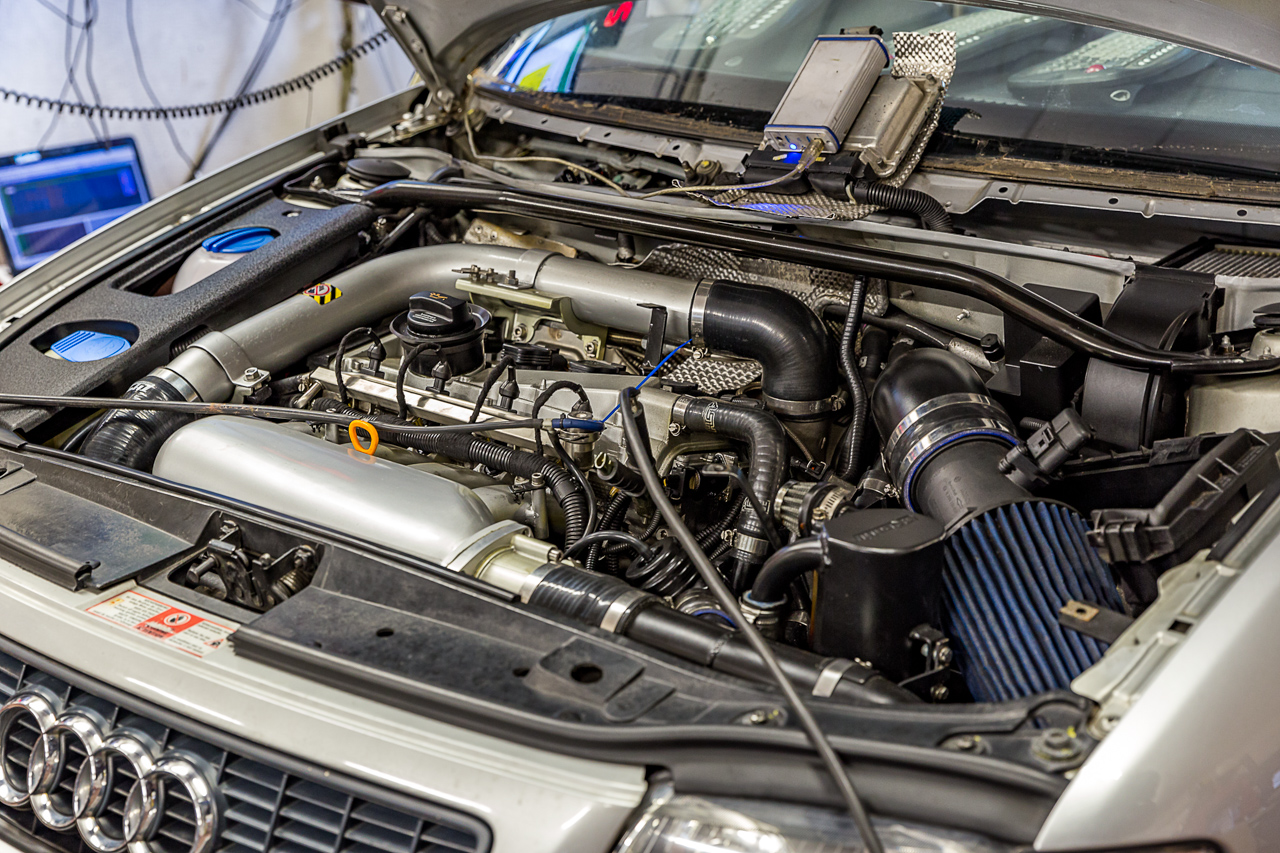
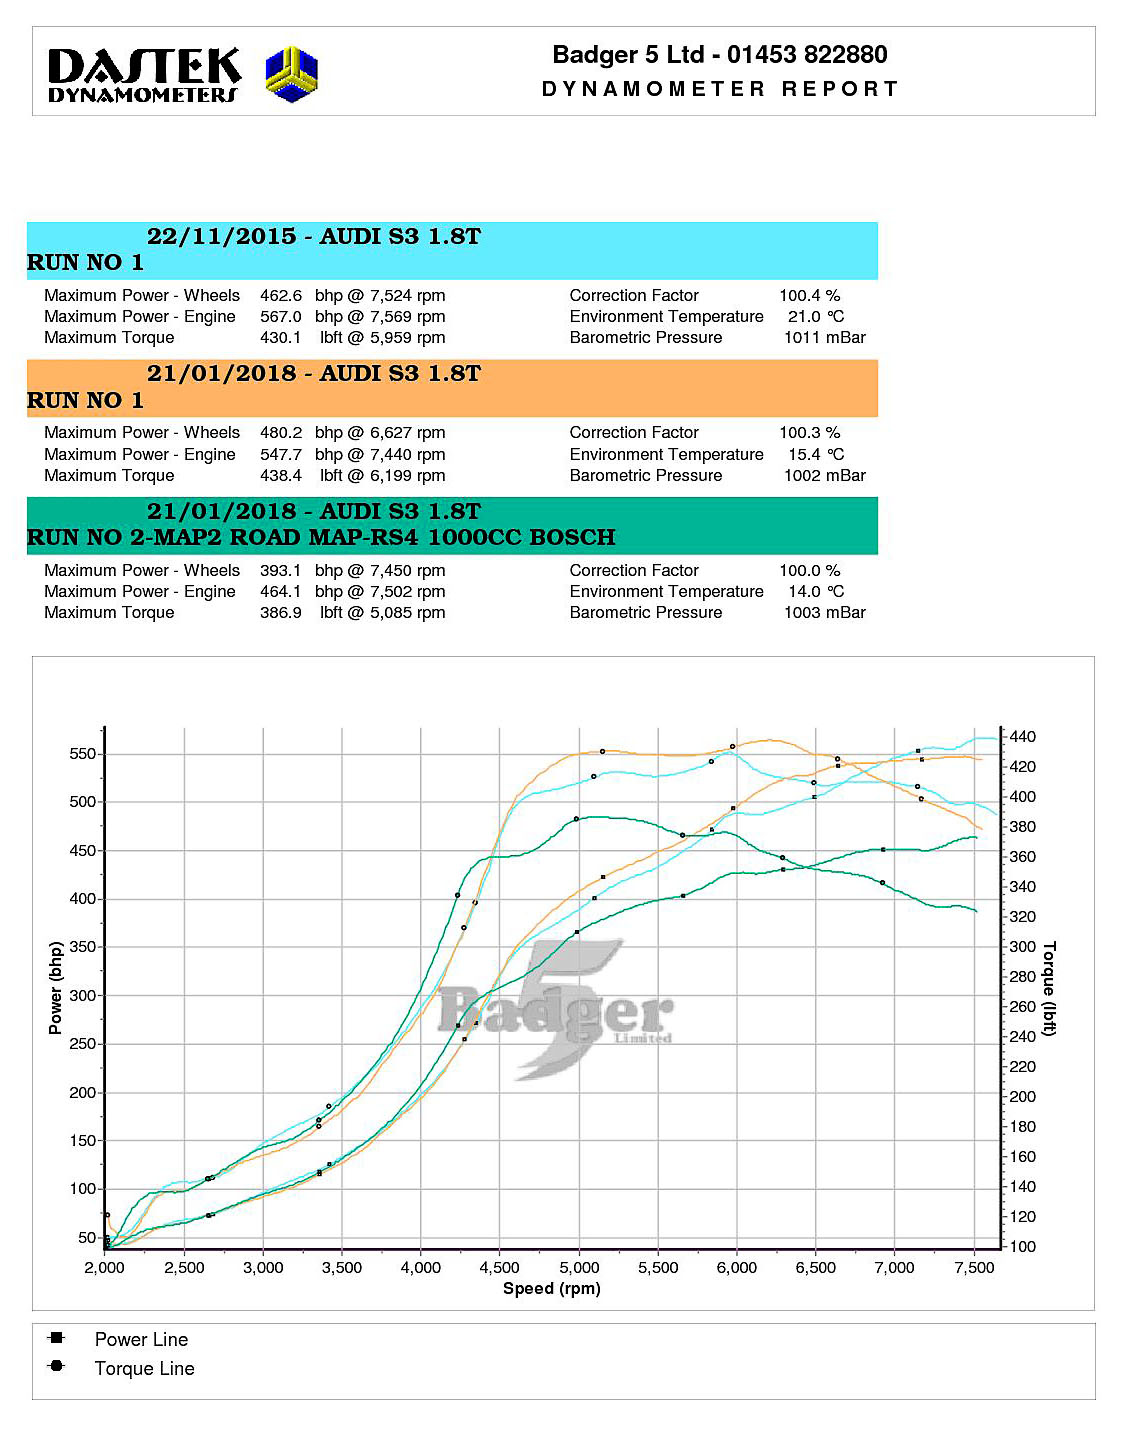
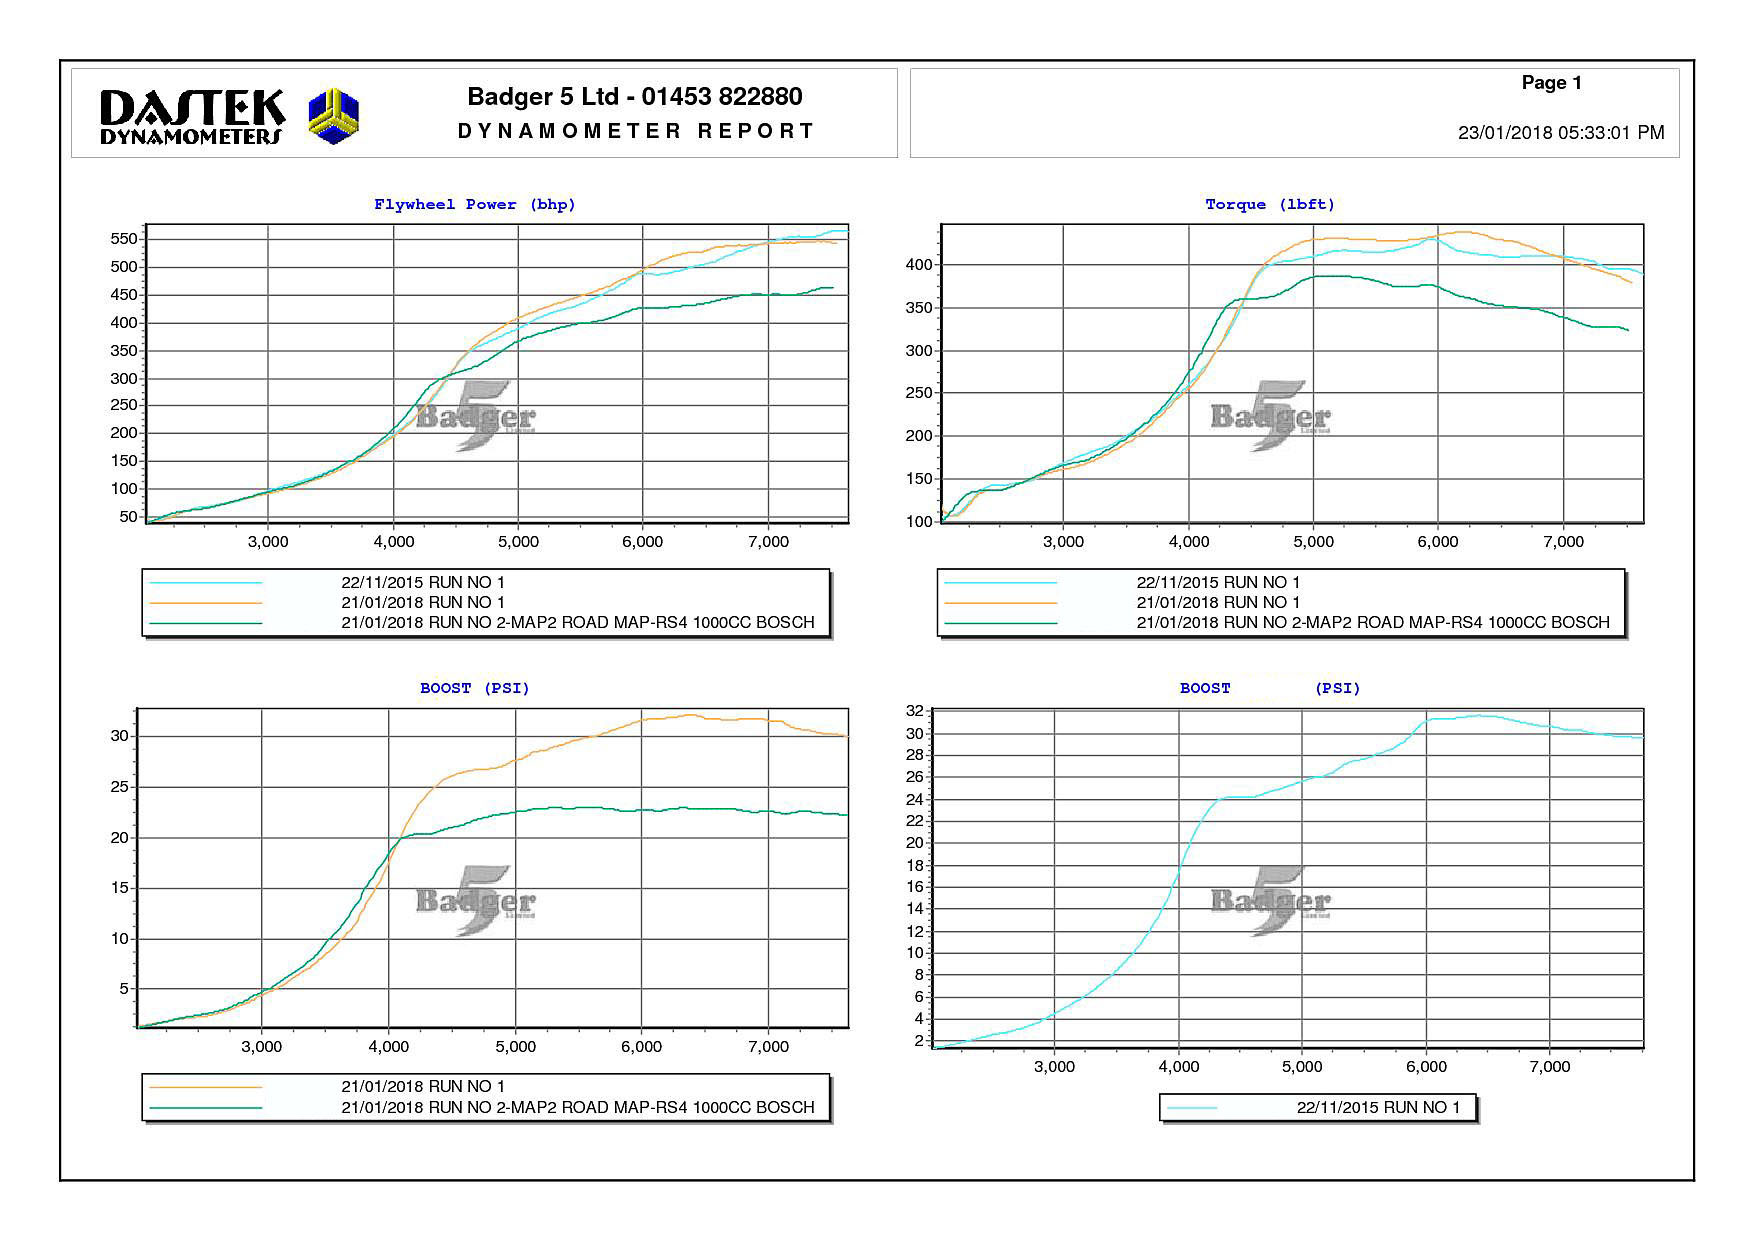
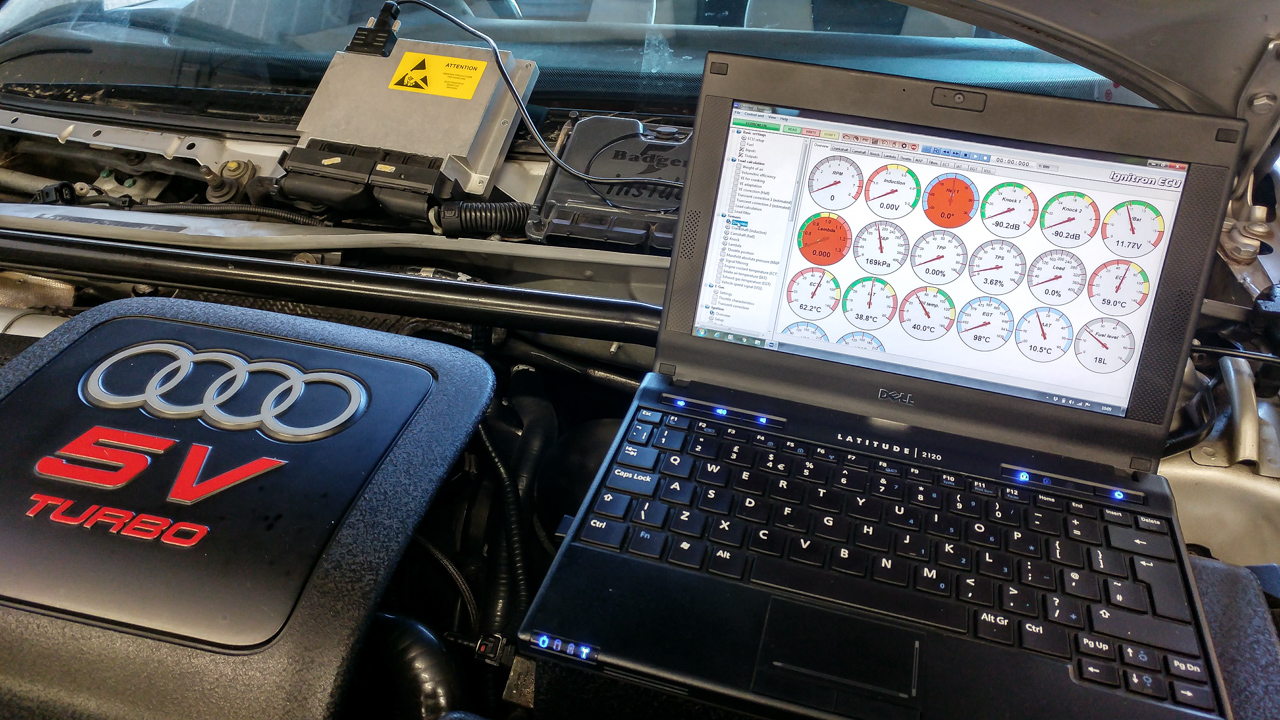
One last thing, I should also be geting my final map which will include a fix for the EGT issue and an increase in boost to 1.8bar... then off to the dyno ;P

<tuffty/>
Hi tuffty,
I'm currently working on a stack pillar mount like the one you've done, great job by the way.
Could you tell me where you brought the vacuum pipe in from the engine bay to the cab and how you got it up to the pillar?
Thanks

Sent from my E6853 using Tapatalk
 
Hi tuffty,
I'm currently working on a stack pillar mount like the one you've done, great job by the way.
Could you tell me where you brought the vacuum pipe in from the engine bay to the cab and how you got it up to the pillar?
Thanks

Sent from my E6853 using Tapatalk

Vacuum pipe was bought from A N Other seller on eBay... standard off the shelf stuff...

I routed it into the scuttle then through the black cover (on a facelift or white on pre-facelift) on the drivers side to get it into the cabin area

<tuffty/>
 
Vacuum pipe was bought from A N Other seller on eBay... standard off the shelf stuff...

I routed it into the scuttle then through the black cover (on a facelift or white on pre-facelift) on the drivers side to get it into the cabin area

<tuffty/>
Thanks I think I know where you mean the black box under wiper mechanism?
Where will it come out in the cab will I need to remove dash or anything to find the end?

Sent from my E6853 using Tapatalk
 
That's the one... You will need to remove the lower part of the dash to get your hands up there

<tuffty/>
 
I never bothered... you have to twist it in some way or other (a few people have posted on this before) but all I did was unplug it once I dropped the lower dash

<tuffty/>
 
Little update... for a while now I have been wanting to sort the fuelling out on my car... I was running 750cc injectors @4bar which equates to around 865 ish cc...

Logging the duty and lambda correction suggested they were pretty much maxed out giving me no head room if I needed it so... today Bill kindly gave me a slot on the dyno and I fitted a set of 1000cc injectors swapping the the FPR from 4bar to 3bar...

20180121 111956


Things went well... injectors behaved nicely with very low IDC but... it was evident that something was amiss..
Tufftyfuelling001


Despite adding fuel in the map the ECU was still trying to add fuel... AFR was fine but it suggested fuel just wasn't getting through quickly enough... Bill had seen this before on other builds and the fix was to fit a billet rail (larger) and larger fuel line from the inline pump to the fuel rail...

To be honest I knew I was close to the limit with standard lines and always planned to upgrade but.. seems this may force my hand a bit :)

Before I do anything though I need to check the fuel pressure though... its entirely plausible that either one of my pumps could be weak... I am still on the original (17yr old) intank pump and the DA inline has been in some 8 years now so who knows... we didn't have time today to hook up the pressure gauge so will either rig up a pressure sender and connect it to the FIS Control (will do that anyway) or grab a run on the dyno at some point to test it...

Power wise I was down a little peak power but gained a little midrange torque but this is easily within the normal operating range of a highly tuned car and I on the road its still fast as f*ck!

Took a video of the 22psi run..


...and a graph...
Tufftyfuelling002


Once I have sorted the fuel rail etc out then I might look at any tweaks to the map but tbh I can't imagine there is much more power there without compromising reliability and drivability and I am not a number chaser... my car is fast enough... :)

<tuffty/>
 
  • Like
Reactions: IPG, hydro s3 and S3 Hilife
...oh and of course took a couple of actual pictures too...

20180121-96dpi-IMG_9368-Edit.jpg


20180121-96dpi-IMG_9369-Edit.jpg


<tuffty/>
 
  • Like
Reactions: tomjol, andrew_wright, Solberg and 4 others
For completeness I grabbed the dyno plots from Bills today...

Previous full boost map run, current full boost map run and the fast road map run
tuffty-s3-dyno-20180123.jpg


tuffty-s3-dyno-compound-20180123.jpg


<tuffty/>
 
  • Like
Reactions: andrew_wright and antwan64og
So with the New Year, new enthusiasm thing going on with the car I finally took to plunge on something I had been sitting on for most of last year..

20180211-96dpi-20180211_100949_HDR.jpg


So.... you may have worked out that I am now running a standalone ECU... :)

The Ignitron ECU is a focused ME7.5 replacement... its more or less plug and play hardware wise and so far has been a fairly painless experience to setup... its as OE++ as a standalone can get which is right up my street...

I am going down the VE tuning route and have binned the MAF sensor... this meant I needed to fit a MAP sensor into the inlet so it could see both vacuum and boost so I used a 4bar Bosch sensor which is a standard VAG part...
20180210-96dpi-20180210_162250.jpg


Its kinda 'thrown' in there for now to get the car running but the inlet will come off at some point and it fitted properly with a boss welded in..

The ECU fits in the OE bracket too
20180211-96dpi-20180211_122803.jpg


Ran the USB cable through to the car so I can easily connect my laptop if I need to (the ECU has an autolog feature which means I don't need the laptop connected until I want to download it for viewing!)
20180211-96dpi-20180211_124125.jpg


Car started fine on first turn of the key... I am basically at the fuel tuning stage so no boost or other things just yet... just drive and adapt...
20180211-96dpi-20180211_130209.jpg


The engine feels a little flat at the moment as timing is at a very conservative level until fuelling is done but overall the MAF less experience with this setup just shows how tetchy a MAF can be when at this level of tune... might explain why Audi decided to go MAF less on the latest RS3 engine...

Starting to fall in love with the car again after a period of meh ness... I have a fuel rail on the way to address the potential starvation issue and will be doing a bit more work on things like baffeling the catch can and generally tidying things up... I may even revisit the camber plates and see if I can fit a more substantial spherical bearing in them now that the H&R's have removed the crashy ride (a contributing factor to the bearings popping before)

So... bit of driving to do to get the fuelling adaptions sorted and then the actual tuning can begin... really looking forward to it...

While I doubt that I will get any more top end power I will gain in drivability and the fact I can tweak as I go... ME7 tuning is quite involved and I don't have the time to spend on it... it also ideally needs emulating on the dyno for a few sessions to get it where it needs to be and trying to get Bills time on the dyno is just a difficult as he is so busy...

This way I can get most of the leg work done then the dyno session can be to do the more interesting stuff... once there I can 'live' with it for a while and make small adjustments as required from logging and tuning on the go..

Beyond that the ECU has 'toys' too... ;)
27992870 10156240903904874 6313503085758689414 o


Rather excited about this next chapter of the S3's modded life :)

<tuffty/>
 
  • Like
Reactions: ToughlilT, craigt1985, IPG and 7 others
Sounds like a cracking piece of kit. Good to hear you've got the bug back too :thumbs up:
 
  • Like
Reactions: <tuffty/>
Looks like a really fantastic piece of kit PT!

Really Impressed with how easily its been installed and up and running so soon!

Can't wait to see how you get on tuning it
 
  • Like
Reactions: <tuffty/>
Logging capabilities on it are cool... you can log using the software on a connected laptop or set it to auto log... it will then write a log based on variables you define to its internal memory that can be downloaded as and when... you can just set it and forget about it...

If you have an issue at anytime you can easily just download the log and see what was going on at the time...
Log sensors
Log ignition
Log injection

All very cool stuff...

<tuffty/>
 
  • Like
Reactions: S3 Hilife, Alex C and andrew_wright
Do you still have fis control working?

Enviado do meu SM-G950F através do Tapatalk
Not at the moment... need to send the spec to Stefan and see if there is a way to display it over CAN as the iecu is CAN only and has no k-line comms

<tuffty/>
 
Not at the moment... need to send the spec to Stefan and see if there is a way to display it over CAN as the iecu is CAN only and has no k-line comms

<tuffty/>
Integrated haldex controller would also be a great mod

Enviado do meu SM-G950F através do Tapatalk
 
Do you still have fis control working?

Enviado do meu SM-G950F através do Tapatalk

So... I posted in the FIS forum (http://fis-control.de/punBB/viewtopic.php?id=315) and sadly it seems that the IECU won't be able to communicate with FIS....

I did get FIS up and running again though as the default loaded preset was block 1 of the ECU... this would essentially make FIS crap out from not being able to connect so the fix was to set external sensors as the default...

Upshot is I can configure the FIS presets for external sensors so I can add a wideband controller, fuel pressure etc in addition to oil pressure and temp that I already have... that would give me enough data to keep me happy for the immediate potential issues...

The ECU however will allow external sensors to be connected to its redundant connections...
Analogue input


Analogue input2


...which is quite nice...

As much as I hate to lose FIS and its usefulness by connecting the sensors to the ECU it means they can be logged in context of everything else and the logging system on this ECU is awesome...

In any case... I need glasses for reading and computer work but my distance is bob on... means I can't really see the DIS very well without glasses and can't drive with them on... might be time to move that on especially as I take my netbook that has VCDS and the Ignitron software on it in the car when I go out in her so I can live without FIS at the end of the day if needs must...

Adding a sensor to an input adds a menu item that gives you a table to scale... really nice feature that :)
Oilpressure


So far I have been working on coldstart.... or more specifically cranking... its little things like this that makes or breaks how the car feels overall...
In the file below you can see a bit of a blip in revs on cranking when the engine catches... this gave a rather stumbly start
Cranking coldstart 07


...bit of tweaking and the transition is smoother and now starts rather nicely
Cranking coldstart 08


Revs rise a little too high now but thats a tweak on the TPS side of things...

Nerdvana :)

<tuffty/>
 
Indeed... soon as they sort out cruise control, I'm joining the queue for one of these!
You will of course need to convert your loom and go DBW of course but if you pop over to the UK Prawn will knock that out and map it in a weekend LOL ;)

<tuffty/>
 
  • Like
Reactions: Rainbird and Alex C

Similar threads

Replies
5
Views
1K
Replies
1
Views
1K
D
Replies
0
Views
702
Deleted member 65282
D