

Arvo,
I never found a guide with photos for removing a bumper from an Audi S3 only ones with writing so I thought I would do one to help out. I am a novice and no mechanic; so please note I take no responsibility for your actions on your own car in using this guide.
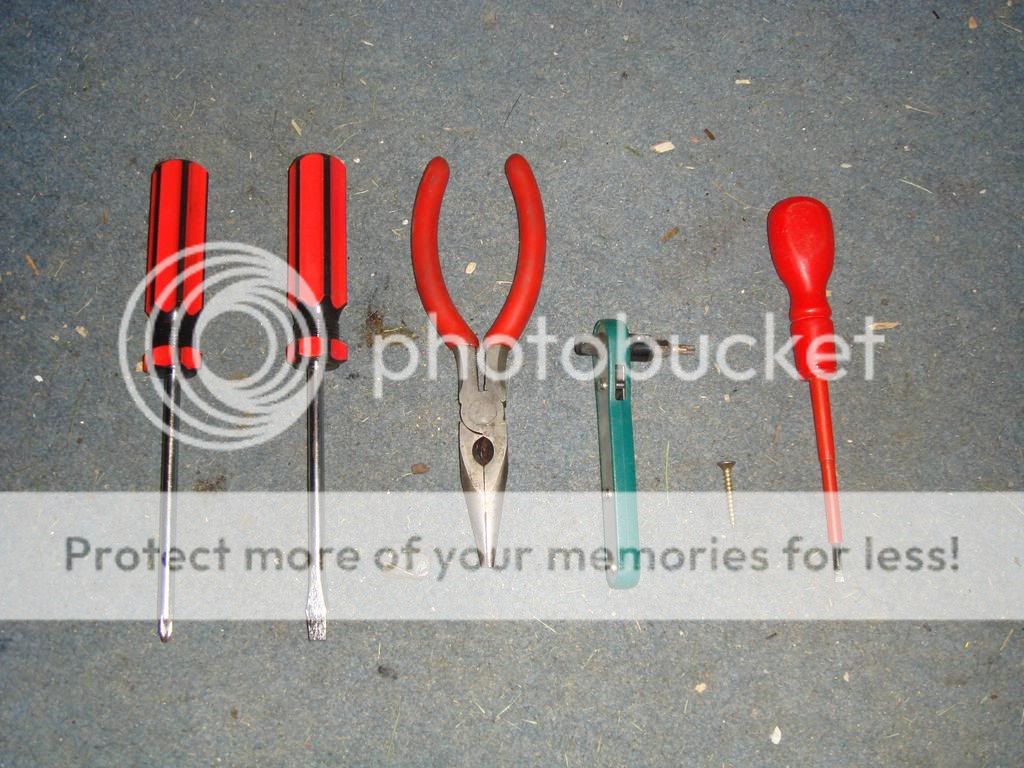
1. Tools Used
Proskit 'T' Bar Screw Driver (Cheers HTC for the heads up on this baby) with T20 Torx Bit
Philips Screwdriver
Medium Flathead Screwdriver
Small Flathead Screwdriver
Small Nose Pliers
Small Screw
Box to support the bumper
Rug to rest the bumper on
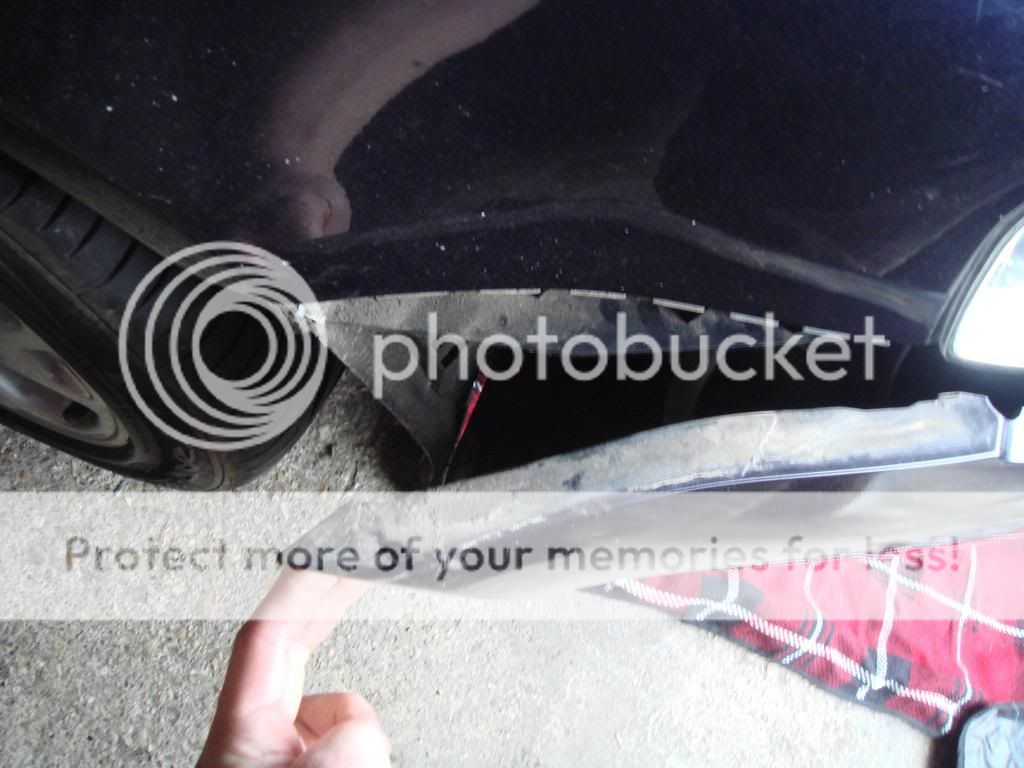
2. Remove 5 x T20 Torx Screws from the wheel liner on both sides; 2 up the side and 3 at the base. The 3 at the base hold on the plastic 'mini mud guard'.
(The T Bar is awesome it is a two way ratchet so easy to use and small enough to mean you don't have to take of the wheel, billy bonus!!)

3. Next remove the two philips screws from underneath the bumper in the square recesses (I've highlighted one, there is another on the other side)


4. On top of the bumper are 4 x Black Plastic Round tabs; these are both lug and fixing. Stage 1 is removing the lug. The lugs are hollow with a small hole at the top the best way is inserting a small screw. This way you can screw into the lug and then pull it out - easy!

5. Stage 2 is then taking out the fixing part. Prise it up slighty using the flathead screwdriver and then use the pliers to pull it out.

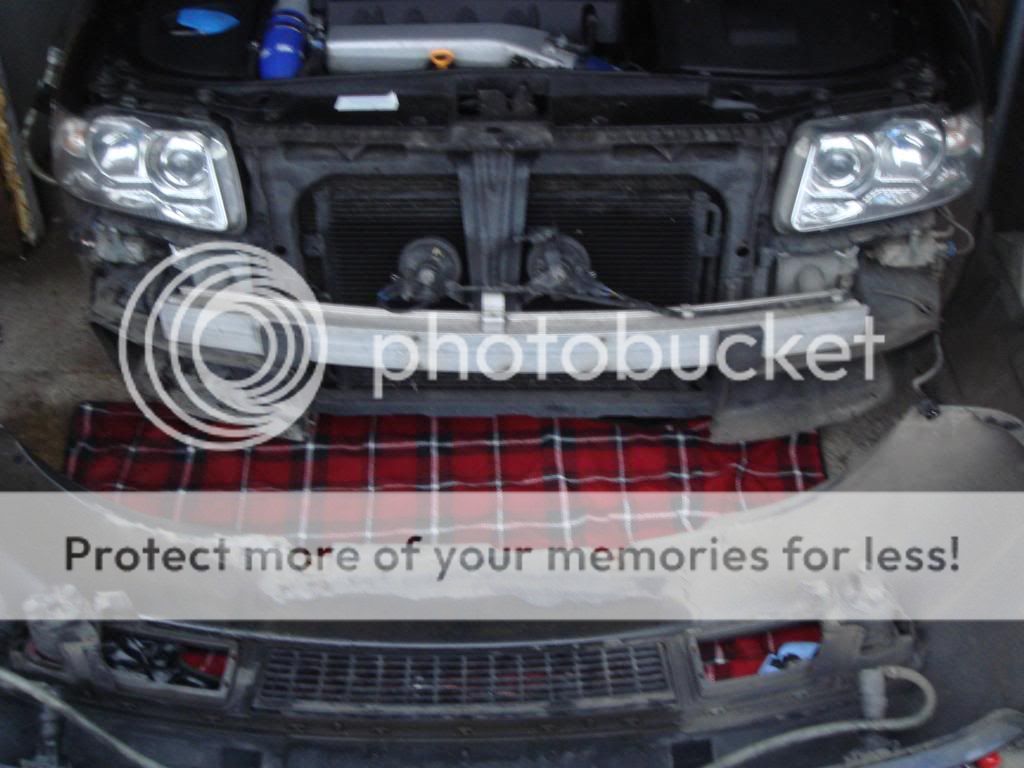
6. The bumper is now ready to be removed. It is very bendy so don't worry about cracking it (just don't wrench it off woth no remorse). Start at the ends and pull it away to the side and then pull forward.
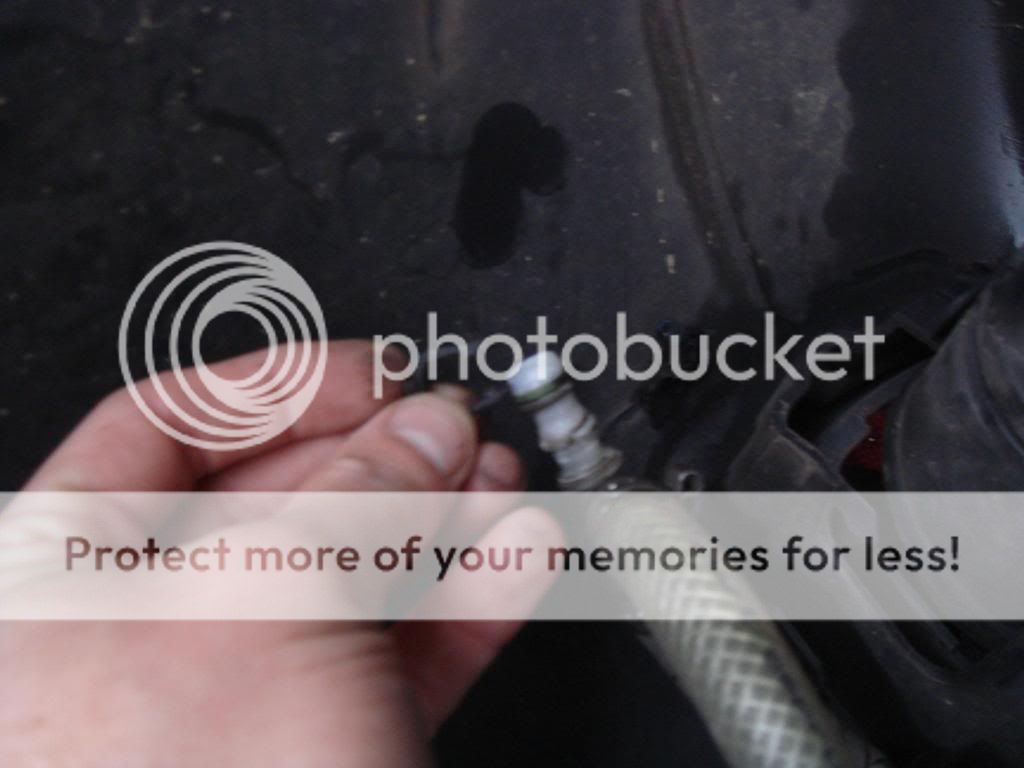
7. Once the bumper has come away you have 3 connections to undo. 2 are for the foglights (on both sides) and 1 is for the headlight washer fluid on the drivers side.
Carefully not to drop the bumper on the floor as you may pull the connections out - rest it on a box or bucket to support it.

8. To disconnect the washer fluid there is a small 'U' shaped black clip that you just need to pull up to free the connecting pipes - bear in mind that washer fluid comes out quick so raise the hose above the car to minimise loss and to stop covering you in fluid.


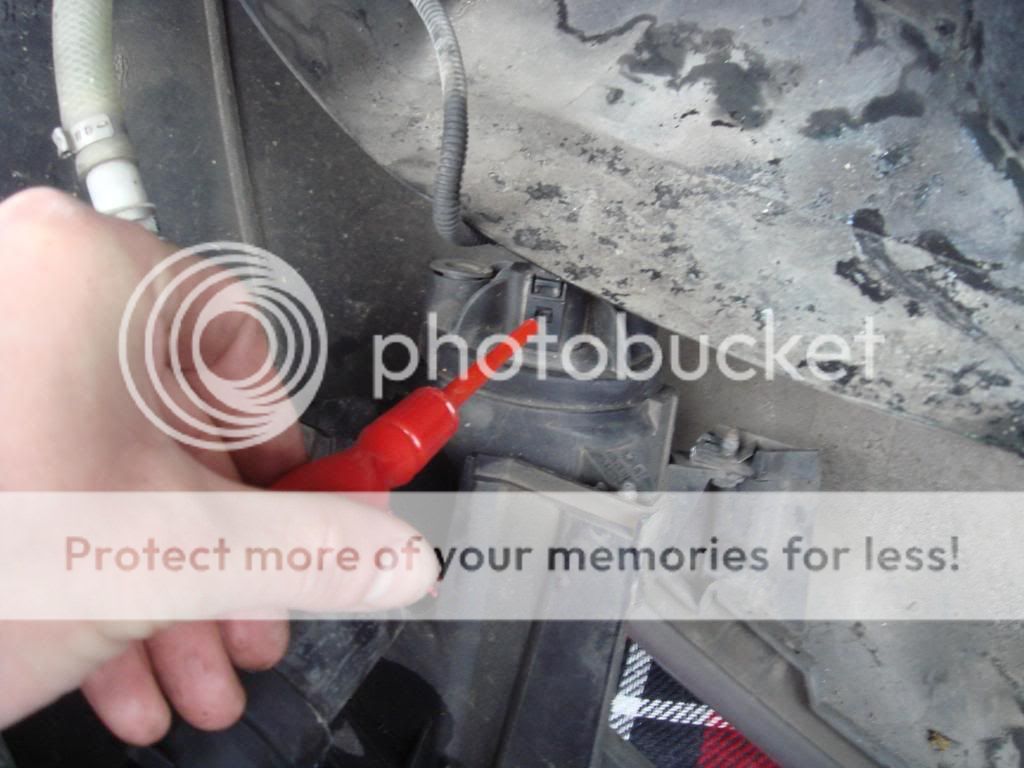
9. Excellent, now using the small screwdriver undo the clip on both the fog lights.
10. Nice work! All done. Rest the bumper on the rug and crack on with what you have to do. In my case it was to remove the drivers headlight to sort my hose and to fix my lower grille.
Well I hope that helps someone.
If anyone wants to add, amend or abuse please do so!
Oh and not trying to steal ruairi's thunder on bumper upgrades - just I had to do it to sort my grille out asap and thought why not take some photos!
Cheers
:icon_thumright:
I never found a guide with photos for removing a bumper from an Audi S3 only ones with writing so I thought I would do one to help out. I am a novice and no mechanic; so please note I take no responsibility for your actions on your own car in using this guide.
1. Tools Used
Proskit 'T' Bar Screw Driver (Cheers HTC for the heads up on this baby) with T20 Torx Bit
Philips Screwdriver
Medium Flathead Screwdriver
Small Flathead Screwdriver
Small Nose Pliers
Small Screw
Box to support the bumper
Rug to rest the bumper on
2. Remove 5 x T20 Torx Screws from the wheel liner on both sides; 2 up the side and 3 at the base. The 3 at the base hold on the plastic 'mini mud guard'.
(The T Bar is awesome it is a two way ratchet so easy to use and small enough to mean you don't have to take of the wheel, billy bonus!!)
3. Next remove the two philips screws from underneath the bumper in the square recesses (I've highlighted one, there is another on the other side)
4. On top of the bumper are 4 x Black Plastic Round tabs; these are both lug and fixing. Stage 1 is removing the lug. The lugs are hollow with a small hole at the top the best way is inserting a small screw. This way you can screw into the lug and then pull it out - easy!
5. Stage 2 is then taking out the fixing part. Prise it up slighty using the flathead screwdriver and then use the pliers to pull it out.
6. The bumper is now ready to be removed. It is very bendy so don't worry about cracking it (just don't wrench it off woth no remorse). Start at the ends and pull it away to the side and then pull forward.
7. Once the bumper has come away you have 3 connections to undo. 2 are for the foglights (on both sides) and 1 is for the headlight washer fluid on the drivers side.
Carefully not to drop the bumper on the floor as you may pull the connections out - rest it on a box or bucket to support it.
8. To disconnect the washer fluid there is a small 'U' shaped black clip that you just need to pull up to free the connecting pipes - bear in mind that washer fluid comes out quick so raise the hose above the car to minimise loss and to stop covering you in fluid.
9. Excellent, now using the small screwdriver undo the clip on both the fog lights.
10. Nice work! All done. Rest the bumper on the rug and crack on with what you have to do. In my case it was to remove the drivers headlight to sort my hose and to fix my lower grille.
Well I hope that helps someone.
If anyone wants to add, amend or abuse please do so!
Oh and not trying to steal ruairi's thunder on bumper upgrades - just I had to do it to sort my grille out asap and thought why not take some photos!
Cheers
:icon_thumright:


