S4 B8/B8.5 Brake cooling DIY

cmdv

Registered User
Joined
Dec 27, 2017
Messages
50
Reaction score
20
Points
8
Location
Yorkshire
I'm in the process of upgrading my brakes to Maccan calipers.

In the process thought why not have a go at doing some work on the cooling as it's clear the B8/B8.5 platform haven't really accommodated for this!

What I'll do is upgrade this post as I get things done. I know others have done it but it's kind of scattered across multiple posts and different forums.

So to kick things off, here are all the part numbers, images and pricing at time of purchase:

(Direct from local Porsche dealer)
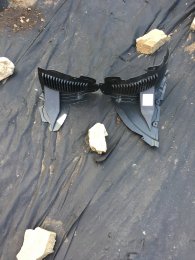
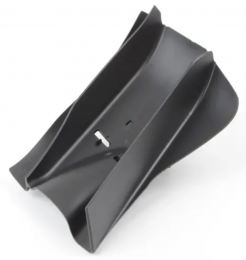
Air Scoops
Screenshot 2020 06 05 at 094809
1 x 95B615447B — Air Baffle Scoop Left -- £5.02
1 x 95B615448B — Air Baffle Scoop Right. -- £5.02


Clamps
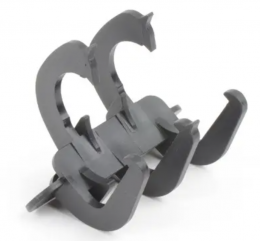
Screenshot 2020 06 05 at 094922

6 x 95B699011B — Track Rod Clamp -- 80p each (I went for 6 incase some broke)


(from parts request on this forum aka creweaudiparts)
Spoilers
Spoilers

8J0807547A / 8J0807548A £9.00 each


Well Vents
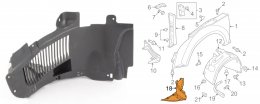
Well vents
8J0821191G / 8J0821192D £28.00 each


TOTAL = £88.84


The other part I haven't added which I think I'll get as the oem fog grills are aren't hollow so wouldn't let more air through but I'm not sure on fitment when comparing with oem?!?
Fog grilles
https://ebay.us/4tnUm2 -- £49.50
 
  • Like
Reactions: desertstorm, joedredd and ld2130
Right here is what I managed to do, still a few finishing touches but it's 90% done.

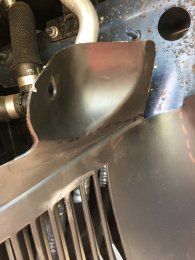
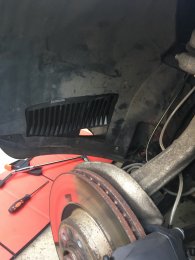
Firstly took out all wheel lining to get some room,I grabbed the well vents to see where they might fit:
IMG 0909

The main problem is the circumference of the well vent doesn't quite match the angle of the oem plastic which sits bellow it.
But I figured if I chopped off excess plastic off the well vent it should fit.

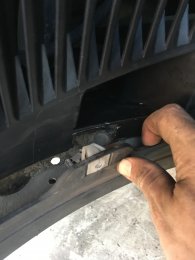
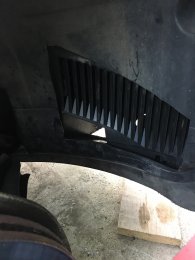
First victim to the trim is this tab which is just pushing against piping (similar on right hand side too).
IMG 0911
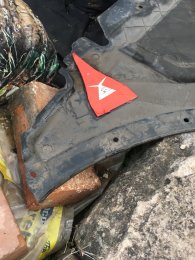
The whole section facing towards the engine in the image bellow wasn't needed as well so chop chop for you.
IMG 0912

Here are some side by side of what was taken off:
IMG 0921 IMG 0922 IMG 0923

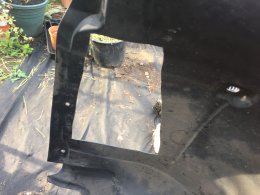
Now I made a template of the bottom of the well as I wanted to keep the original under tray and just cut a hole in it, so it would align with the new well vent, I pushed the template through the well to see where it was going to sit with the new well vent in position
IMG 0924 IMG 0920

Before making cuts I wanted to double check if I could use original skirt piece, as when I tested out the one I bought much like the well vent it's wasn't going to be a straight swap and it was missing the plastic pieces which are used to screw / attached wheel lining.

Needed to check if the well vent got in the way of these clips:

IMG 0926 IMG 0927 IMG 0928
Looks like only the first one would be an issue, so that would require a little more removal!!

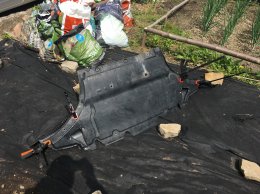
With the vent template in situ, I did a rough outline then removed the whole belly panel (not sure of it's name tbh) and marked them out properly ready for cutting:
IMG 0930 IMG 0929

I then cut out the holes, I used a stanly knife to do this, it's pretty tough plastic so it was more of a stabbing motion to get through it.

Now I had to align the well vents with the new holes in the belly panel, because I left enough plastic around the well vent I was able to use a pop rivet gun to attack in 3 spots. I then mixed up some epoxy resin and used this to aid the joining of the two pieces.

Couple of clamps and result:
IMG 0932

The resin was pretty transparent and didn't quite fill all I wanted so got my self some black "No Nonsense Roof & Gutter Sealant" This would make the dodgy work blend in nicely (not that anyone is looking under your car too often!!) Also put some on the top for good measure!!
IMG 0934 IMG 0935

I let things dry over night (should have probably left it a couple of days but I got impatient!!)

Next I made another template this time wanted to make a cut out of the original wheel liner to allow for the vents. This is how that looked on one side: (the liner is on it's side, so the bottom on the image is on the left)

IMG 0936

Now put the car bar on jacks and take the whole belly pan with newly attached well vents and slid it under the car.
Couple of extra jacks to prop it up near to it's original position, was worried I might not be able to get it all back on as on piece but it was pretty easy.

Once things were close I fitted a screw in dead center of pan and worked getting each side in place and added more screws to the belly pan so that was all fitted and ready to put the newly cut wheel liners back. This part wasn't as bad as I thought and went back on pretty easy, here is the result:

IMG 0937 IMG 0939

I still need to to pull in the side nearest the engine to meet with the liner and probably add another rivet as there is a slight gap there. I'll also add some more sealant if needed. But you can clearly see the well and if I get some hollow fog grills maybe a little more air from there.

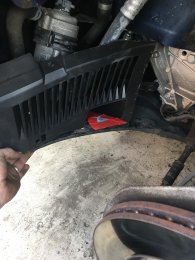
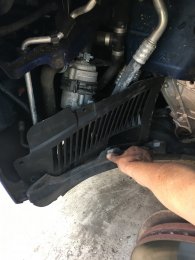
Finally I attached my scoops, these didn't need any cutting they seem to fit straight on. I'm glad I got extra clips as managed to snap one, it's pretty weird getting those clips on!!

it looks like they are face down but remember when you put wheels back on and lower the car they point nicely up towards the brakes:
IMG 0938

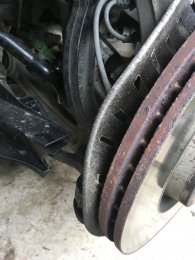
Another bit I'll have to do, is cut away some of the aluminium dust guard that sits behind the brake disc to allow air to actually hit the discs. I'll get more pics up when I've done that!

Well hope this helps anyone who is thinking of doing a bit of plastic butchering. :)
 
  • Like
Reactions: desertstorm, ruairi83, RyanJonS4 and 3 others
Great thread @cmdv, very informative and good quailty pics. I'm considering this going down this route.


How did you find the quality and fitment of the aftermarket foglight grilles? I purchased some from Aliexpress after a lot of thought, as i expected them to be of low quality. Lo and behold, tabs were already broken off before i had even opened up the packages. They did refund immediately, to give them their dues.

Have these ebay set been OK for you?
 
  • Like
Reactions: cmdv
@Super Nintendo Chalmers I haven't bought them as of yet the current mod seems to be doing the trick but I will do in the future.

forgot to come back and report what I did to the brake dust guards, so here they are:IMG 1044IMG 1046

ps: I need to brake disc but need funds first :whip:
 
How did you attach the air scoops to the clips? I've bought the parts but it is not obvious how they connect!