

WhooA3
Registered User
- Joined
- Jul 1, 2016
- Messages
- 10
- Reaction score
- 4
- Points
- 3
Hi,
I’ve just finished installing a semi-dynamic light kit on my Audi s3 8V which I bought from Ash at Audi Retrofits in the UK (@audi_retrofits). These are simply small modules that plug into the back of the existing lights. I was a little unsure how to remove the rear lights, so I thought I would put together an install guide for anyone that is interested. Install time 10-15 mins. Relatively Easy.
Here are the before and after videos
BEFORE
AFTER
![MEDIA]](/xf/proxy.php?image=http%3A%2F%2F%5BMEDIA%3Dyoutube%5DEaqsORgpByw%5B%2FMEDIA%5D&hash=54b687e9388a61b1f1d2fee9b313ab2b)

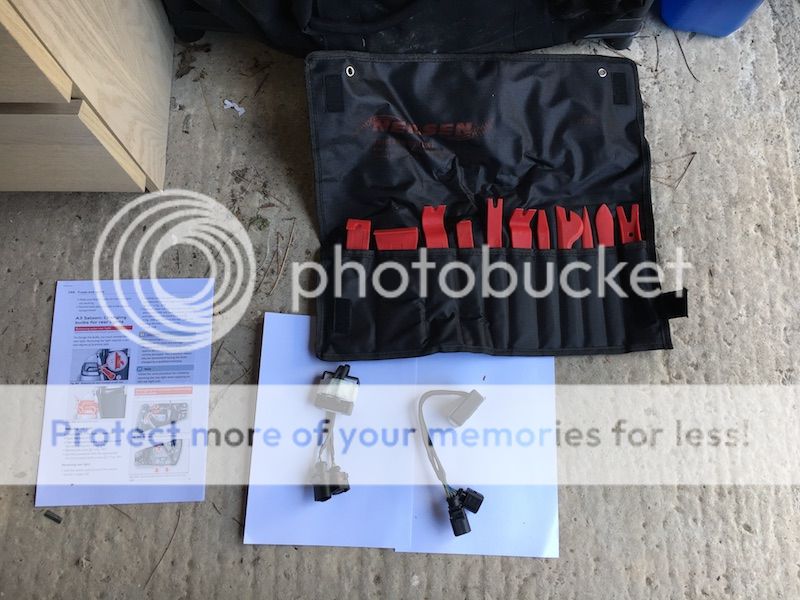
Tools
· Standard Audi Toolkit (located in boot with spare wheel).
· From the above, the Torx screwdriver bit (located in the toolkit bag) and the screwdriver main body.
· A trim removal kit which I bought from Amazon – I recommend getting one of these kits. Note: the owners manual Page 268 says to use the plastic spatula from the standard Audi toolkit, but I found it a bit rubbish to be honest.
· Wide masking tape (to ensure paintwork around light isn’t damaged when removing light unit.

Method
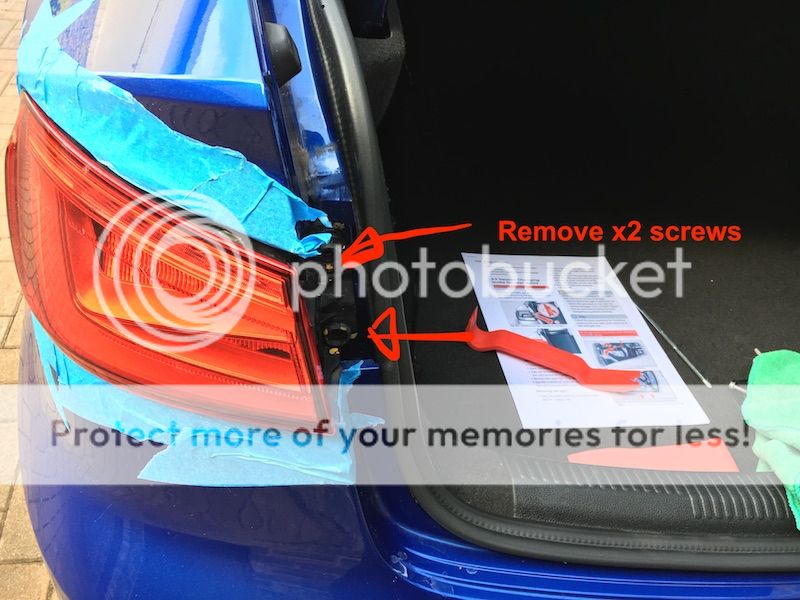
1. Use the masking tape to mask around each light fitting. When masking, slip the masking tape in to the gap between the light unit and the chassis. This will help prevent the paintwork being damaged when removing the light.
2. Remove the light as per the instructions in Audi’s manual Page 268 (link here). In summary:
- Instead of using the spatula in the Audi tool kit, use one of the trim removal tools. This is much more effective and less likely to damage the paintwork.
- Remove the trim covering the screws (adjacent to the boot) using a small trim removal tool.

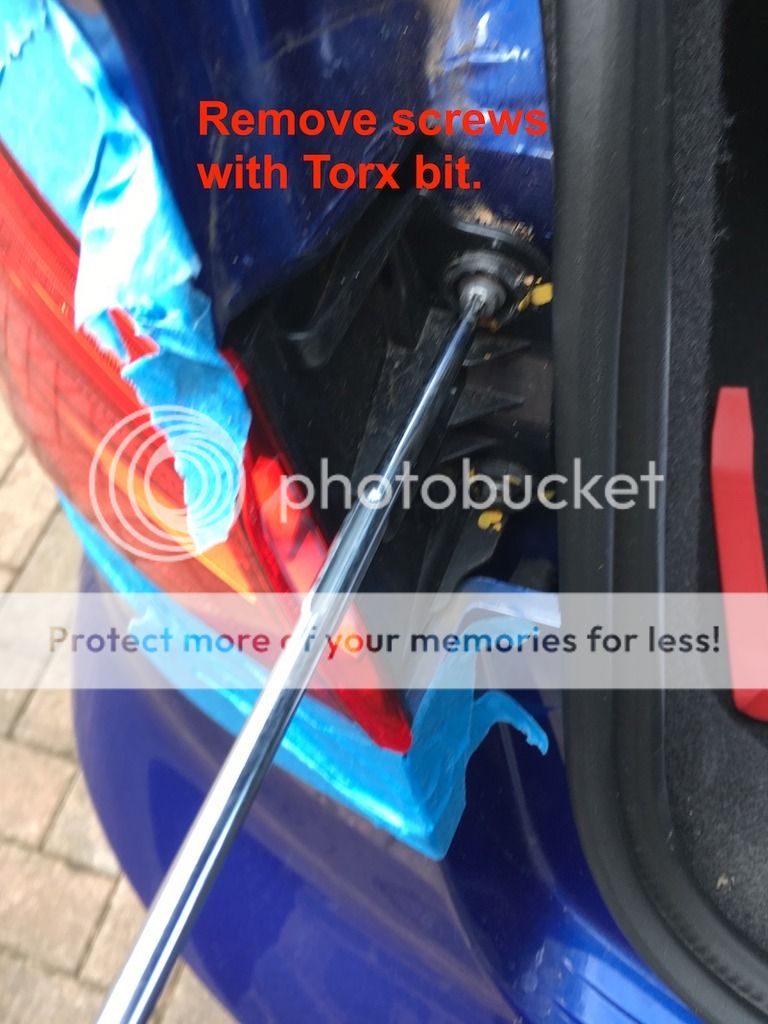
-Remove the two screws on one side of the light fitting (nearest the boot).
- On the other side of the light fitting, use a trip removal tool to pull the unit towards you. Gradually ease out the rear light by pulling alternatively with the trim removal tool in one hand and the side of the light fitting (where the screws were removed) with the other. Eventually the light will pop out.

3. Unplug the light.
4. Plug in the Audi-Retrofits Semi Dynamic Unit. One end into the light itself and the other into the wiring loom.
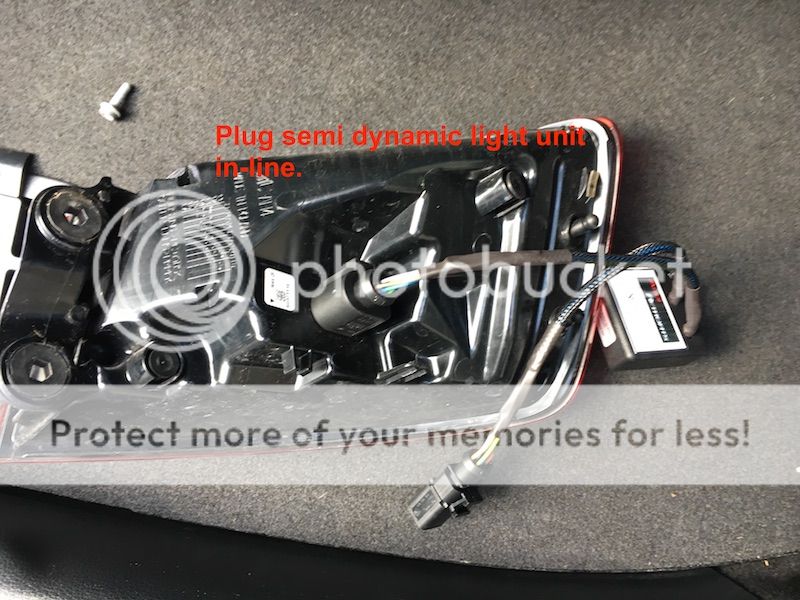
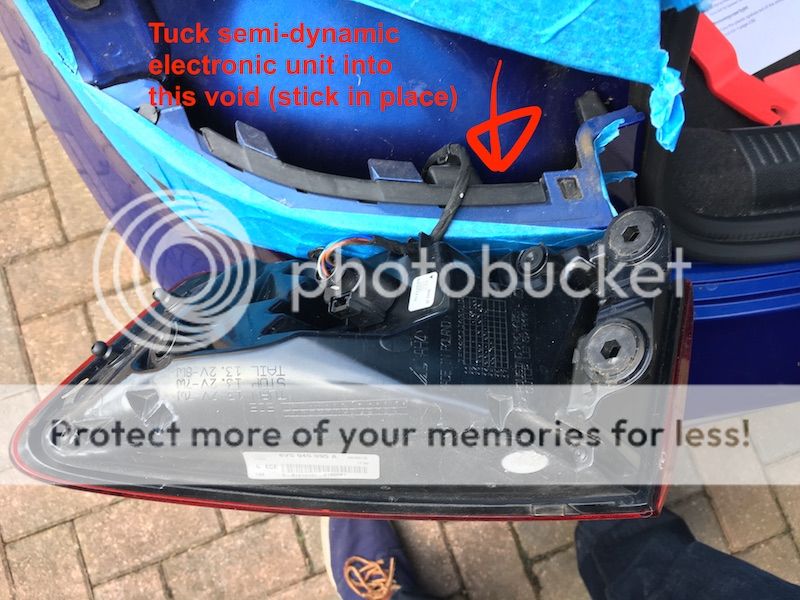
5. Loosely place the light back into the chassis. Test the hazards / indicators to ensure the light is working as required. Tuck the semi-dynamic light unit box into the cavity below the light. Fix in place using the sticky pad.
6. Removing masking tape and then replace the light properly, screwing in place.
7. Repeat process for the other light unit.
I’ve just finished installing a semi-dynamic light kit on my Audi s3 8V which I bought from Ash at Audi Retrofits in the UK (@audi_retrofits). These are simply small modules that plug into the back of the existing lights. I was a little unsure how to remove the rear lights, so I thought I would put together an install guide for anyone that is interested. Install time 10-15 mins. Relatively Easy.
Here are the before and after videos
BEFORE
AFTER
Tools
· Standard Audi Toolkit (located in boot with spare wheel).
· From the above, the Torx screwdriver bit (located in the toolkit bag) and the screwdriver main body.
· A trim removal kit which I bought from Amazon – I recommend getting one of these kits. Note: the owners manual Page 268 says to use the plastic spatula from the standard Audi toolkit, but I found it a bit rubbish to be honest.
· Wide masking tape (to ensure paintwork around light isn’t damaged when removing light unit.
Method
1. Use the masking tape to mask around each light fitting. When masking, slip the masking tape in to the gap between the light unit and the chassis. This will help prevent the paintwork being damaged when removing the light.
2. Remove the light as per the instructions in Audi’s manual Page 268 (link here). In summary:
- Instead of using the spatula in the Audi tool kit, use one of the trim removal tools. This is much more effective and less likely to damage the paintwork.
- Remove the trim covering the screws (adjacent to the boot) using a small trim removal tool.
-Remove the two screws on one side of the light fitting (nearest the boot).
- On the other side of the light fitting, use a trip removal tool to pull the unit towards you. Gradually ease out the rear light by pulling alternatively with the trim removal tool in one hand and the side of the light fitting (where the screws were removed) with the other. Eventually the light will pop out.
3. Unplug the light.
4. Plug in the Audi-Retrofits Semi Dynamic Unit. One end into the light itself and the other into the wiring loom.
5. Loosely place the light back into the chassis. Test the hazards / indicators to ensure the light is working as required. Tuck the semi-dynamic light unit box into the cavity below the light. Fix in place using the sticky pad.
6. Removing masking tape and then replace the light properly, screwing in place.
7. Repeat process for the other light unit.
Last edited:

