What have you done to your A3 (8p) this week

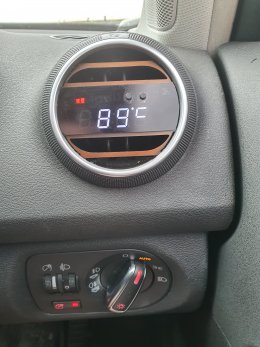
This was a complete retrofit of the OEM webasto heater with remote control. So it's not a readily available kit. I've spent a few weekends gathering information and part numbers. It's a bit of a job, but I really missed the feature from my 8R Q5, so I went ahead and did it.

Webasto has a retrofit option for the A3 8P, but it is not integrated into CAN and uses a different type of Thermo Top heater, so it was not an option for me :p
 
Back box delete at https://fastlanestyling.co.uk/ in Romford, only booked it yesterday and got in for 830 this morning, £150 and had a choice of tips, went with slashcut, sounds nice, not boomy

Exhausting
 
Last edited:
  • Like
Reactions: e9_mustii
Back box delete at https://fastlanestyling.co.uk/ in Romford, only booked it yesterday and got in for 830 this morning, £150 and had a choice of tips, went with slashcut, sounds nice, not boomy

View attachment 250347
Had my bmw done there a few years back if its just a back box you done you should be fine.

Had a full system done in the 118d and the welds where **** lol cracked 3 times in 7 months

Sent from my SM-N976B using Tapatalk
 
Had my bmw done there a few years back if its just a back box you done you should be fine.

Had a full system done in the 118d and the welds where **** lol cracked 3 times in 7 months

Sent from my SM-N976B using Tapatalk
Was just the back box delete, watched the guy like a hawk and was chatting to him, welds seem fine
 
Was just the back box delete, watched the guy like a hawk and was chatting to him, welds seem fine
Yea its a smaller job plus easier then custom cut and weld job mine took much longer so he probs rushed it abit

Sent from my SM-N976B using Tapatalk
 
  • Like
Reactions: dave_beastttt
Finally swapped out my matte grey Le Mans for a set of rotors.

Before:

3ea369bd010750dd38237bd8d54ee75e.jpg


After:

06548fab58e79ef5734ac0239a1d7342.jpg


3be4184b794fb1ed42116520f5e7d22d.jpg


Magride retrofit coming soon….

Sent from my iPhone using Tapatalk
 
  • Like
Reactions: phateuk and MT-V6
Stepper motor for temp broken so replaced it. Figured I’d change the shifter lights to white
59e08231fd28e16e67f965bd91b940d2.jpg

53b9db579b370cd6630f9dc63f1be40f.jpg


Sent from my iPhone using Tapatalk
 
  • Like
Reactions: Davill9 and Troubs12
Stepper motor for temp broken so replaced it. Figured I’d change the shifter lights to white
59e08231fd28e16e67f965bd91b940d2.jpg

53b9db579b370cd6630f9dc63f1be40f.jpg


Sent from my iPhone using Tapatalk

Careful it’s a slippery slope that one next thing you’ll be doing what I did and about 100 or so smd’s later…

27ff57580a6ae15dd2472650e8db49c9.jpg

d98e78fa36796c08cf9432e987f086a5.jpg

95b620482787481fc0981b0bcc5cea9c.jpg


Sent from my iPhone using Tapatalk
 
  • Like
Reactions: Davill9 and GTz
I got caught in the white led trap too!

1959f21cbfc87fbf6e77be39270dd340.jpg
 
  • Like
  • Love
Reactions: Davill9, GTz, tcardio and 1 other person
Can you link me to the leds used please
Sent from my SM-F711B using Tapatalk
 
  • Like
Reactions: Davill9
  • Like
Reactions: JayA3sline
Changed out my seats , so deep hoovering needed
10112e74e60b143151606ee2a080a40f.jpg
653534dfcd625f6ee02abf96fe746ae7.jpg
b9572bb3c6a365a7a476e856e7637a09.jpg
6446d972df13d344d877f0f13f881fe9.jpg


Sent from my SM-G970F using Tapatalk
 
  • Like
Reactions: Troubs12
Changed out my seats , so deep hoovering needed
10112e74e60b143151606ee2a080a40f.jpg
653534dfcd625f6ee02abf96fe746ae7.jpg
b9572bb3c6a365a7a476e856e7637a09.jpg
6446d972df13d344d877f0f13f881fe9.jpg


Sent from my SM-G970F using Tapatalk

Nice bud this is gonna sound a little odd but would you mind sending me a few pics of your B pillar stickers so I can grab the part numbers. My tyre pressure one is in my fuel flap went ages ago and I won’t to update the car abit by putting the new stickers in the newer locations.


Sent from my iPhone using Tapatalk
 
New toy
 

Attachments

  • 20220503_182857.jpg
    20220503_182857.jpg
    2.1 MB · Views: 121
  • Like
Reactions: Davill9, tcardio and ch1z64
Nice bud this is gonna sound a little odd but would you mind sending me a few pics of your B pillar stickers so I can grab the part numbers. My tyre pressure one is in my fuel flap went ages ago and I won’t to update the car abit by putting the new stickers in the newer locations.


Sent from my iPhone using Tapatalk
Can easily do that for u mate

Sent from my SM-G970F using Tapatalk
 
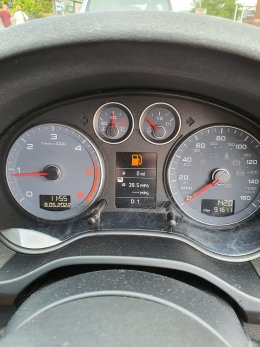
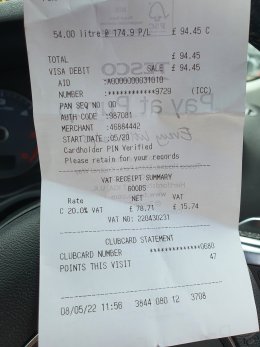
I played the fuel lottery game lol
55l tank
 

Attachments

  • 2022-05-08 11.53.36.jpg
    2022-05-08 11.53.36.jpg
    1.8 MB · Views: 131
  • 2022-05-08 12.03.12.jpg
    2022-05-08 12.03.12.jpg
    1.3 MB · Views: 133
If I lived near you, I’d do it for free. That screen just makes my OCD go Rainman


Sent from my iPhone using Tapatalk
 
  • Like
Reactions: Davill9 and LEE69
Sold it. It was just sat on the drive most of the time. Put some fuel in it yesterday and the filter started leaking. Had corroded underneath the lamp and had a pin ***** hole. Sad to see it go but it needs to be used.
 
Just sold these today .was sad to see them go but had to be done so i can reduce price when selling my S3 on .
eea0397331ca6421e7a58ef7182e22d7.jpg
453cc480c8789f1e252e4bfb5f4b7e38.jpg


Sent from my SM-G970F using Tapatalk
 
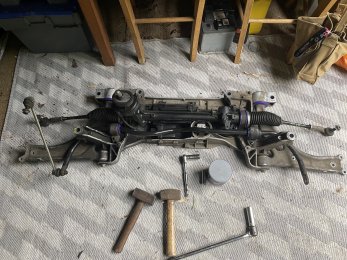
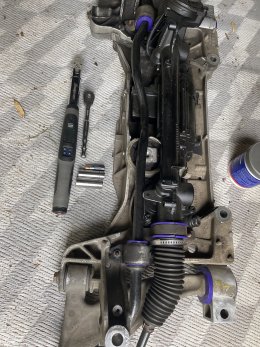
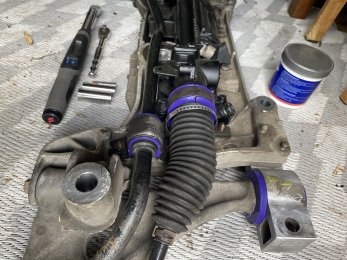
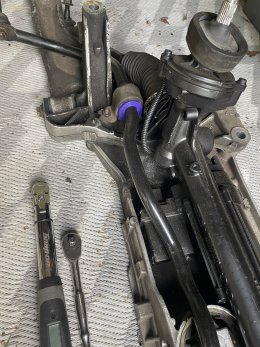
A small job for the weekend on the grass…

new subframe bushes
New arb bushes
New steering rack
New droplinks
New lower ball joints
New tie rods
New tie rod ends
New lower arm console bushes
New lower arm bushes
New steering rack
New steering rack bush
New front springs
New front top mounts & bearings
All genuine or powerflex apart from rack.

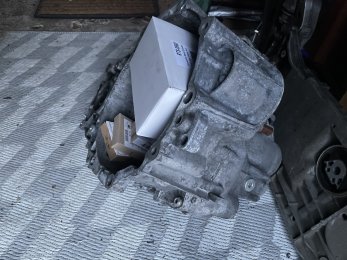
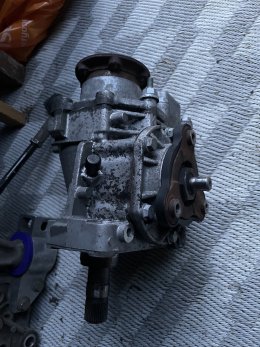
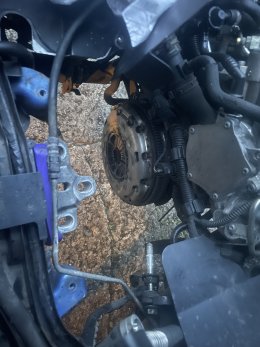
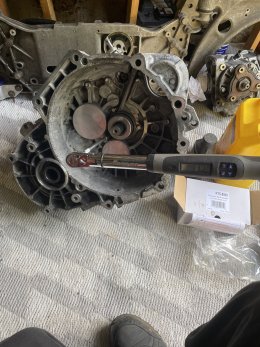
now that’s done I took transfer box off and 6 speed off to re seal and do input shaft bearings
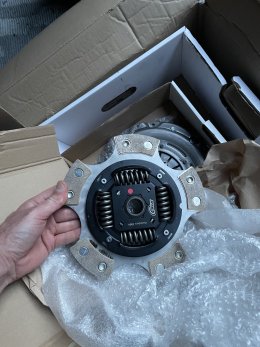
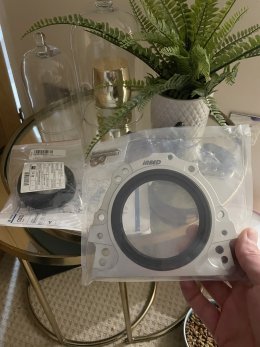
And while there I will do iabed rear main seal and rts full smf paddle conversion.

the questions will be coming soon on torque specs…
Subframe is now complete - onto the rest in the morning without any manual

not bad 5 1/2 hrs to remove the lot on grass and re assembly of subframe !
Gearbox and transfer is being dropped back to me from a local tractor repair place (hot parts cleaning machine) so will not be covered in oil in a bit

and yes lol I have now done the rack gater bands also
 

Attachments

  • F25CCAF1-910A-4E08-A76E-74AADE99E81C.jpeg
    F25CCAF1-910A-4E08-A76E-74AADE99E81C.jpeg
    5.9 MB · Views: 110
  • F8A9ACE1-4406-41B5-B33A-E330841B1684.jpeg
    F8A9ACE1-4406-41B5-B33A-E330841B1684.jpeg
    2.7 MB · Views: 108
  • 971B5EE3-B2F9-4CD6-80BF-CFE32C7907E7.jpeg
    971B5EE3-B2F9-4CD6-80BF-CFE32C7907E7.jpeg
    2 MB · Views: 100
  • FC35DDFA-B1D0-4F73-887C-A173868ACD5F.jpeg
    FC35DDFA-B1D0-4F73-887C-A173868ACD5F.jpeg
    2.7 MB · Views: 90
  • Like
Reactions: e9_mustii
Careful it’s a slippery slope that one next thing you’ll be doing what I did and about 100 or so smd’s later…

27ff57580a6ae15dd2472650e8db49c9.jpg

d98e78fa36796c08cf9432e987f086a5.jpg

95b620482787481fc0981b0bcc5cea9c.jpg


Sent from my iPhone using Tapatalk
How do you do this… I have o8 s3 with red interior lights everywhere and would love white like newer facelift

is there a how to on here ?
 
How do you do this… I have o8 s3 with red interior lights everywhere and would love white like newer facelift

is there a how to on here ?

No really buddy I’m pretty good with a soldering iron so I just ordered the smd’s and stripped the units and switches down changed them.

The dash needles I had to rub down and paint white on the bottom as after swapping the smd’s over they lit up pink lol

Sent from my iPhone using Tapatalk
 
  • Like
Reactions: vdt and Davill9
No really buddy I’m pretty good with a soldering iron so I just ordered the smd’s and stripped the units and switches down changed them.

The dash needles I had to rub down and paint white on the bottom as after swapping the smd’s over they lit up pink lol

Sent from my iPhone using Tapatalk
Fair play I will give it a go once I get the whole front end and transmission back on.
I guess it’s a case of starting with one and just cracking on with the rest once you see the difference the first makes

not great with electrics but always willing to try !
 
Fair play I will give it a go once I get the whole front end and transmission back on.
I guess it’s a case of starting with one and just cracking on with the rest once you see the difference the first makes

not great with electrics but always willing to try !

It’s mainly making sure you get them the right way round really else they won’t light up. Pm me if you like and I can go over it abit more don’t want to big down this thread too much


Sent from my iPhone using Tapatalk
 
  • Like
Reactions: Davill9
A small job for the weekend on the grass…

new subframe bushes
New arb bushes
New steering rack
New droplinks
New lower ball joints
New tie rods
New tie rod ends
New lower arm console bushes
New lower arm bushes
New steering rack
New steering rack bush
New front springs
New front top mounts & bearings
All genuine or powerflex apart from rack.

now that’s done I took transfer box off and 6 speed off to re seal and do input shaft bearings
And while there I will do iabed rear main seal and rts full smf paddle conversion.

the questions will be coming soon on torque specs…
Subframe is now complete - onto the rest in the morning without any manual

not bad 5 1/2 hrs to remove the lot on grass and re assembly of subframe !
Gearbox and transfer is being dropped back to me from a local tractor repair place (hot parts cleaning machine) so will not be covered in oil in a bit

and yes lol I have now done the rack gater bands also
Now the suspension and subframe is all done… onto the gearbox and transfer box refurb and re seal
 

Attachments

  • 4E68C57C-1EB9-45DB-8A29-1D543DAC4EF3.jpeg
    4E68C57C-1EB9-45DB-8A29-1D543DAC4EF3.jpeg
    2.1 MB · Views: 84
  • ADE8ACDD-7CD0-4C56-B951-70AFD7B4ACBC.jpeg
    ADE8ACDD-7CD0-4C56-B951-70AFD7B4ACBC.jpeg
    2 MB · Views: 88
Last edited:
That's an epic amount of work! What has triggered you to do all of that? It will feel like a new car once you are done
 
That's an epic amount of work! What has triggered you to do all of that? It will feel like a new car once you are done
Well the engine was a replacement from a rear ended car on 62k but the car itself is on 130k and I never changed anything else at the time (no money left) but always had intended to do at some point so when the rack went, I just happened to have a spare car to use so just went for it

not often I have spare time with a spare car
I guess I figured while that is off I might as well take that off and so on till I ended up with engine on brace bar and stopping at uprated rear main seal

all good fun apart from being rained off all day today

I guess mate, I love the 08 s3 but was a nightmare to try and find a decent one in manual, sprint blue, black edition and hatchback with bhz engine with low mileage so slowly making it as close to buying a new car as I can
 
  • Like
Reactions: MT-V6 and Troubs12
Strong work on that whip seriously. I hope it all works out for you. In terms of the leds, it’s really easy. Just get an adjustable iron and only use around 350c. LEDs are cheap so order a bunch. I would also purchase green and blue to mix it up. I love all the above pics but I felt blue on hvac for minus temp and blue for ac was reasonable. I used green for mode and speech but to each their own. Soldering is zen. Once you get started, time disappears and before you know it 100 smds goes by. Have a fan and ventilation. Purchase solder wick and flux pen and practice first. Take a picture of circuit board prior to conversion. LEDs have polarity so match the notch accordingly. Iron in,solder in,solder out, iron out


Sent from my iPhone using Tapatalk
 
Whacked a new turbo and Sachs DMF/Clutch in :welcoming:

View attachment 254422View attachment 254423

nice mate
Just doing the same myself but went for the rts paddle and smf conversion kit, and as car is going to Rick soon again, thought I’d chuck an uprated turbo & rear main seal in there… was literally about to post pics and see you are doing same jobs too.

off with the old and on with the new ay
 

Attachments

  • EC287A3E-DE74-4227-8877-C6169D14D6FA.jpeg
    EC287A3E-DE74-4227-8877-C6169D14D6FA.jpeg
    1.7 MB · Views: 75
  • 82E4F830-5A70-4479-8682-F3F10F9E5CC9.jpeg
    82E4F830-5A70-4479-8682-F3F10F9E5CC9.jpeg
    1.7 MB · Views: 90
  • 01869DF7-2A26-41B8-B054-BF4CB69B6EF6.jpeg
    01869DF7-2A26-41B8-B054-BF4CB69B6EF6.jpeg
    1.6 MB · Views: 78
  • C3F02A5A-7280-41E0-AF97-955D947D8119.jpeg
    C3F02A5A-7280-41E0-AF97-955D947D8119.jpeg
    2.4 MB · Views: 82
Last edited:
  • Like
Reactions: green8p