After reading every thread on the subject and a few PMs to people who'd already bought one I decided on a Forge CAI about 3 weeks ago. It came yesterday, fitted it this morning, have driven it round this afternoon. It is, in my opinion, an absolutely essential item to have on your S3. Here's the full write up for those interested:
1. Buying
2. Fitting
3. Results / Conclusion
1. Buying
The price from Forge themselves was £241. Damian at DPM offered me a good discount on this (I won't quote it here but contact him if you decide on this route) but I found a brand new unopened one on eBay for £120 without looking too hard. With £15 p&p it was delivered a couple of days later in perfect, unopened condition. The seller I bought from was Barry 3-2-1 but there were a couple on eBay at similar prices.
2. Fitting
Tools needed: Torx 20 screwdriver (£4 B&Q), 24mm deep 12 point socket (£5 B&Q), jack stands, wrench. The instructions from Forge are cack - they are for a LHD Golf MkV which doesn't have all the same parts as the S3. Here's how I did it:
i) Unclip the spring clamp from the original intake and the 2 Torx screws
on the front edge:
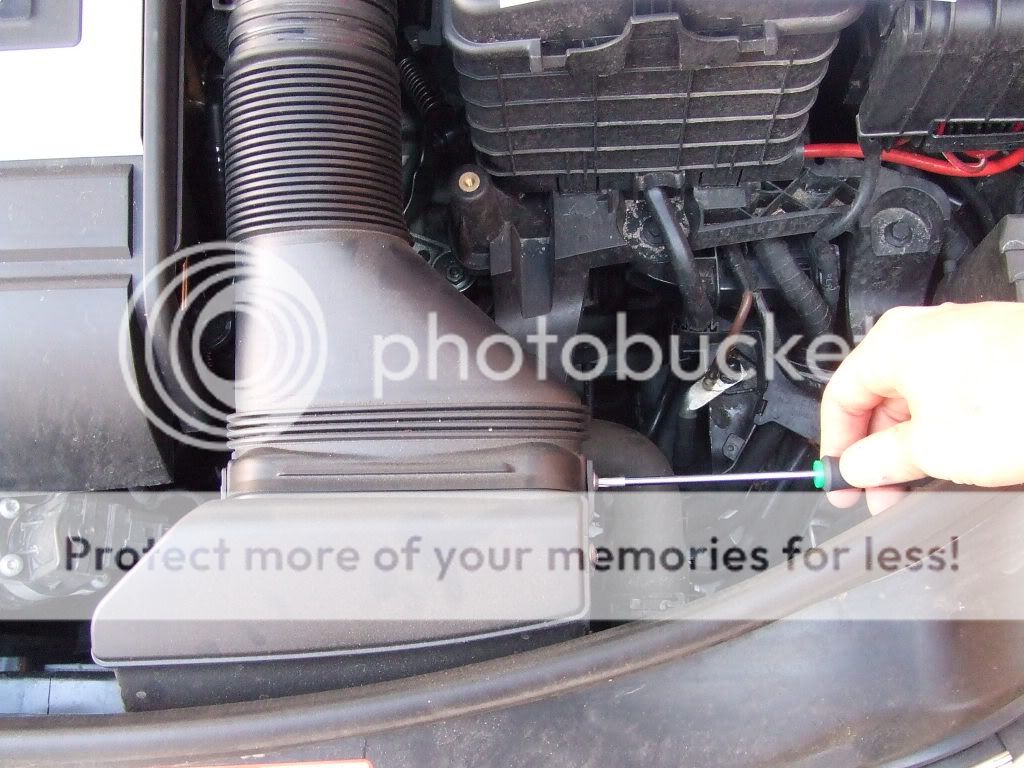
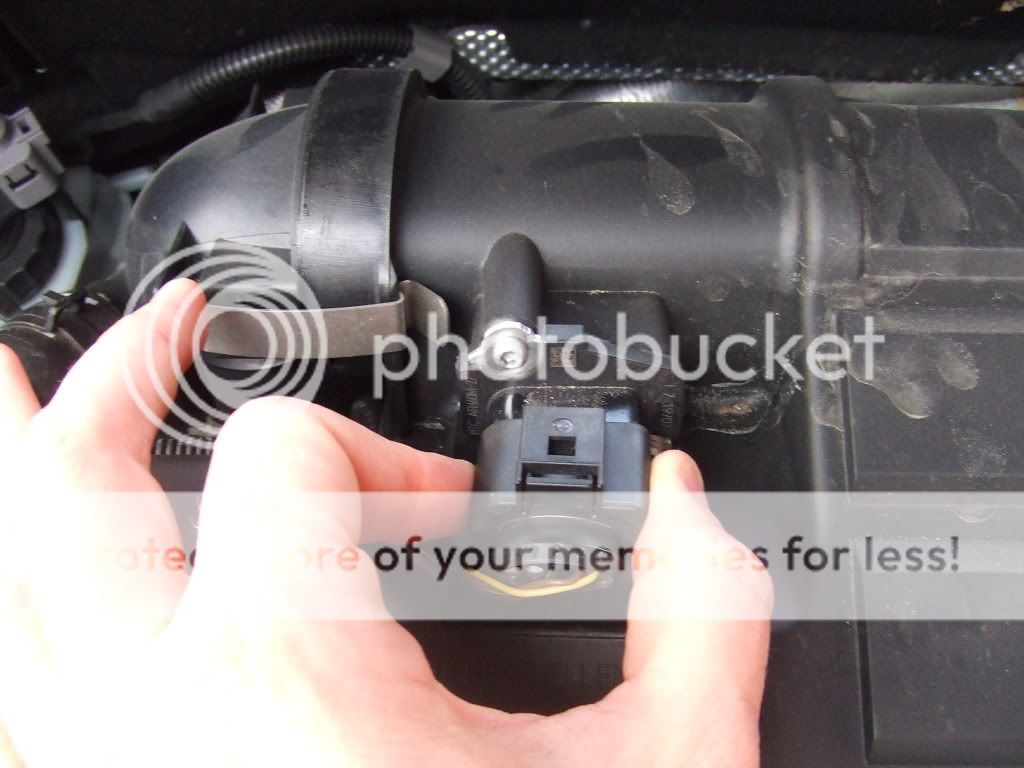
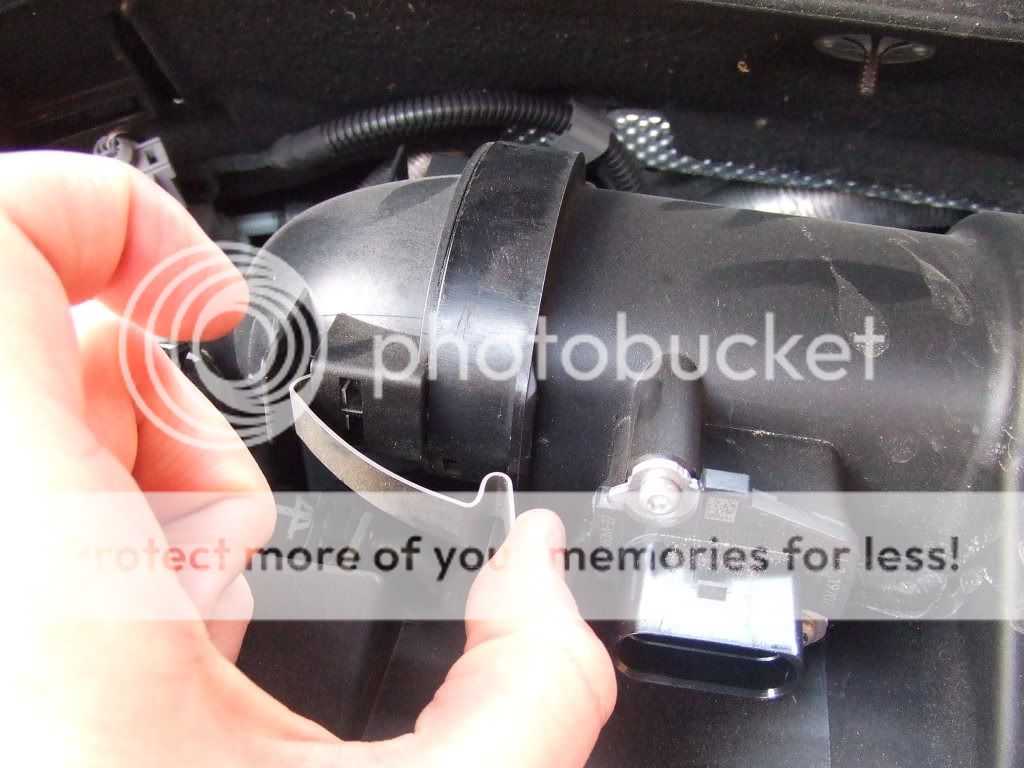
ii) Then unclip the MAF sensor with a flathead screwdriver and undo the clips on the turbo inlet pipe:
iii) This step is not in the instructions because the S3 has a DV valve located in a different place from the Golf which they are based on. Unclamp the DV hose and keep the spring clamp safe:

iv) Then remove the engine cover. YOU MUST RUN THE ENGINE UNTIL ITS HOT before you attempt this ******. I found the front left corner came away the easiest, then the front right and then the back edge was a doddle. Getting the first one loose is not easy but its like opening a jam jar: it comes loose all in one go just as you think your head will explode.
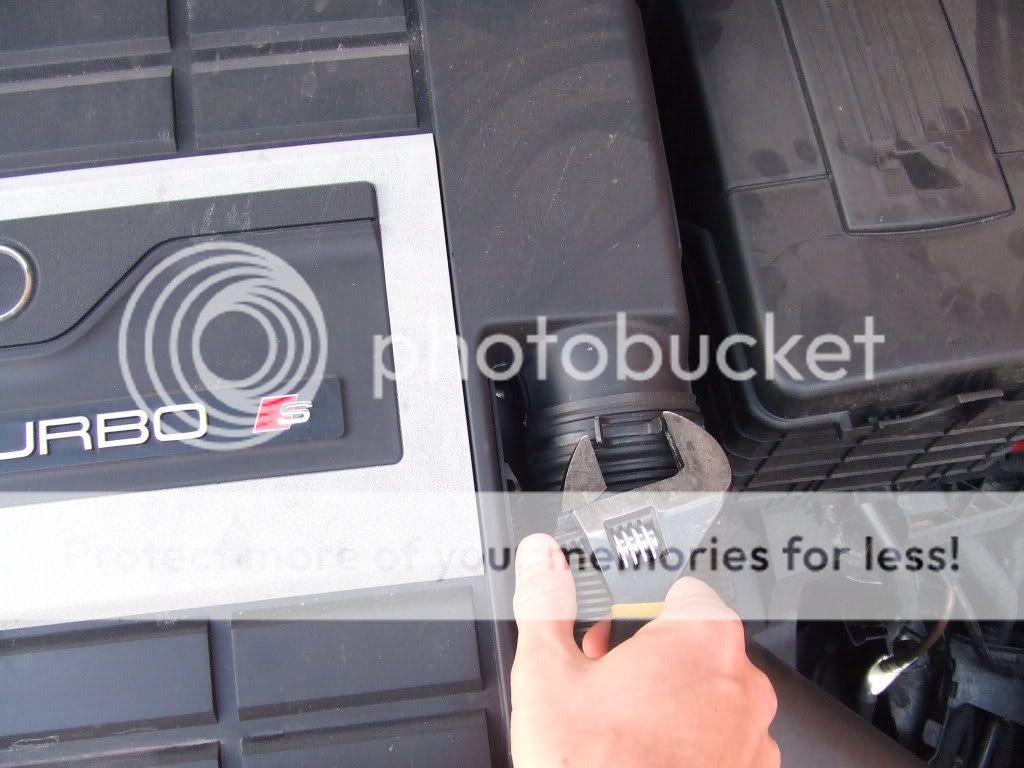
v) This is the worst bit. Turning yourself into Harry Houdini for a few minutes, you have to get your pliers/wrench down to the other end of the plastic turbo inlet pipe which will now be swinging free after you unclamped it earlier in step ii). Here a picture (bit shaky as I was swearing loudly at this point). Took me about 20 mins to finally get it off - its just tricky to get your fingers down there !
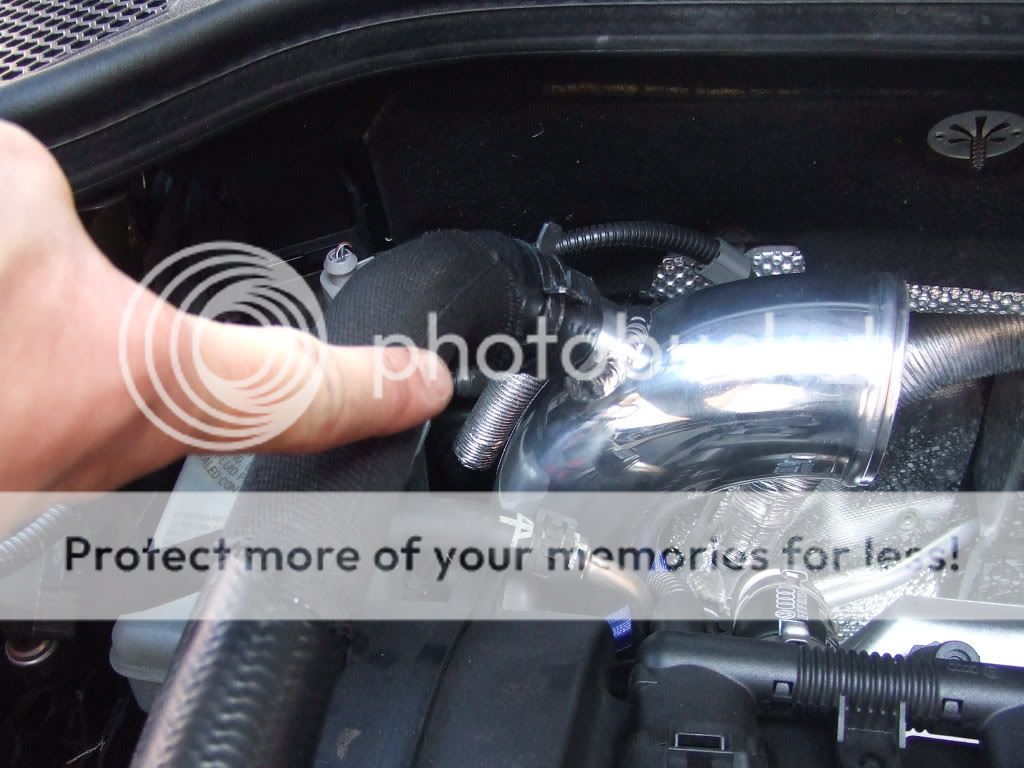
vi) This bit is also not in the instructions. Fit the pipe plus 2 silicone connector pipes to the turbo inlet as follows:
vii) Then fit the heatshield - you'll need to undo the existing plastic engine mounts using the 24mm socket, put the heatshield down and then put the engine mounts back to pin it in place. Dead easy.
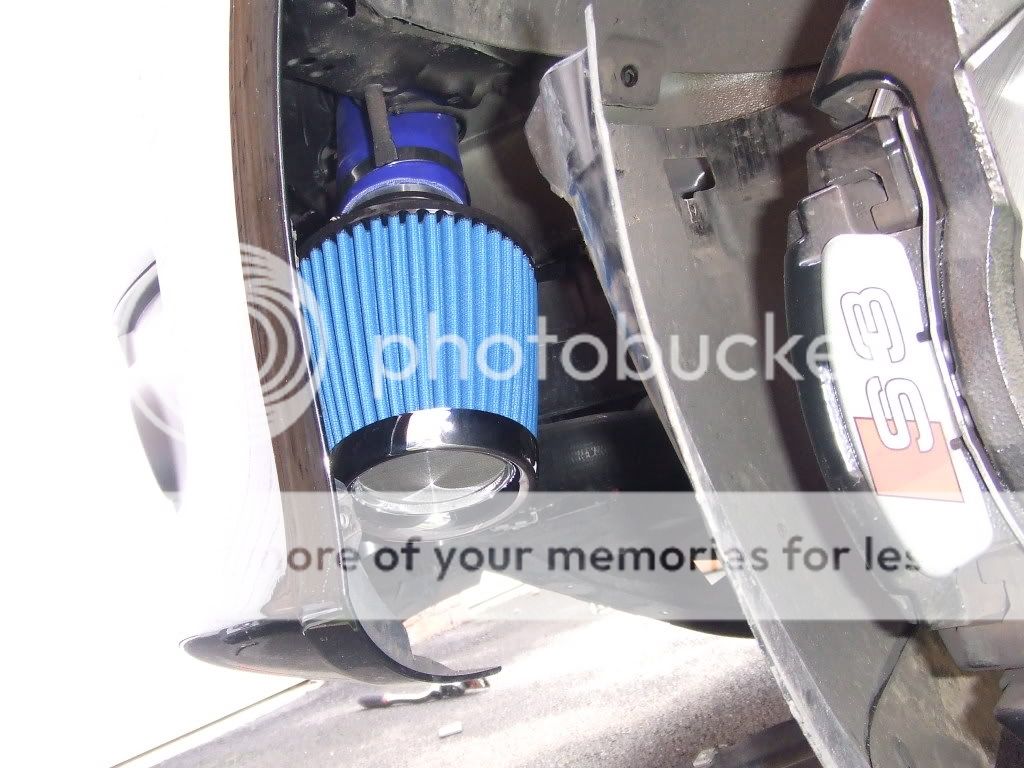
viii) Then jack the car up and take off passenger side front wheel. Then use a Torx 20 to undo all the screws from the wheel liner and four more underneath. This is the fun bit. Connect the cone filter to the crooked silicone tube (with jubilee clips) and with one hand feed the cone up through the wheel arch and into the engine bay leaving the silicone pipe resting just next to the DRL bulb changing unit. You need one hand underneath the car and one hand in the engine bay - help if you're an octopus with long arms or if you can get someone to help you at this point.
ix) Then you can fix the main pipe to the turbo inlet pipe (step vi) and the engine mountings using the Allen bolt provided.
x) Finally connect the silicone pipe coming from underneath the car to the main pipe which is heading down towards the DRL unit. I had to use a bit of lube at this point to get the silicone pipe onto the main pipe - don't forget you are still mounting the car at this point with one arm underneath and one arm over the top. Not easy but lube made it much easier. Obviously don't get any lube on the INSIDE of anything !! Tighten all jubilee clips. Done. Have big beer.
3. Results / Conclusions
NOISE: Its not as noisy as I thought - certainly not as burbly or "wah wah wah" as the old K&N cone filter on my Corrado. But there is a great whooshing sound as the air comes in and lots of hisses and hushes on the overrun. Its subtle though. PERFORMANCE - well: I could not have been more shocked. It almost feels like its been mapped again. Rabbit222 has posted a thread showing a "with/without" dyno readout which shows the Forge CAI gives serious extra power: I can back that up fully. You will feel the difference in the first drive and I'm guessing as the ECU gets used to all that extra air there might be more to come. My old K&N was a purely cosmetic mod offering great sound - make no mistake this is a performance mod.
Overall - for £120 this must be the best value mod you could get. Even if you don't find one on eBay it is worth the £240 EASILY. Do not delay. And if you're worried about fitting - I have the mechanical skills of a goat and managed the whole thing in 2 hours.
1. Buying
2. Fitting
3. Results / Conclusion
1. Buying
The price from Forge themselves was £241. Damian at DPM offered me a good discount on this (I won't quote it here but contact him if you decide on this route) but I found a brand new unopened one on eBay for £120 without looking too hard. With £15 p&p it was delivered a couple of days later in perfect, unopened condition. The seller I bought from was Barry 3-2-1 but there were a couple on eBay at similar prices.
2. Fitting
Tools needed: Torx 20 screwdriver (£4 B&Q), 24mm deep 12 point socket (£5 B&Q), jack stands, wrench. The instructions from Forge are cack - they are for a LHD Golf MkV which doesn't have all the same parts as the S3. Here's how I did it:
i) Unclip the spring clamp from the original intake and the 2 Torx screws
on the front edge:
ii) Then unclip the MAF sensor with a flathead screwdriver and undo the clips on the turbo inlet pipe:
iii) This step is not in the instructions because the S3 has a DV valve located in a different place from the Golf which they are based on. Unclamp the DV hose and keep the spring clamp safe:
iv) Then remove the engine cover. YOU MUST RUN THE ENGINE UNTIL ITS HOT before you attempt this ******. I found the front left corner came away the easiest, then the front right and then the back edge was a doddle. Getting the first one loose is not easy but its like opening a jam jar: it comes loose all in one go just as you think your head will explode.
v) This is the worst bit. Turning yourself into Harry Houdini for a few minutes, you have to get your pliers/wrench down to the other end of the plastic turbo inlet pipe which will now be swinging free after you unclamped it earlier in step ii). Here a picture (bit shaky as I was swearing loudly at this point). Took me about 20 mins to finally get it off - its just tricky to get your fingers down there !
vi) This bit is also not in the instructions. Fit the pipe plus 2 silicone connector pipes to the turbo inlet as follows:
vii) Then fit the heatshield - you'll need to undo the existing plastic engine mounts using the 24mm socket, put the heatshield down and then put the engine mounts back to pin it in place. Dead easy.
viii) Then jack the car up and take off passenger side front wheel. Then use a Torx 20 to undo all the screws from the wheel liner and four more underneath. This is the fun bit. Connect the cone filter to the crooked silicone tube (with jubilee clips) and with one hand feed the cone up through the wheel arch and into the engine bay leaving the silicone pipe resting just next to the DRL bulb changing unit. You need one hand underneath the car and one hand in the engine bay - help if you're an octopus with long arms or if you can get someone to help you at this point.
ix) Then you can fix the main pipe to the turbo inlet pipe (step vi) and the engine mountings using the Allen bolt provided.
x) Finally connect the silicone pipe coming from underneath the car to the main pipe which is heading down towards the DRL unit. I had to use a bit of lube at this point to get the silicone pipe onto the main pipe - don't forget you are still mounting the car at this point with one arm underneath and one arm over the top. Not easy but lube made it much easier. Obviously don't get any lube on the INSIDE of anything !! Tighten all jubilee clips. Done. Have big beer.
3. Results / Conclusions
NOISE: Its not as noisy as I thought - certainly not as burbly or "wah wah wah" as the old K&N cone filter on my Corrado. But there is a great whooshing sound as the air comes in and lots of hisses and hushes on the overrun. Its subtle though. PERFORMANCE - well: I could not have been more shocked. It almost feels like its been mapped again. Rabbit222 has posted a thread showing a "with/without" dyno readout which shows the Forge CAI gives serious extra power: I can back that up fully. You will feel the difference in the first drive and I'm guessing as the ECU gets used to all that extra air there might be more to come. My old K&N was a purely cosmetic mod offering great sound - make no mistake this is a performance mod.
Overall - for £120 this must be the best value mod you could get. Even if you don't find one on eBay it is worth the £240 EASILY. Do not delay. And if you're worried about fitting - I have the mechanical skills of a goat and managed the whole thing in 2 hours.

")

 . I'll be fitting that today to stop the metal on metal rattle from the heatshield.