Just done this modification, i spent a while searching the forum in regards to what kit to get etc. Quite alot of it was outdated, so as of 2010 this is the score with B6 Hid kits.
Shopping for a kit
This is a minefield, every man and his dog is selling kits. Alot claim to have special "a4" kits or "canbus kits we have had specifically designed". Its all rubbish! There are only a handful of manufacturers for these kits and it all comes from china, there are some that have slightly better quality ballasts than others but the people charging £100 plus are just making more profit. The variation in cost to them between the cheap and the expensive ones is £5 max.
What you want for the A4 is a H7 kit, in the kit you get 2x bulbs, and 2x ballasts. Some come with an optional relay kit, you don't need this on the A4. You do on the A3.
Ok first off - the standard style kit
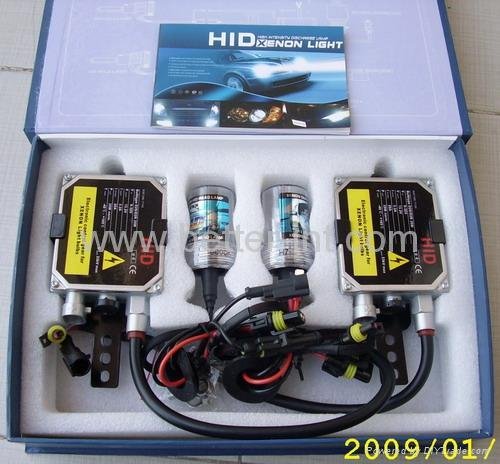
This is the basic kit.
Will it bring up the bulb error : yes
Does it fit well : It can.. but the ballast is large, if you intend to use the area under the headlight its not ideal.
Slimline ballasts

This is usually a few quid dearer, it comes with a slimline ballast, but as a result you end up with the igniter in a separate box. So volume wise its not any smaller really
Will it bring up a bulb error: yes
Does it fit well : yes, these fit neatly under the headlamp and you can put the igniter inside the lamp itself.
Ok, so now we get in to the "can bus" ones. The theory behind the system is the cars ecu sends a weak voltage down the bulb to check for resistance of the bulb element. Since its a HID ballast plugged in it flags up an error.
Older style Canbus kits
Now alot of companies are selling "specially developed can bus kits". Which are one of the above kits but with this thrown in the box:

They come in a few different designs but the basics are that they have 2 wires in and 2 wires out, and go in between the H7 connector and the ballast itself. They put a load onto the circuit which fools the ecu into thinking the bulb is connected ok. They go under the name of canbus cancelers or sometimes load resistors.
Do they bring up a bulb error: no!
Do they fit well: Same as above really, but you will struggle to get the canceler and the igniter in the box.
The latest style of hid kit, and in my opinion the one to go for. Is the genuine canbus kits with the slimline ballast.
This is not just a kit with the optional canceler thrown in, the canceler is built in and as a result theres less connectors and the canceler box is alot smaller. Giving you the best chance of a neat install

I got mine from a company called lightec-autostyle. They sell the exact kit above, I got a prototype unit but they are awaiting stock of new kit. Just contact them if you want them to let you know when its arrived. Im not sure how much they will be, i think its gonna be about 10-15 dearer than their existing kits though. They also have a thicker than average metal case on them - so less EM radiation and chance of it bringing up an ABS fault
http://lightec-autostyle.co.uk/
Color rating (6000k etc)

The number rating stands for how hot the bulb runs in kelvin.
The hotter the rating of bulb (higher number) the more if shifts up the spectrum to blues and then purple. As a result you also get LESS visible light with a higher number
OEM is 4300k ish, most people go for 6000k which provides a nice white/blue tone.
Fitting
First job is to remove the headlights, easy job really.
Here is a picture guide posted by another member: http://www.audi-sport.net/vb/showthread.php?t=101033&p=1033950#post1033950
Remove - 2x T30s on the top of the lights
Remove half way - 2x T30s on the back of the lights near the bottom. Removing the air feed pipe is required and removing the 10mm bolts on the pas tank may help.
Slide the headlight forward to gain better access to the clip, fiddly job but use a screwdriver to push the tab down and the connector slides off.
If you flip the headlight upside down you can see where the OEM hid ballast would have gone. If you have bought a slimline ballast it should sit in there quite nice.
Theres another guide on this bit too which is pretty similar to how ive done it.
http://www.audi-sport.net/vb/showthread.php?t=70212&pagenumber=
Now you need to cut a hole to post the wires and the igniter/built in canceler through. You have two choices: Use a hole saw, get a lot of plastic swarf off the drill inside the lamp unit. You can minimize this using a hoover etc but chances are you will still end up with some bits inside.
The other option is to use a soldering iron, ive got a gas one with a specific plastic cutting tool on it. Its a lot neater and there is zero chance of dropping anything inside the lamp unit.


Once i had cut the hole, i stuck the igniter down and left the cannceler part loose as there was nothing to stick it to. The main thing to consider is the headlight adjuster.. and that you wont place things in such a manner that they will jam up. You can twist the motor 90 degrees to unclip it then swing the inner lamp unit yourself to check the movement.

Note - the ballast back has been removed in this picture.

To protect everything i made up some plates.

You can make two at once to save time as they're identical on both sides (just flip one over)

To secure the ballast i have removed 2 screws from the ballast casing and put them through the mounting plate. Its better to mount the ballast to the plate rather than stick them to the plastic as it acts as a heatsink. If you do end up with ABS errors, adding a small wire to ground to this plate should sort the issue.

Painted up ready for fitting. I used 6 self tapping screws and some silicone to create a water tight seal.
Refitting is the reverse of the removal. Testing along the way for obvious reasons. Its good to fit some LED sidelights too that have built in load resistors. As the hids make the standard bulb look a bit naff and yellow.
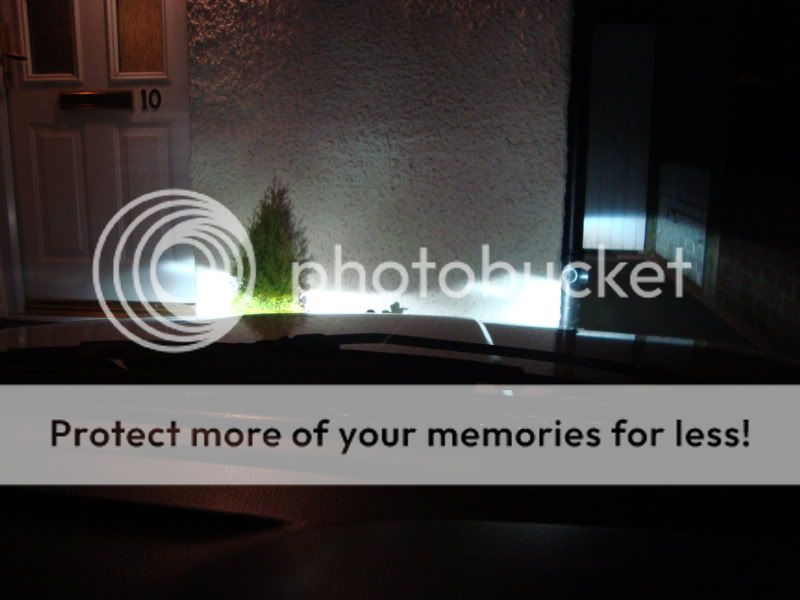
I will add some before and after pictures once its gone dark. In my excitement i forgot to take a pic of the finished thing too so will do that when I take it out to replace the sidelight clip that got bust.
Shopping for a kit
This is a minefield, every man and his dog is selling kits. Alot claim to have special "a4" kits or "canbus kits we have had specifically designed". Its all rubbish! There are only a handful of manufacturers for these kits and it all comes from china, there are some that have slightly better quality ballasts than others but the people charging £100 plus are just making more profit. The variation in cost to them between the cheap and the expensive ones is £5 max.
What you want for the A4 is a H7 kit, in the kit you get 2x bulbs, and 2x ballasts. Some come with an optional relay kit, you don't need this on the A4. You do on the A3.
Ok first off - the standard style kit
This is the basic kit.
Will it bring up the bulb error : yes
Does it fit well : It can.. but the ballast is large, if you intend to use the area under the headlight its not ideal.
Slimline ballasts
This is usually a few quid dearer, it comes with a slimline ballast, but as a result you end up with the igniter in a separate box. So volume wise its not any smaller really
Will it bring up a bulb error: yes
Does it fit well : yes, these fit neatly under the headlamp and you can put the igniter inside the lamp itself.
Ok, so now we get in to the "can bus" ones. The theory behind the system is the cars ecu sends a weak voltage down the bulb to check for resistance of the bulb element. Since its a HID ballast plugged in it flags up an error.
Older style Canbus kits
Now alot of companies are selling "specially developed can bus kits". Which are one of the above kits but with this thrown in the box:
They come in a few different designs but the basics are that they have 2 wires in and 2 wires out, and go in between the H7 connector and the ballast itself. They put a load onto the circuit which fools the ecu into thinking the bulb is connected ok. They go under the name of canbus cancelers or sometimes load resistors.
Do they bring up a bulb error: no!
Do they fit well: Same as above really, but you will struggle to get the canceler and the igniter in the box.
The latest style of hid kit, and in my opinion the one to go for. Is the genuine canbus kits with the slimline ballast.
This is not just a kit with the optional canceler thrown in, the canceler is built in and as a result theres less connectors and the canceler box is alot smaller. Giving you the best chance of a neat install
I got mine from a company called lightec-autostyle. They sell the exact kit above, I got a prototype unit but they are awaiting stock of new kit. Just contact them if you want them to let you know when its arrived. Im not sure how much they will be, i think its gonna be about 10-15 dearer than their existing kits though. They also have a thicker than average metal case on them - so less EM radiation and chance of it bringing up an ABS fault
http://lightec-autostyle.co.uk/
Color rating (6000k etc)
The number rating stands for how hot the bulb runs in kelvin.
The hotter the rating of bulb (higher number) the more if shifts up the spectrum to blues and then purple. As a result you also get LESS visible light with a higher number
OEM is 4300k ish, most people go for 6000k which provides a nice white/blue tone.
Fitting
First job is to remove the headlights, easy job really.
Here is a picture guide posted by another member: http://www.audi-sport.net/vb/showthread.php?t=101033&p=1033950#post1033950
Remove - 2x T30s on the top of the lights
Remove half way - 2x T30s on the back of the lights near the bottom. Removing the air feed pipe is required and removing the 10mm bolts on the pas tank may help.
Slide the headlight forward to gain better access to the clip, fiddly job but use a screwdriver to push the tab down and the connector slides off.
If you flip the headlight upside down you can see where the OEM hid ballast would have gone. If you have bought a slimline ballast it should sit in there quite nice.
Theres another guide on this bit too which is pretty similar to how ive done it.
http://www.audi-sport.net/vb/showthread.php?t=70212&pagenumber=
Now you need to cut a hole to post the wires and the igniter/built in canceler through. You have two choices: Use a hole saw, get a lot of plastic swarf off the drill inside the lamp unit. You can minimize this using a hoover etc but chances are you will still end up with some bits inside.
The other option is to use a soldering iron, ive got a gas one with a specific plastic cutting tool on it. Its a lot neater and there is zero chance of dropping anything inside the lamp unit.
Once i had cut the hole, i stuck the igniter down and left the cannceler part loose as there was nothing to stick it to. The main thing to consider is the headlight adjuster.. and that you wont place things in such a manner that they will jam up. You can twist the motor 90 degrees to unclip it then swing the inner lamp unit yourself to check the movement.
Note - the ballast back has been removed in this picture.
To protect everything i made up some plates.
You can make two at once to save time as they're identical on both sides (just flip one over)
To secure the ballast i have removed 2 screws from the ballast casing and put them through the mounting plate. Its better to mount the ballast to the plate rather than stick them to the plastic as it acts as a heatsink. If you do end up with ABS errors, adding a small wire to ground to this plate should sort the issue.
Painted up ready for fitting. I used 6 self tapping screws and some silicone to create a water tight seal.
Refitting is the reverse of the removal. Testing along the way for obvious reasons. Its good to fit some LED sidelights too that have built in load resistors. As the hids make the standard bulb look a bit naff and yellow.
I will add some before and after pictures once its gone dark. In my excitement i forgot to take a pic of the finished thing too so will do that when I take it out to replace the sidelight clip that got bust.
Last edited: