Thought I'd put up a few pictures of my recent dashcam installation if anyone's interested ") Hardwired this 2-channel system to my car a few days ago.
Hardwired this 2-channel system to my car a few days ago.


The front and rear cameras with CPL filters from edr-auto.fr attached:


The first thing I did was to find out which fuses to use. To get parking mode working on the F770 you need two fuses; one that's always on and one that's switched by the ignition. That way the F770 knows when to enter and leave parking mode.
The fuse box (one of them) is located on the left side of the cabin. For a LHD like mine it's under the wheel, for a RHD it's behind the glovebox.
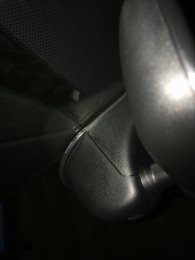
To get to it I had to remove the panel to the right of the light switch. the one that says airbag on it. You can pry this right off but I recommend first removing the larger panel to the left that's against the door to be able to access the clips for the other panel from behind and help get them out to avoid breaking anything.


Here you can see the other panel and the clips that hold it in place. You can easily squeeze these together and remove the panel that way.


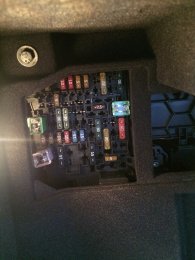
And the fuse box is revealed:

For the fuses I chose the 12v outlet one (bottom in picture) for switched and the one for central locking for the permanent (top in picture).
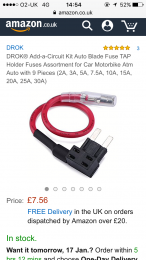
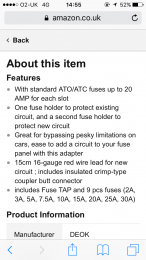
To get a "professional" installation that can easily be reversed/removed I used "fuse taps", also called "Add-a-Circuits" that plug right into the existing fuse slot and lets you create a second circuit off of that with a seperate fuse. They look like this:
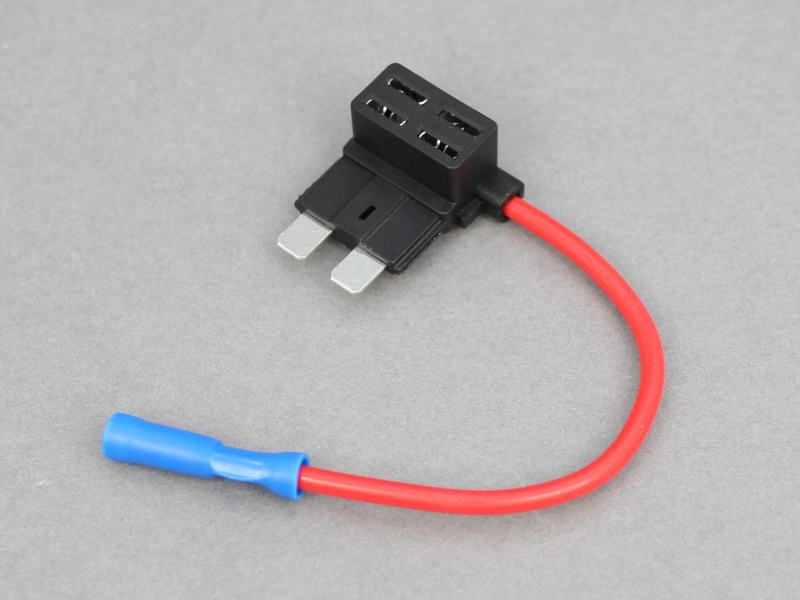
You just plug it in (the right way!) where the existing fuse is located, insert the original fuse in the bottom slot and the new fuse in the top slot. I chose 5A fuses for the dashcam.
I chose to attach "cable shoe" connectors with some tape around them to the fuse taps and the hardwiring kit. I could have also soldered (best result) or used i.e. Wago connectors. I used my awesome crimping tool from Cimco to do this.

Before:

After:


Together:


Installed:


Then I started with the running of the power cable from the fuse box to the front facing camera. Ran it up along the A piller and along the headline, just tucking it in as I went along. Easy.


Then I ran the cable from the front camera to the rear camera. Exactly the same way, tucking in in along the headliner on the right side of the car. No need to remove any panels until I got to the rear door.


Then came the rear door and the panels had to come off. These are fastened with clips all the way around that needs to be carefully removed to avoid breaking anything. There are also two T25 screws behind the warning triangle that has to come off first.


Now I just had to run the cable through the right grommet and out to where the camera would be mounted. I used a piece of network cable to feed the cable through.


The leftover cable (about 2 meters) I tucked behind this panel. It's a good idea to avoid looping too much cable near the DAB antenna to avoid interference issues. I also attached the included ferrite core in this end and have not yet experienced any DAB issues.

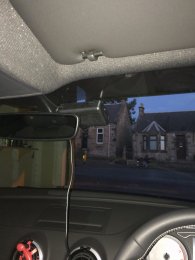
Figuring out the placement of the two cameras was simple. I just powered them up using the included cigarette jack power adapter and went into the mobile app and viewed the live image. I had to mount the front facing camera a little bit to the right but it's barely visible on the footage.
Here are some pictures of the car after installation. The cameras are almost invisible


Here is a clip from a test drive right after installing it:
Hardwired this 2-channel system to my car a few days ago.The front and rear cameras with CPL filters from edr-auto.fr attached:
The first thing I did was to find out which fuses to use. To get parking mode working on the F770 you need two fuses; one that's always on and one that's switched by the ignition. That way the F770 knows when to enter and leave parking mode.
The fuse box (one of them) is located on the left side of the cabin. For a LHD like mine it's under the wheel, for a RHD it's behind the glovebox.
To get to it I had to remove the panel to the right of the light switch. the one that says airbag on it. You can pry this right off but I recommend first removing the larger panel to the left that's against the door to be able to access the clips for the other panel from behind and help get them out to avoid breaking anything.
Here you can see the other panel and the clips that hold it in place. You can easily squeeze these together and remove the panel that way.
And the fuse box is revealed:
For the fuses I chose the 12v outlet one (bottom in picture) for switched and the one for central locking for the permanent (top in picture).
To get a "professional" installation that can easily be reversed/removed I used "fuse taps", also called "Add-a-Circuits" that plug right into the existing fuse slot and lets you create a second circuit off of that with a seperate fuse. They look like this:
You just plug it in (the right way!) where the existing fuse is located, insert the original fuse in the bottom slot and the new fuse in the top slot. I chose 5A fuses for the dashcam.
I chose to attach "cable shoe" connectors with some tape around them to the fuse taps and the hardwiring kit. I could have also soldered (best result) or used i.e. Wago connectors. I used my awesome crimping tool from Cimco to do this.
Before:
After:
Together:
Installed:
Then I started with the running of the power cable from the fuse box to the front facing camera. Ran it up along the A piller and along the headline, just tucking it in as I went along. Easy.
Then I ran the cable from the front camera to the rear camera. Exactly the same way, tucking in in along the headliner on the right side of the car. No need to remove any panels until I got to the rear door.
Then came the rear door and the panels had to come off. These are fastened with clips all the way around that needs to be carefully removed to avoid breaking anything. There are also two T25 screws behind the warning triangle that has to come off first.
Now I just had to run the cable through the right grommet and out to where the camera would be mounted. I used a piece of network cable to feed the cable through.
The leftover cable (about 2 meters) I tucked behind this panel. It's a good idea to avoid looping too much cable near the DAB antenna to avoid interference issues. I also attached the included ferrite core in this end and have not yet experienced any DAB issues.
Figuring out the placement of the two cameras was simple. I just powered them up using the included cigarette jack power adapter and went into the mobile app and viewed the live image. I had to mount the front facing camera a little bit to the right but it's barely visible on the footage.
Here are some pictures of the car after installation. The cameras are almost invisible
Here is a clip from a test drive right after installing it:
Last edited: