

Goodbye Vauxhall (sort of), well hello Audi S3
- Thread starter Harvey
- Start date
You are using an out of date browser. It may not display this or other websites correctly.
You should upgrade or use an alternative browser.
You should upgrade or use an alternative browser.
- Joined
- Aug 21, 2014
- Messages
- 136
- Reaction score
- 30
- Points
- 28
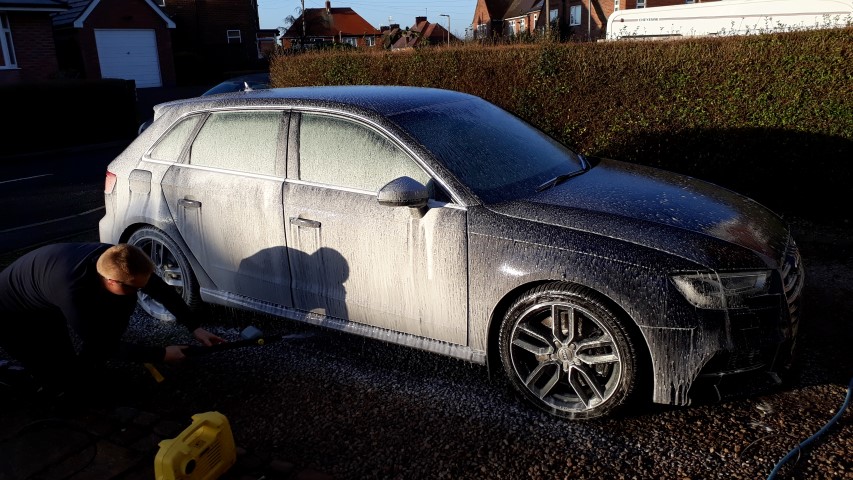
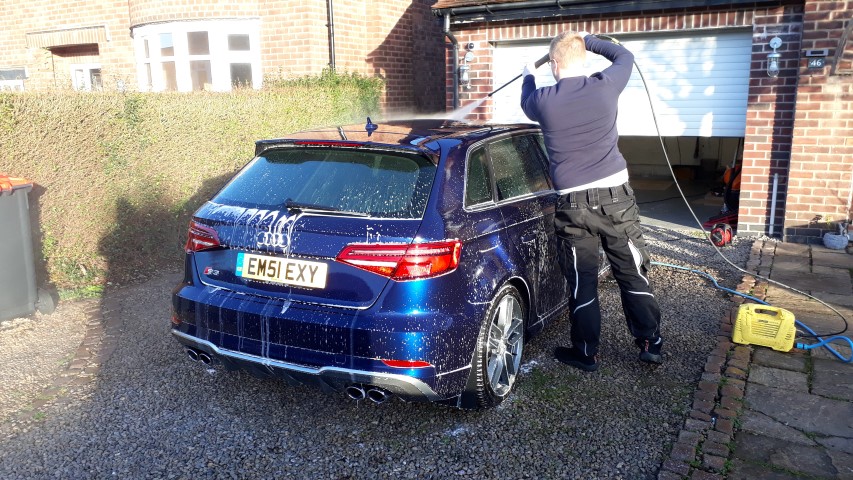
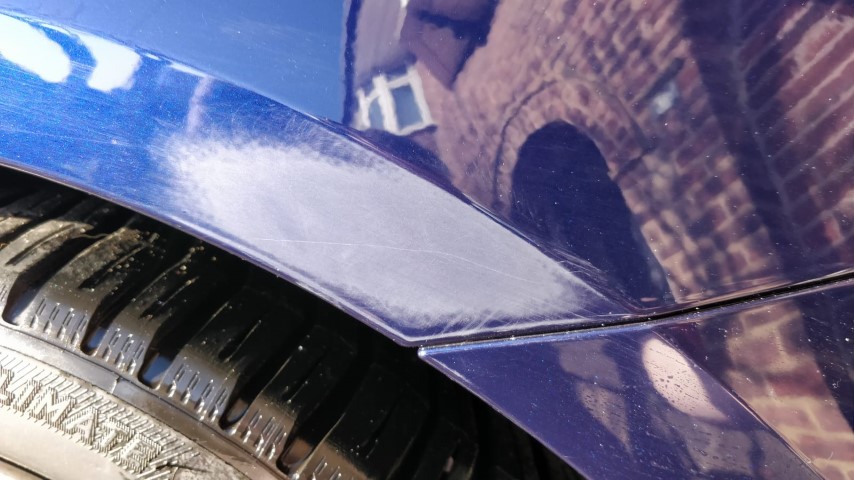
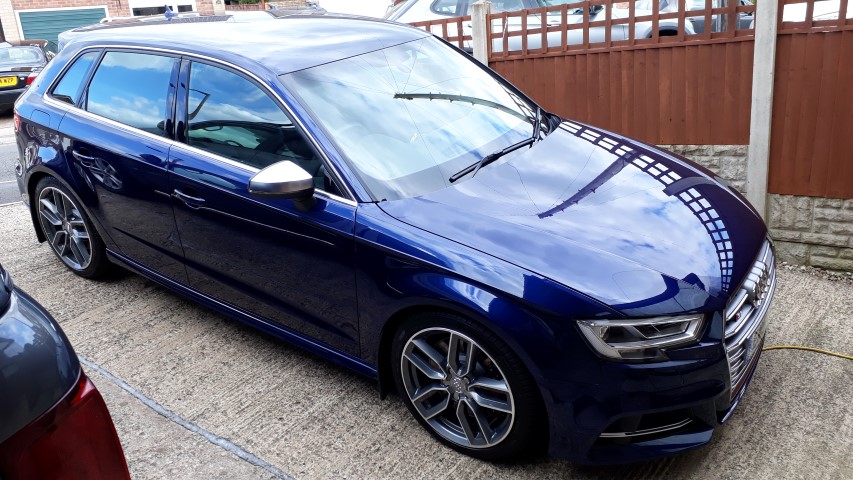
Looks great, I love a bit of detailing.Since purchasing the S3 we known the paint required some proper loving as it was swirltastic everywhere, especially so in bright sunshine. I’m good at keeping my vehicles clean and tidy but don’t have the expertise for pro detailing so arranged for a friend to sort it. The car was dropped off at 9am on Saturday and for the first time ever someone else washed a vehicle wifey and I owned. Heavy detergent wash then rinse before the good stuff started.
As there was nothing I could do and I love walking I headed the 10 miles home on foot. During this time I was send some alarming pictures before the first pass using the cutting compound. You really don’t realise just how bad it is unless you use an ultra-bright torch up close and personal.
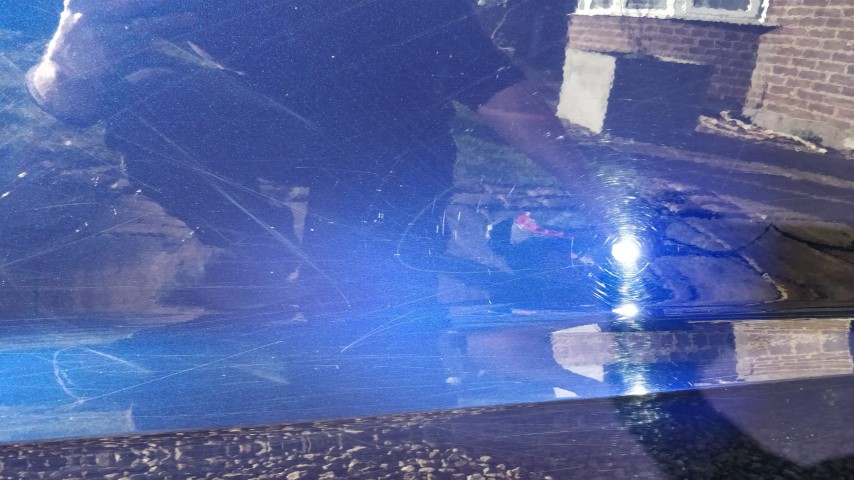
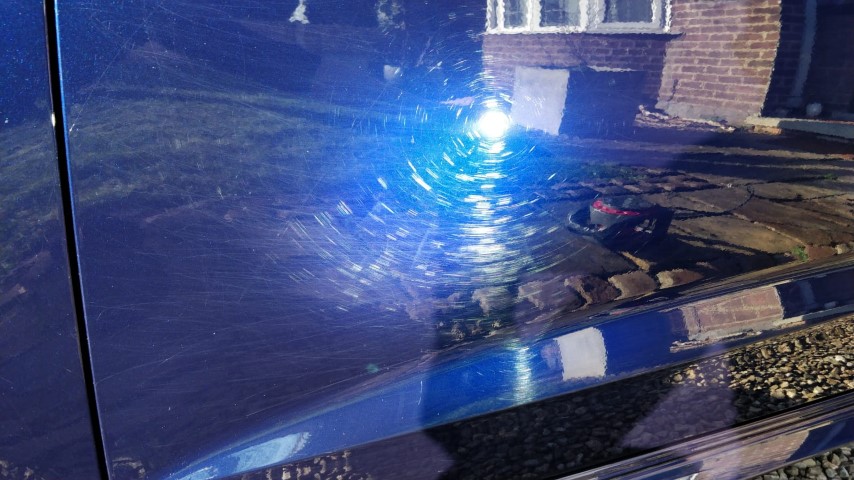
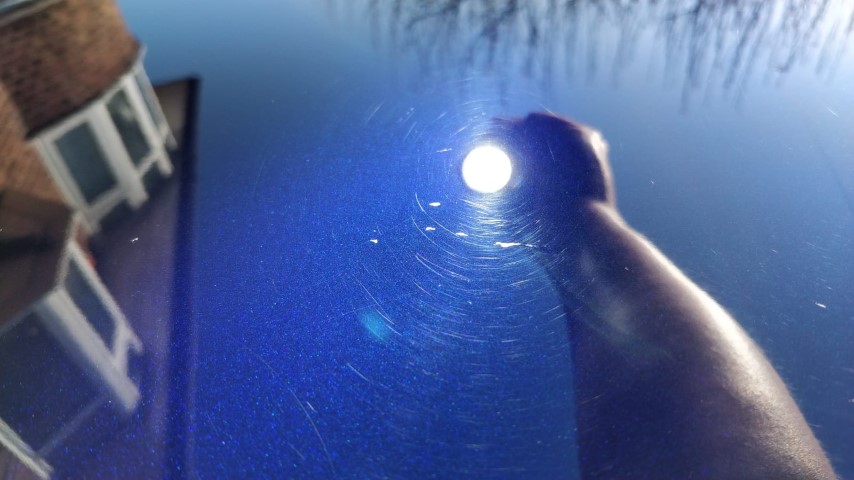
Some parts were that bad the wet ‘n’ dry came out!
As my mate does this as a hobby at home he cracked on with it late into Saturday night and with both cutting passes done the ceramic coat was applied and left to cure overnight.
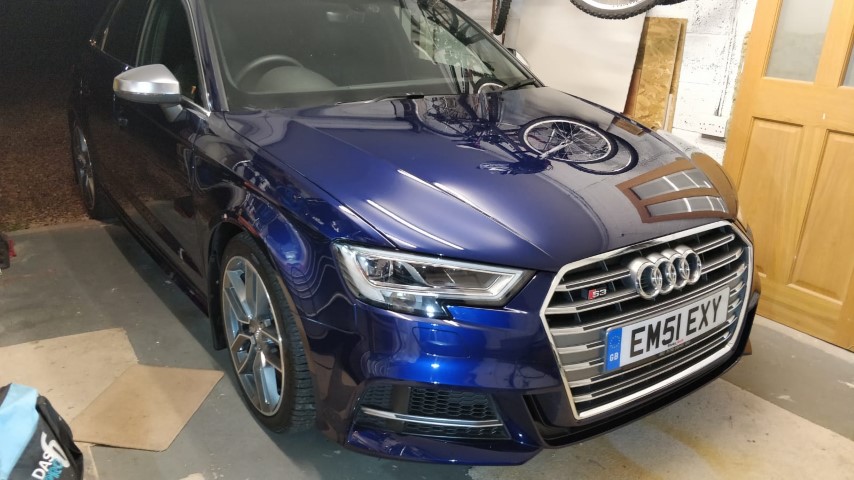
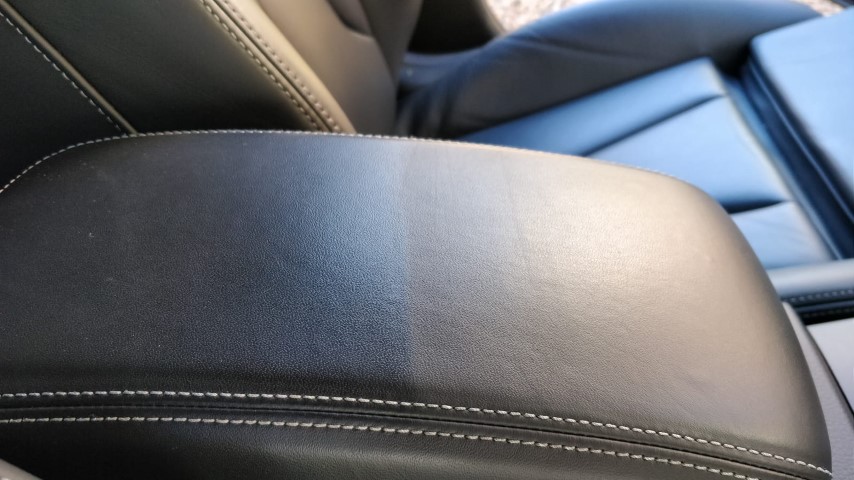
On Sunday morning the top sealer was applied, tires dressed and some minor interior leather cleaning was completed before I was collected early afternoon.

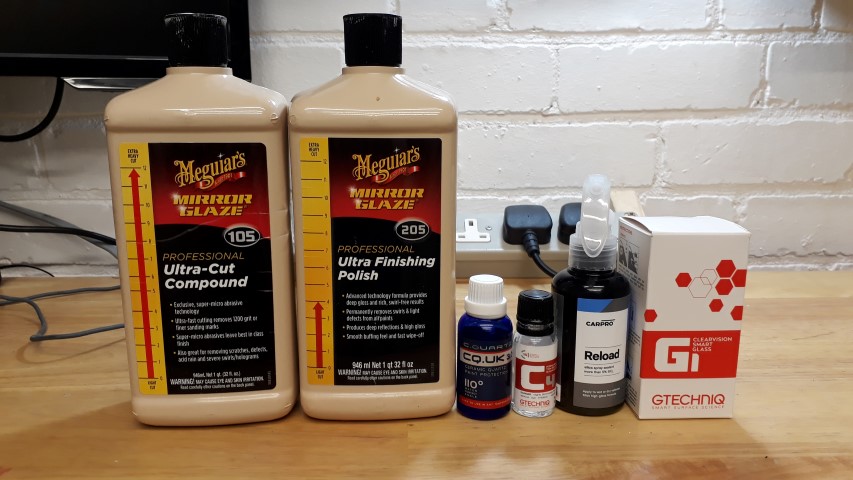
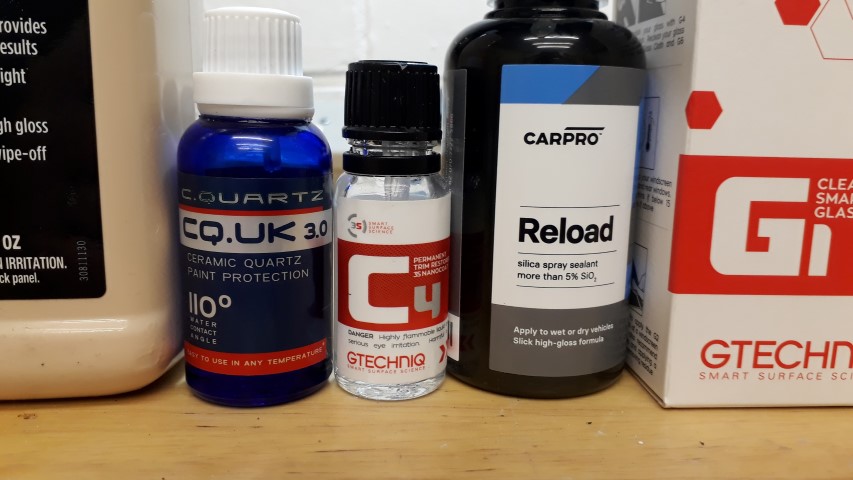
Here’s some of the products used to help turn a swirly mess into a lush finish. A sponge pad was initially used on the machine polisher, but it was swapped for a microfibre pad for a better finish. I'm sure all you detailing peeps will know what this lot is but all I know is how to keep my vehicles clean and running sweet.
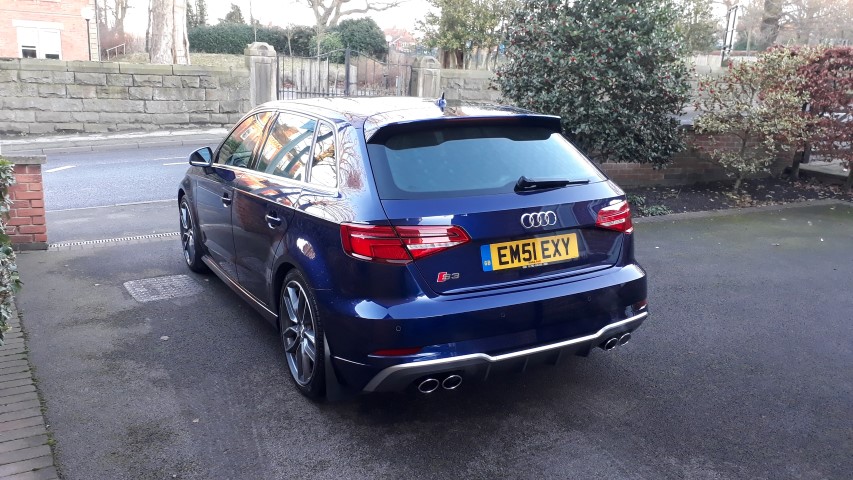
I popped the car round to my parents after collecting it and had a good look round. The finish is amazing and I’m over the moon now all the darn swirls have been banished. As I said I’m no detailer but hopefully now I can keep it clean without any swirls shouting “HELLO” every time the sun pops its head out. Huge thanks to Alex for his skills and determination…keeeeeep polishing.
Now that the paint looks spot on, it’s a lot easier to stay like that if you wash carefully and look after it. I’m an amateur detailer and I do my own cars myself. It’s been 8 years that I corrected the paint on my original 8L S3 now and it still looks mint. Could do with a quick run over I suppose now, but you’ll be amazed at how long the finish lasts! Thanks for posting and sharing ")
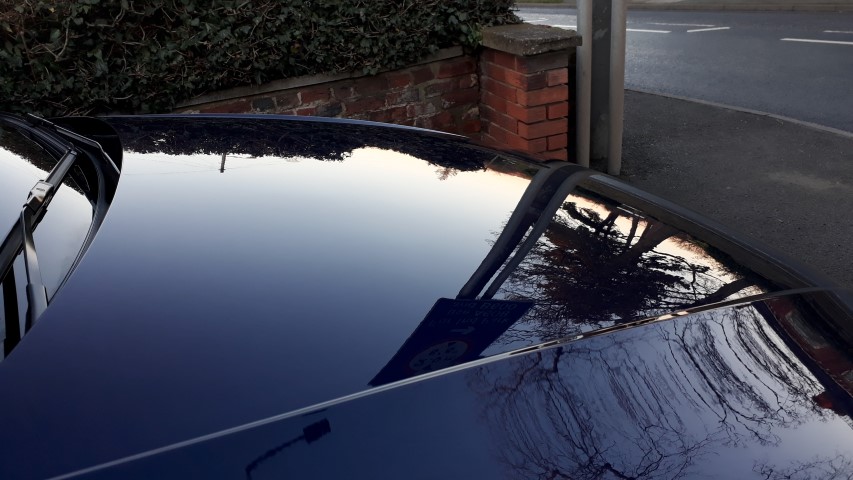
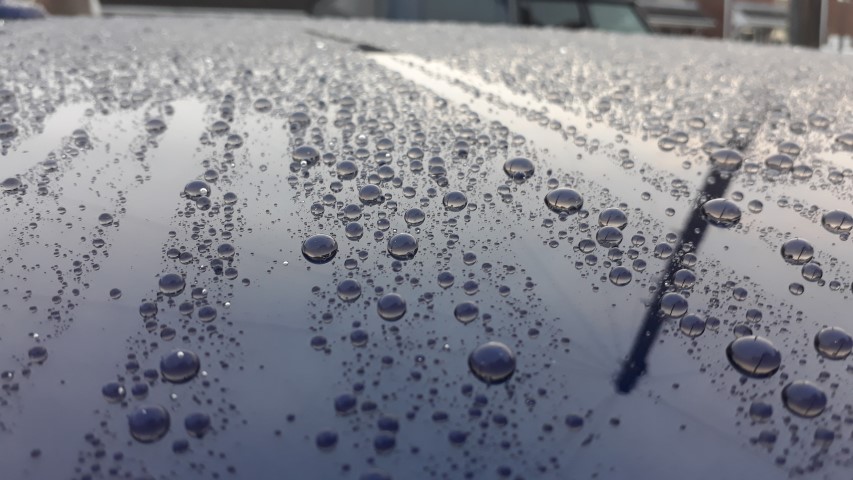
The first wash after the detailing and my goodness the water beading is mental, I love it
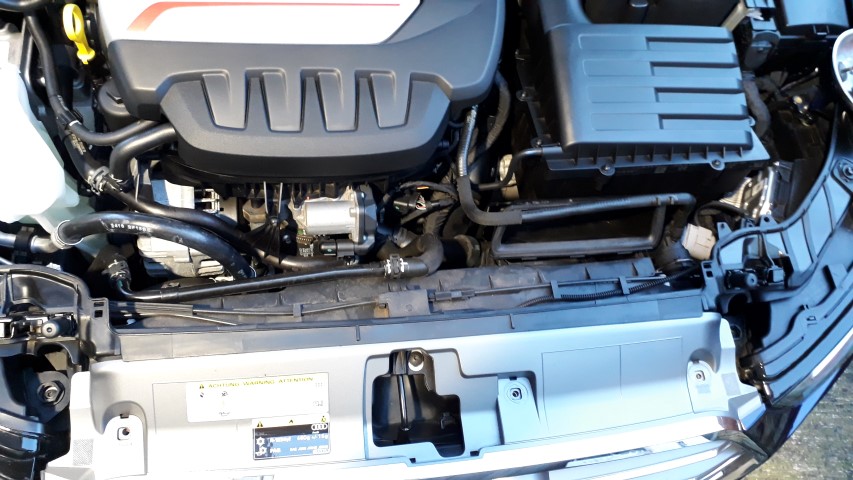
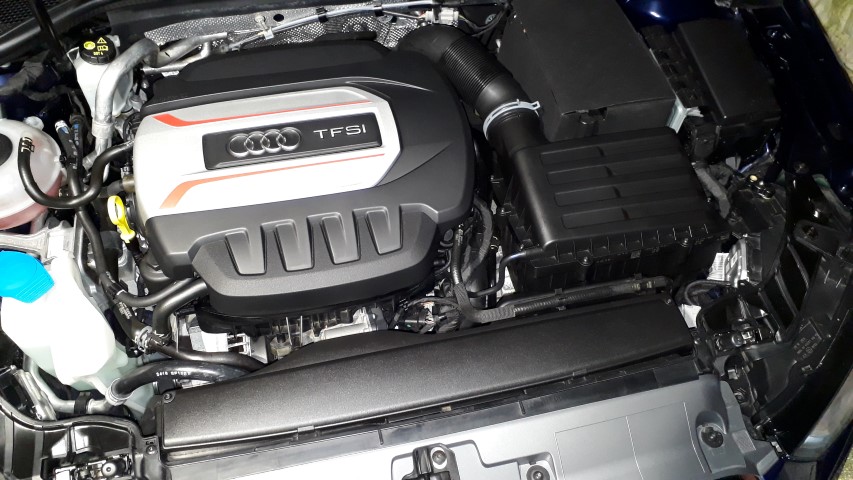
I’m all about leaving the daily drivers standard but something sparked my interest so after the necessary research I cracked on yesterday after work.
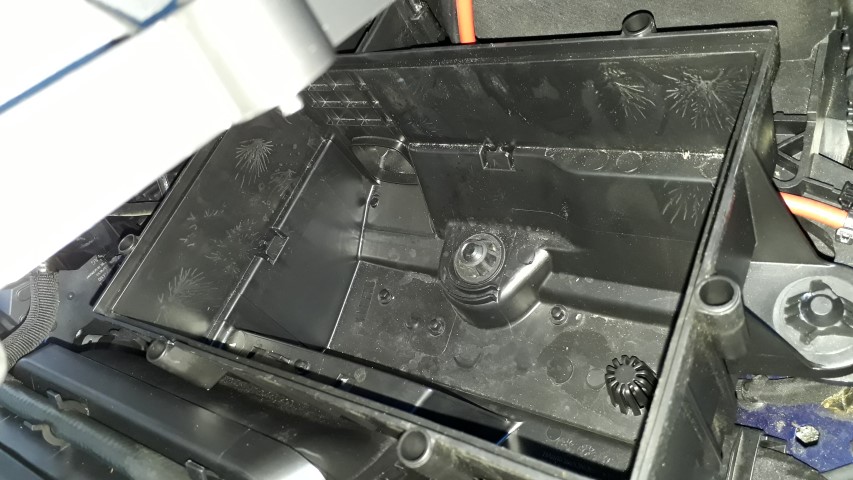
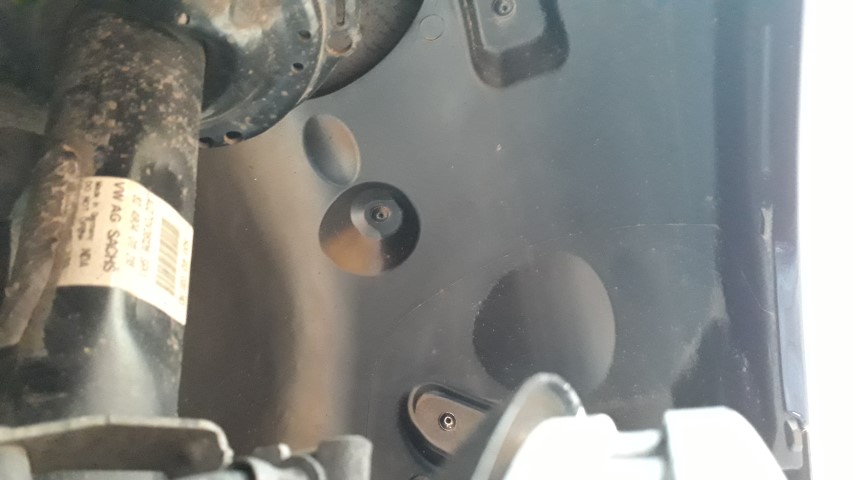
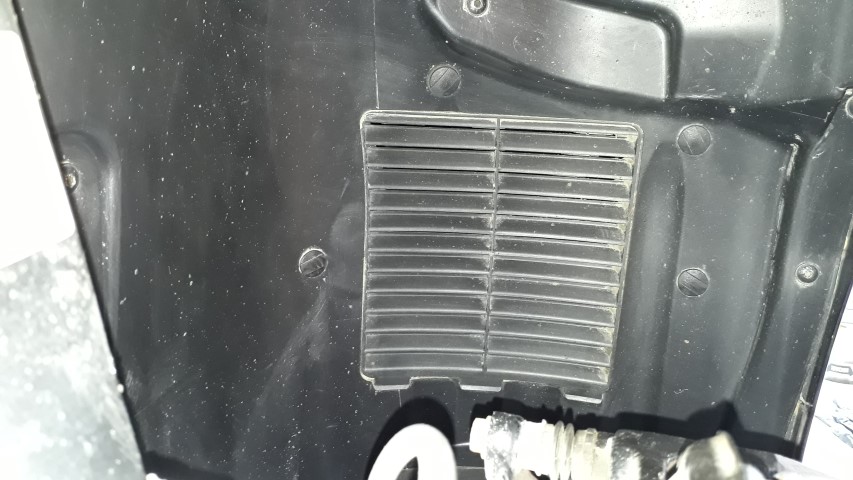
First job was to remove what is referred to as the snow gate within the lower section of the airbox. Some gentle tugging (no giggling people) and out it popped.
Surprisingly clean in there as I usually find leaves and the odd small creature on the dirty side in airboxes.
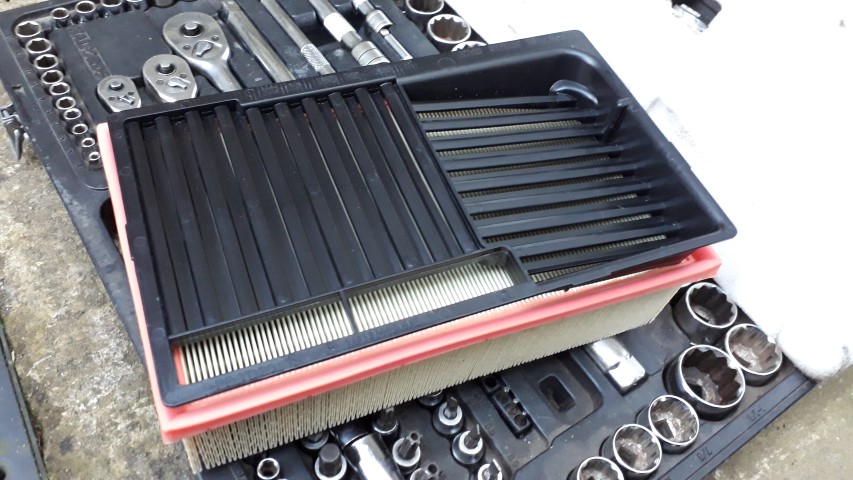
I might also have added a Ramair panel filter as they are so cheap, last a lifetime and I’ve used them on previous vehicles so know the quality is there. Part no.RPF-3129
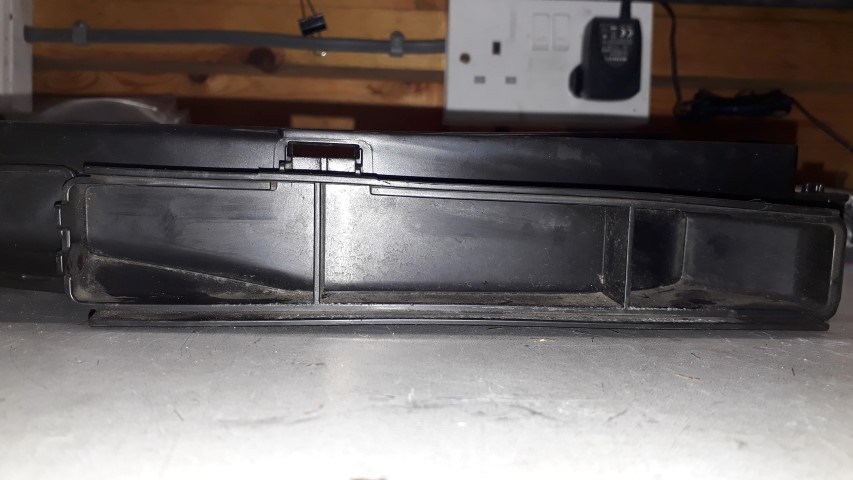
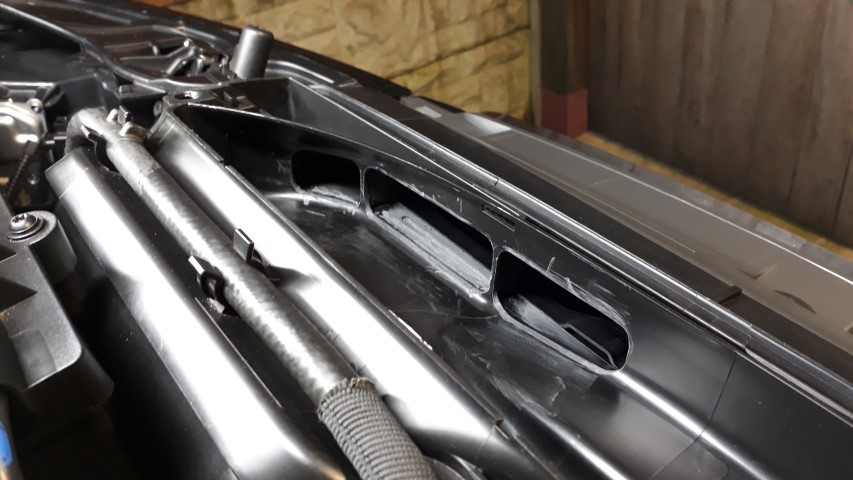
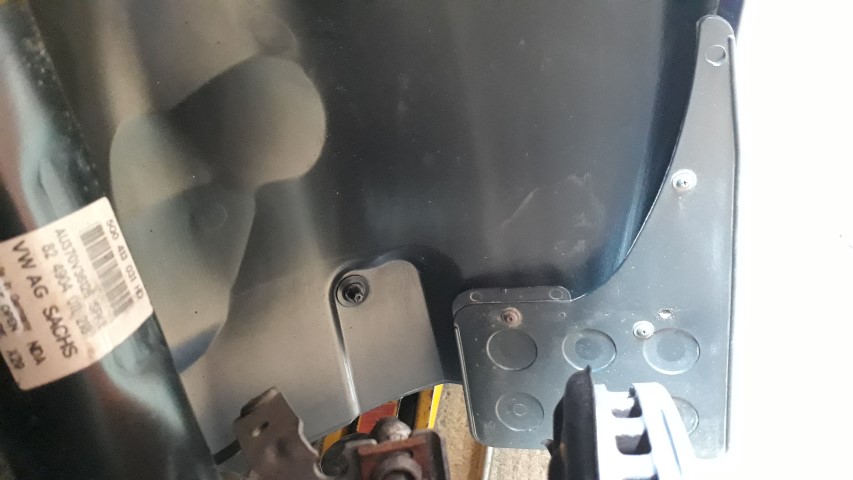
Next up was to remove the air guide which is as simple as removing 4 screws, giving it a wiggle and off it pops. It was dirty under there so I couldn’t just leave it.
That’s better.
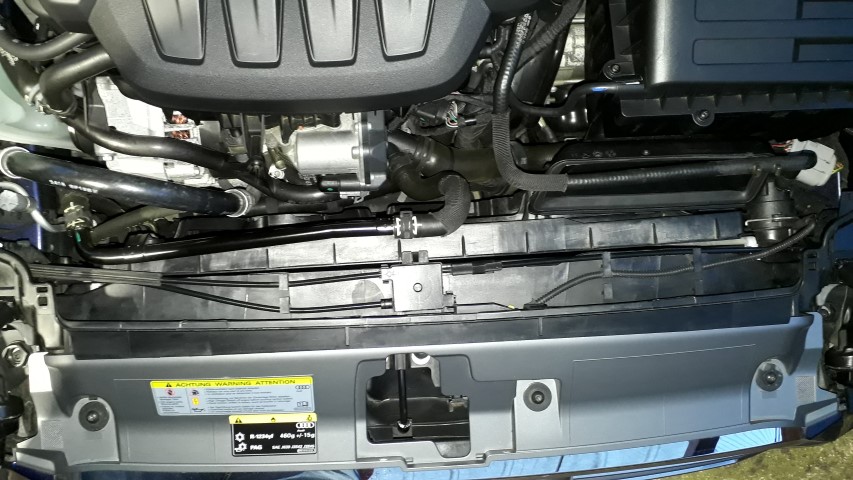
On to the job in-hand to get some more fresh air into the engine. The air guide already has the relevant air feeds cast into the plastic but for whatever reason VAG decided to leave them blanked off.
My trusty Dremel came in handy and I decided to leave the virtual supports in place to keep the strength.
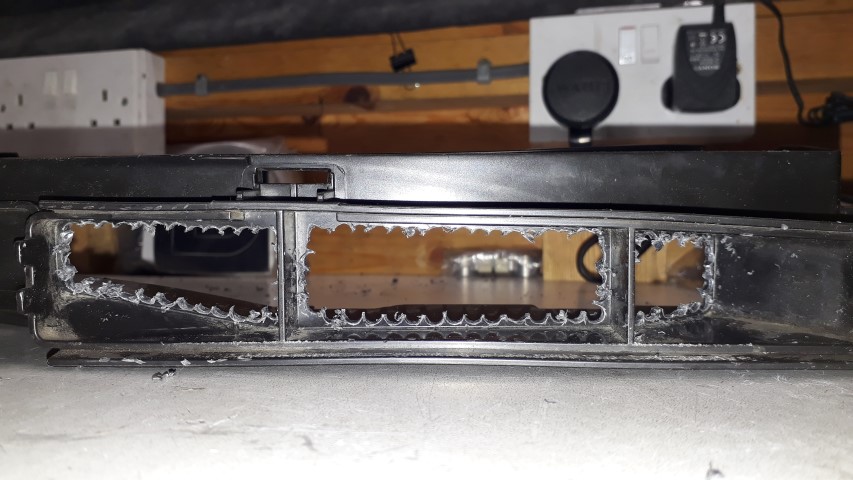
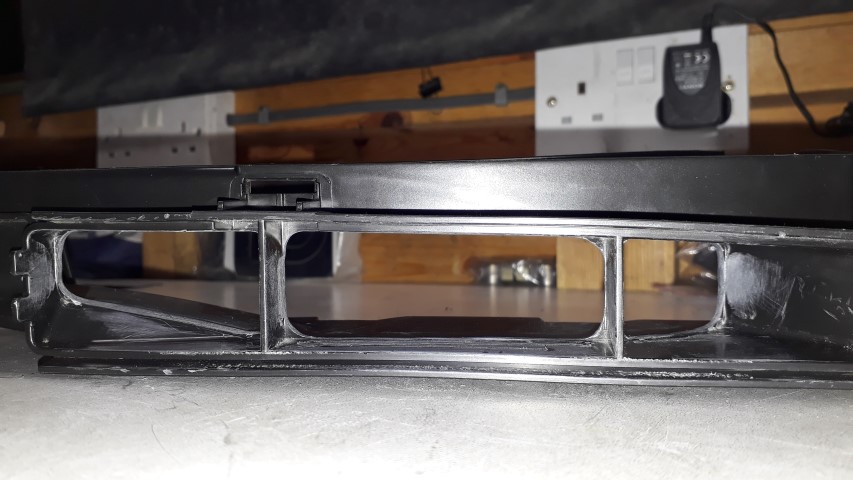
All done and looking tidy, just how I like things.
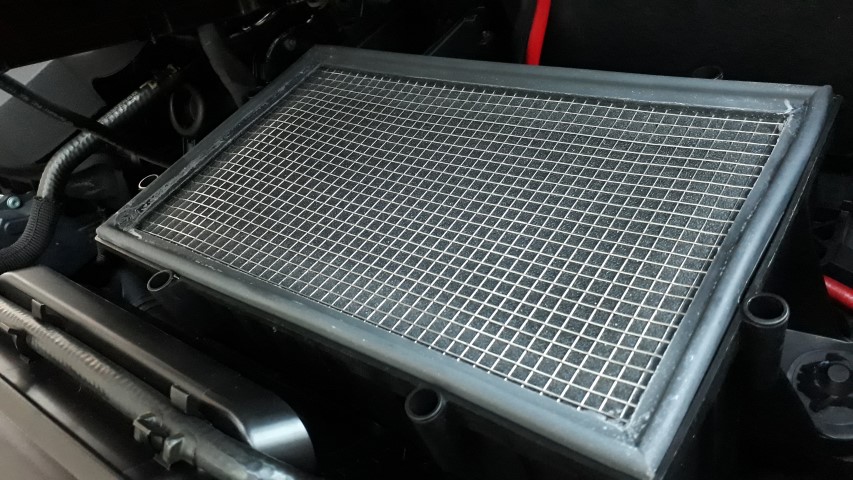
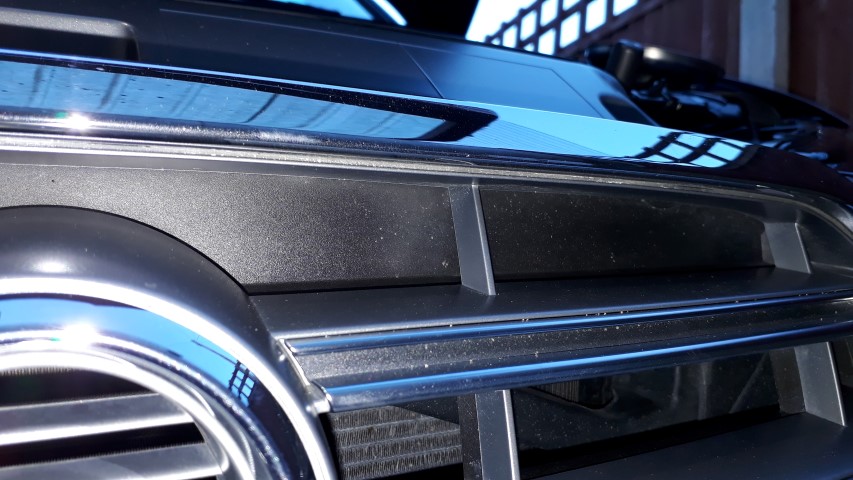
I know there is talk about removing the top grill blanking plate but checking this out there is no need as it helps stop direct road spray & dirt getting in and there is plenty of available air through the rest of the grill with nothing to gain removing the blanking bar so I decided to leave it in place as I'm not chasing power.
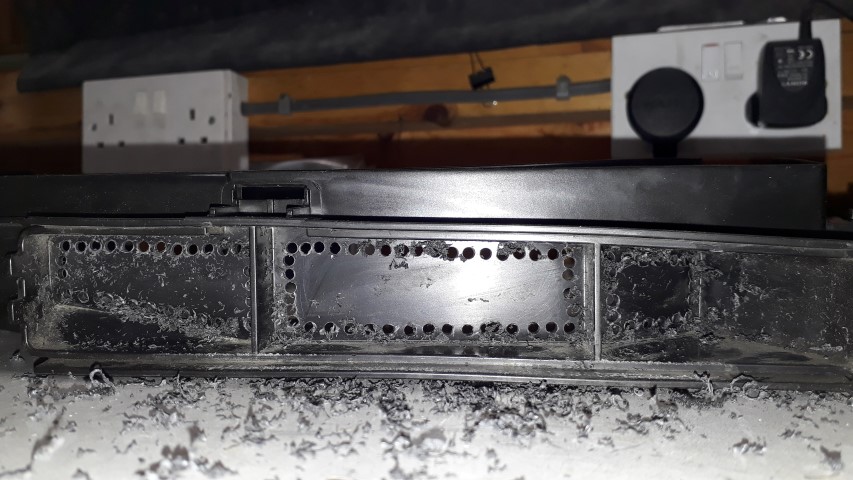
Extra holes for some fresh goodness.
All done and looking standard, just how I like it for my dailies.
First job was to remove what is referred to as the snow gate within the lower section of the airbox. Some gentle tugging (no giggling people) and out it popped.
Surprisingly clean in there as I usually find leaves and the odd small creature on the dirty side in airboxes.
I might also have added a Ramair panel filter as they are so cheap, last a lifetime and I’ve used them on previous vehicles so know the quality is there. Part no.RPF-3129
Next up was to remove the air guide which is as simple as removing 4 screws, giving it a wiggle and off it pops. It was dirty under there so I couldn’t just leave it.
That’s better.
On to the job in-hand to get some more fresh air into the engine. The air guide already has the relevant air feeds cast into the plastic but for whatever reason VAG decided to leave them blanked off.
My trusty Dremel came in handy and I decided to leave the virtual supports in place to keep the strength.
All done and looking tidy, just how I like things.
I know there is talk about removing the top grill blanking plate but checking this out there is no need as it helps stop direct road spray & dirt getting in and there is plenty of available air through the rest of the grill with nothing to gain removing the blanking bar so I decided to leave it in place as I'm not chasing power.
Extra holes for some fresh goodness.
All done and looking standard, just how I like it for my dailies.
- Joined
- Mar 15, 2012
- Messages
- 7,239
- Reaction score
- 14,247
- Points
- 113
What difference has it made to what it was like before?I’m all about leaving the daily drivers standard but something sparked my interest so after the necessary research I cracked on yesterday after work.
First job was to remove what is referred to as the snow gate within the lower section of the airbox. Some gentle tugging (no giggling people) and out it popped.
Surprisingly clean in there as I usually find leaves and the odd small creature on the dirty side in airboxes.
I might also have added a Ramair panel filter as they are so cheap, last a lifetime and I’ve used them on previous vehicles so know the quality is there. Part no.RPF-3129
Next up was to remove the air guide which is as simple as removing 4 screws, giving it a wiggle and off it pops. It was dirty under there so I couldn’t just leave it.
That’s better.
On to the job in-hand to get some more fresh air into the engine. The air guide already has the relevant air feeds cast into the plastic but for whatever reason VAG decided to leave them blanked off.
My trusty Dremel came in handy and I decided to leave the virtual supports in place to keep the strength.
All done and looking tidy, just how I like things.
I know there is talk about removing the top grill blanking plate but checking this out there is no need as it helps stop direct road spray & dirt getting in and there is plenty of available air through the rest of the grill with nothing to gain removing the blanking bar so I decided to leave it in place as I'm not chasing power.
Extra holes for some fresh goodness.
All done and looking standard, just how I like it for my dailies.
ps Nice write up and piccies

Car feels no different to drive and no extra induction noises that I can notice under normal driving. I'll get it back on the rollers later this year to see if it has gained anything as that'll be the proof of the pudding
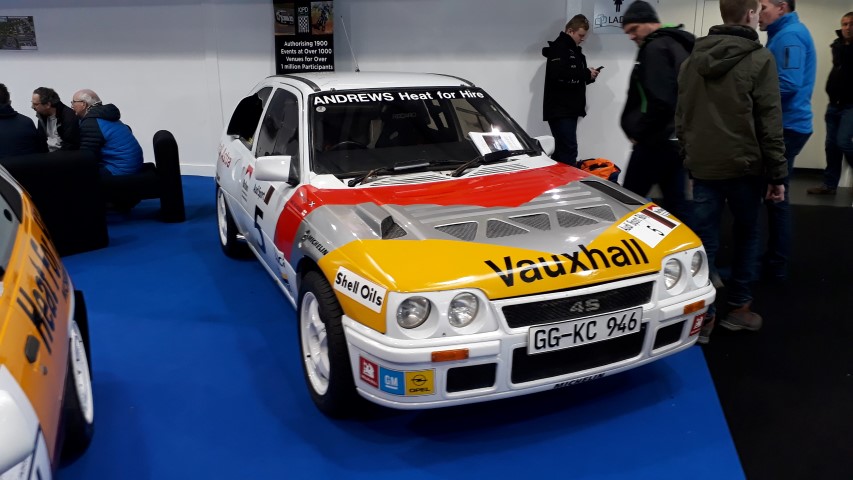
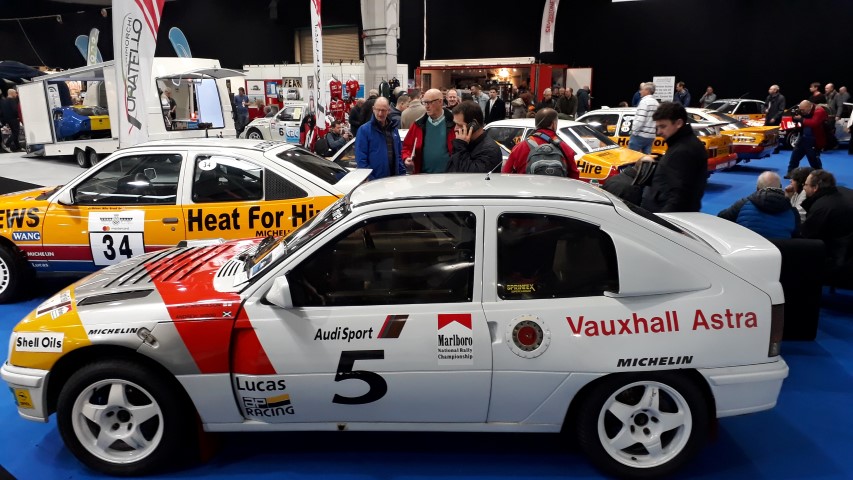
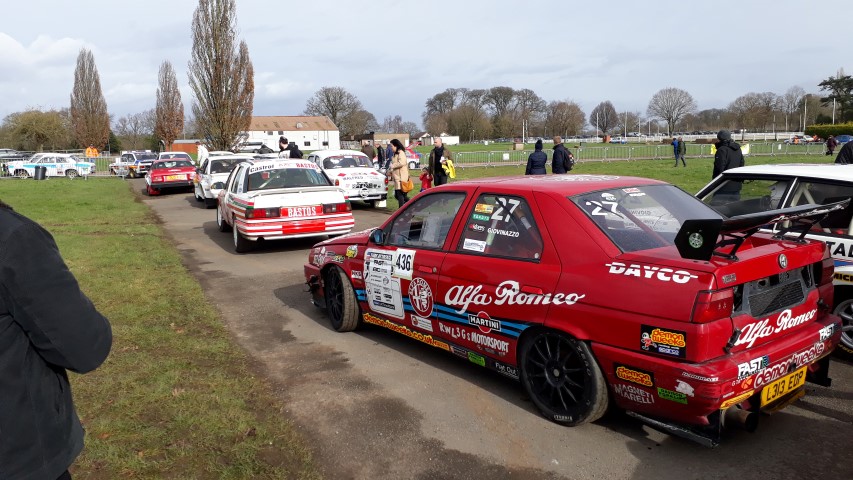
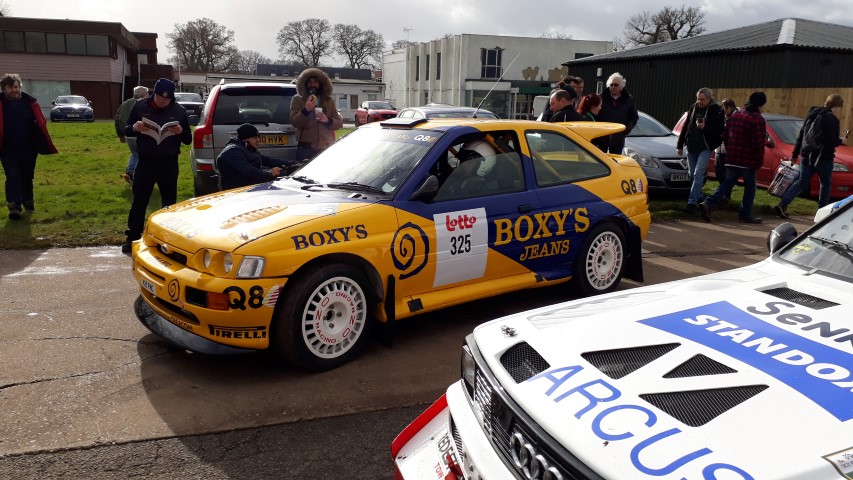
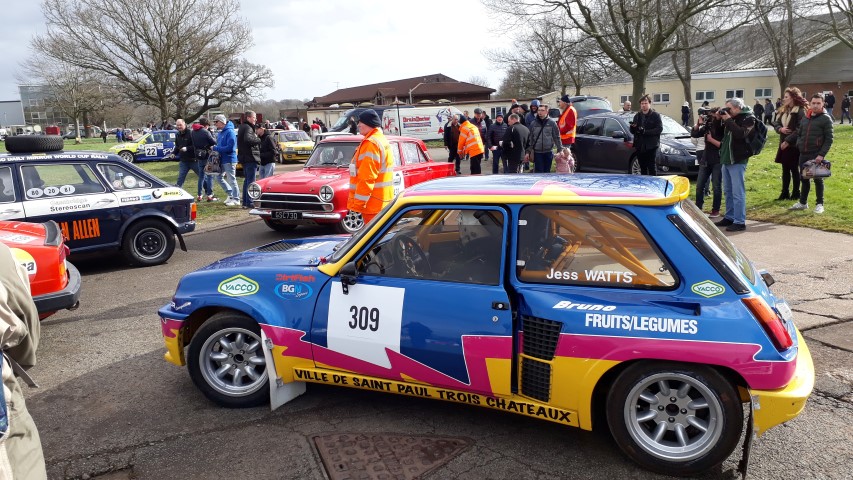
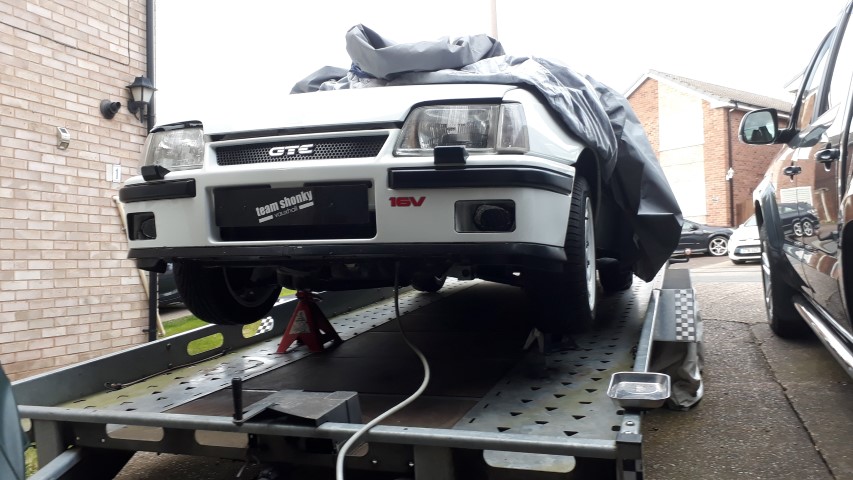
The wife and I popped to Race Retro on Saturday as a friend who was displaying had spare tickets going free so we couldn’t say no could we. Some lovely machinery there…
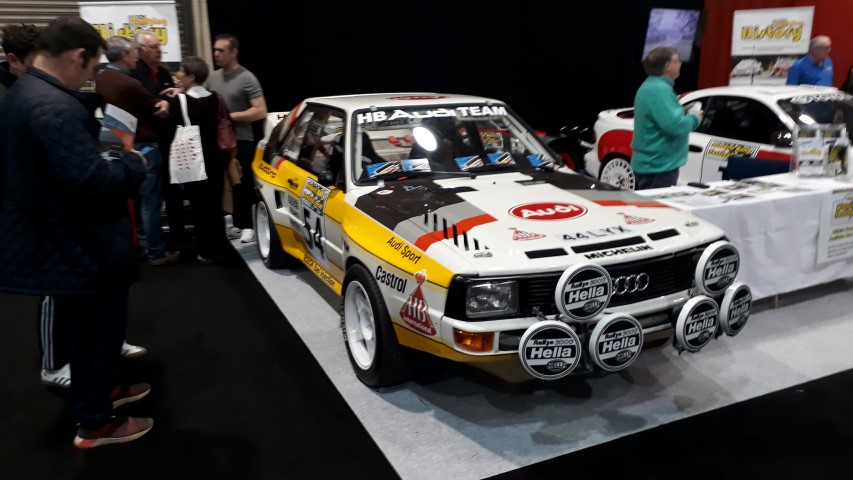
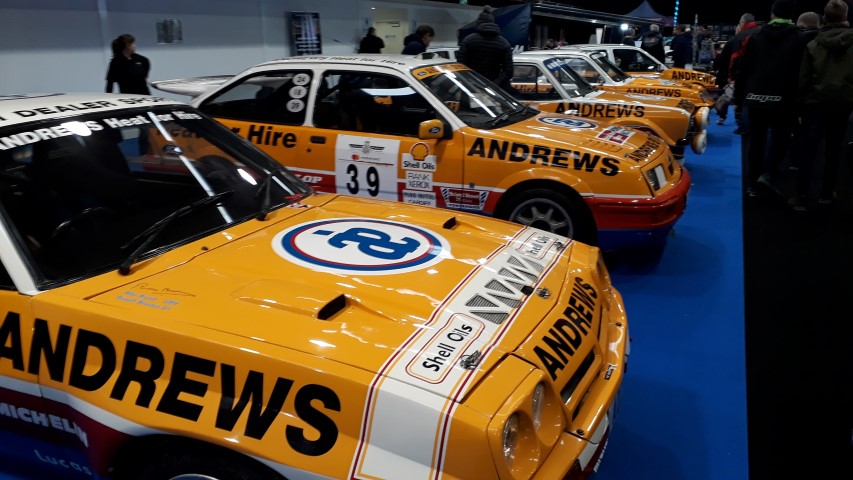
This is my friends ultra rare Astra 4S with details here if you want to know more about the car.
The live action rally demo was great with some amazing sounding machinery whizzing past.
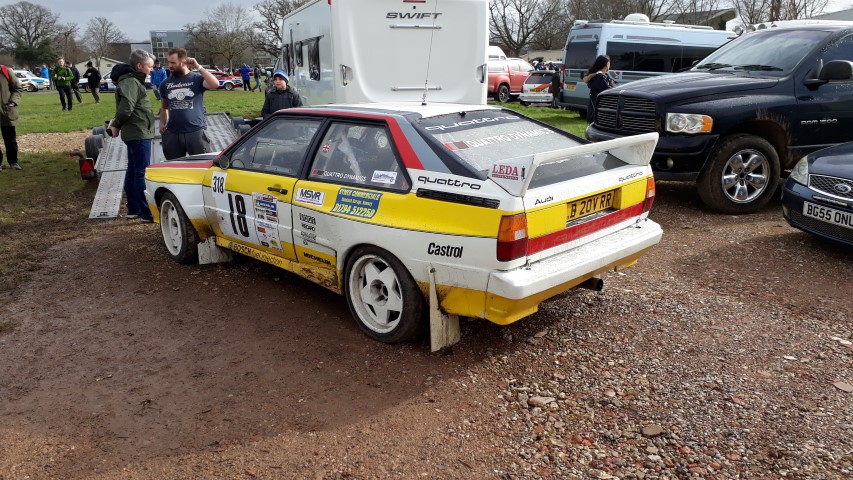
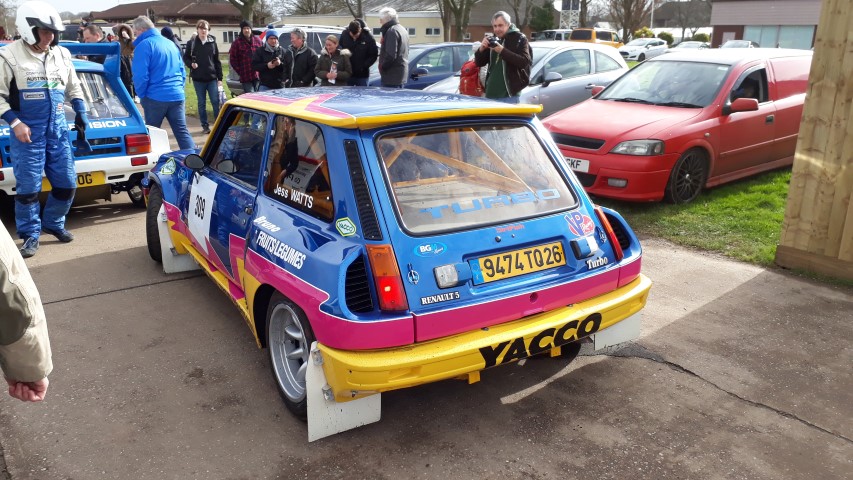
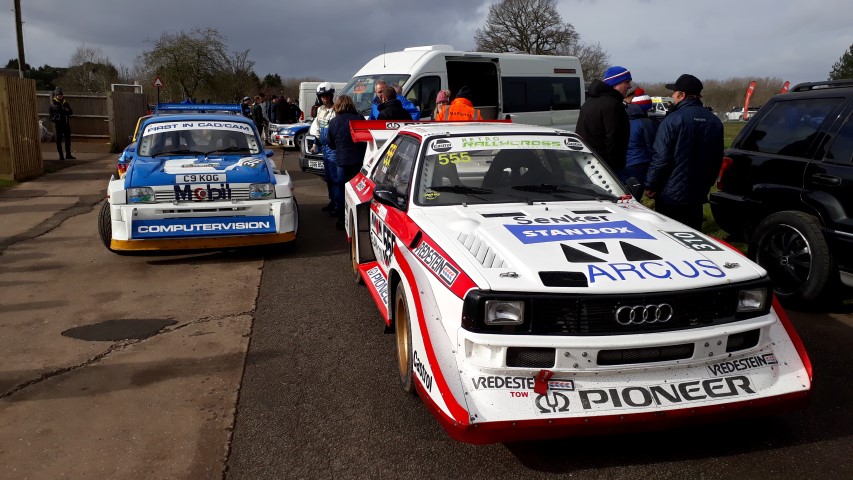
This Alfa sounded pure evil.

This is my friends ultra rare Astra 4S with details here if you want to know more about the car.
The live action rally demo was great with some amazing sounding machinery whizzing past.
This Alfa sounded pure evil.
Some awesome looking cars there, I’m very jealous. Bet you had a fab day mateThe wife and I popped to Race Retro on Saturday as a friend who was displaying had spare tickets going free so we couldn’t say no could we. Some lovely machinery there…
This is my friends ultra rare Astra 4S with details here if you want to know more about the car.
The live action rally demo was great with some amazing sounding machinery whizzing past.
This Alfa sounded pure evil.
- Joined
- Mar 15, 2012
- Messages
- 7,239
- Reaction score
- 14,247
- Points
- 113
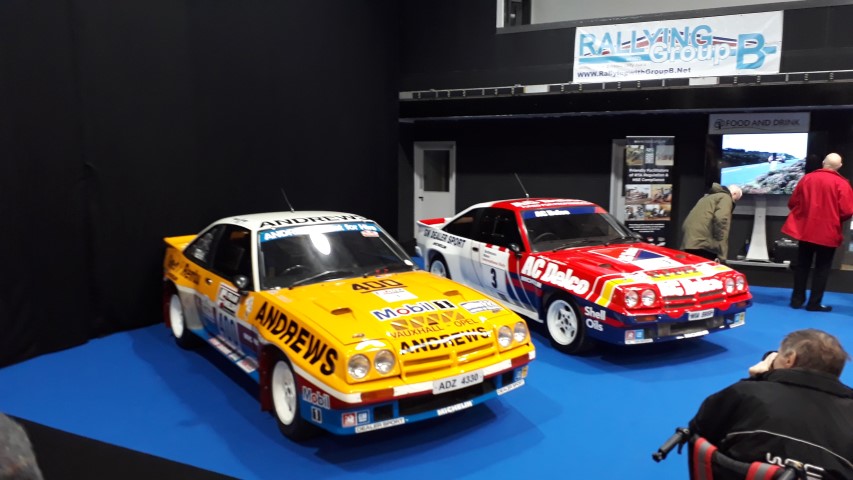
The Opel Manta GTE brought back memories of when I met my better half. Hers was a lovely red one..Great car to drive. Can't be that many on the road now I'm guessing?The wife and I popped to Race Retro on Saturday as a friend who was displaying had spare tickets going free so we couldn’t say no could we. Some lovely machinery there…
This is my friends ultra rare Astra 4S with details here if you want to know more about the car.
The live action rally demo was great with some amazing sounding machinery whizzing past.
This Alfa sounded pure evil.
The Opel Manta GTE brought back memories of when I met my better half. Can't be that many on the road now I'm guessing?
Certainly not many kicking around now, few and far between.
I’ve started gathering bits and pieces for servicing as I intend completing them myself from here on.
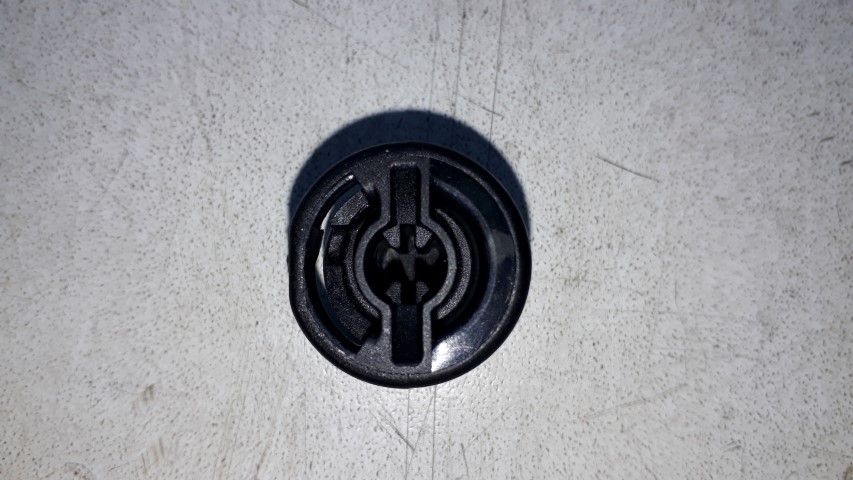
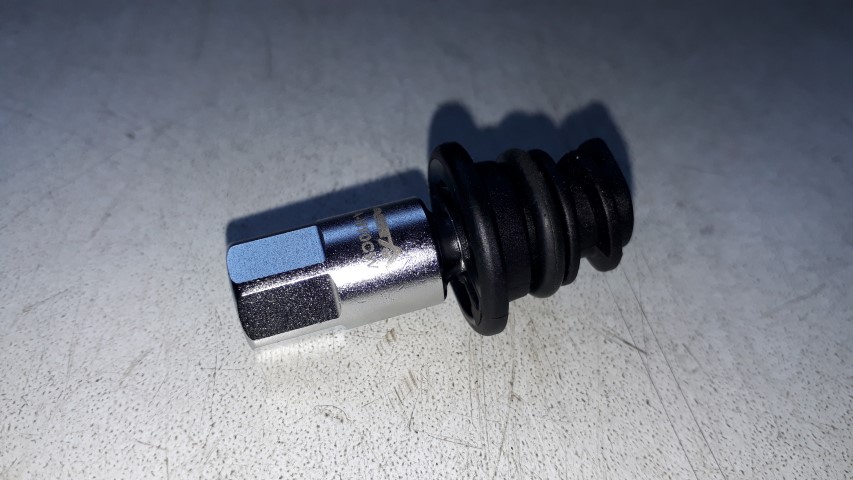
Grabbed a few sump plugs as they were really cheap and not worth taking chances reusing them as it is recommended to change at each service.
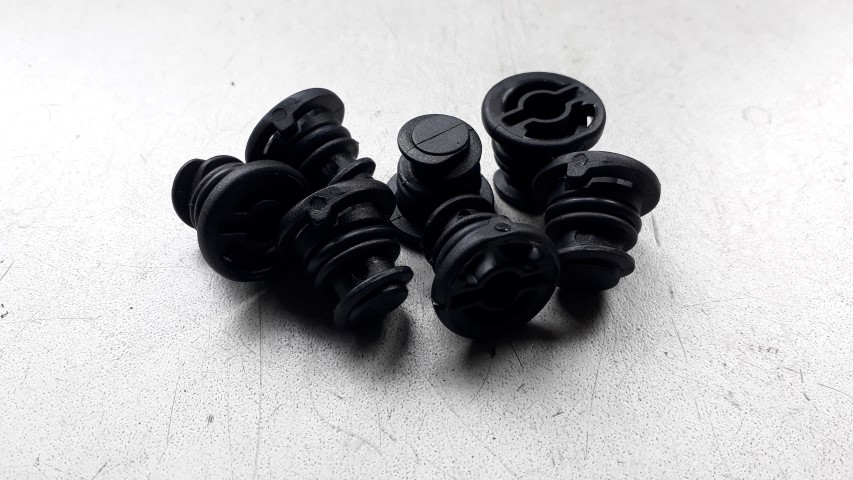
Also bought the proper tool for removal to save any messing with flat blade screwdrivers, note the shape.
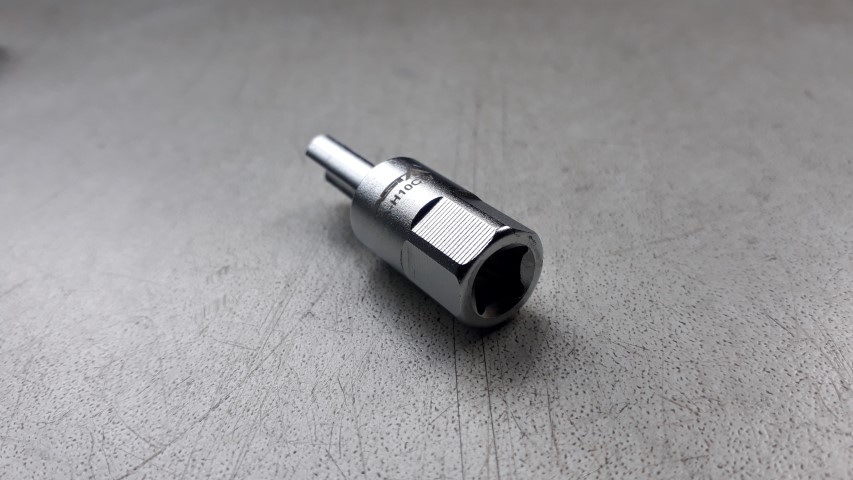
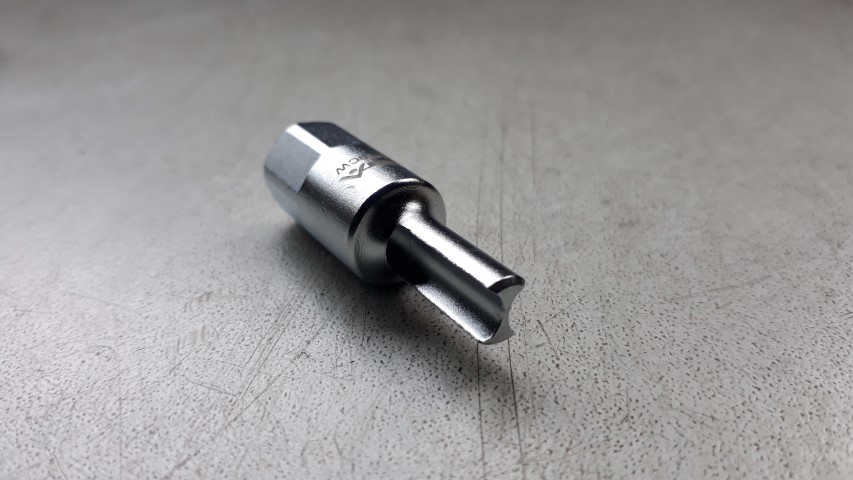
It’s designed to fit snuggly in here and works perfectly.
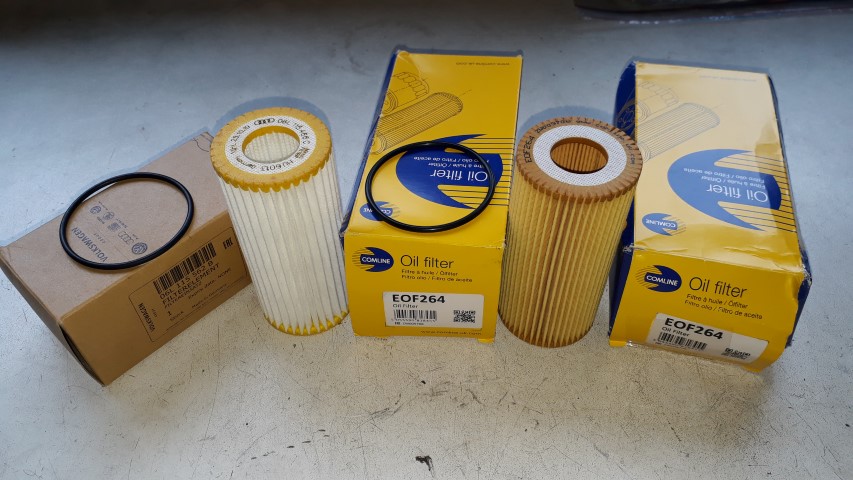
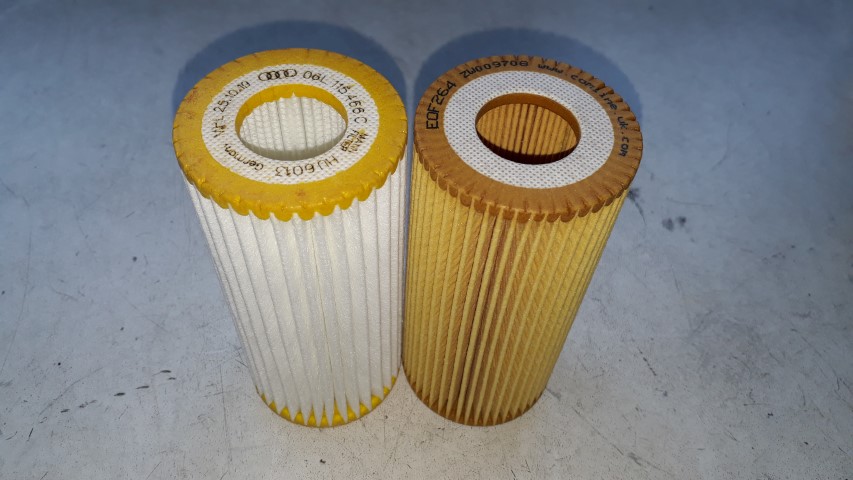
Also grabbed new old stock oil filters at a bargain price as I’ll be changing the oil every 6 months. The OE is a Mann branded part no.HU6013 same as Comline EOF264. I’ve used Comline branded filters for years so know their quality is excellent.
Grabbed a few sump plugs as they were really cheap and not worth taking chances reusing them as it is recommended to change at each service.
Also bought the proper tool for removal to save any messing with flat blade screwdrivers, note the shape.
It’s designed to fit snuggly in here and works perfectly.
Also grabbed new old stock oil filters at a bargain price as I’ll be changing the oil every 6 months. The OE is a Mann branded part no.HU6013 same as Comline EOF264. I’ve used Comline branded filters for years so know their quality is excellent.
- Joined
- Mar 15, 2012
- Messages
- 7,239
- Reaction score
- 14,247
- Points
- 113
'Proper Job'I’ve started gathering bits and pieces for servicing as I intend completing them myself from here on.
Grabbed a few sump plugs as they were really cheap and not worth taking chances reusing them as it is recommended to change at each service.
Also bought the proper tool for removal to save any messing with flat blade screwdrivers, note the shape.
It’s designed to fit snuggly in here and works perfectly.
Also grabbed new old stock oil filters at a bargain price as I’ll be changing the oil every 6 months. The OE is a Mann branded part no.HU6013 same as Comline EOF264. I’ve used Comline branded filters for years so know their quality is excellent.
Might be worth buying an aftermarket service booklet so you will have something to show any potential buyer in the future. Why Audi thought online service history was a good idea ?
'Might be worth buying an aftermarket service booklet so you will have something to show any potential buyer in the future.
For all my cars I always keep a comprehensive paper history including all receipts and detailed itemised servicing. I'm both OTT and OCD with stuff like this as a car isn't just a means to an end for me, it's a way of life
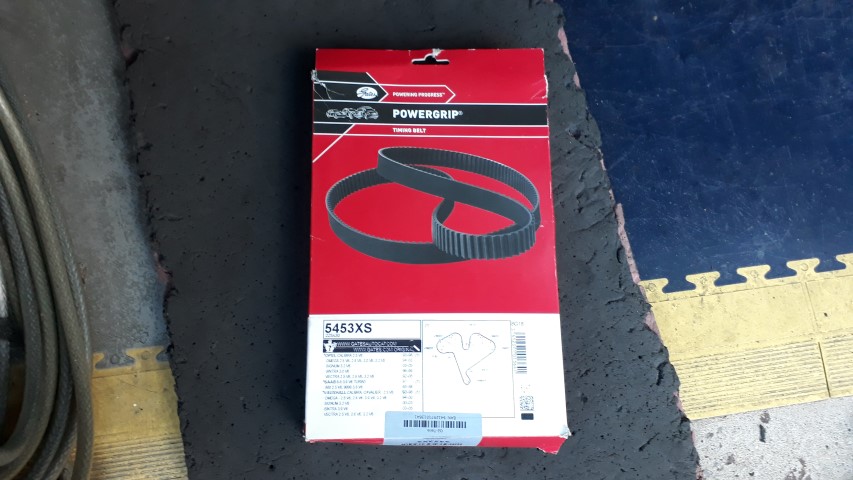
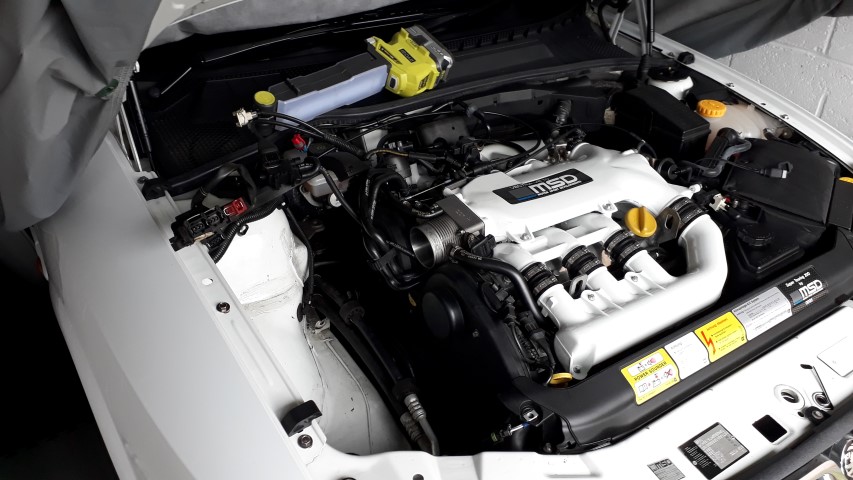
With a bit of time currently on my side I decided to change the timing belt on my garage weight, namely my 1997 Vauxhall Vectra ST200 you would have seen pics of in my first post in this thread. It doesn't come out very often having last seen the road in 2016. Back then I fitted a full Contitech timing kit (belt & rollers) but on cold start you could hear the belt squeaking. The squeak cleared after a few minutes but annoyed the hell out of me having never had this issue previously. A friend in the know suggested I try a Gates belt so that's what I decided to buy and fit.
Started stripping it down and removing the Contitech timing belt.

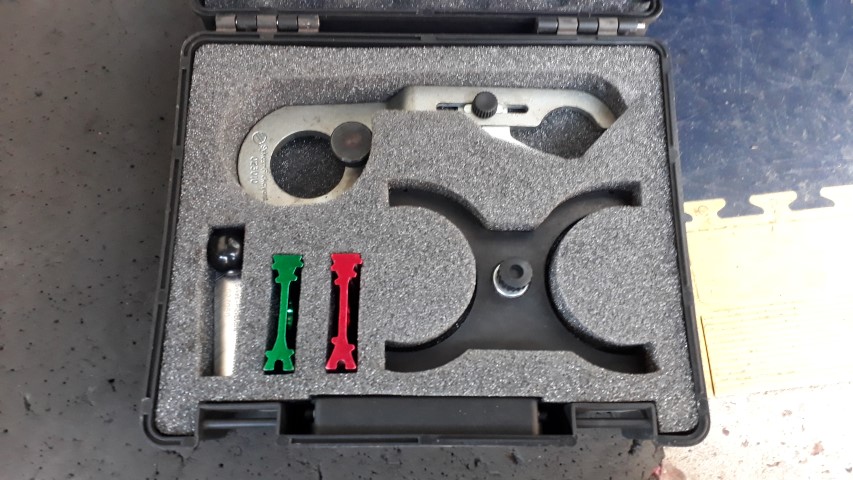
Fortunately, I’ve got a pucka Sykes-Pickavant timing tool so this makes things so much easier.
New Gates belt installed, with timing quadruple checked after finding it a pain to balance the front and rear banks but my determination won the day. Bit less here and a bit more there and I’ve got the cam timing marks bang in the centre of where they should be, it just required a little finesse with the lower and top center eccentric idlers.

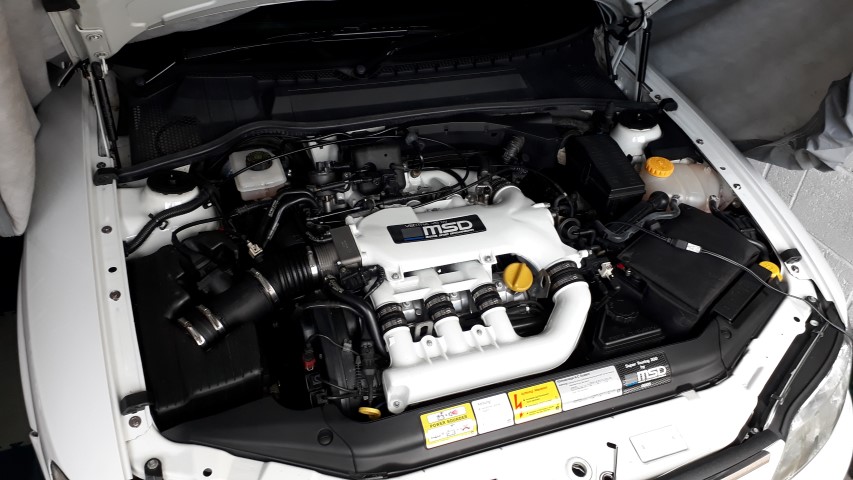
All buttoned back together to test another day as I need to remove the old fuel and get some fresh in there.
Started stripping it down and removing the Contitech timing belt.
Fortunately, I’ve got a pucka Sykes-Pickavant timing tool so this makes things so much easier.
New Gates belt installed, with timing quadruple checked after finding it a pain to balance the front and rear banks but my determination won the day. Bit less here and a bit more there and I’ve got the cam timing marks bang in the centre of where they should be, it just required a little finesse with the lower and top center eccentric idlers.
All buttoned back together to test another day as I need to remove the old fuel and get some fresh in there.
- Joined
- Mar 15, 2012
- Messages
- 7,239
- Reaction score
- 14,247
- Points
- 113
Job well doneWith a bit of time currently on my side I decided to change the timing belt on my garage weight, namely my 1997 Vauxhall Vectra ST200 you would have seen pics of in my first post in this thread. It doesn't come out very often having last seen the road in 2016. Back then I fitted a full Contitech timing kit (belt & rollers) but on cold start you could hear the belt squeaking. The squeak cleared after a few minutes but annoyed the hell out of me having never had this issue previously. A friend in the know suggested I try a Gates belt so that's what I decided to buy and fit.
Started stripping it down and removing the Contitech timing belt.
Fortunately, I’ve got a pucka Sykes-Pickavant timing tool so this makes things so much easier.
New Gates belt installed, with timing quadruple checked after finding it a pain to balance the front and rear banks but my determination won the day. Bit less here and a bit more there and I’ve got the cam timing marks bang in the centre of where they should be, it just required a little finesse with the lower and top center eccentric idlers.
All buttoned back together to test another day as I need to remove the old fuel and get some fresh in there.
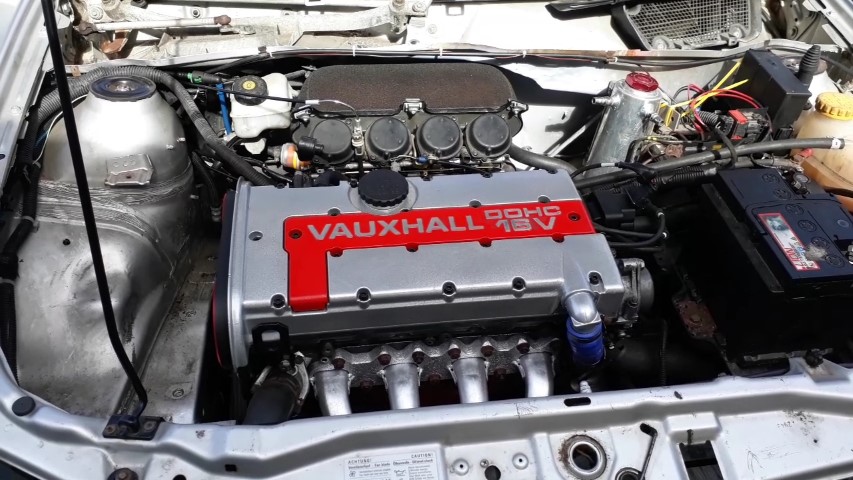
Looking at the pics of the engine reminded me on how well the 2.5 looks under the bonnet..never had mine looking that clean mind you.
Lovely smooth engine from what I remembered
 You should get it out and enjoy it more. Such a shame letting it sit idle in the garage.
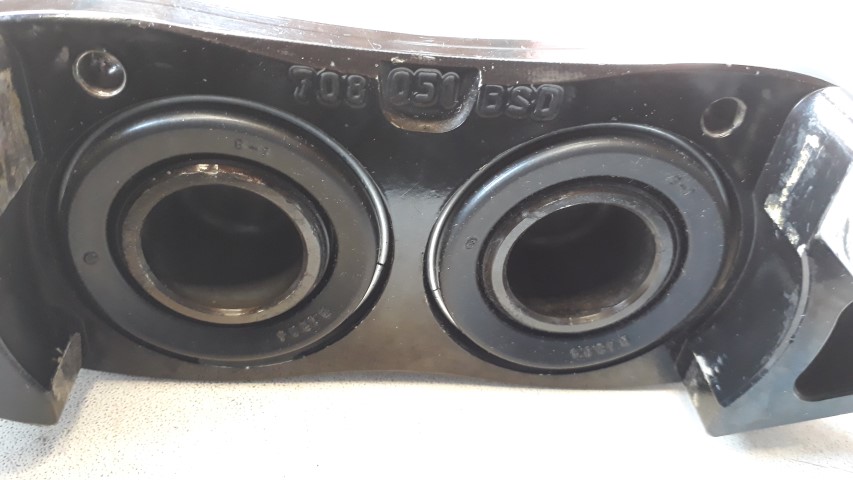
My track car required some TLC finding the front caliper weather seals had seen better days after 12 years of hard work.

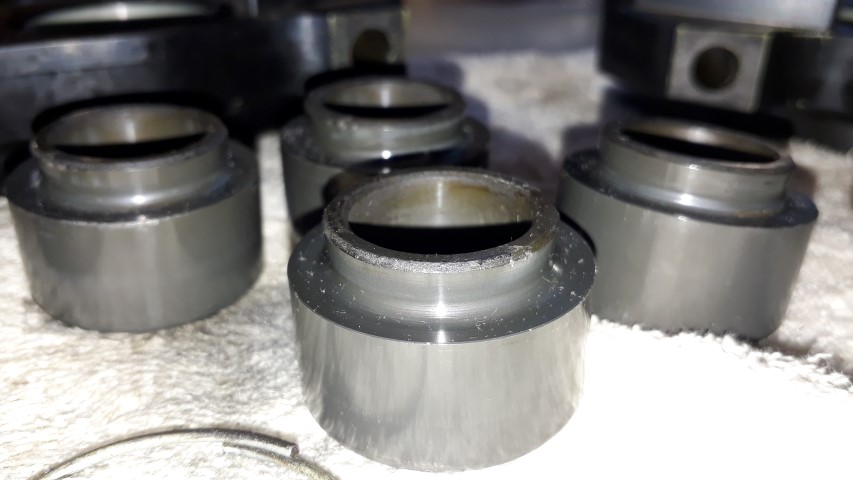
I cracked on and stripped both calipers for an inspection. I’m pleased to say all eight pistons are fit and well and have no score damage.
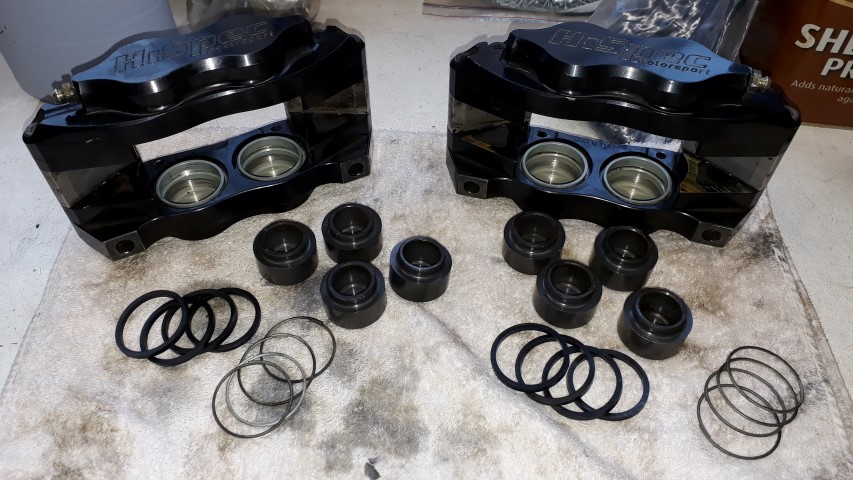
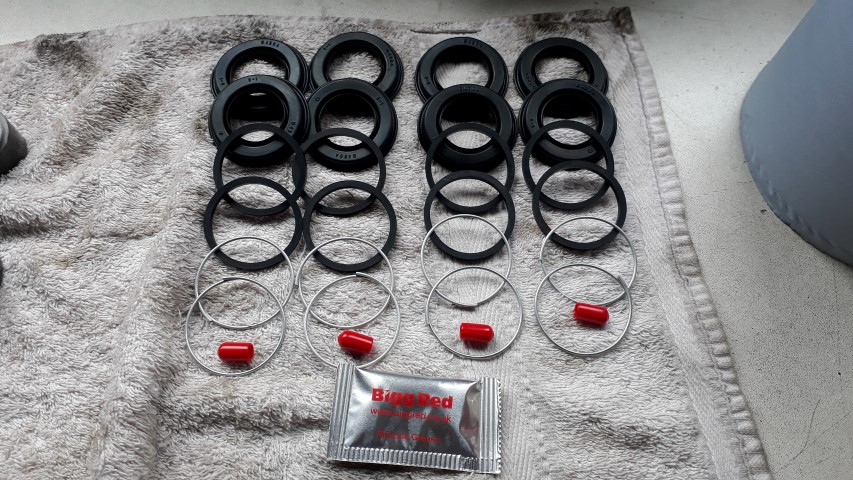
With HiSpec wanting silly money for seals a spot of research was required. I measured the pistons at 38mm diameter and found the Billet 4 uses Girling seals from a Volvo 204 or 260 1974-1993. A Bigg Red BRK203801 seal kit was ordered and this is what turned up.
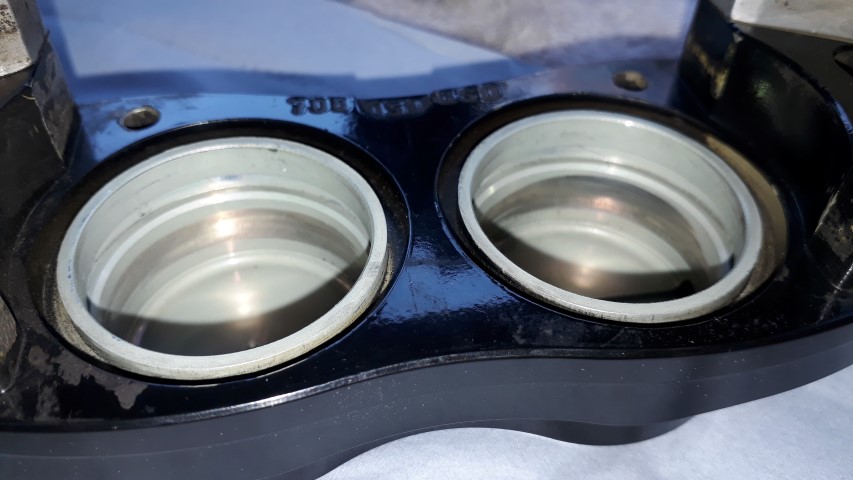
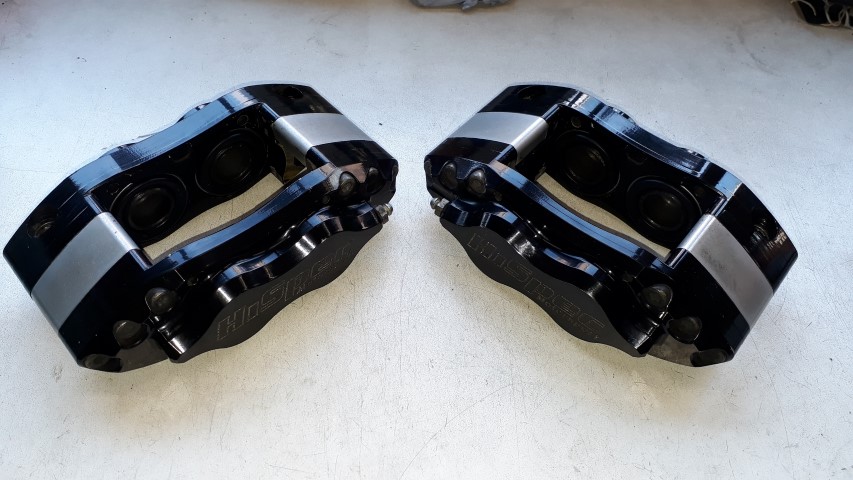
I cracked on with thorough caliper cleaning.
Assemble was straight forward once I’d figured out you had to have the retaining spring on the weather seal prior to pressing it into the caliper.
All seals replaced and calipers like new.
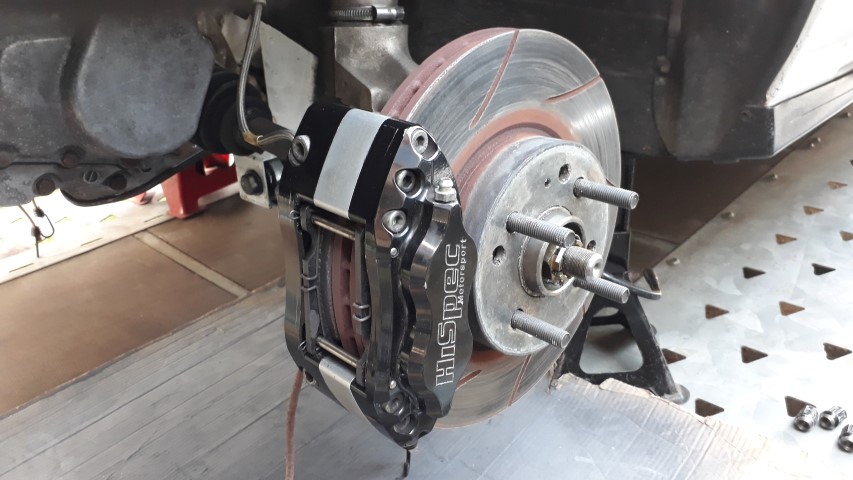
Disc faces sanded, pad faces sanded and calipers fitted with brakes bled.
I cracked on and stripped both calipers for an inspection. I’m pleased to say all eight pistons are fit and well and have no score damage.
With HiSpec wanting silly money for seals a spot of research was required. I measured the pistons at 38mm diameter and found the Billet 4 uses Girling seals from a Volvo 204 or 260 1974-1993. A Bigg Red BRK203801 seal kit was ordered and this is what turned up.
I cracked on with thorough caliper cleaning.
Assemble was straight forward once I’d figured out you had to have the retaining spring on the weather seal prior to pressing it into the caliper.
All seals replaced and calipers like new.
Disc faces sanded, pad faces sanded and calipers fitted with brakes bled.
Something really satisfying getting the spanners out, I think I might have to get myself a project. No spanners on my current car, just a laptop required.My track car required some TLC finding the front caliper weather seals had seen better days after 12 years of hard work.
I cracked on and stripped both calipers for an inspection. I’m pleased to say all eight pistons are fit and well and have no score damage.
With HiSpec wanting silly money for seals a spot of research was required. I measured the pistons at 38mm diameter and found the Billet 4 uses Girling seals from a Volvo 204 or 260 1974-1993. A Bigg Red BRK203801 seal kit was ordered and this is what turned up.
I cracked on with thorough caliper cleaning.
Assemble was straight forward once I’d figured out you had to have the retaining spring on the weather seal prior to pressing it into the caliper.
All seals replaced and calipers like new.
Disc faces sanded, pad faces sanded and calipers fitted with brakes bled.

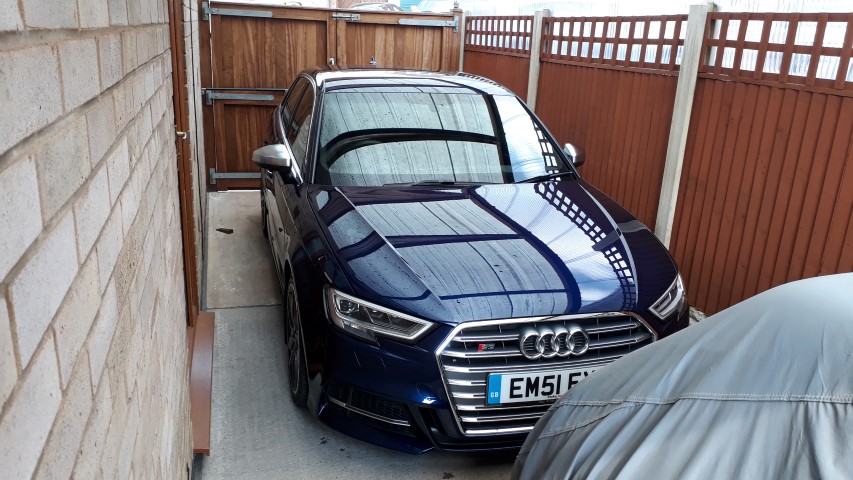
The S3 got safely tucked behind my gates for some fettling and fiddling earlier this week.
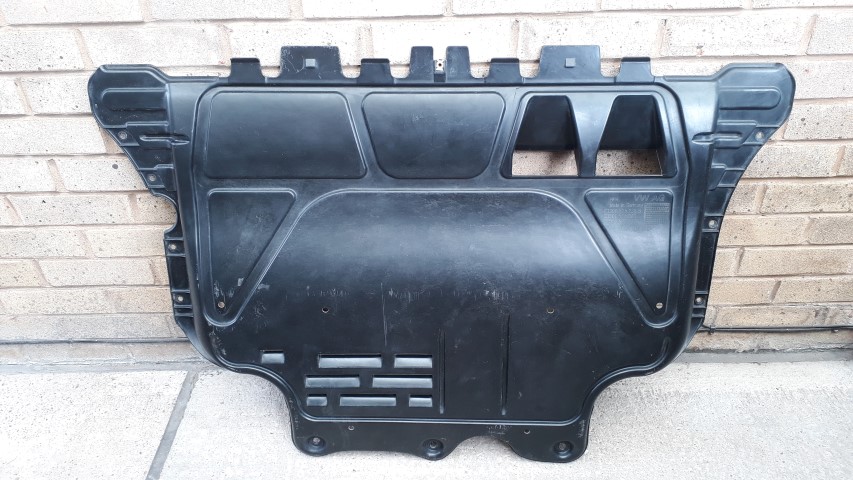
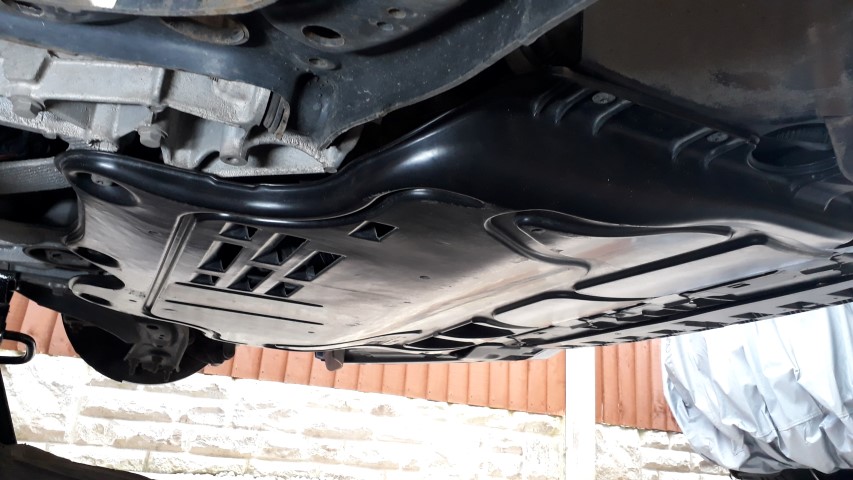
I’ve been curious to the condition of the engine on the underside so removed the cover for a closer look. All seems fine with no leaks and in good nick under here.
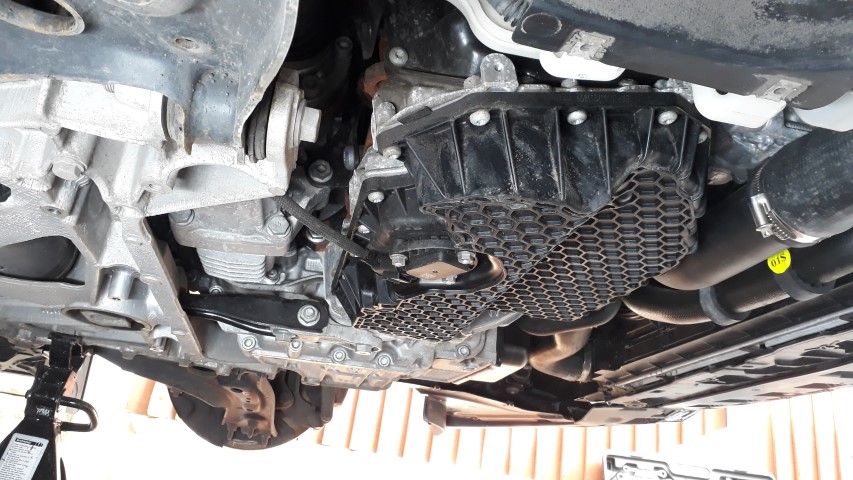
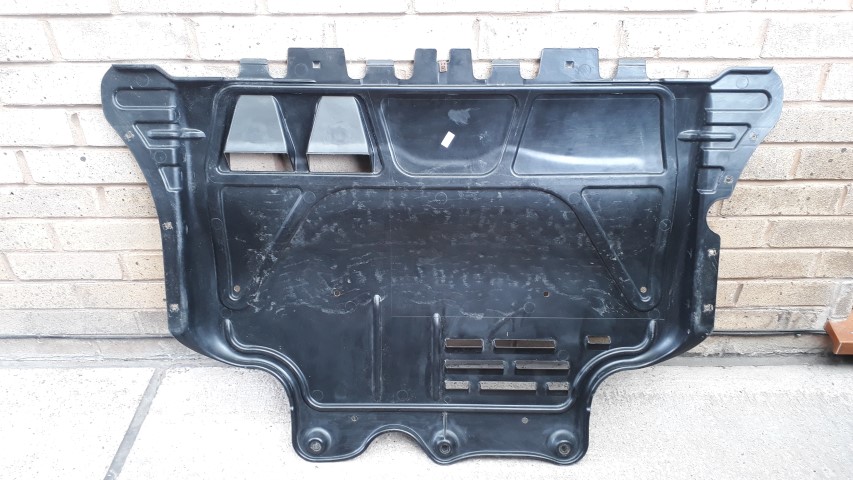
The tray was filthy which will never do…
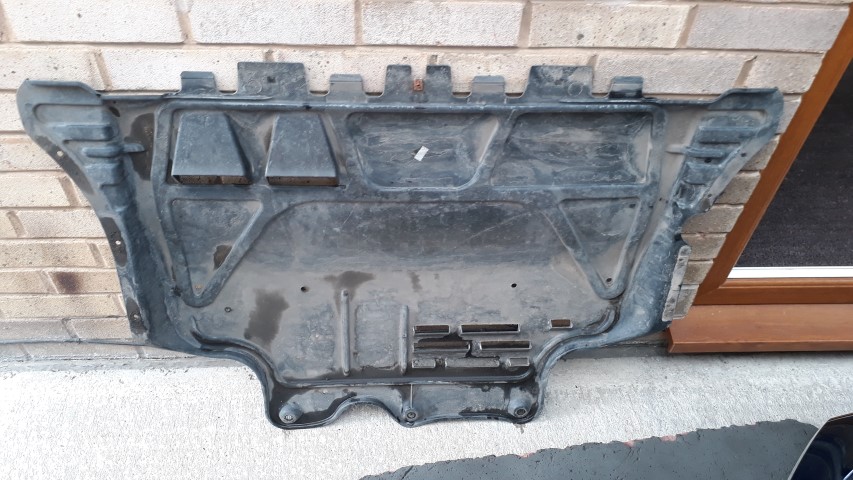
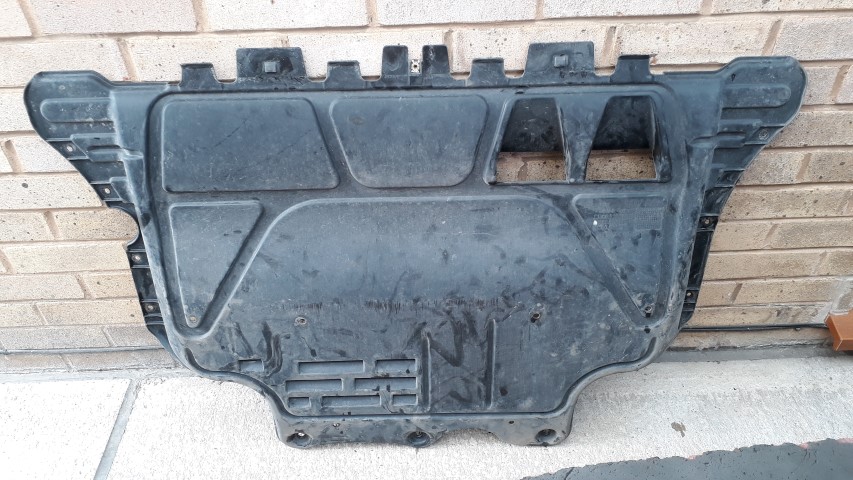
…so got a wash and polish before being refitted, much better.
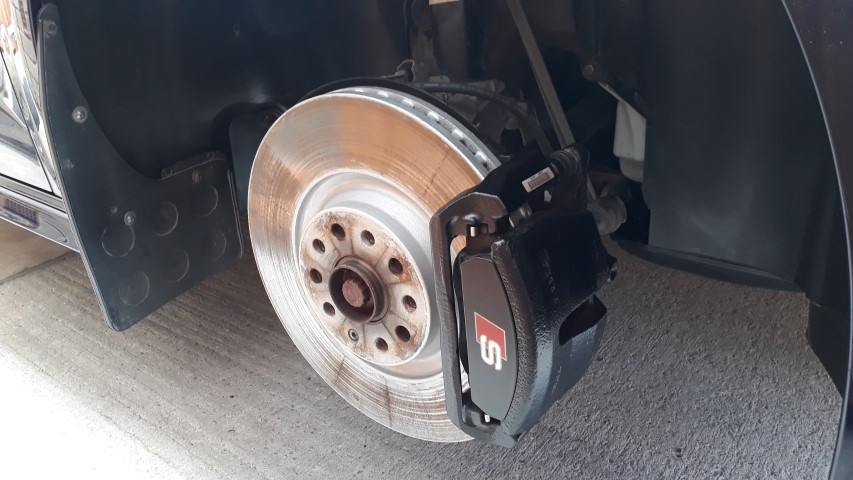
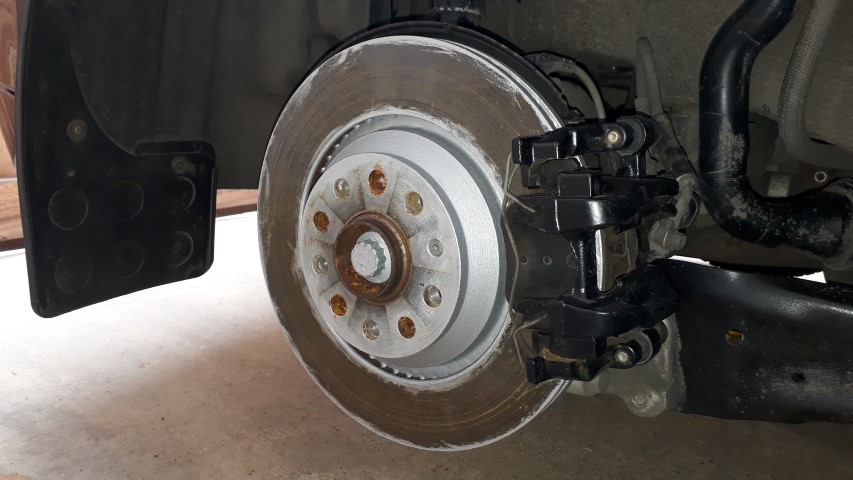
Next job was to give the disc bells and outer edges a tickle using Hammerite smooth silver which was to top-up as the existing painting I had done last year now requiring refresh. The calipers also got a clean, made so much easier when manufactures use decent powder coating.

I’ve been curious to the condition of the engine on the underside so removed the cover for a closer look. All seems fine with no leaks and in good nick under here.
The tray was filthy which will never do…
…so got a wash and polish before being refitted, much better.
Next job was to give the disc bells and outer edges a tickle using Hammerite smooth silver which was to top-up as the existing painting I had done last year now requiring refresh. The calipers also got a clean, made so much easier when manufactures use decent powder coating.
The mucky arch liners also had a wipe over with the plastic fronts coming up very well. The rears have those horrible hard fabric type to aid sound deadening so they just got a brush and lite wipe over.
With the rims removed they all got a detail using SRP (Autoglym Super Resin Polish) finished with AutoSmart quick detailing wax.
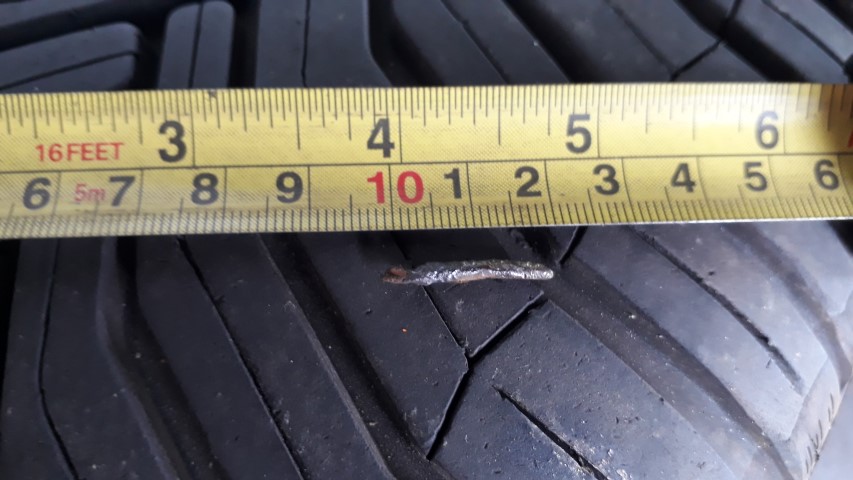
While I was checking the wheels I noticed the remains of a nail in the front left but luckily it had entered at an angle and hadn’t pierced the inner skin so fortunately no air loss when I wrestled it out.
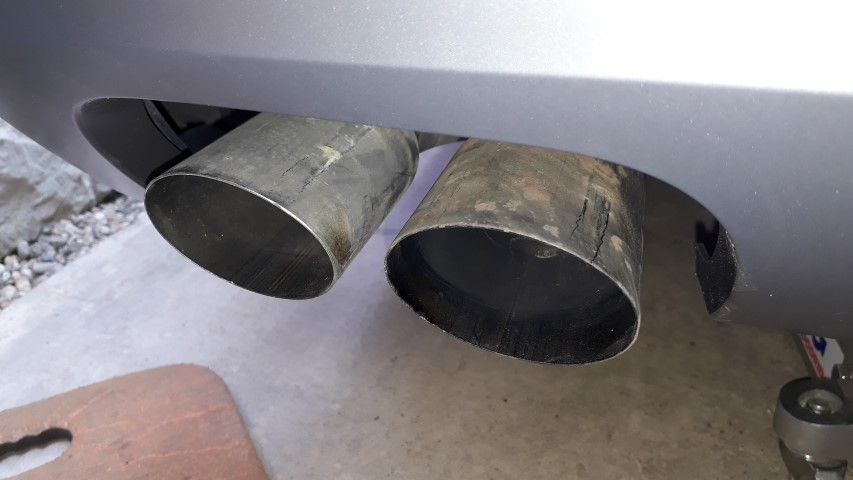
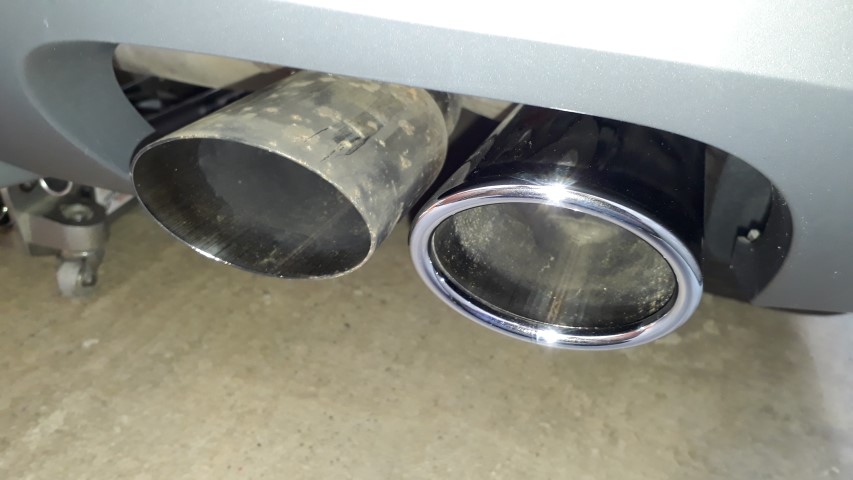
Last but not least as I do love shiny tips (stop it you dirty minded rascals) so all four were removed with the aid of a screwdriver to press in the rear tab and a soft face hammer.

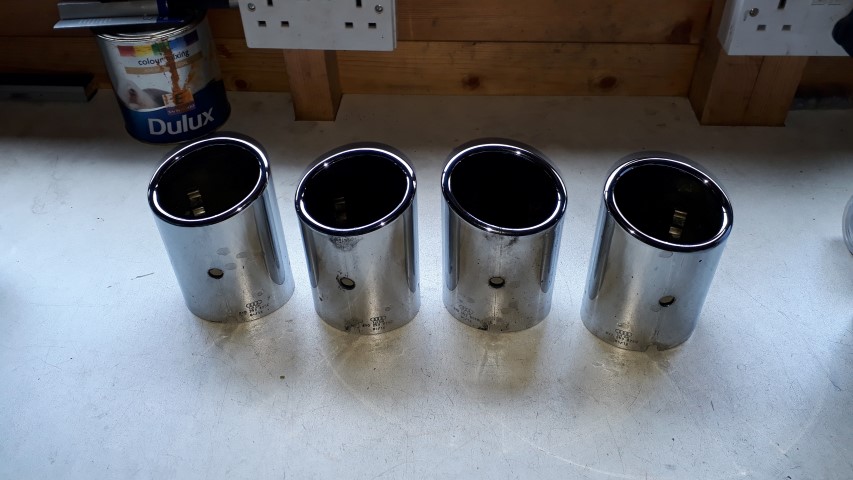
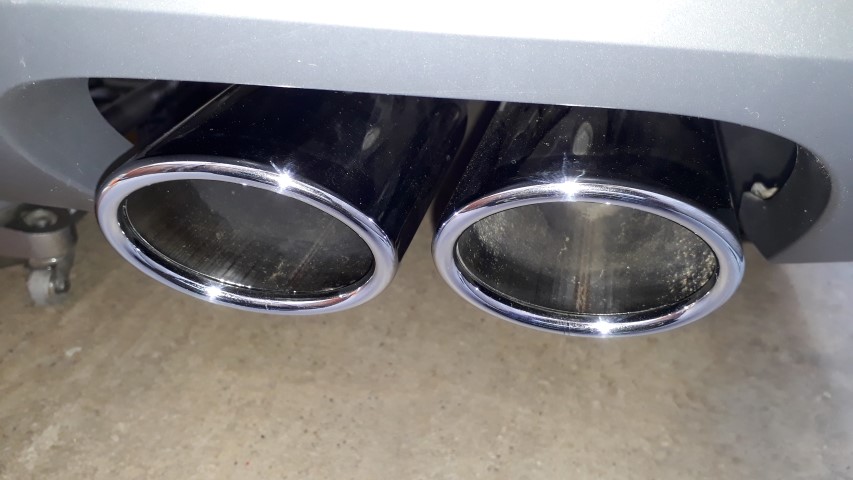
After frantic to and fro action using Autosol, yes I was sweating during and after, they were all gleaming with any tar spots gone.
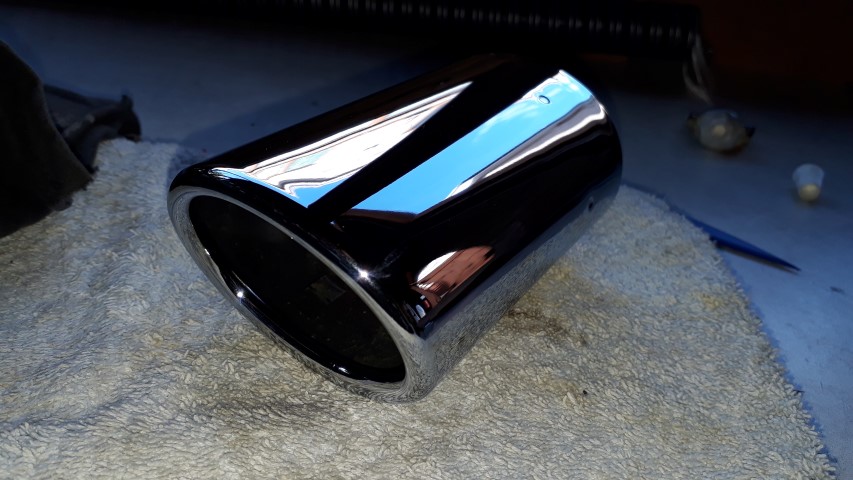
Bish, bash, bosh, job done and the shiny tips will last a little longer.
With the rims removed they all got a detail using SRP (Autoglym Super Resin Polish) finished with AutoSmart quick detailing wax.
While I was checking the wheels I noticed the remains of a nail in the front left but luckily it had entered at an angle and hadn’t pierced the inner skin so fortunately no air loss when I wrestled it out.
Last but not least as I do love shiny tips (stop it you dirty minded rascals) so all four were removed with the aid of a screwdriver to press in the rear tab and a soft face hammer.
After frantic to and fro action using Autosol, yes I was sweating during and after, they were all gleaming with any tar spots gone.
Bish, bash, bosh, job done and the shiny tips will last a little longer.
Did you polish your tips (ahem) with a cloth, or a machine? I need to give mine a spruce up but some of the stains are a real pig to remove. Would a fine wire wool help? Loving your attention to detail.
Did you polish your tips (ahem) with a cloth, or a machine?
They all had a vigorous hand job, only reason being I don't have access to a machine polisher.
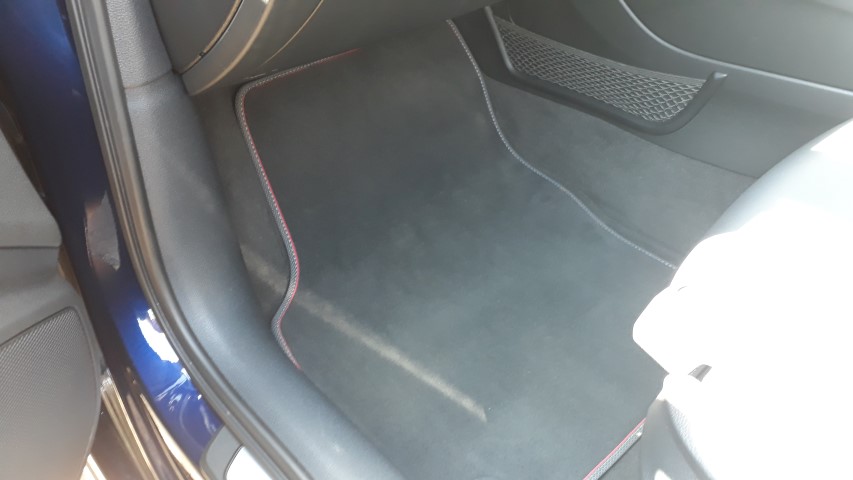
As Summer is knocking on the door and the weather has picked up I thought it only right the rubber Winter floor mats get banished into storage and the posh cloth gets laid.
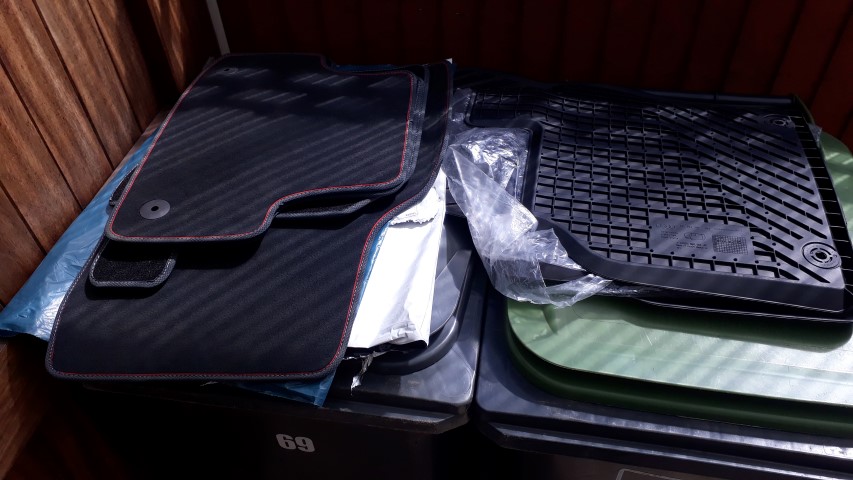
I managed to wangle a full set of four genuine Audi cloth mats when we purchased the car. They don’t seem very hardwearing but fit perfectly, probably cost a fortune, nearly match the existing flooring colour and I like the red stitching and funky piping around them.
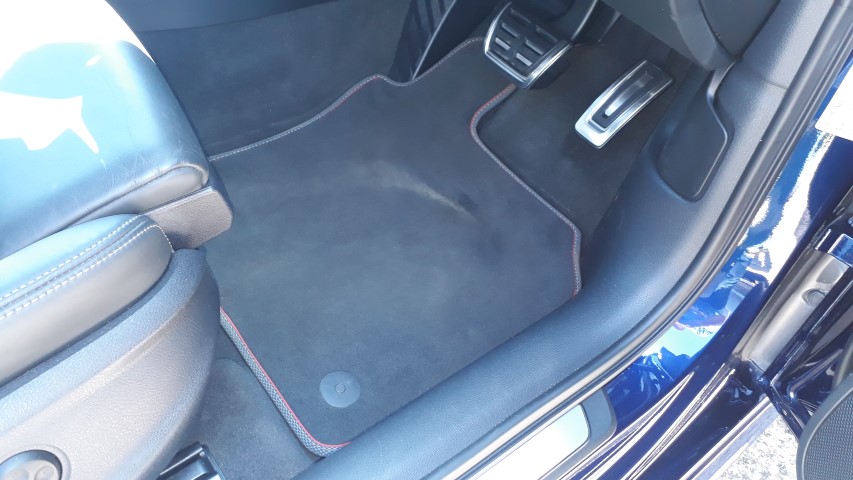

I managed to wangle a full set of four genuine Audi cloth mats when we purchased the car. They don’t seem very hardwearing but fit perfectly, probably cost a fortune, nearly match the existing flooring colour and I like the red stitching and funky piping around them.
I always like to have at least one vehicle I can use a roof rack on just in case I need to carry stuff and things so the lucky winner was chosen at random from a pool of one. The winner is our mighty Amarok so a set of roof rails were ordered but it began life looking naked.
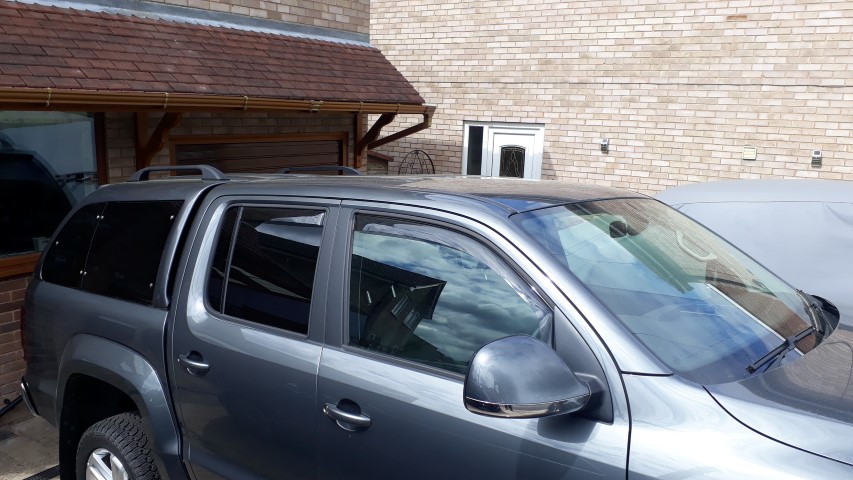
After a spot of research the best looking but still a bit weird, value for money, load capacity at 75kg plus TUV approved where ordered from the VanStyle & 4x4Style eBay shop. They simply bolt on using 4x M6x80mm fittings.
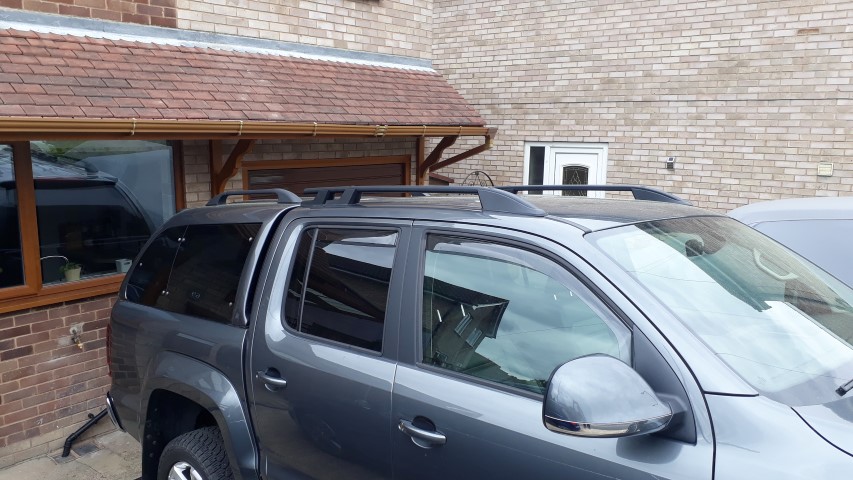
As I already have roof bars that I knew would fit I didn’t order those so saved myself some more dosh. The bars won’t be left fitted for day to day driving, this is just to show you they have red motorsport end caps for that go faster look. The rails make it easier when washing the roof section as you now have something to grab onto to pull yourself up when standing on the sill.

As the bars are of a somewhat familiar brand to me I thought it only fitting I christen my new roof rack assembly a VAG-Vaux hybrid Anyone need anything carrying…after the lockdown obviously.

After a spot of research the best looking but still a bit weird, value for money, load capacity at 75kg plus TUV approved where ordered from the VanStyle & 4x4Style eBay shop. They simply bolt on using 4x M6x80mm fittings.
As I already have roof bars that I knew would fit I didn’t order those so saved myself some more dosh. The bars won’t be left fitted for day to day driving, this is just to show you they have red motorsport end caps for that go faster look. The rails make it easier when washing the roof section as you now have something to grab onto to pull yourself up when standing on the sill.
As the bars are of a somewhat familiar brand to me I thought it only fitting I christen my new roof rack assembly a VAG-Vaux hybrid
Anyone need anything carrying…after the lockdown obviously.
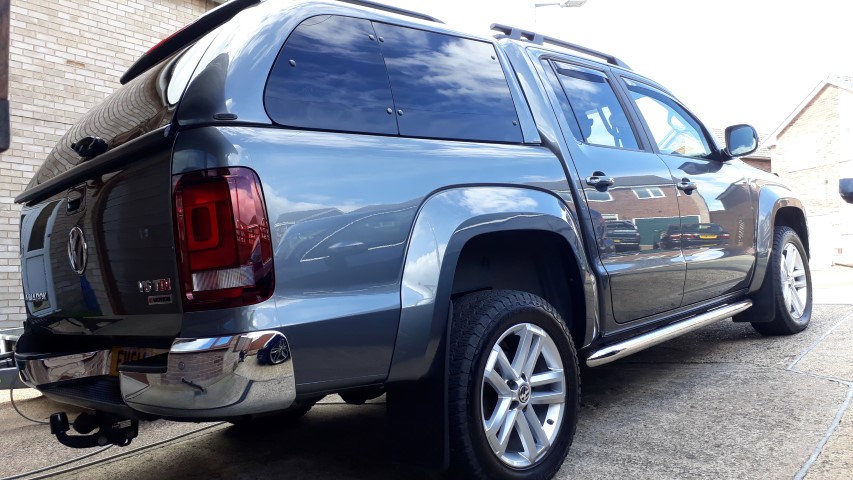
I’ve spent a couple of energetic days detailing the massive Amarok by hand as I don’t have a machine polisher & don’t profess to be good at it but love a clean looking vehicle. The paint work was surprisingly good so I didn’t need to crack open my AutoSmart clay cloth, if you’ve never tried one they come highly recommended. I used Autoglym Super Resin Polish with a topcoat of AutoSmart Wax Detail on the bodywork plus wheels, the stainless nudge & sill bars getting a good Autosol treatment, glass had Rain-X Cleaner & Rain Repellent with the tire walls having ArmorAll Extreme Tire Shine Gel applied.
I’m really pleased with the outcome which looks even better in the flesh as the pictures just don’t do it justice. It’s the next best thing to ceramic coating which I couldn’t justify for a work horse.
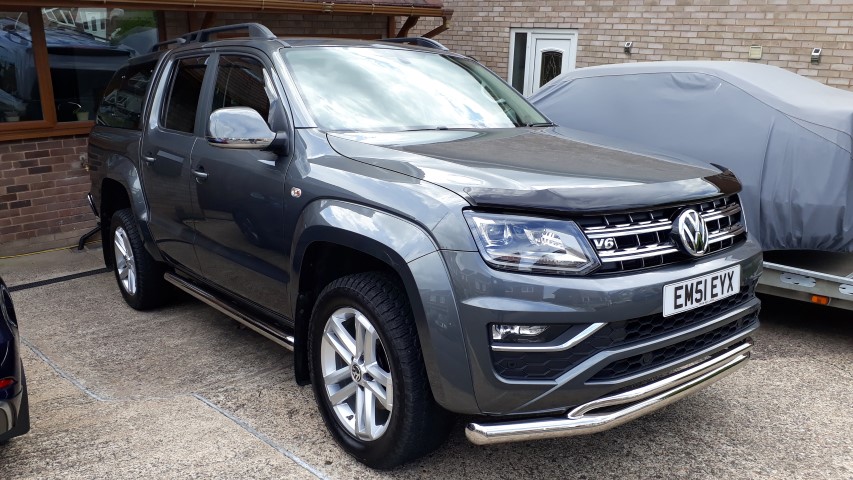
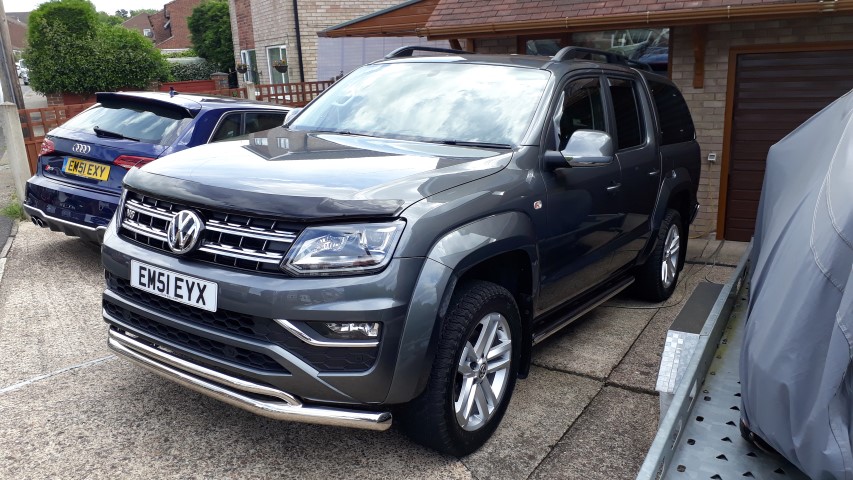
I really love this shot as it shows off the paint reflection.
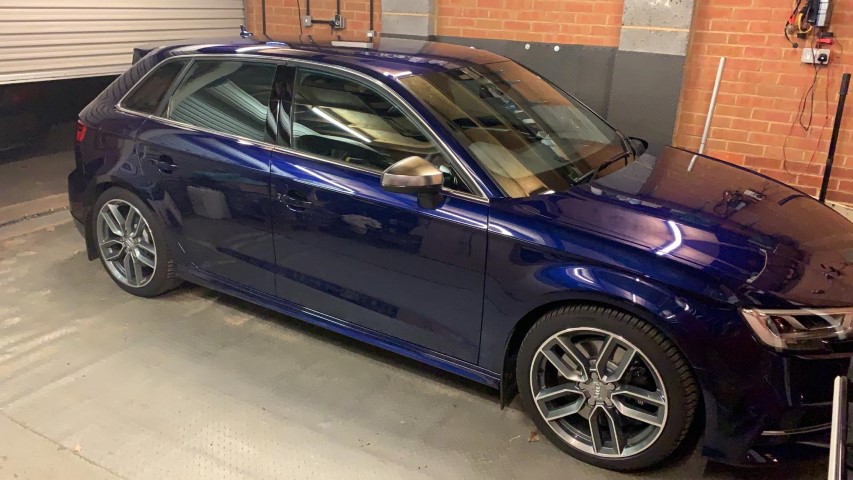
“What about the S3?” I hear you ask as this is an Audi forum. It’s not been forgotten and having not used it for a few weeks still got a wash & ArmorAll Extreme Tire Shine Gel to spruce up the look.

I’m really pleased with the outcome which looks even better in the flesh as the pictures just don’t do it justice. It’s the next best thing to ceramic coating which I couldn’t justify for a work horse.
I really love this shot as it shows off the paint reflection.
“What about the S3?” I hear you ask as this is an Audi forum. It’s not been forgotten and having not used it for a few weeks still got a wash & ArmorAll Extreme Tire Shine Gel to spruce up the look.
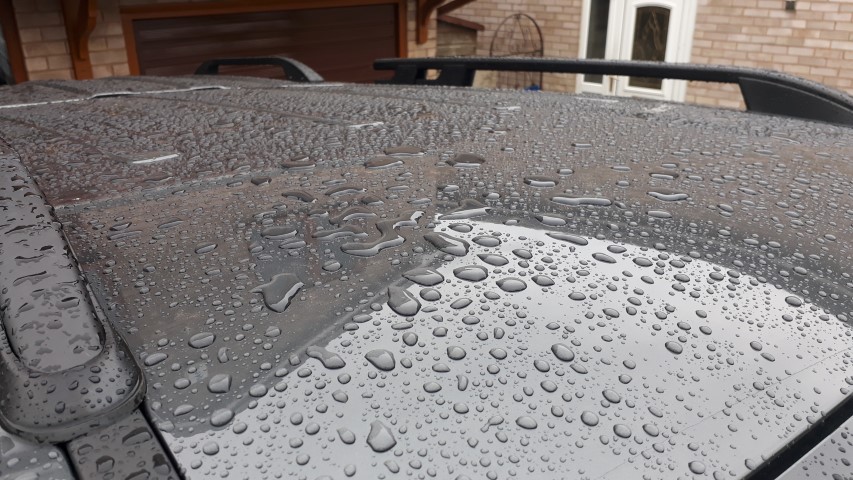
Woke this morning to see we had rain in the night, my first thoughts were…beading…so I popped outside to take a couple of snaps of the Amarok. I’m pretty pleased with all my hard work.


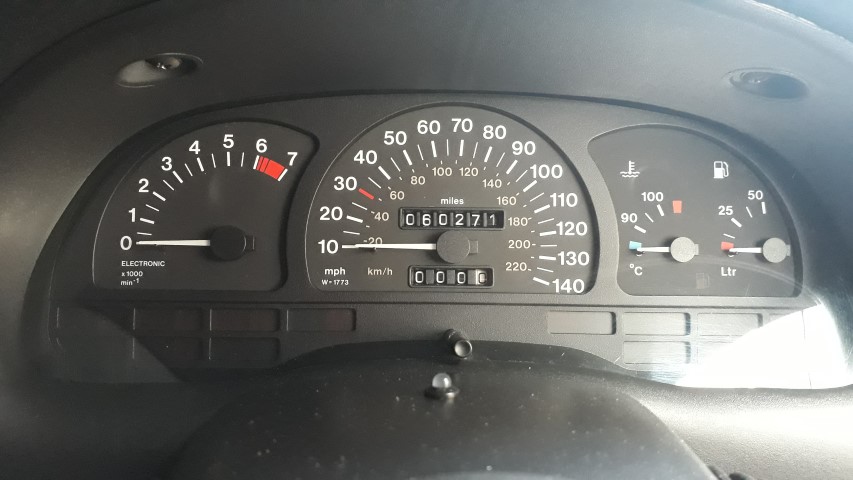
I've been working on my wife’s Astra mk3 and thought you lot might be interested. The Astra mk2 GTE from 1984-1991 was fitted with an LCD dash which was way ahead of its time, a bit like the virtual cockpit but released 35 years ago. I have one in my mk2 GTE track car as standard and happen to have some spares. The Astra mk3 uses a completely different shaped dash so I formulated a plan to retro fit the LCD panels while keeping the original looks and feel to keep a factory standish mk3 dash.
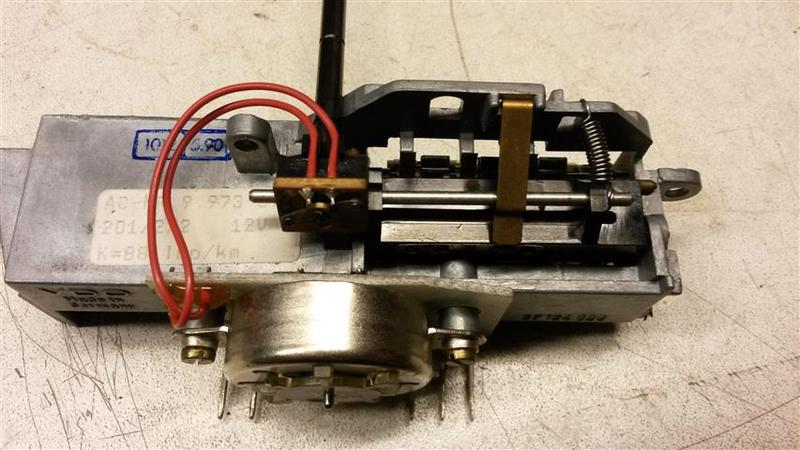
I started with adapting the odometer so it could have the trip reset in the centre as the mk2 is offset. A longer bar was added from a donor mk3 dash with plunger moved accordingly.
I then stripped both dashes to be left with this.

The dash fronts were cut to give maximum visibility of the full LCD panels and glued together to make a single unit.
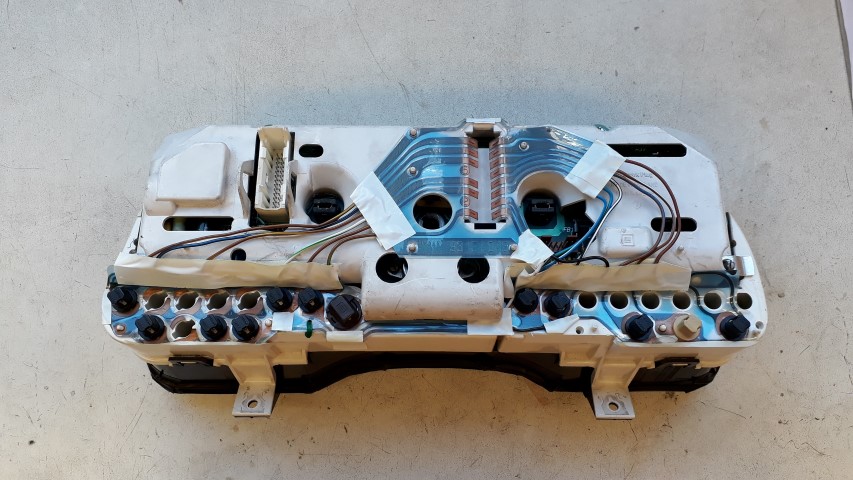
Test assembled after the rear covers were cut to make sure it all fitted together.

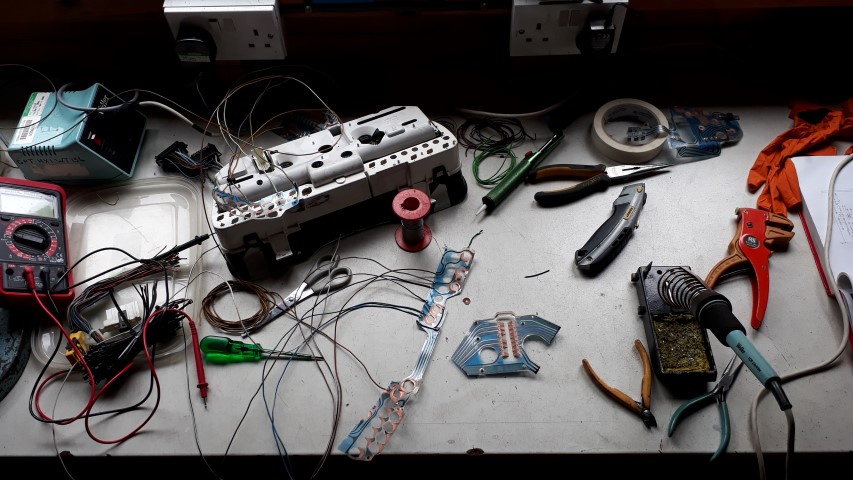
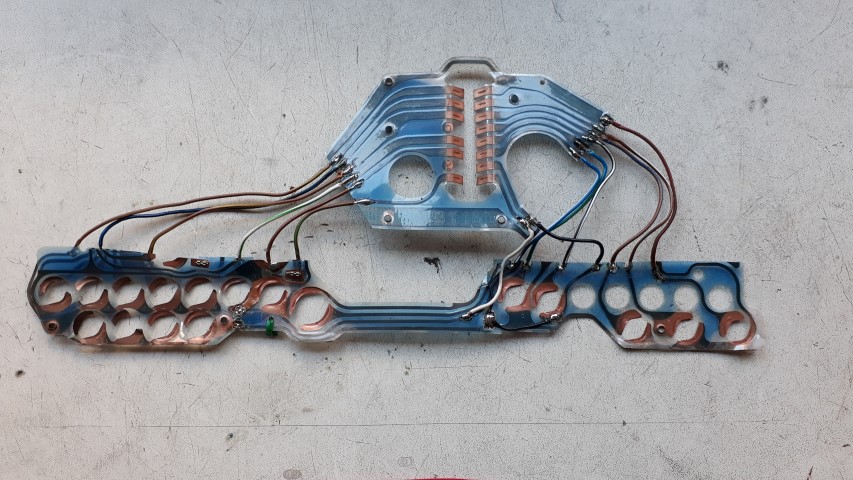
Sorting wiring so I could use the correct colours. Donated from a '97 Vectra V6 main harness loom.

Next was to cut the rear warning light circuits & solder the mk2 loom plug connector part to the lower mk3 warning light section.
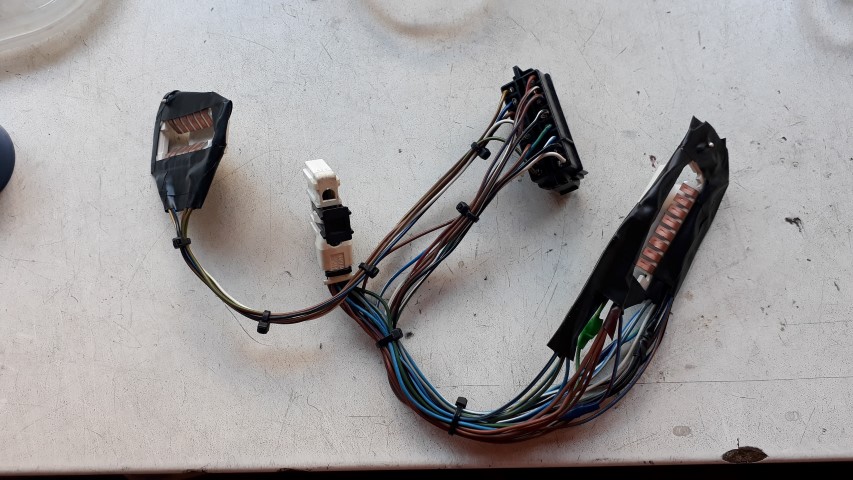
I made an adaptor loom so it was plug'n'play with no cutting on the car side loom.
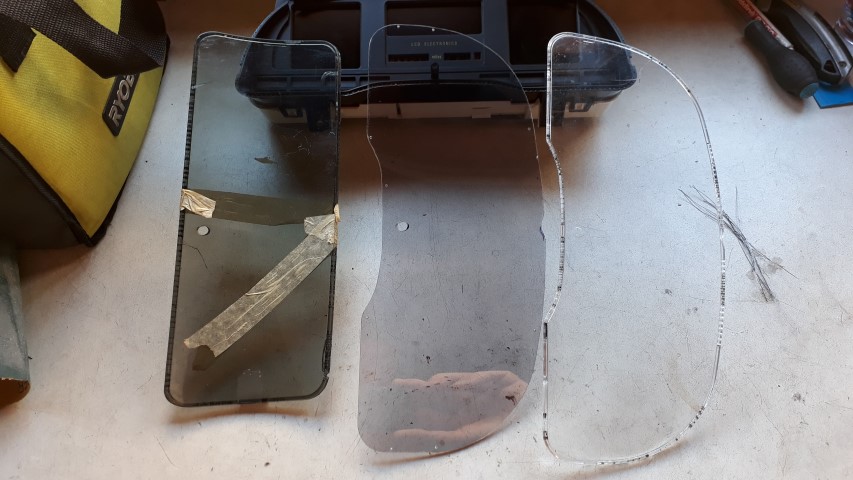
The LCD dash comes with a tinted front (left) so I used grey tinted polycarbonate sheet & made my own cover (centre) as the mk3 only come with clear fronts (right).
This is the lower warning light circuit finished & taped for protection. I’ve made the whole dash so it can be fully disassembled should there be any issues.
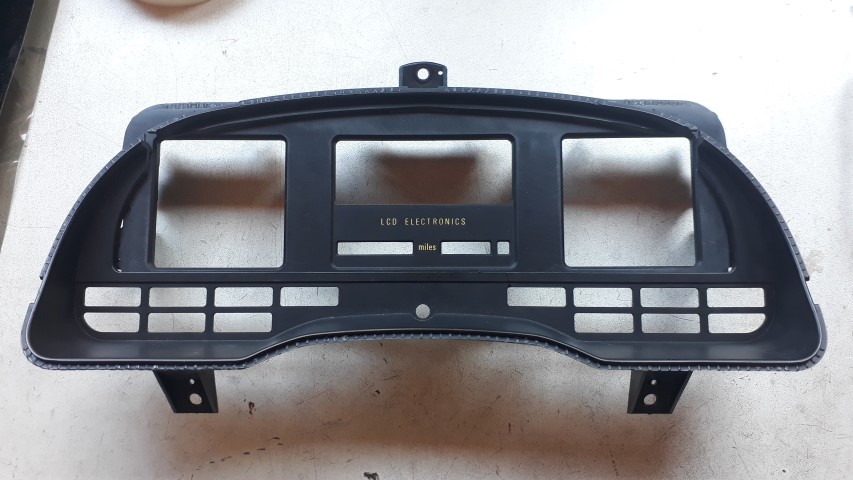
The original dash looks like this, dull, boring & standard…yawn.
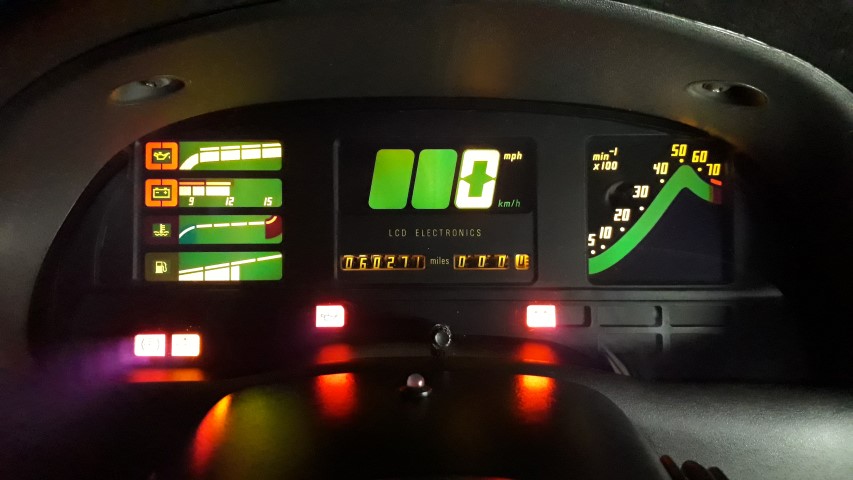
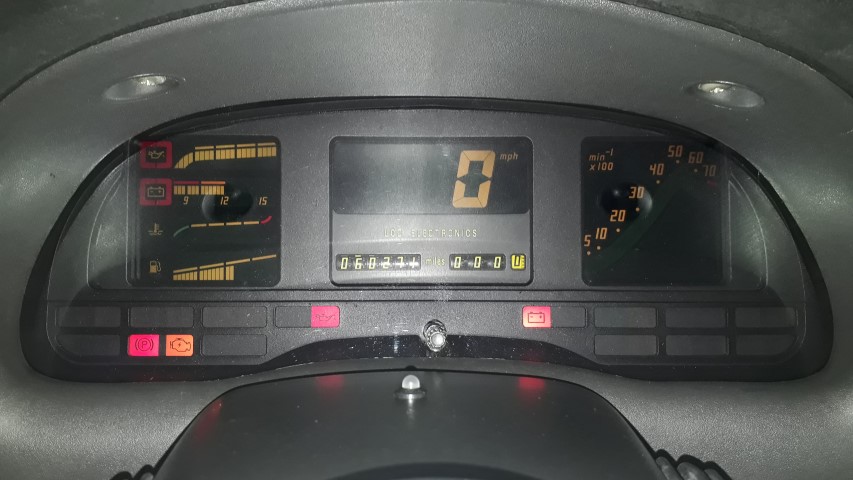
The new hybrid creation pictured with & without flash for better clarity. I know it won’t be to everyone’s taste but the wife & I love it as it’s added that little extra uniqueness. All the LCD feeds are working correctly speedo/rpm etc as are all the lower warning lights which aren't shown in the pictures.
I started with adapting the odometer so it could have the trip reset in the centre as the mk2 is offset. A longer bar was added from a donor mk3 dash with plunger moved accordingly.
I then stripped both dashes to be left with this.
The dash fronts were cut to give maximum visibility of the full LCD panels and glued together to make a single unit.
Test assembled after the rear covers were cut to make sure it all fitted together.
Sorting wiring so I could use the correct colours. Donated from a '97 Vectra V6 main harness loom.
Next was to cut the rear warning light circuits & solder the mk2 loom plug connector part to the lower mk3 warning light section.
I made an adaptor loom so it was plug'n'play with no cutting on the car side loom.
The LCD dash comes with a tinted front (left) so I used grey tinted polycarbonate sheet & made my own cover (centre) as the mk3 only come with clear fronts (right).
This is the lower warning light circuit finished & taped for protection. I’ve made the whole dash so it can be fully disassembled should there be any issues.
The original dash looks like this, dull, boring & standard…yawn.
The new hybrid creation pictured with & without flash for better clarity. I know it won’t be to everyone’s taste but the wife & I love it as it’s added that little extra uniqueness. All the LCD feeds are working correctly speedo/rpm etc as are all the lower warning lights which aren't shown in the pictures.
Wow, not seen a Super Tourer in a long time, I used to have a Vectra 2.2 150 sri. Used to be well into my Vauxhalls, Always wanted a Mark 2 GTE. Timing chain went twice so i got rid of it in the end. Welcome to Audi.
Once again some classy work mate. You have to love the old GTE LCD and like you say, way ahead of its time. I remember when Audi announced the new VC, I did chuckle, like you I had "VC" in my GTE (positive it was D reg) 29yrs ago.I've been working on my wife’s Astra mk3 and thought you lot might be interested. The Astra mk2 GTE from 1984-1991 was fitted with an LCD dash which was way ahead of its time, a bit like the virtual cockpit but released 35 years ago. I have one in my mk2 GTE track car as standard and happen to have some spares. The Astra mk3 uses a completely different shaped dash so I formulated a plan to retro fit the LCD panels while keeping the original looks and feel to keep a factory standish mk3 dash.
I started with adapting the odometer so it could have the trip reset in the centre as the mk2 is offset. A longer bar was added from a donor mk3 dash with plunger moved accordingly.
I then stripped both dashes to be left with this.
The dash fronts were cut to give maximum visibility of the full LCD panels and glued together to make a single unit.
Test assembled after the rear covers were cut to make sure it all fitted together.
Sorting wiring so I could use the correct colours. Donated from a '97 Vectra V6 main harness loom.
Next was to cut the rear warning light circuits & solder the mk2 loom plug connector part to the lower mk3 warning light section.
I made an adaptor loom so it was plug'n'play with no cutting on the car side loom.
The LCD dash comes with a tinted front (left) so I used grey tinted polycarbonate sheet & made my own cover (centre) as the mk3 only come with clear fronts (right).
This is the lower warning light circuit finished & taped for protection. I’ve made the whole dash so it can be fully disassembled should there be any issues.
The original dash looks like this, dull, boring & standard…yawn.
The new hybrid creation pictured with & without flash for better clarity. I know it won’t be to everyone’s taste but the wife & I love it as it’s added that little extra uniqueness. All the LCD feeds are working correctly speedo/rpm etc as are all the lower warning lights which aren't shown in the pictures.

Jessicajess2018
Registered User
Hiya,As Summer is knocking on the door and the weather has picked up I thought it only right the rubber Winter floor mats get banished into storage and the posh cloth gets laid.
I managed to wangle a full set of four genuine Audi cloth mats when we purchased the car. They don’t seem very hardwearing but fit perfectly, probably cost a fortune, nearly match the existing flooring colour and I like the red stitching and funky piping around them.
Could you tell me where you got your rubber mats from please? I’ve been searching all over.
Thanks
Hiya,
Could you tell me where you got your rubber mats from please?
It can be minefield finding the right mats as Audi fit multiple shapes and sizes to the A3 but if you have a Sportback (5 door hatch) )mk3 preface 2013>2016 or facelift 2017>present then you'll require the part numbers below.
8V2061501041 - Front rubber pair
8V5061512041 - Rear rubber pair
I bought mine through eBay, keep your eyes peeled as you'll find a bargain on there or pay a premium through one of the main dealers who sell on there if you can't wait. There is also the parts request system on here which might offer a reasonable discount click me
Last edited:
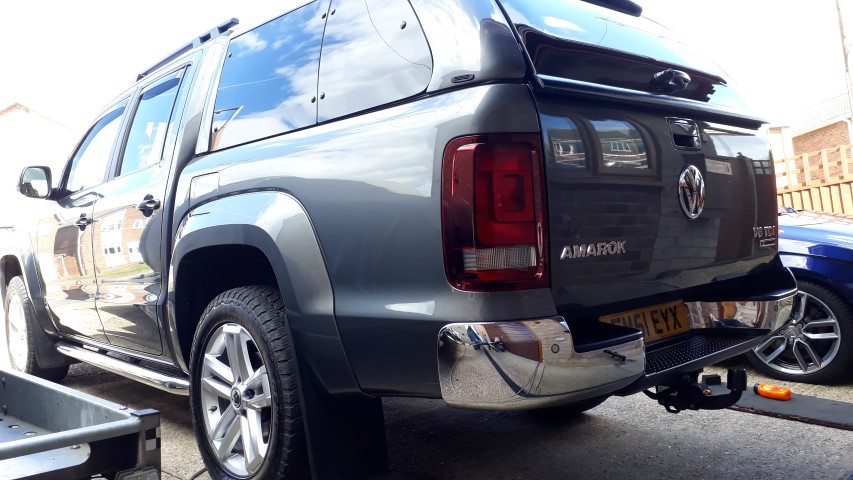
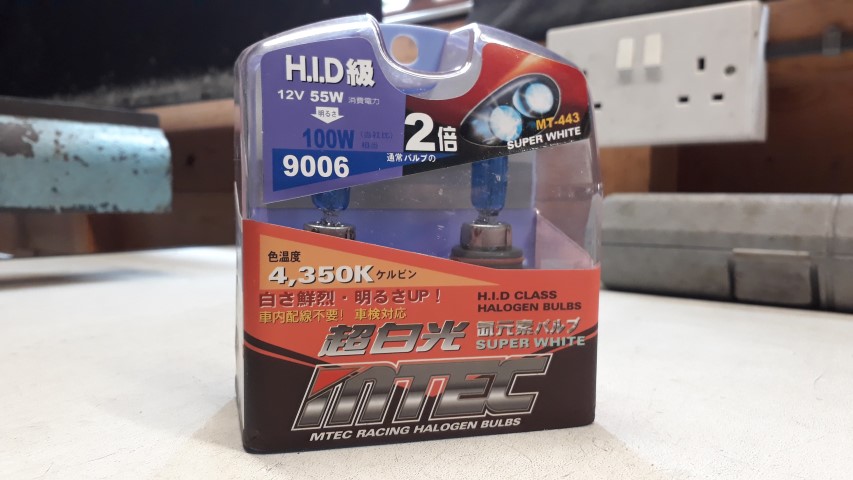
Sometime ago I changed the Amarok front fog bulbs (cornering lights) as they looked horrible and yellow but now give a lovely white after fitting MTEC Super White.
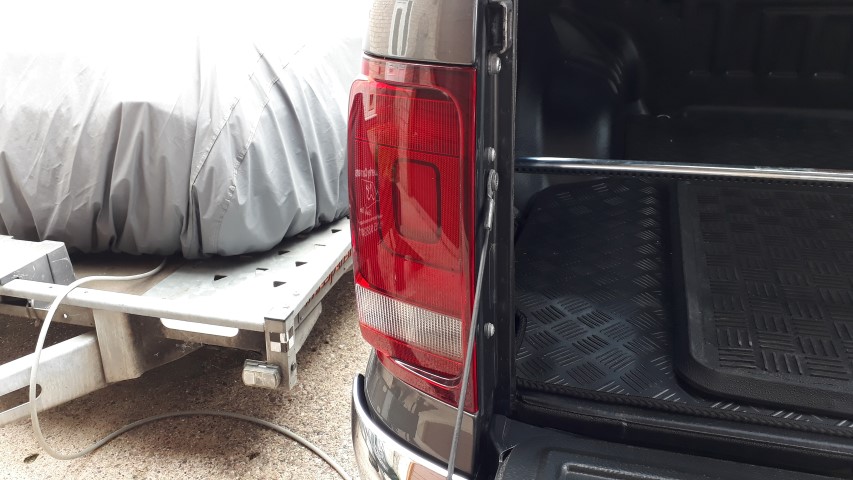
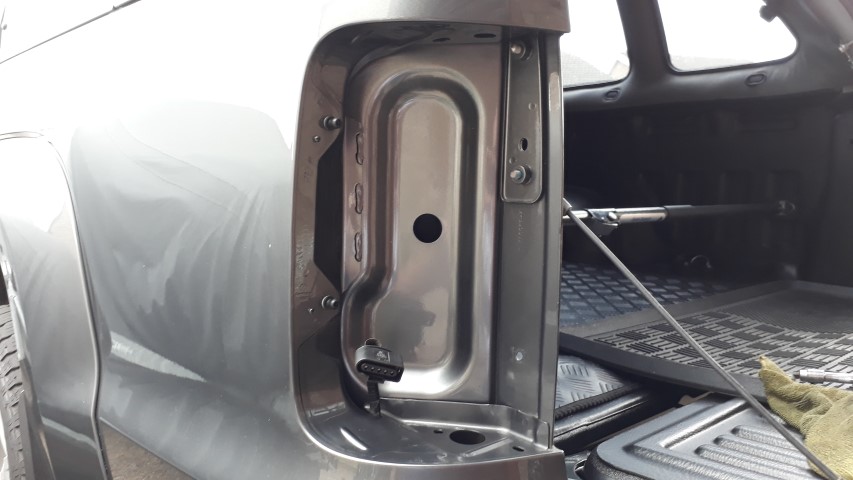
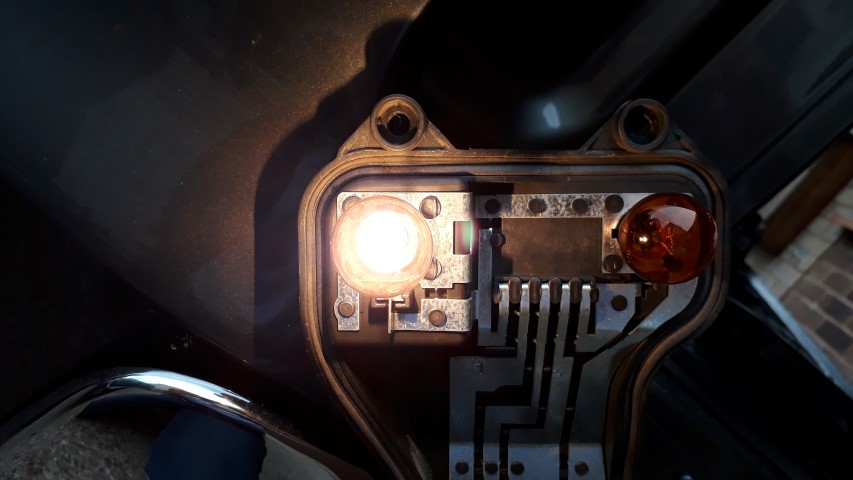
Fast forward to now and I decided to ‘upgrade’ the reverse bulb as the original bulb looked yellow compared to the additional LED under chassis lights that had been installed by the previous owner. Only the nearside has a reverse light so I removed the two fixing screws and tapped the unit to the nearside and off it popped.
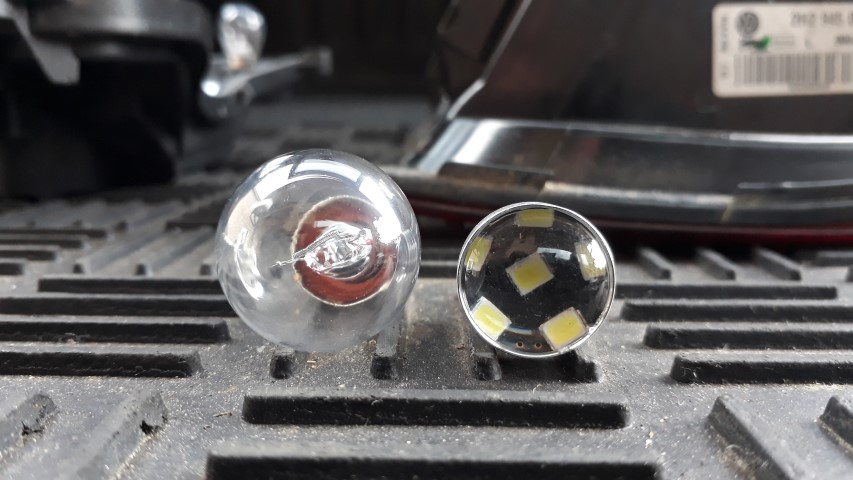
Here are the bulbs compared with the replacement utilising 6 SMD LEDs and a convex lens to help spread the light output. At £1.29 for two bulbs I’ve got a spare should it go pop.
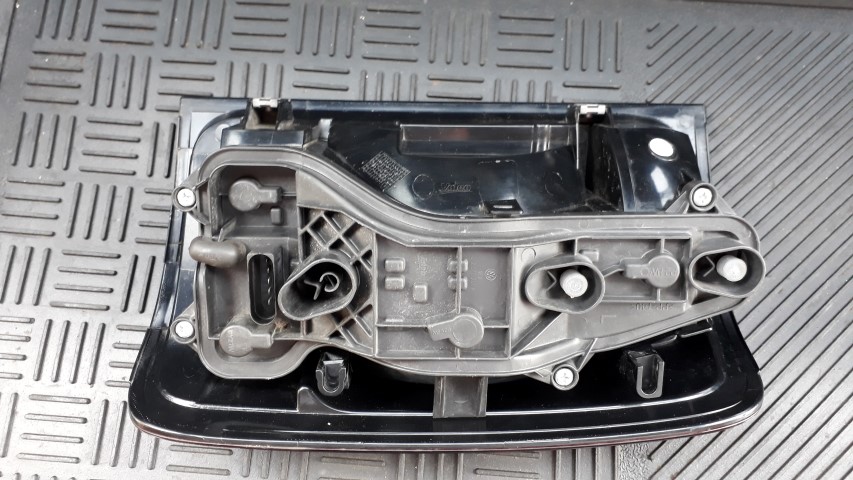
With the taillight removed I couldn’t just leave all the dirt so got busy giving everything a fresh clean.
This was the nasty yellow output from the OE filament bulb.
With the funky LED reverse bulb installed it looks so much better and white.
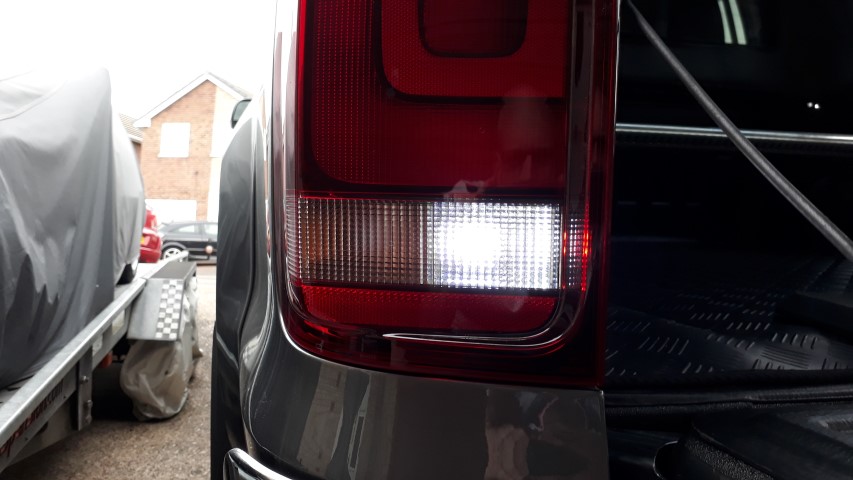
So when reversing the new bulb now matches the additional LED under chassis lights. I can only assume these additional reverse lights were to allow for safe reversing and trailer hook-up in the dark as they work really as an addition to the standard fit reverse camera.

Fast forward to now and I decided to ‘upgrade’ the reverse bulb as the original bulb looked yellow compared to the additional LED under chassis lights that had been installed by the previous owner. Only the nearside has a reverse light so I removed the two fixing screws and tapped the unit to the nearside and off it popped.
Here are the bulbs compared with the replacement utilising 6 SMD LEDs and a convex lens to help spread the light output. At £1.29 for two bulbs I’ve got a spare should it go pop.
With the taillight removed I couldn’t just leave all the dirt so got busy giving everything a fresh clean.
This was the nasty yellow output from the OE filament bulb.
With the funky LED reverse bulb installed it looks so much better and white.
So when reversing the new bulb now matches the additional LED under chassis lights. I can only assume these additional reverse lights were to allow for safe reversing and trailer hook-up in the dark as they work really as an addition to the standard fit reverse camera.

In addition I've finally got the Amarok speed related central locking auto lock at 10mph> and unlock when ignition key is removed working. It wasn't rocket science but I was trying to activate via VCDS Basic Settings in module 09 Central Electrics and you have to enable it in module 09 Adaption prior to Basic Settings, what an idiot I am. Before anyone states the obvious there is no module 46 Central Convenience installed in the Amarok and thus no dash screen option for the speed related central locking, it all has to be coded via module 09 Central Electrics.
Busy few weeks helping a mate with a top-end rebuild and custom made baffled sump swap on his Astra mk4 which we converted to a C20XE last year using a stock engine and box. He’s since purchased a straight cut Quaife SCCR with 4.2 final drive and ATB diff which is a fantastic gearbox combo. Another mate was selling his R1 bike carbs after upgrading to Jenvery TBs so we grabbed it and got the car running last weekend using Nodiz mappable ignition only management. I’m impressed with the Nodiz kit as it’s easy to install with only coil, crank sensor and TPS to connect and comes with a ‘safe’ map to get you up and running. I've got a little more wiring to sort as he's doing away with the key so it'll be a switches and push button starter then off to mapping.
Wifey and I (read that as mainly me) have been toying with the idea of a few retrofits as the S3 is slightly under spec and missing a few must haves. I contacted Alex at VAG Car Coding but I’m based in the Midlands so he kindly put me onto his Leicester based counterpart VagPro who has been nothing but helpful. After asking a few questions and sending a full VCDS scan of my car the decision was made and the car is booked in later this month.
The retrofits going on the car are as follows:
• Rear-view camera high
• Front parking sensors
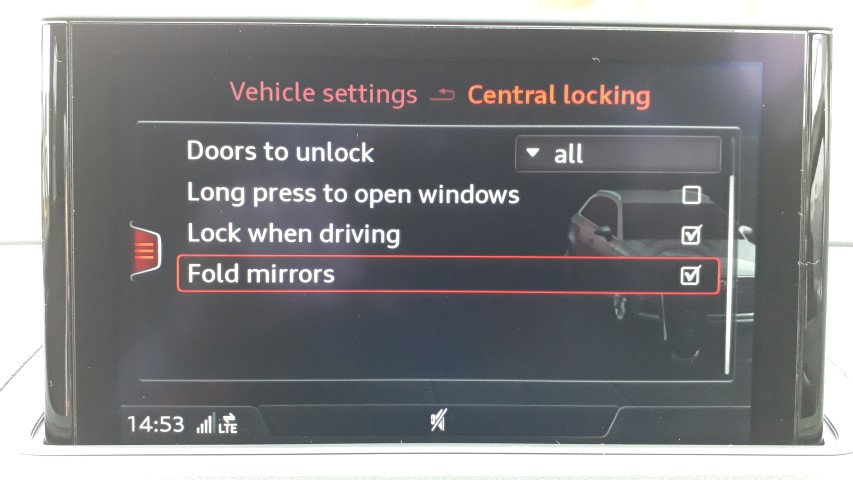
• Folding mirrors
• Hill-hold assist
The car already has rear parking sensors so it’s being upgraded to the all singing all dancing Audi Parking System Plus. Why Audi don’t supply folding mirrors as standard is bonkers, just a money maker. The HHA is just a nice feature to have and means you don’t need to be holding the brake pedal on every time you stop, plus it’s a cheap retrofit and adds another option the car wouldn’t of otherwise had.
I could have sourced everything myself and spent ages painstakingly and very carefully installing and then scratching my head trying to figure out VCDS. However, as the S3 is our daily driver and I have other vehicle toys to keep my entertained it was simpler to hand it over to the professionals.
VagPro has now sourced all the parts and kept me in the loop sending the pictures below earlier this week.


The retrofits going on the car are as follows:
• Rear-view camera high
• Front parking sensors
• Folding mirrors
• Hill-hold assist
The car already has rear parking sensors so it’s being upgraded to the all singing all dancing Audi Parking System Plus. Why Audi don’t supply folding mirrors as standard is bonkers, just a money maker. The HHA is just a nice feature to have and means you don’t need to be holding the brake pedal on every time you stop, plus it’s a cheap retrofit and adds another option the car wouldn’t of otherwise had.
I could have sourced everything myself and spent ages painstakingly and very carefully installing and then scratching my head trying to figure out VCDS. However, as the S3 is our daily driver and I have other vehicle toys to keep my entertained it was simpler to hand it over to the professionals.
VagPro has now sourced all the parts and kept me in the loop sending the pictures below earlier this week.
DJAlix
VAG CAR CODING
Site Sponsor
VCDS Map User
VAG Can Professional
ODIS (Offboard Diagnostic System)
Khurrum is a top man. I will be supporting him remotely during your sessionWifey and I (read that as mainly me) have been toying with the idea of a few retrofits as the S3 is slightly under spec and missing a few must haves. I contacted Alex at VAG Car Coding but I’m based in the Midlands so he kindly put me onto his Leicester based counterpart VagPro who has been nothing but helpful. After asking a few questions and sending a full VCDS scan of my car the decision was made and the car is booked in later this month.
The retrofits going on the car are as follows:
• Rear-view camera high
• Front parking sensors
• Folding mirrors
• Hill-hold assist
The car already has rear parking sensors so it’s being upgraded to the all singing all dancing Audi Parking System Plus. Why Audi don’t supply folding mirrors as standard is bonkers, just a money maker. The HHA is just a nice feature to have and means you don’t need to be holding the brake pedal on every time you stop, plus it’s a cheap retrofit and adds another option the car wouldn’t of otherwise had.
I could have sourced everything myself and spent ages painstakingly and very carefully installing and then scratching my head trying to figure out VCDS. However, as the S3 is our daily driver and I have other vehicle toys to keep my entertained it was simpler to hand it over to the professionals.
VagPro has now sourced all the parts and kept me in the loop sending the pictures below earlier this week.
I’d noticed the S3 and Amarok had what looked to be oil vapour around the engine oil caps as both use the same cap design which I now know are prone to sweating. After a spot of research I found this interesting post on the Golf mk7 forum here. To attempt and sort the issue I purchased a pair of Viton o-rings at 44.17mm ID x 1.78mm C/S from a wel know auction site.
Here you can see the damp around the S3 cap. It’s not overly obvious as I keep it clean anyway but this is after only a couple of weeks with limited car use.

These are the Viton seals and here you can see the lip under the cap where they fit.

Seal installed under the cap.

While I was at it I rotated the main cap seal as VAG don’t list a separate part number so I’ll find a replacement square section o-ring and post here when I find what I’m after.

I treated the S3 to a couple of replacement smellies and a genuine funky Audi Sport keyring. Please note that no Gecko were harmed in the making of the air fresheners!

Here you can see the damp around the S3 cap. It’s not overly obvious as I keep it clean anyway but this is after only a couple of weeks with limited car use.
These are the Viton seals and here you can see the lip under the cap where they fit.
Seal installed under the cap.
While I was at it I rotated the main cap seal as VAG don’t list a separate part number so I’ll find a replacement square section o-ring and post here when I find what I’m after.
I treated the S3 to a couple of replacement smellies and a genuine funky Audi Sport keyring. Please note that no Gecko were harmed in the making of the air fresheners!
My Astra GTE track car although not being used hasn’t gone unloved. I noticed the exhaust wrap was showing its age after 10 years of abuse. Not falling off but easily torn lasting well as it was protected with VHT exhaust paint. Decided the best idea was to over wrap it so I started with this.
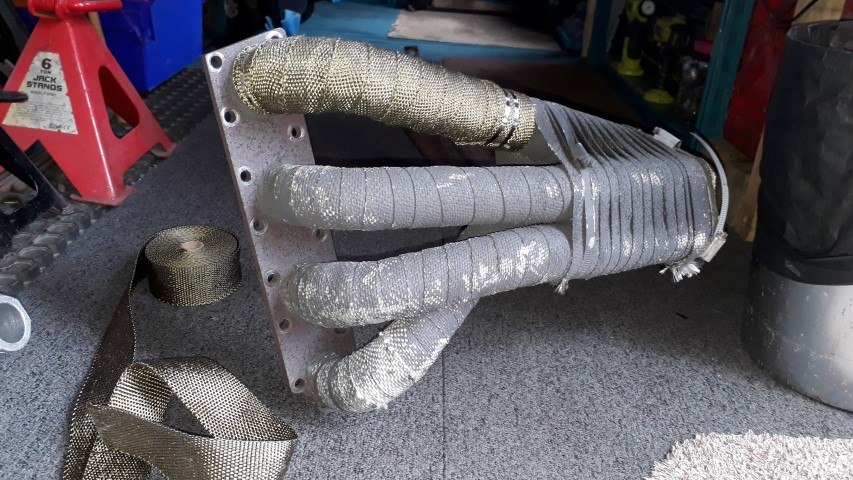
Then it was ready for a good coating of VHT exhaust paint.
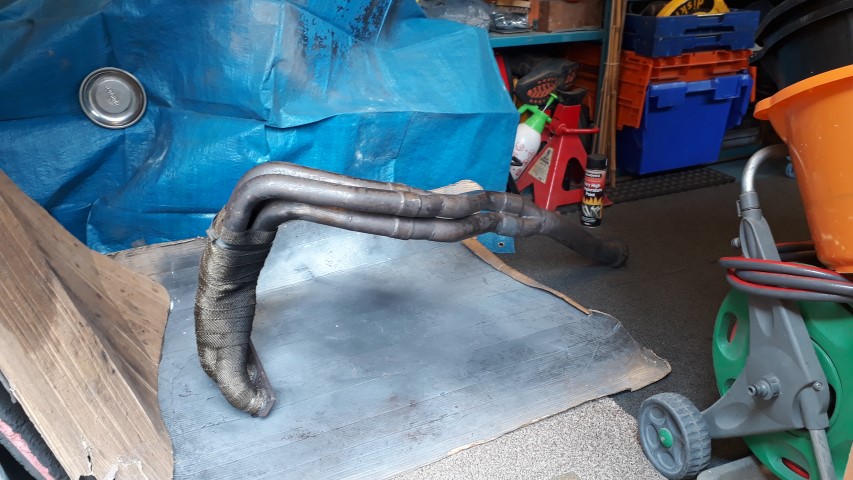
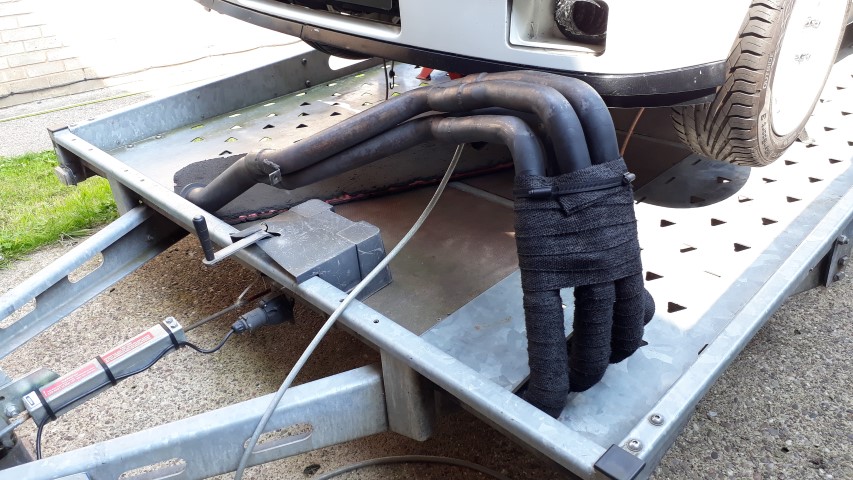
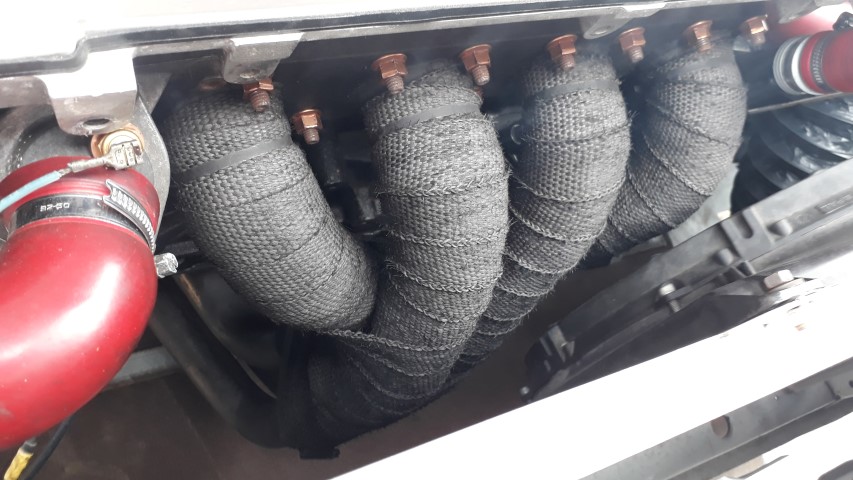
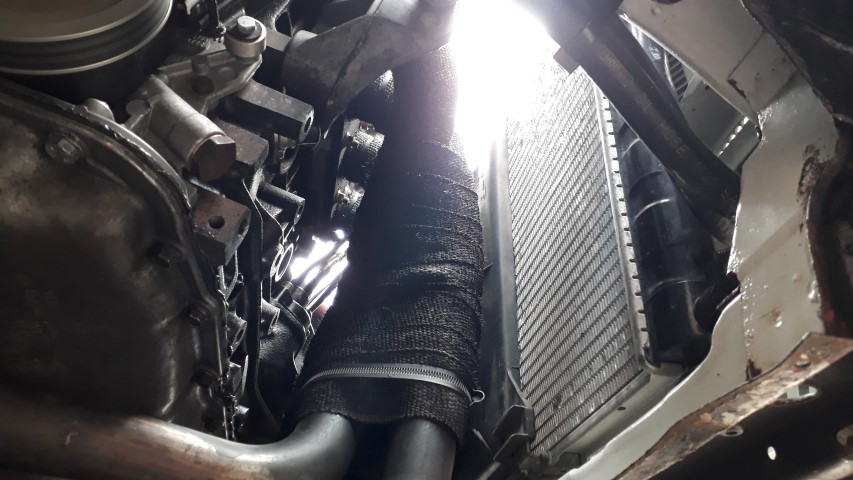
Now reinstalled and looking good.
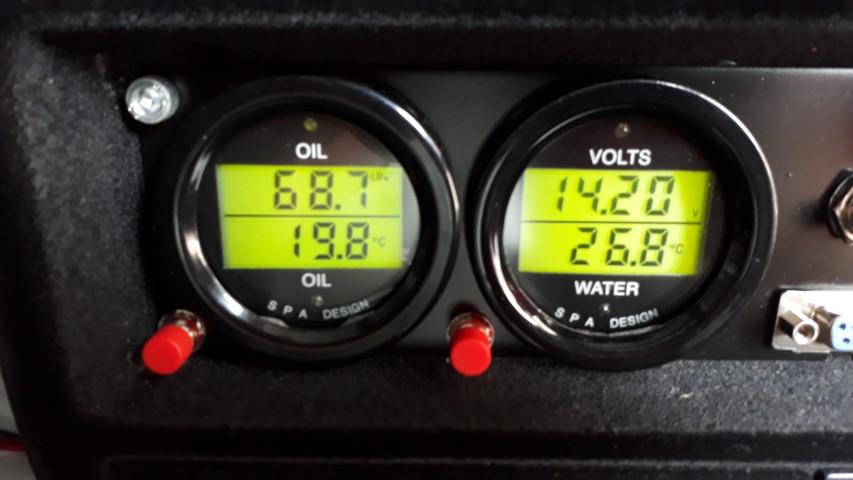
Having not started the GTE for nearly a year I thought it best I bring it to life. Purged the fuel tank and popped fresh V-Powerl in, primed the oil pump and it fired straight up with no issues. This was the initial start-up specs; top left oil pressure psi, bottom left oil temp, top right battery voltage, bottom right coolant temp.
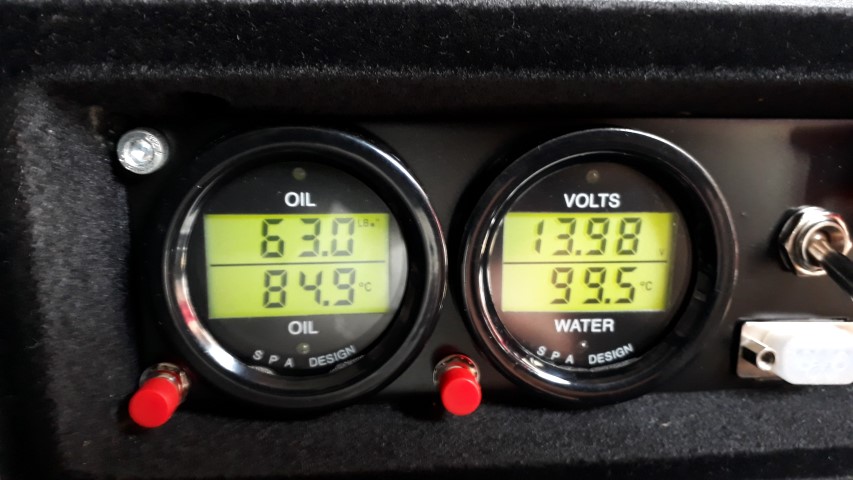
This was after 15 minutes of idling and fast idling holding at 2k rpm. Nice and warm and best of all no leaks from anywhere which is amazing for an 20XE redtop…it won’t last as they always leak from somewhere.
Then it was ready for a good coating of VHT exhaust paint.
Now reinstalled and looking good.
Having not started the GTE for nearly a year I thought it best I bring it to life. Purged the fuel tank and popped fresh V-Powerl in, primed the oil pump and it fired straight up with no issues. This was the initial start-up specs; top left oil pressure psi, bottom left oil temp, top right battery voltage, bottom right coolant temp.
This was after 15 minutes of idling and fast idling holding at 2k rpm. Nice and warm and best of all no leaks from anywhere which is amazing for an 20XE redtop…it won’t last as they always leak from somewhere.
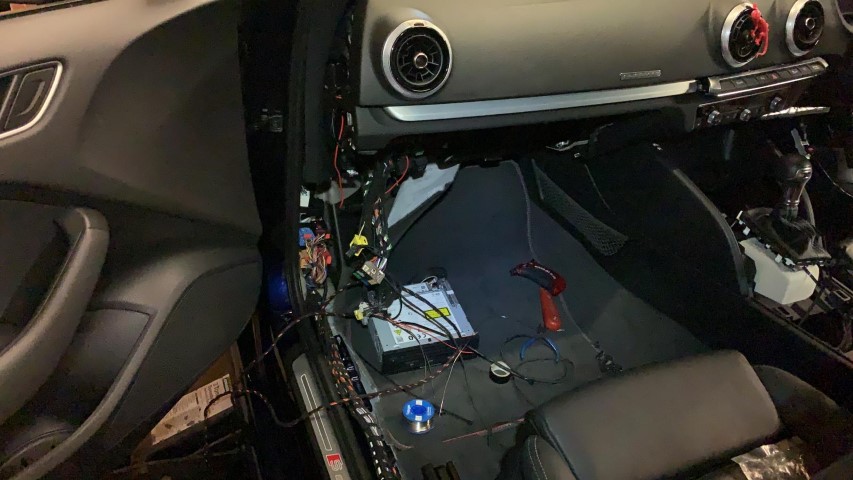
The planned retrofits began earlier this week after dropping the S3 down with VagPro the evening prior. Khurrum was just finishing off a Bentley and assured me the S3 would be safely tucked away for the night. I later-on received confirmation it had a comfy bed after receiving this.
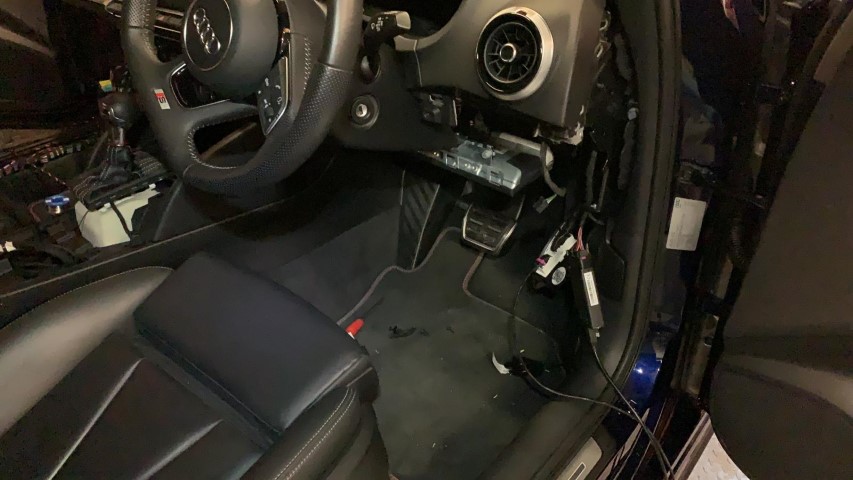
During the work I was sent update pictures of the S3 as the various pieces of hardware were installed. I looked like a Haynes photoshoot in progress with the S3 interior stripped and placed on super posh linen to avoid any scratches.


Huge thanks goes to Kharrum at VagPro for his hard work and attention to detail with our beloved S3, the wife and myself knew the car was in great hands. The front to rear loom was correctly ran alongside the existing loom and not simply tucked up in the headlining. All connections are soldered with heat shrink used and fuses added along with power termination in the correct fuse box locations, no jumper fuses used with this install as it’s been done by a pro You can’t tell anything has been apart having been very carefully removed and reinstalled, it’s like the retrofit had been done when the car was built.
As a reminder this is what has been retrofitted using all original Audi parts complete with warranty:
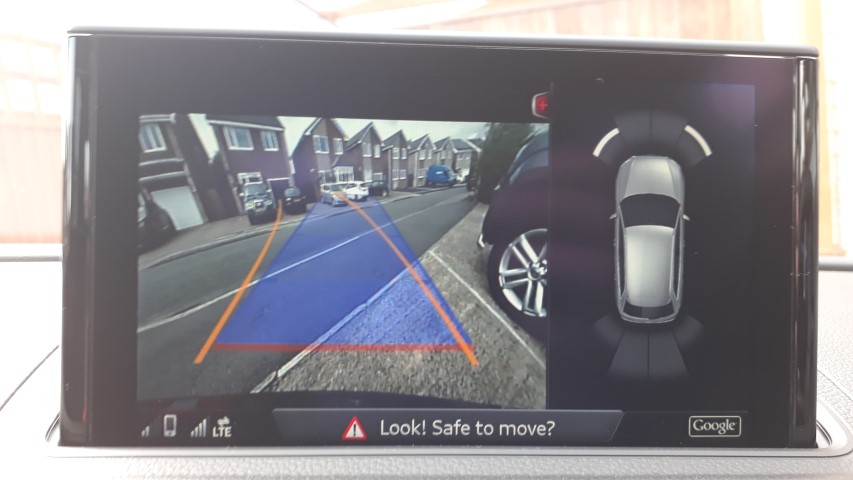
• Rear-view camera high
• Front parking sensors
• Folding mirrors
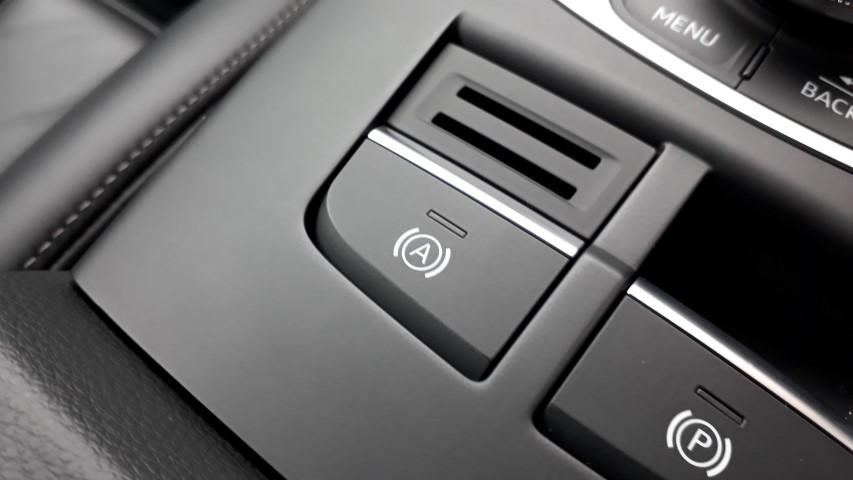
• Hold Assist
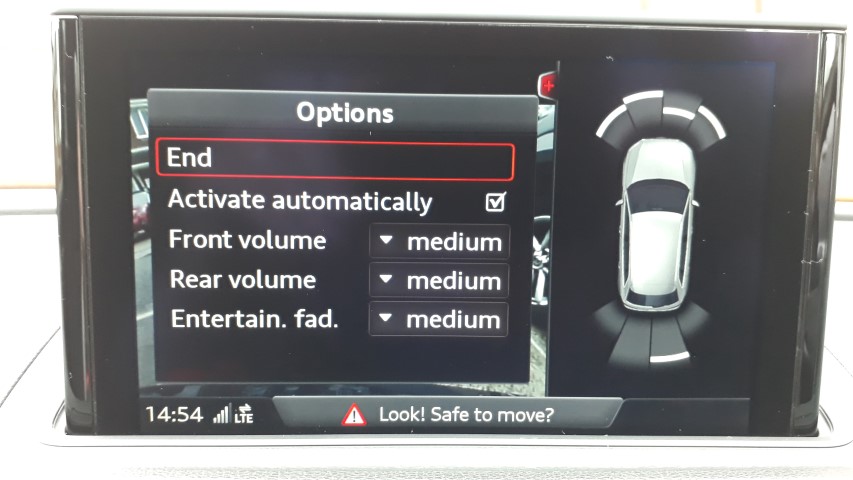
A few pics, okay a lot of pics, of the items that have been retrofitted. The wife and I are over the moon and so pleased with the work. Massive thanks again go to Khurrum at VagPro.
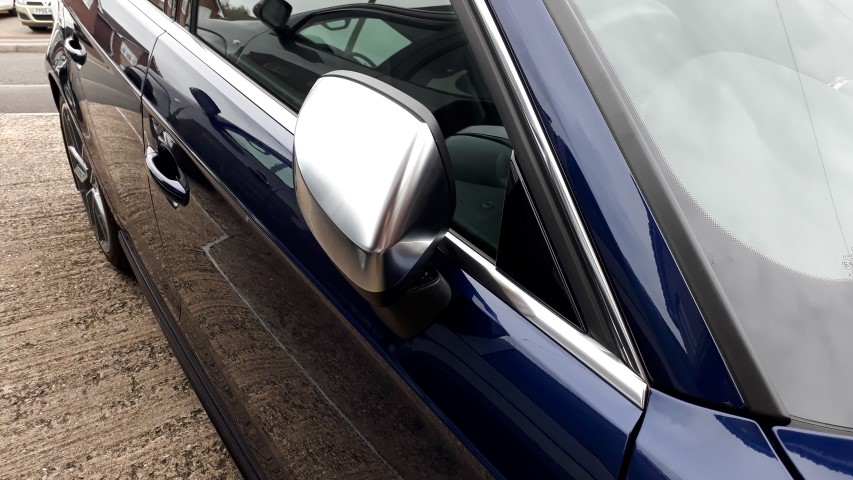
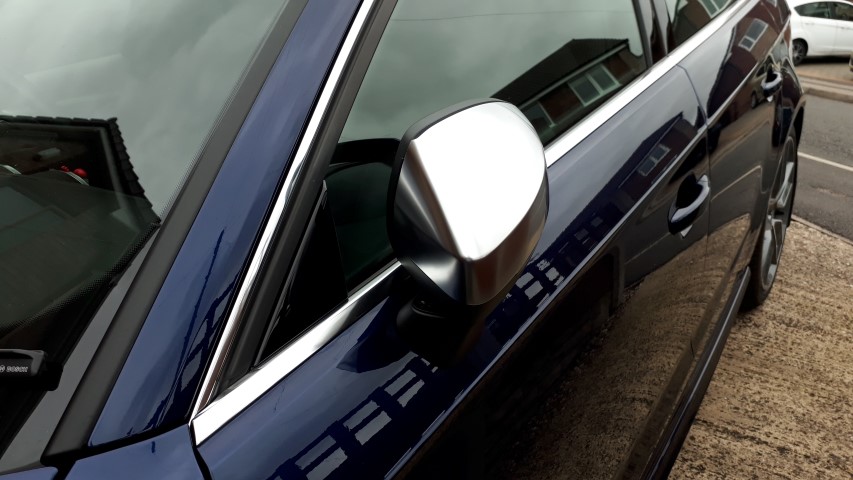
Folding mirrors.
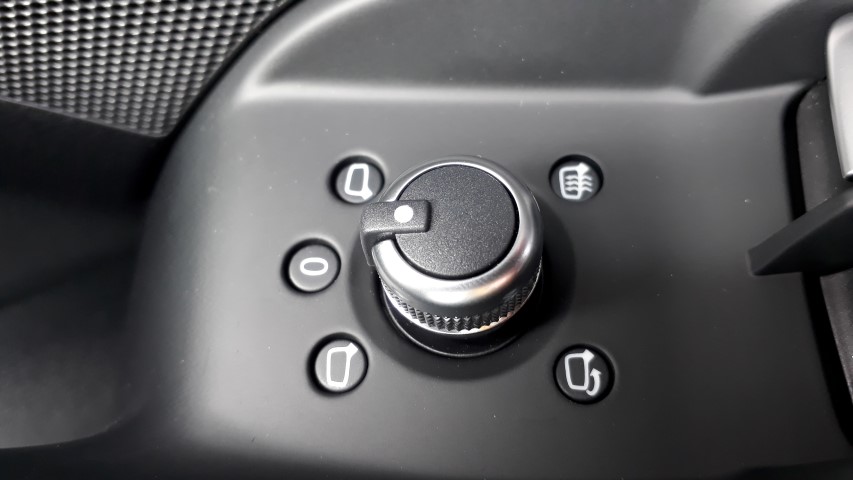

Hold Assist, if you don’t have it I can highly recommend a retrofit. Can be installed on both manual or S-Tronic versions.
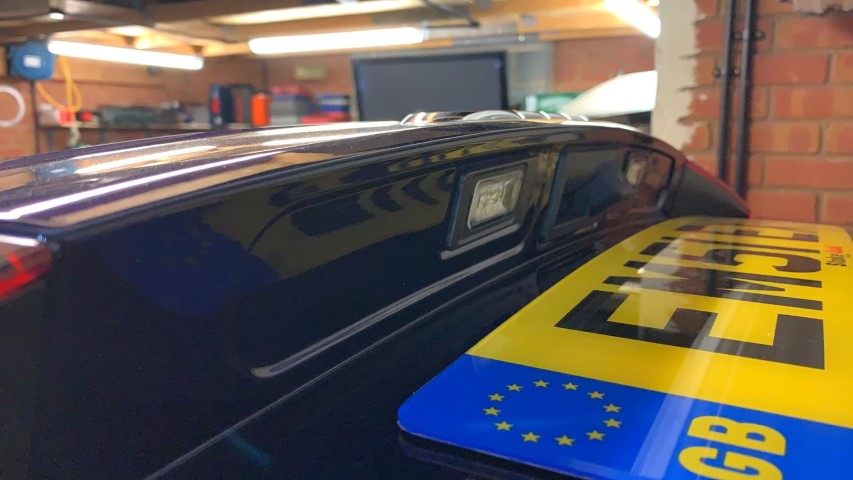
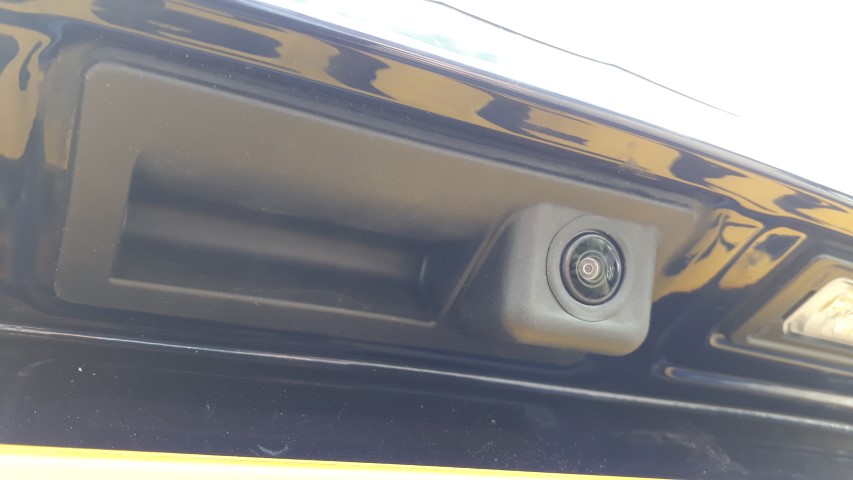
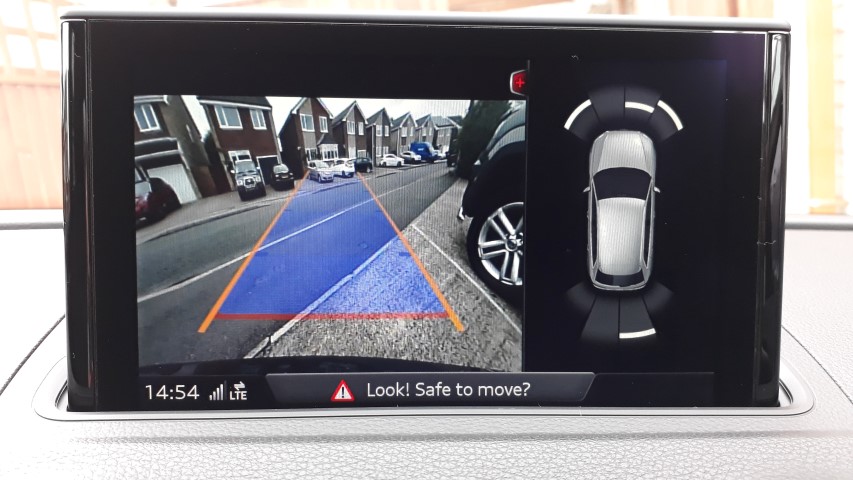
Reverse camera high
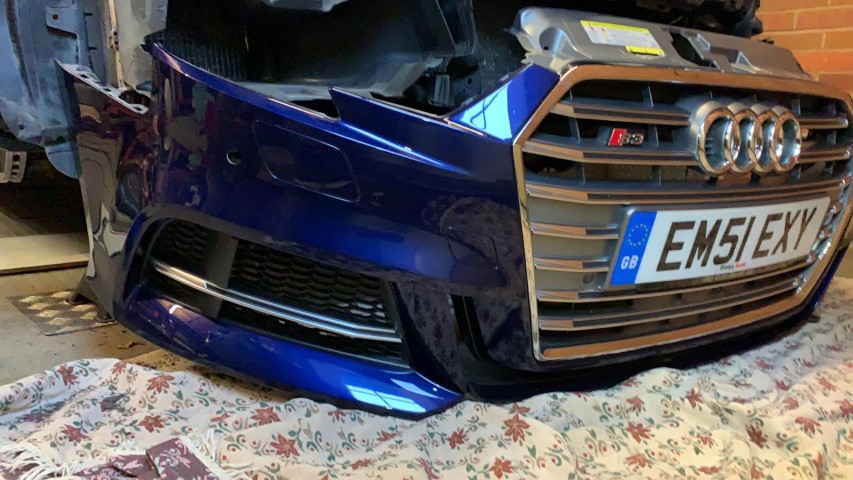
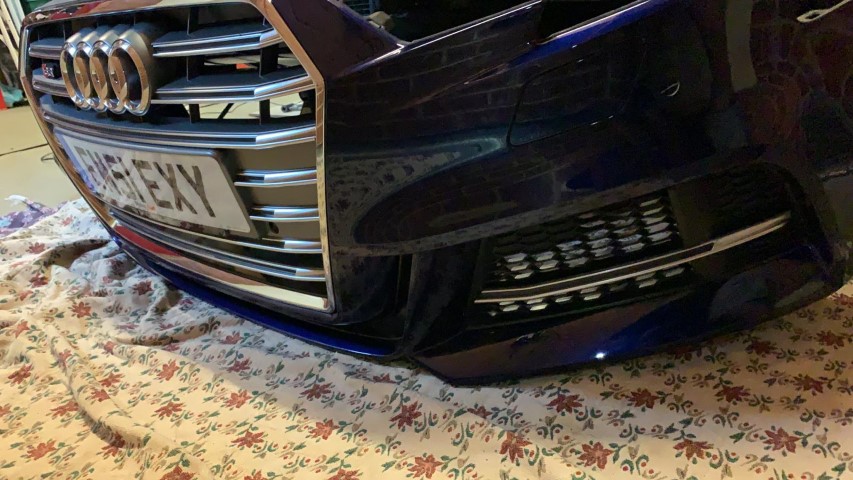
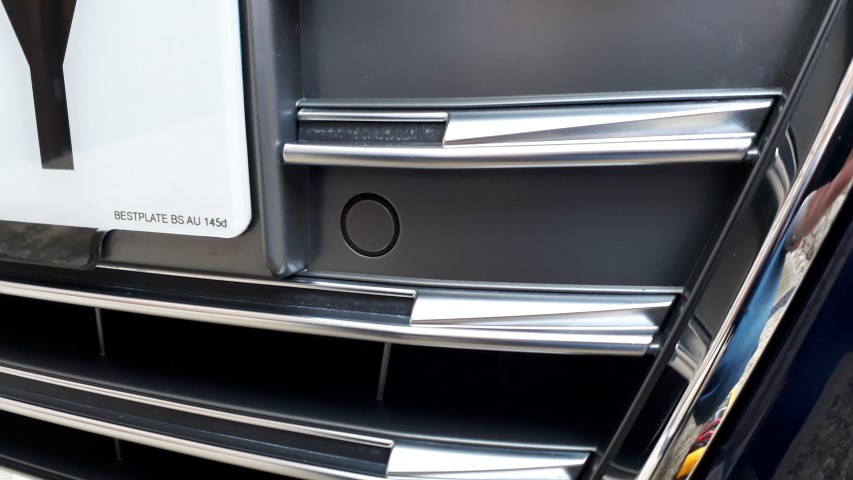
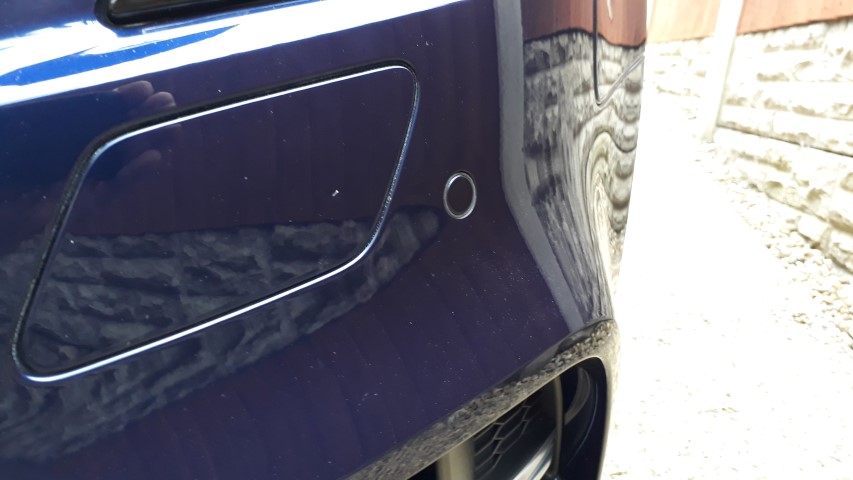
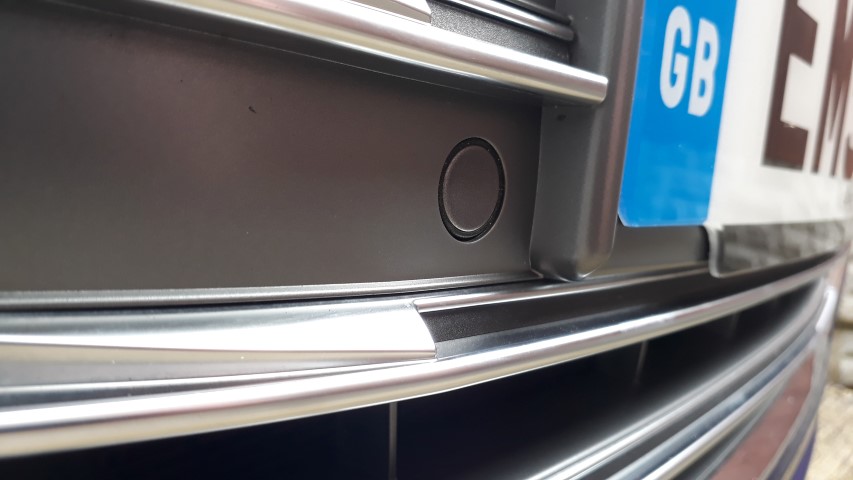
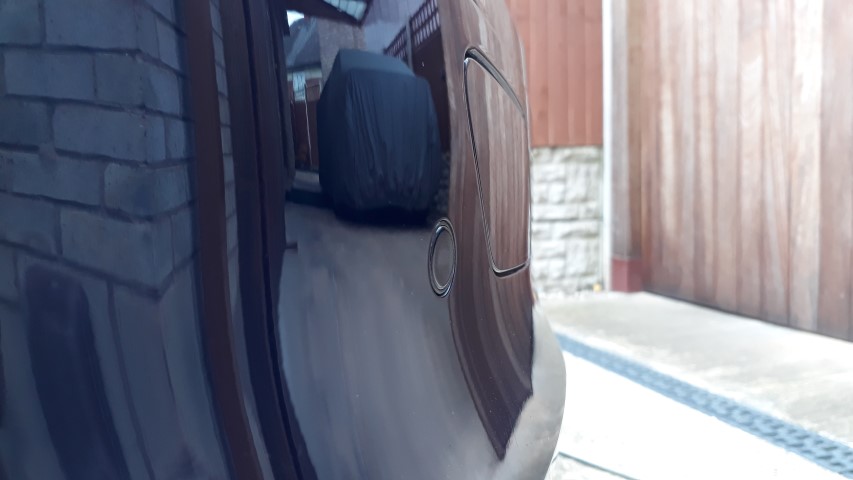
Front parking sensors and the various pieces that make up the Parking System Plus. VagPro did a lovely job getting the sensors to fit flush to the bumper. Fair bit of work involved with the grill mount sensors for the FL but they are all look spot-on.

During the work I was sent update pictures of the S3 as the various pieces of hardware were installed. I looked like a Haynes photoshoot in progress with the S3 interior stripped and placed on super posh linen to avoid any scratches.
Huge thanks goes to Kharrum at VagPro for his hard work and attention to detail with our beloved S3, the wife and myself knew the car was in great hands. The front to rear loom was correctly ran alongside the existing loom and not simply tucked up in the headlining. All connections are soldered with heat shrink used and fuses added along with power termination in the correct fuse box locations, no jumper fuses used with this install as it’s been done by a pro
You can’t tell anything has been apart having been very carefully removed and reinstalled, it’s like the retrofit had been done when the car was built.As a reminder this is what has been retrofitted using all original Audi parts complete with warranty:
• Rear-view camera high
• Front parking sensors
• Folding mirrors
• Hold Assist
A few pics, okay a lot of pics, of the items that have been retrofitted. The wife and I are over the moon and so pleased with the work. Massive thanks again go to Khurrum at VagPro.
Folding mirrors.
Hold Assist, if you don’t have it I can highly recommend a retrofit. Can be installed on both manual or S-Tronic versions.
Reverse camera high
Front parking sensors and the various pieces that make up the Parking System Plus. VagPro did a lovely job getting the sensors to fit flush to the bumper. Fair bit of work involved with the grill mount sensors for the FL but they are all look spot-on.