evomaster3000
Registered User
Well Here's a progress thread for my A6, nobody mods A6's these days, i never intended to as i wanted away from the scene and just a tidy luxury car! but one thing let to another..... and well it's never ending!
I went to most major car shows last year just to get the feel of them really and check em out, meanwhile thinking ip and sourcing parts for the body re-vamp.
I'm adding a few things aswell as removing some, we'll see if they all work well when it's all done i guess!
Some of you may not like what i'm doing, some may and some may not see the point! and honestly i'll never undertake something like this again! 3 years work so far!
Most of the styling modifications i've done and am doing i'm doing not because it's different, but because I want them and I think that it will look good, most if not all are custom one-off pieces.
Anyway, I'm undertaking some major work on the audi and have been since sept 07, anyway here's some progress pics and a few before and during:
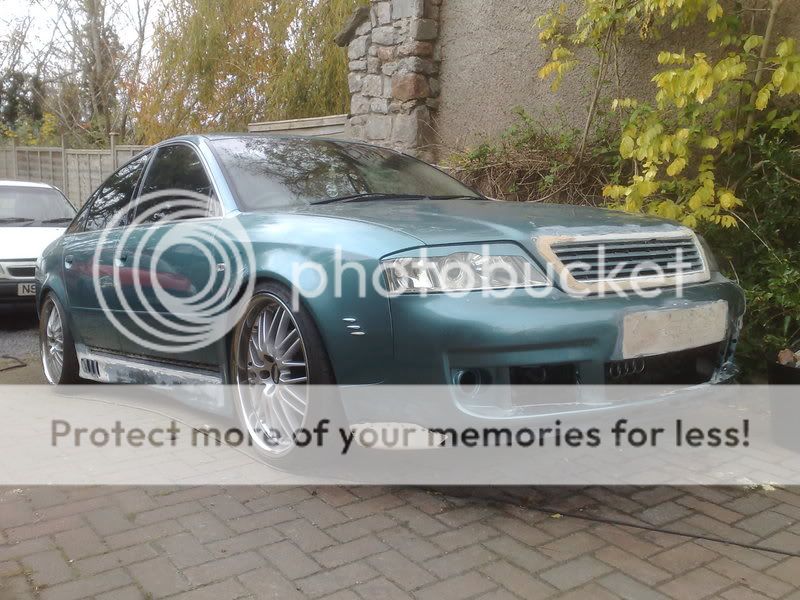
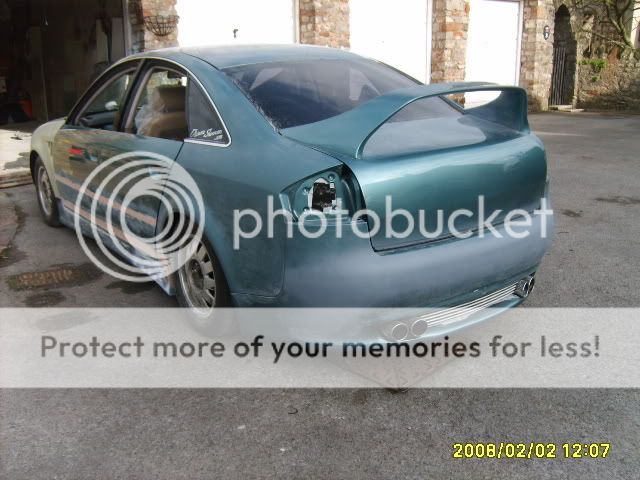
Here's my 1998 Audi A6 SE and how she looked at the end of last year:
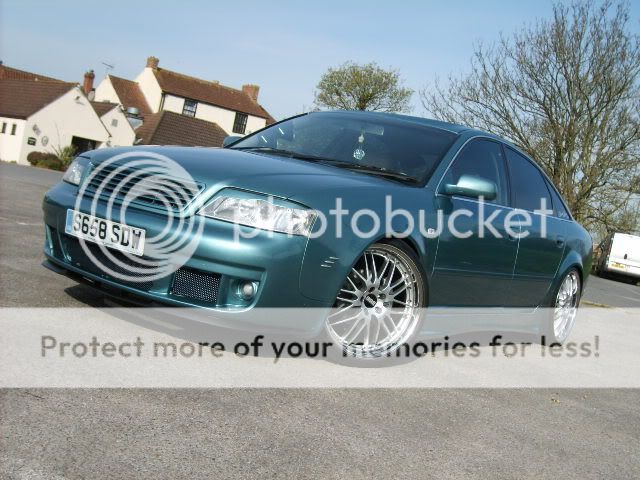
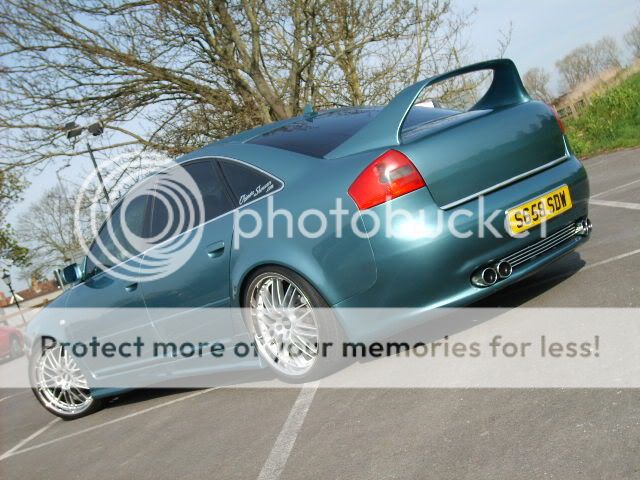
I stuck with this look for the year so it wasn't off the road for the show season and so i could save up and also refine the mods i was going to do for next year which i hope will be the final works for the body.
I'm going for a Euro look with a bit of a twist, the usual Euro smoothing and subtle lines, with my added own touches like the spoiler and a few other things!, anyway it came off the road mid september 2007 and so work started:
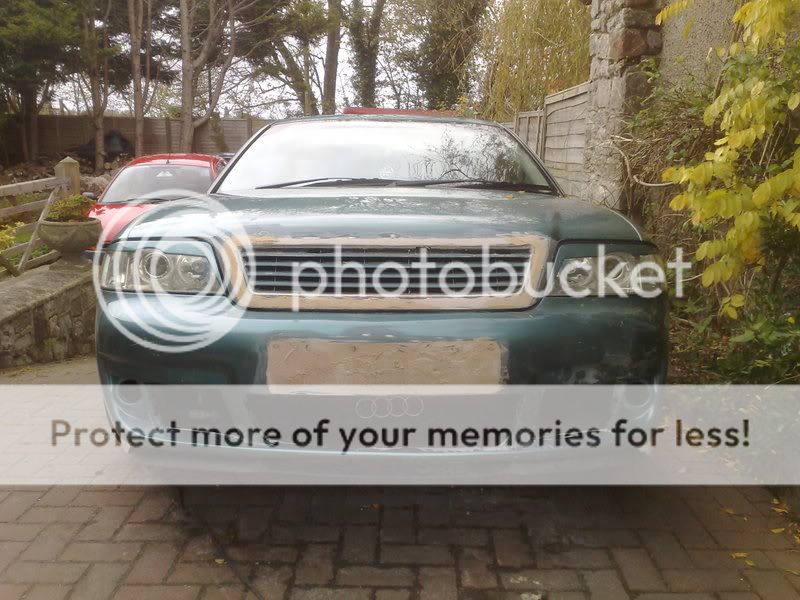
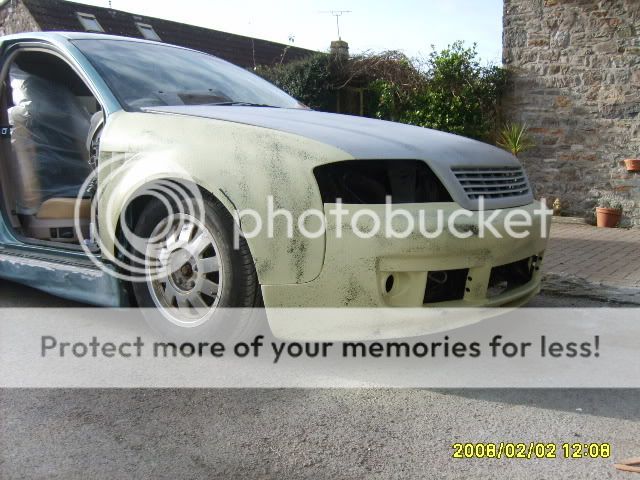
First was to smooth the grill into the bonnet and flush off the number plate recess on the bumper:
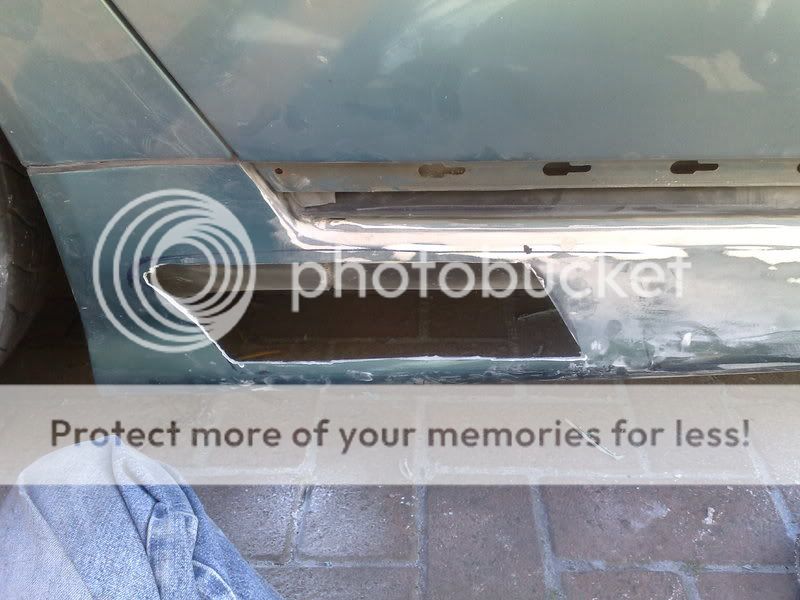
And then to make a start on a slight mod to the skirts, one of my wild but i think innovative ideas, BMW Z3 wing vents upturned and opposised in to the rear of the M3 style skirts:
Line it up make out the hole and get cutting!
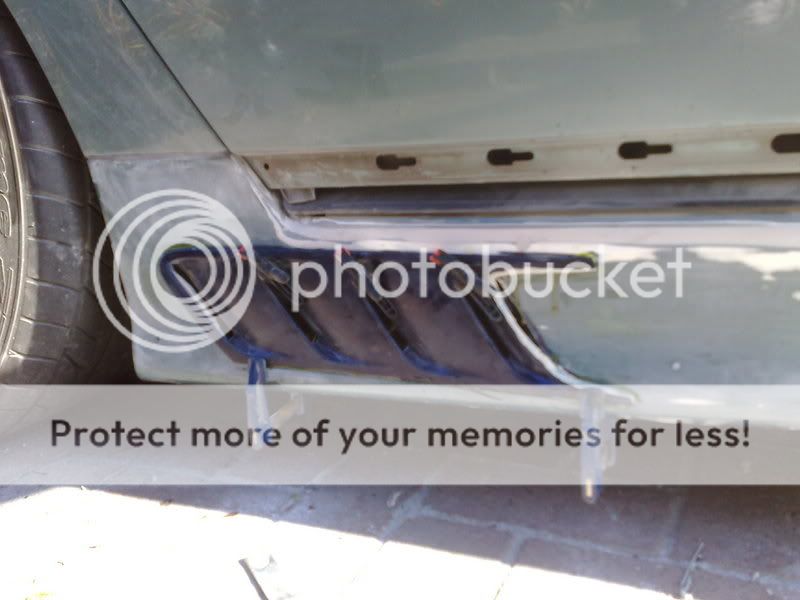
Then get glueing!
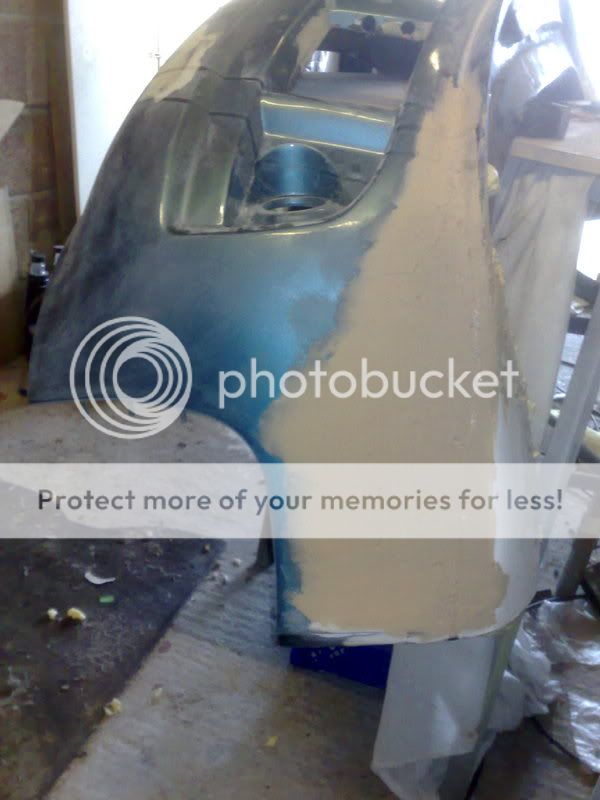
Also i didn't like the design and corner of the front bumper as the other corners were all custom stlyed to the car, whereas this is the original audi RS6 design, plus the added LCR splitter didn't sit nicly enogh for me:
Basicailly it didn't match the height of the skirts on the side.
So i'm handy with building up bumper from plastic and fibreglass as i did build the rear one! and so far hasn't cracked in 2 years! so i set about cutting choping addding filling and bonding some new corners!
Thats the corner piece from a mazda 323f i believe that i robbed from my local bodyshop, it was cut up anyway! all i needed was a base to work with.
Put the bumper back on to check it was at correct height, which it was.
So set about the filler work!
Then a bit of expandable filler to strengthen the corner.

You may be able to see the vents in the skirts smoothed in a bit more.
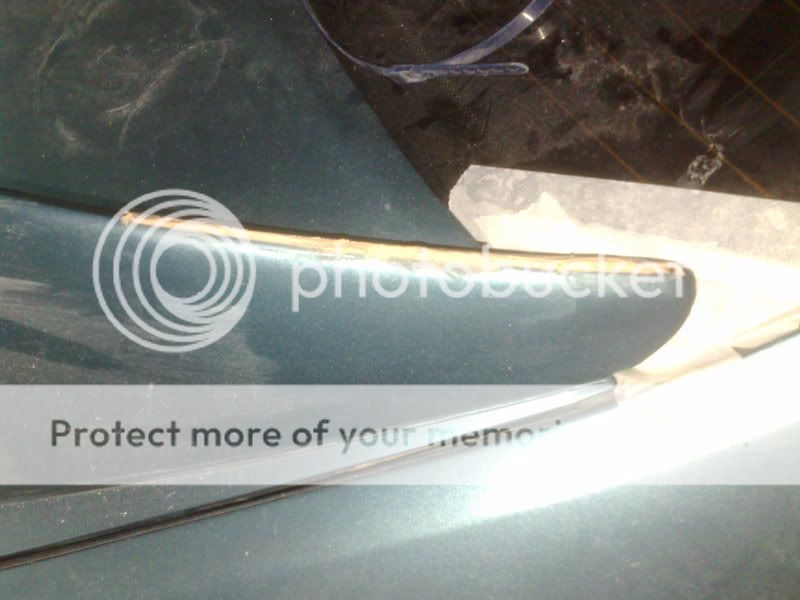
A lot of sanding and primering and dust! and it's nearly to shape! As you may see the LCR Splitter has been re-shaped in to the bumper to follow the lines of the corner all the way round, and then i've followed the flat roughly 1cm line from the wing down all the way to the corner, true worksmanship! Attention to detail is vital! After all at this stage it only takes time to achieve perfection!
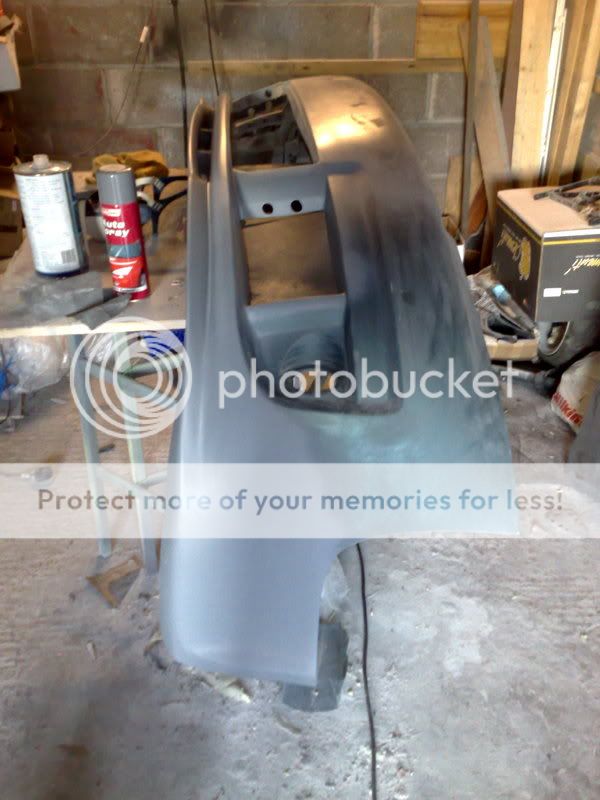
Bonnet now off to do final prep and smoothing of grill.

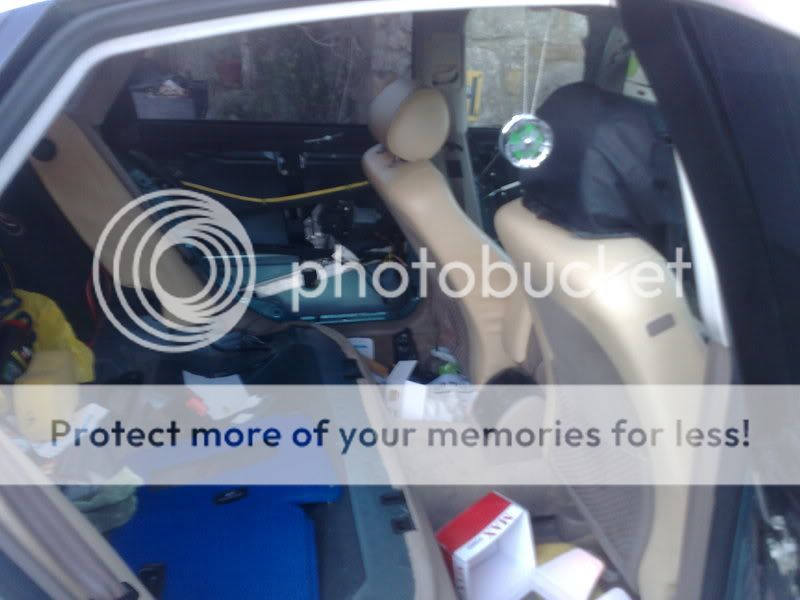
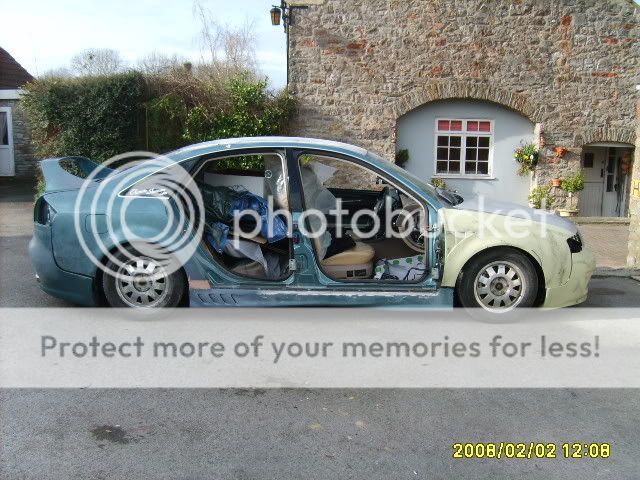
Interior looking a bit empty! As i don't want the leather to get overspray etc.
Not a pretty sight!
I try to do most of the work myself, i'm an amatuer sprayer and i've been messing with cars for years, i also have a very experienced custom painter who runs his own bodyshop to hand. He gives me all the advice i need which is a great help so soon when the car is 90% prepped it will be off to him where it will get a full respray in the green base it is now with blue crushed glass and a blue pearl over the top to give it a blue/green flip.
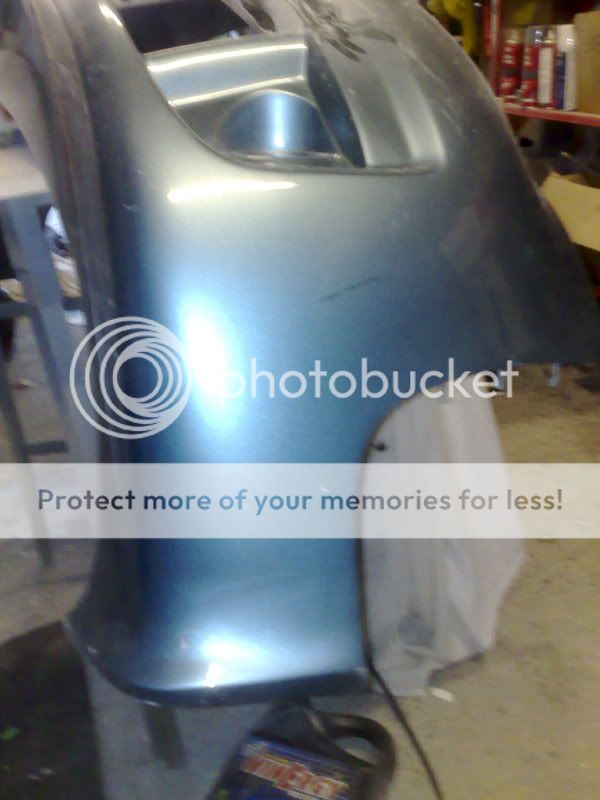
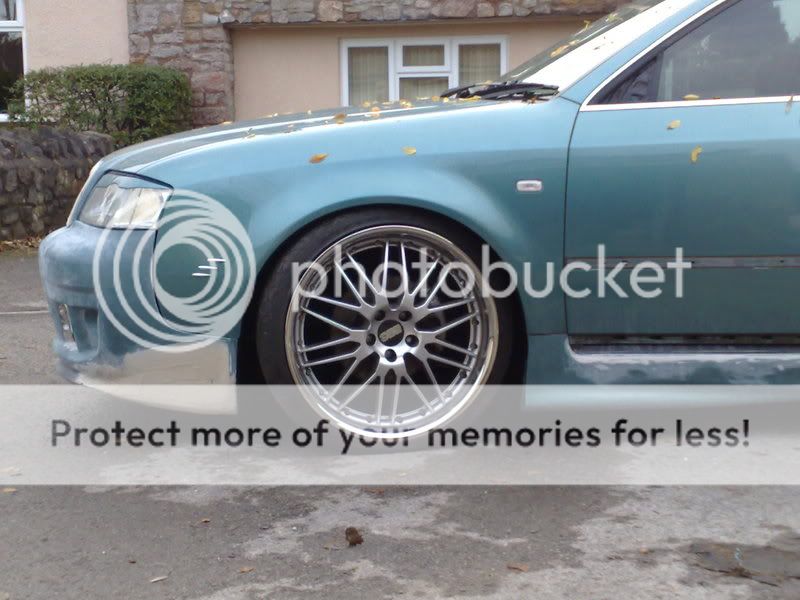
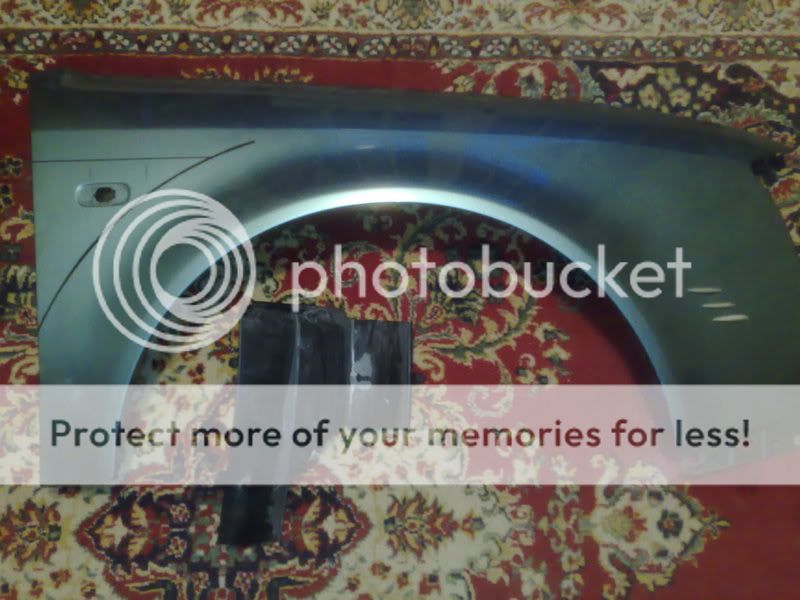
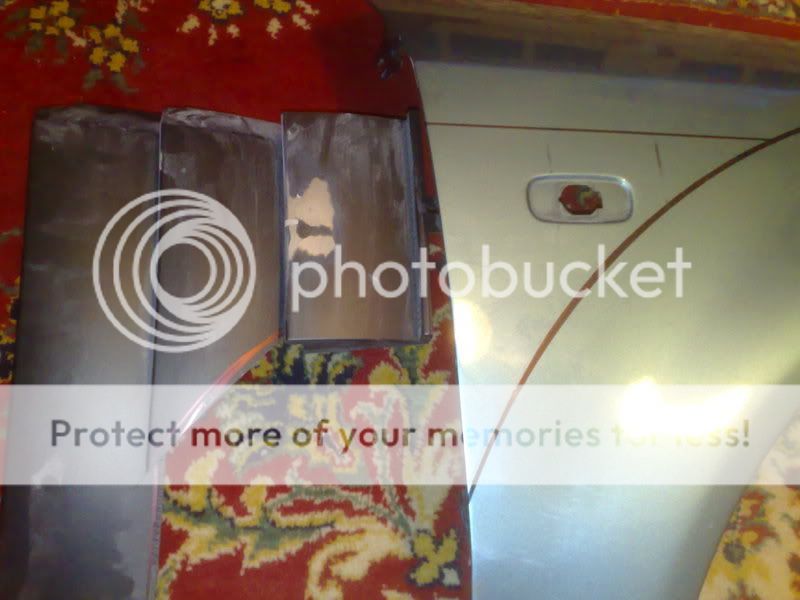
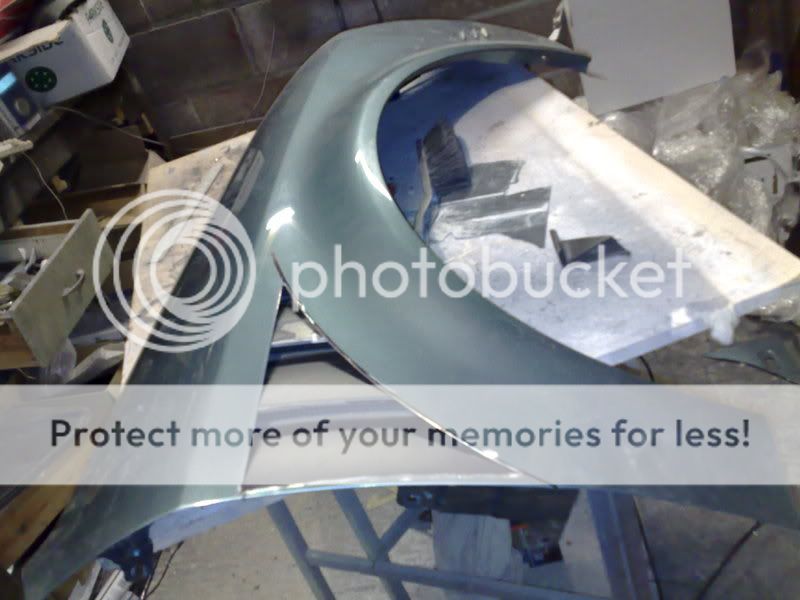
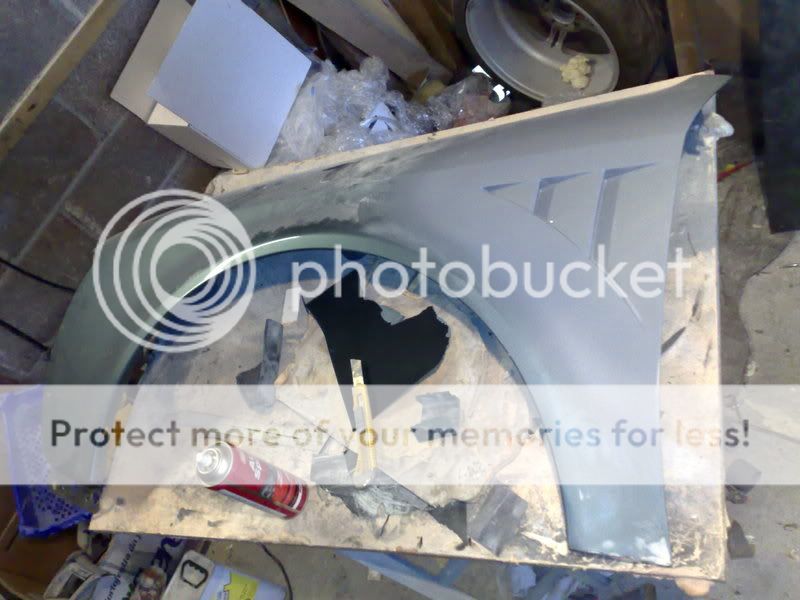
Right well here's the wings and the proposed vent i'm fitting, Its a custom one too, it's the side vent off the new Range Rover, cut up and made in to 3 slats instead of 2, then cut to the line of the arch, hard to explain, the pics say it all!
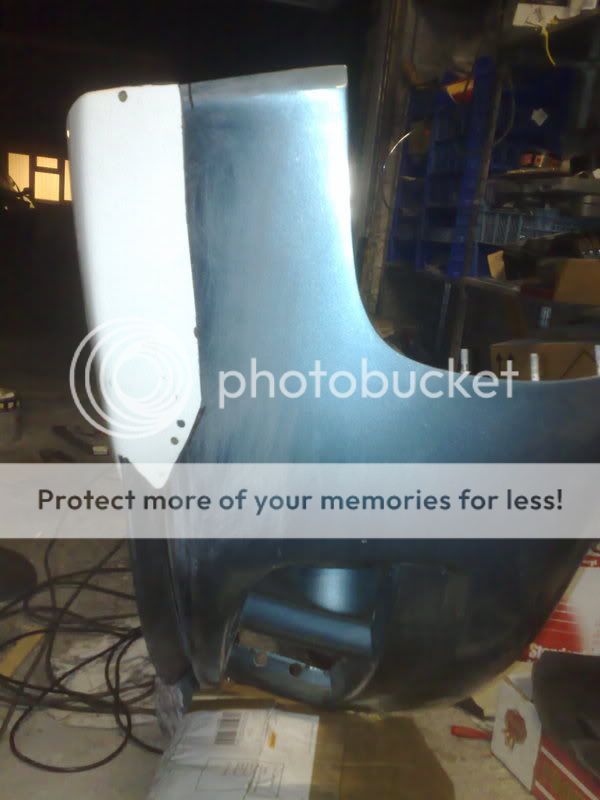
Get cutting and bonding!
Then comes the fibreglass and filler

And after alot of filling and sanding and hobby tooling! Comes primering and sanding to get it flat and smooth:
They took over a week to get them to a stage worthy of a decent coat of primer, never again! But i can almost guarantee they are the only ones like this!
Meanwhile more repair work,
Firstoff the spoiler, a hairline crack had started to develop on the top of it, poor manufacturing to blame! cut the crack out resin poured in to it then filled back over:
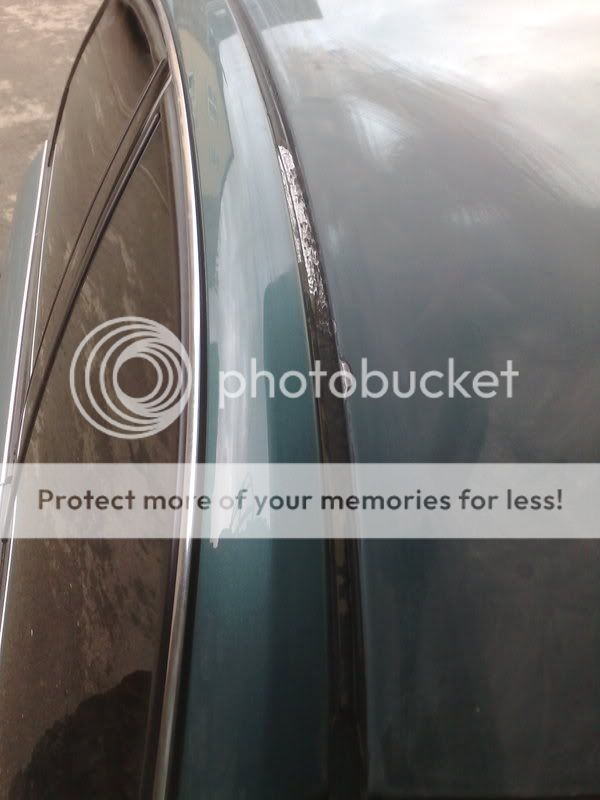
And when removing the roof rails slight bubbling of the paint was unearthed, so ground out all the rust
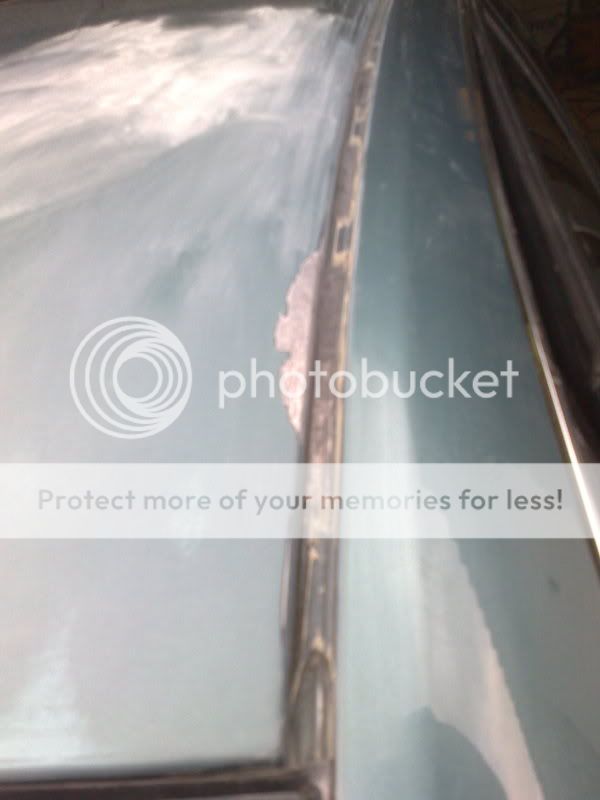
Rust treated to help prevent re-occurance, tho grinding it all out is usually sufficient, Re-bonded the join ready for priming
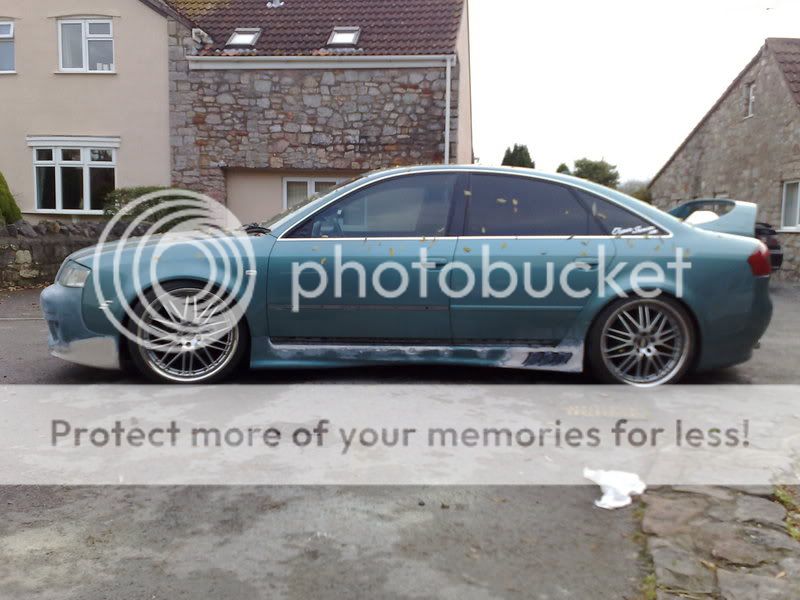
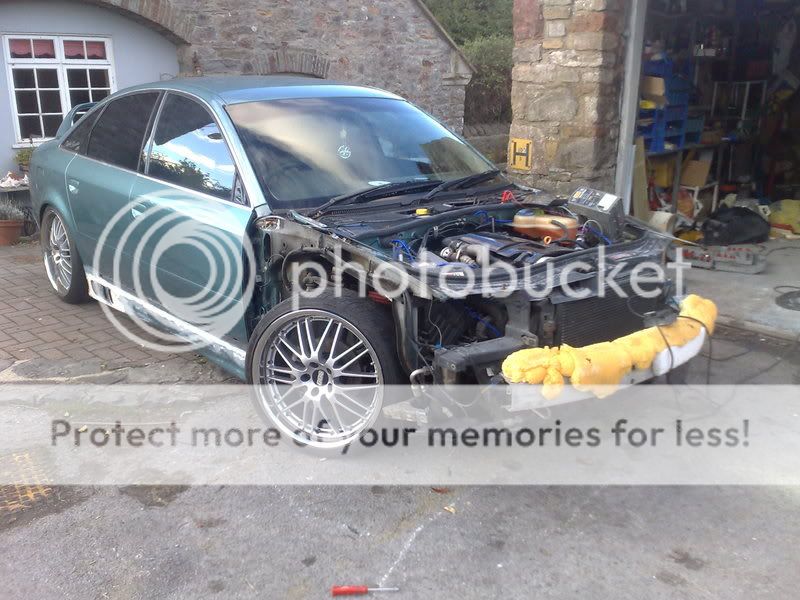
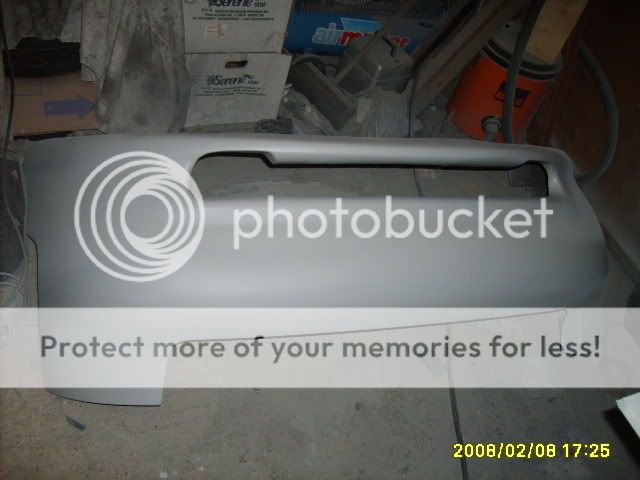
Then to the rear bumper, while still on the car more smoothing to the line on it, (wasn't happy with it and this will be the 4th time it's be re-sprayed!)
Then my new set of tyres turned up! All £383 of them!,

Not too bad really, covered about 12000 miles on the old ones, awefull really but thats the cost of lowering on 20's on a car that tops 2 tonnes fully laden!
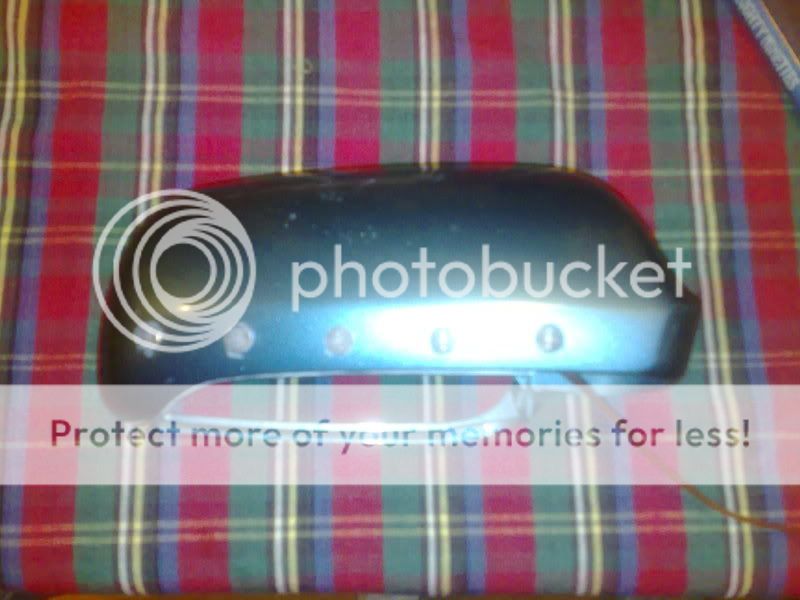
Also doing a little modification to the mirrors, encorperating 5 10mm LED's with the tops flatted to be used as the side repeaters.
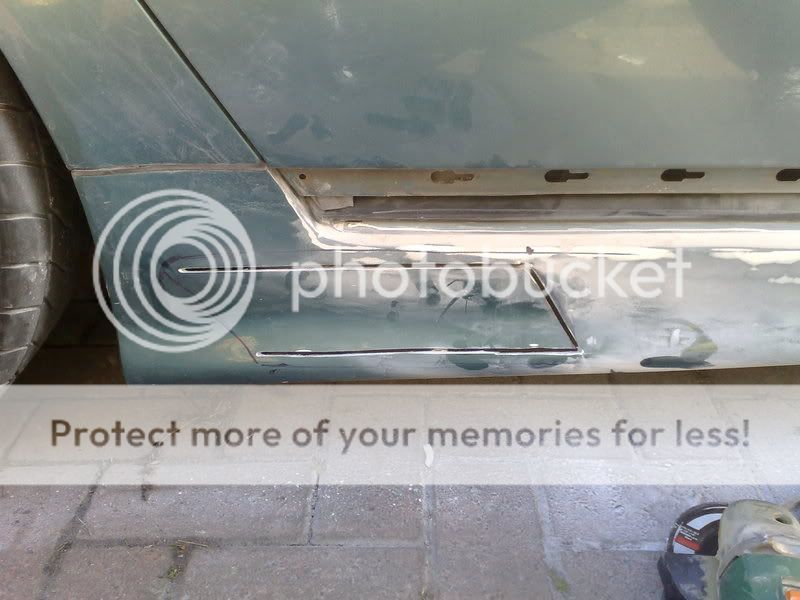
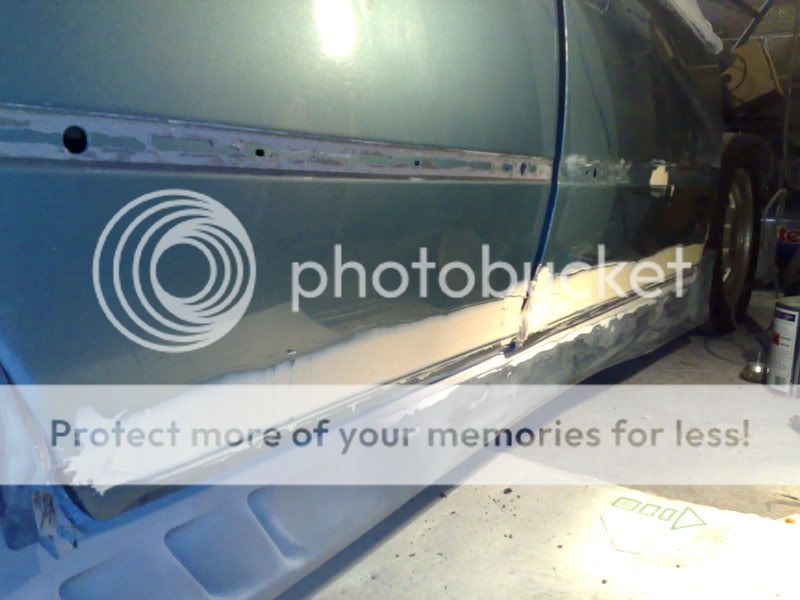
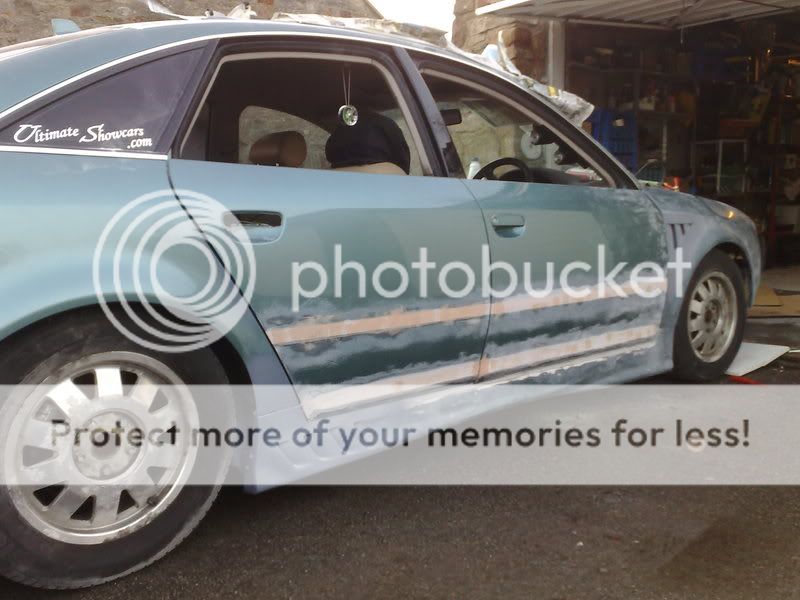
More smoothing work on the doors to be started, removed the door bump strips then had the problem of the glue residue! now Audi only use the best! nothig worked, De-greaser, brake cleaner, thniners, in the end a wire brush bit on a drill! the only way! very effective and keyed the surface up a treat for filler to adhear to.
I went to most major car shows last year just to get the feel of them really and check em out, meanwhile thinking ip and sourcing parts for the body re-vamp.
I'm adding a few things aswell as removing some, we'll see if they all work well when it's all done i guess!
Some of you may not like what i'm doing, some may and some may not see the point! and honestly i'll never undertake something like this again! 3 years work so far!
Most of the styling modifications i've done and am doing i'm doing not because it's different, but because I want them and I think that it will look good, most if not all are custom one-off pieces.
Anyway, I'm undertaking some major work on the audi and have been since sept 07, anyway here's some progress pics and a few before and during:
Here's my 1998 Audi A6 SE and how she looked at the end of last year:
I stuck with this look for the year so it wasn't off the road for the show season and so i could save up and also refine the mods i was going to do for next year which i hope will be the final works for the body.
I'm going for a Euro look with a bit of a twist, the usual Euro smoothing and subtle lines, with my added own touches like the spoiler and a few other things!, anyway it came off the road mid september 2007 and so work started:
First was to smooth the grill into the bonnet and flush off the number plate recess on the bumper:
And then to make a start on a slight mod to the skirts, one of my wild but i think innovative ideas, BMW Z3 wing vents upturned and opposised in to the rear of the M3 style skirts:
Line it up make out the hole and get cutting!
Then get glueing!
Also i didn't like the design and corner of the front bumper as the other corners were all custom stlyed to the car, whereas this is the original audi RS6 design, plus the added LCR splitter didn't sit nicly enogh for me:
Basicailly it didn't match the height of the skirts on the side.
So i'm handy with building up bumper from plastic and fibreglass as i did build the rear one! and so far hasn't cracked in 2 years! so i set about cutting choping addding filling and bonding some new corners!
Thats the corner piece from a mazda 323f i believe that i robbed from my local bodyshop, it was cut up anyway! all i needed was a base to work with.
Put the bumper back on to check it was at correct height, which it was.
So set about the filler work!
Then a bit of expandable filler to strengthen the corner.
You may be able to see the vents in the skirts smoothed in a bit more.
A lot of sanding and primering and dust! and it's nearly to shape! As you may see the LCR Splitter has been re-shaped in to the bumper to follow the lines of the corner all the way round, and then i've followed the flat roughly 1cm line from the wing down all the way to the corner, true worksmanship! Attention to detail is vital! After all at this stage it only takes time to achieve perfection!
Bonnet now off to do final prep and smoothing of grill.
Interior looking a bit empty! As i don't want the leather to get overspray etc.
Not a pretty sight!
I try to do most of the work myself, i'm an amatuer sprayer and i've been messing with cars for years, i also have a very experienced custom painter who runs his own bodyshop to hand. He gives me all the advice i need which is a great help so soon when the car is 90% prepped it will be off to him where it will get a full respray in the green base it is now with blue crushed glass and a blue pearl over the top to give it a blue/green flip.
Right well here's the wings and the proposed vent i'm fitting, Its a custom one too, it's the side vent off the new Range Rover, cut up and made in to 3 slats instead of 2, then cut to the line of the arch, hard to explain, the pics say it all!
Get cutting and bonding!
Then comes the fibreglass and filler
And after alot of filling and sanding and hobby tooling! Comes primering and sanding to get it flat and smooth:
They took over a week to get them to a stage worthy of a decent coat of primer, never again! But i can almost guarantee they are the only ones like this!
Meanwhile more repair work,
Firstoff the spoiler, a hairline crack had started to develop on the top of it, poor manufacturing to blame! cut the crack out resin poured in to it then filled back over:
And when removing the roof rails slight bubbling of the paint was unearthed, so ground out all the rust
Rust treated to help prevent re-occurance, tho grinding it all out is usually sufficient, Re-bonded the join ready for priming
Then to the rear bumper, while still on the car more smoothing to the line on it, (wasn't happy with it and this will be the 4th time it's be re-sprayed!)
Then my new set of tyres turned up! All £383 of them!,
Not too bad really, covered about 12000 miles on the old ones, awefull really but thats the cost of lowering on 20's on a car that tops 2 tonnes fully laden!
Also doing a little modification to the mirrors, encorperating 5 10mm LED's with the tops flatted to be used as the side repeaters.
More smoothing work on the doors to be started, removed the door bump strips then had the problem of the glue residue! now Audi only use the best! nothig worked, De-greaser, brake cleaner, thniners, in the end a wire brush bit on a drill! the only way! very effective and keyed the surface up a treat for filler to adhear to.


")