

My DIY guide for Retro fitting Puddle Lights
- Thread starter RobinA3
- Start date
You are using an out of date browser. It may not display this or other websites correctly.
You should upgrade or use an alternative browser.
You should upgrade or use an alternative browser.
I've fitted the S3 door cards with the puddle lights to my 2012 A3 Sportback but they don't light. Do I need change coding only or do I have to wire up something on a "car" side (the "door card" side is wired up already)?
Also, I know that bytes and bits on cars with CECM have different numbers than those on before-2010 cars with BCM. I learned it when I retrofitted bi-xenons and headlight washers. Can anyone provide me with exact bytes and bits that should be changed to activate puddle and warning lights on a CECM equipped car? I need only numbers because I use OBDeleven and have no access to any bytes/bits description and can only check/uncheck boxes or enter values manually. Thanks.
Also, I know that bytes and bits on cars with CECM have different numbers than those on before-2010 cars with BCM. I learned it when I retrofitted bi-xenons and headlight washers. Can anyone provide me with exact bytes and bits that should be changed to activate puddle and warning lights on a CECM equipped car? I need only numbers because I use OBDeleven and have no access to any bytes/bits description and can only check/uncheck boxes or enter values manually. Thanks.

Thanks! I turned them on by adding +64 to all the right places. It was really easy to do with OBDeleven app on my phone@dp_motley - I think I have it on the 2nd page of my thread.
")
P
Peto Pedro
Guest
HiAs promised in my post about DIY retro fitting footwell lights (http://www.audi-sport.net/vb/showthread.php?t=58215) here is my guide to fitting puddle lights and warning lights.
I fitted these this morning, took about 6 hrs in total for both doors.
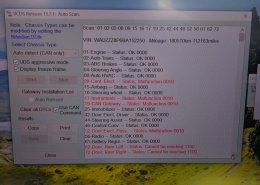
You'll need VAG-COM to switch on the puddle and warning lights, i would advise you to do this first.
You'll need to go to 42 and 52 for the door electrics.

Then in the coding option you'll need to add '64' to the number you already have in the top box, mine was 0000560 so the final number needed was 0000624.
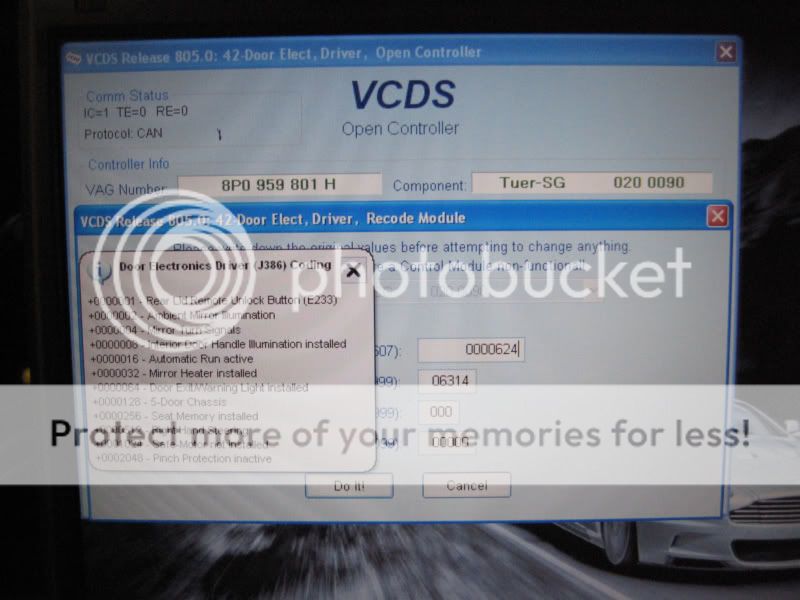
Do this on both 42 and 52.
This the vag com side sorted out.
Now for the hard work.
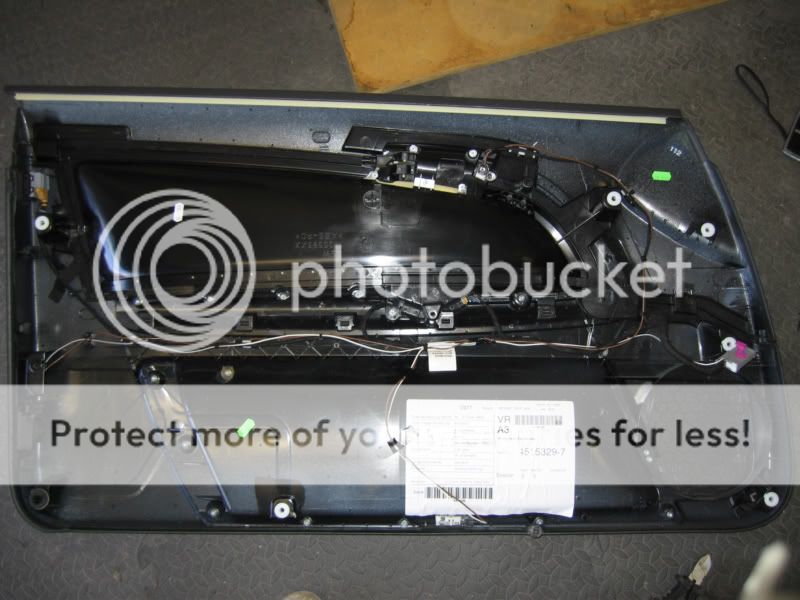
First of all the doorcards will need to be removed.
Remove the trim.
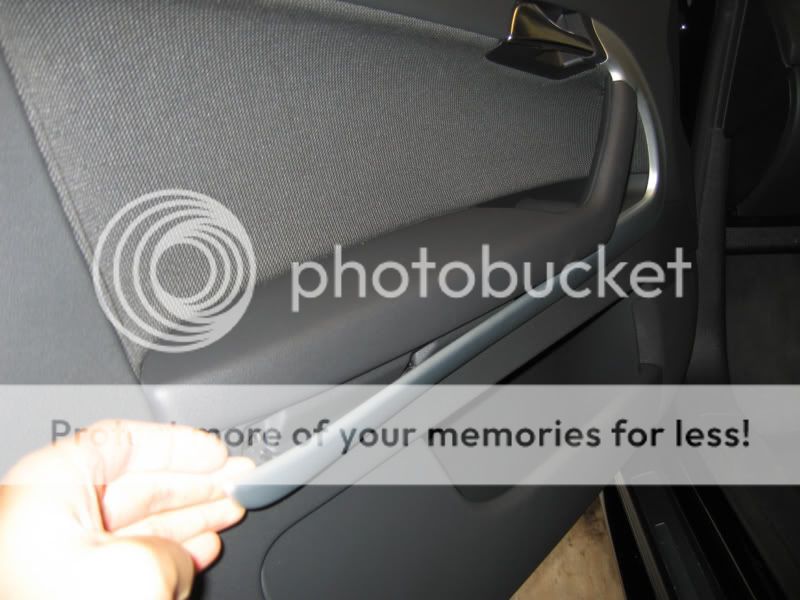

Undo the 3 screws holding on the door card.
Pull the door card off.
Undo the door handle cable and the electrical cable going to the door controller.
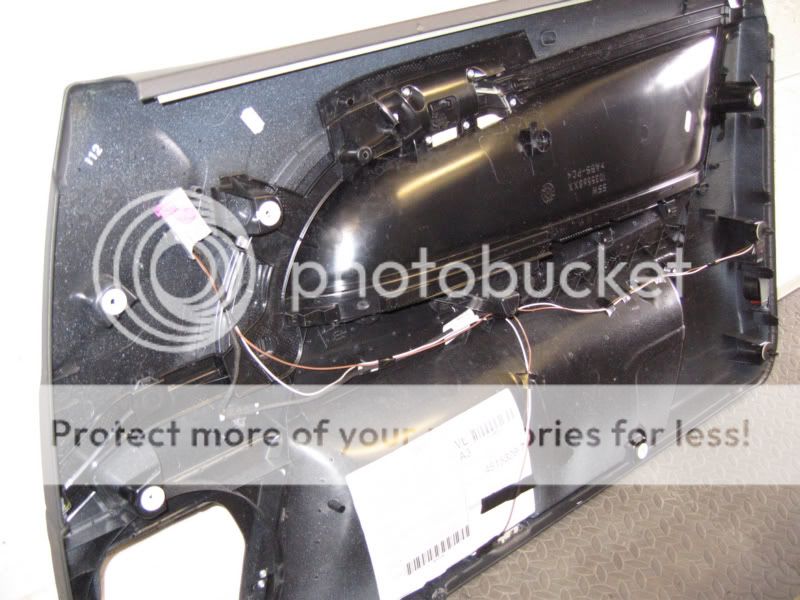
Remove the white foam stuff.
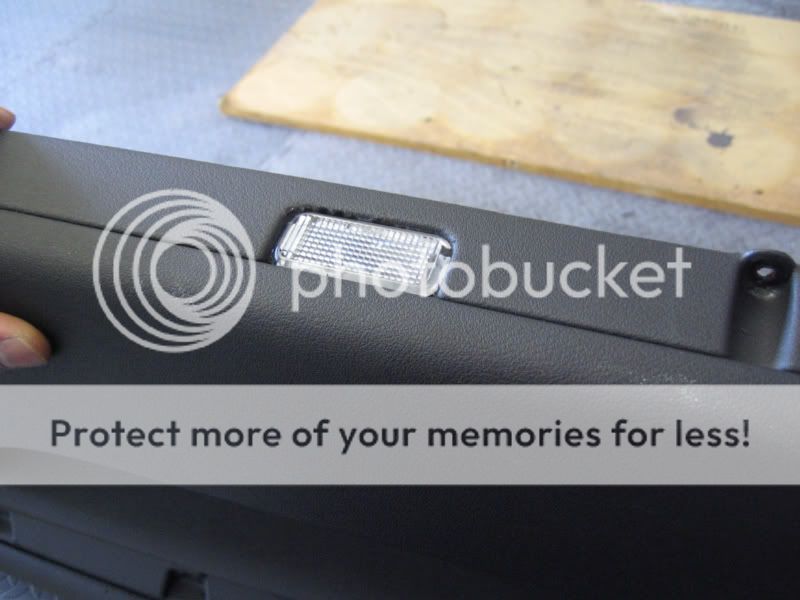
Now you'll need to remove some of the bottom of the door card for the light to sit in place.
I used a drill and used a small drill bit to drill around the rectangle.

Now the light can be palced into the hole, i used a tiny bit of superglue to keep the light in place.
Now for the wiring - DRIVERS SIDE
You can wire the set up in different ways but this is the way i have done it.
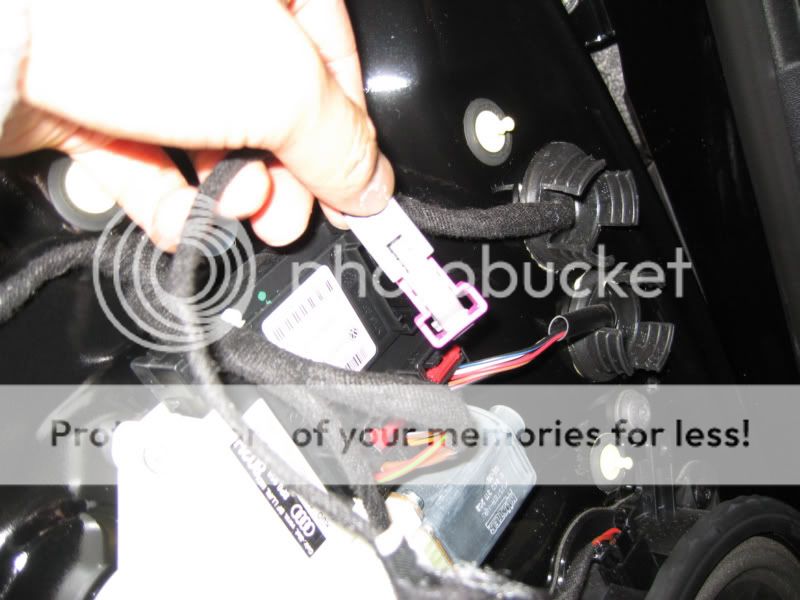
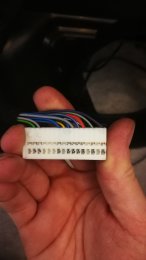
Remove the housing from the main connector (GREY).
Now pin 1 is the supply and pin 2 is the earth.
You'll need to get the supply wire to both the puddle light and the warning light.
I used one wire which then split off into 2.
As for the earth this is the way i did it:
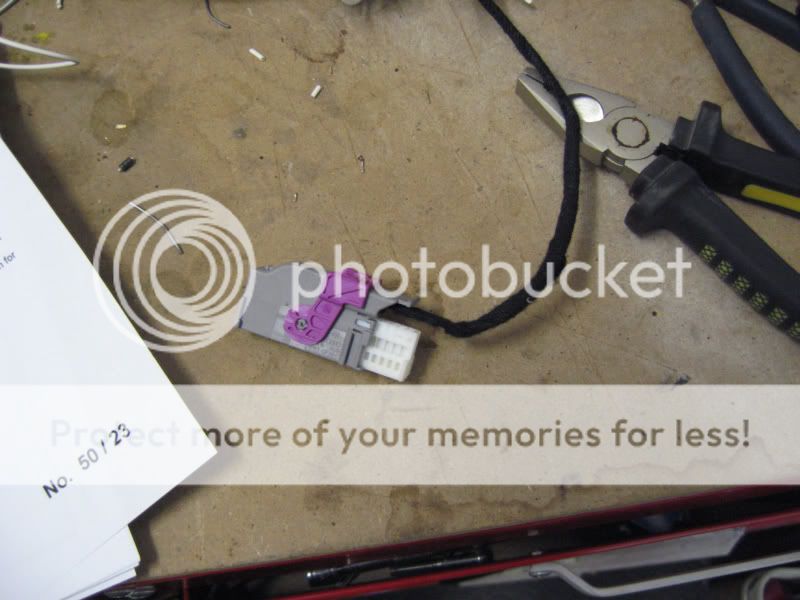
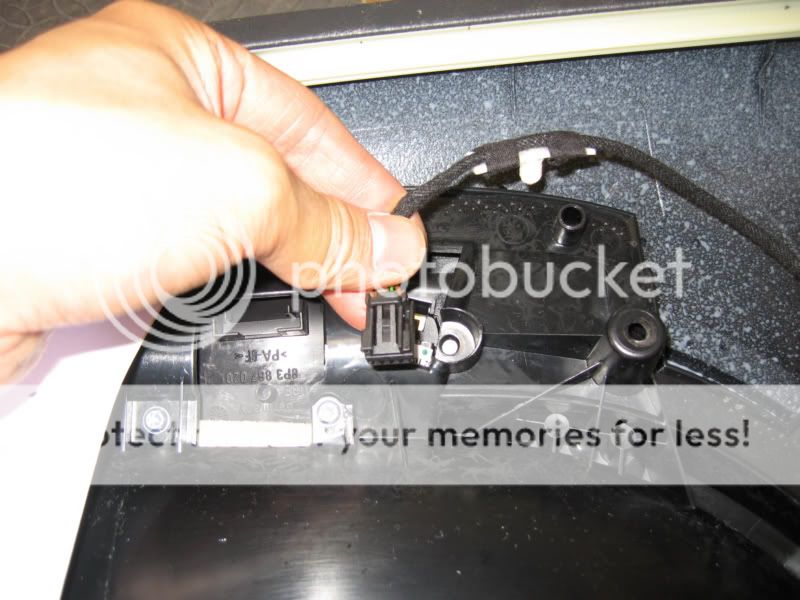
Unplug the connector going to the door lock switch.
Undo the clip from the connector by sliding it away.
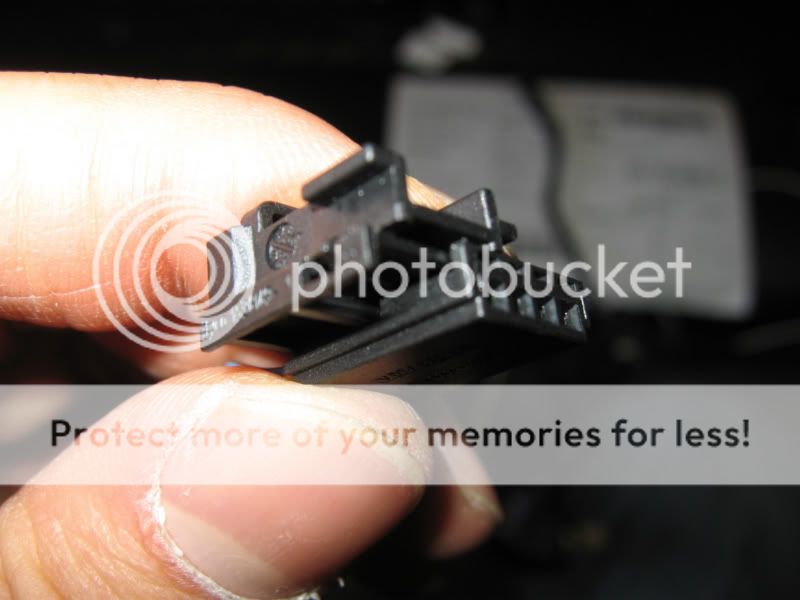
Remove pin 1.
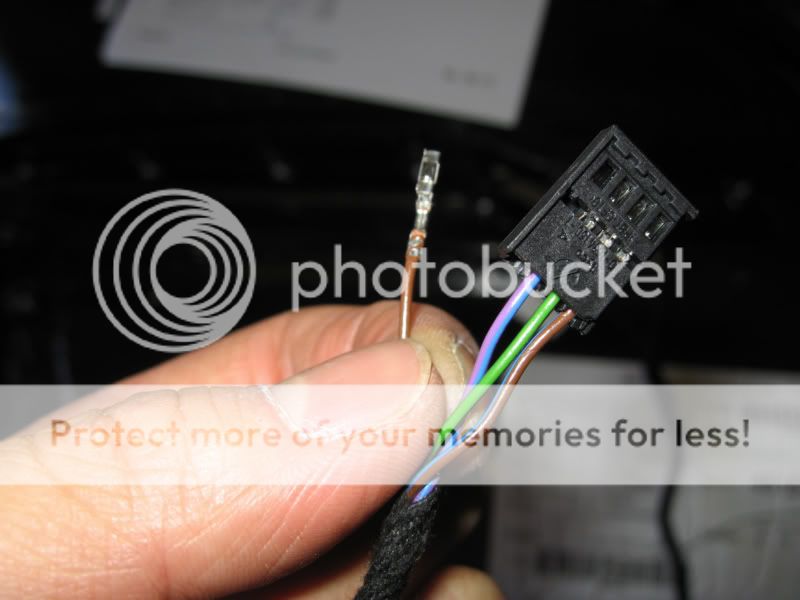
Replace this wire with another earth wire going from pin one to the earth on the warning light.
The wire which was removed from pin one must now be soldered onto the wire you just put in.
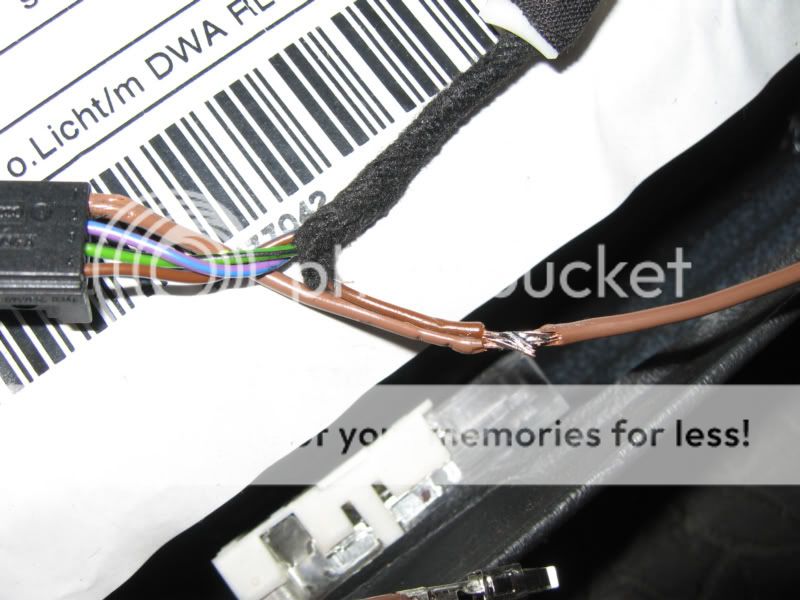
Now you must solder an earth cable going from the puddle light to the earth wire you have just put in.
Put the connector back and plug it back into the locking switch.
Now put the main grey connector back together.
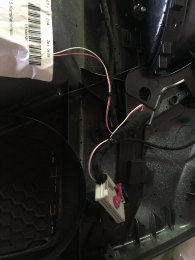
This is what mine looked like when completed.
Put the door card back along with the door handle cable and electrical connector.
The lights should go on when the connector is plugged back in.
Now for the PASSENGER side
The same goes for the passenger side but there is no locking switch to mess with.
As with the drivers door grey plug needs to be taken apart, pin one is the feed and pin 2 is the earth.
Supply the lights with an earth and a supply just like the drivers side.
Remember to tie the wiring down so it doesn't rattle when the doorcard is back on.
Put the door card back on and thats it really.
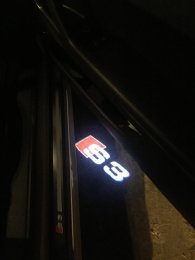
Here is the end result

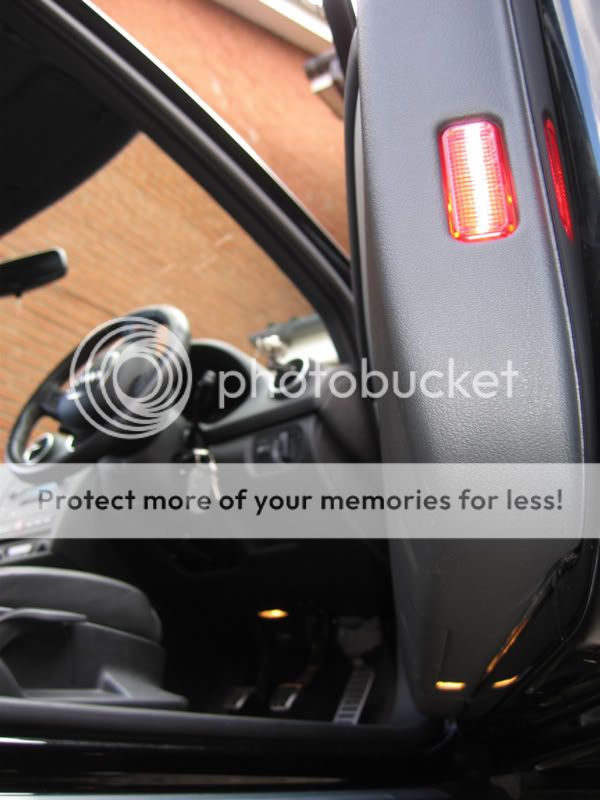
If anyone needs any of the correct electrical connectors for the plugs etc then let me know as i have a supply of them.
Hope you find this post useful.
which one cable is earth on that dor lock connector ? I don't have any lights on door
P
Peto Pedro
Guest

P
Peto Pedro
Guest
Well I have 2011 and it is the same but am confused which connector he meant that pin one is 12V and pin 2 is earth bcos it isn't..Only use the door lock connector if your car is pree 2009
I spent some time yesterday trying to figure out the wiring then realised the instructions from Robin are pre 2009 cars.
On main connector pin one is blue-brown and pin two is empty pin 22 I asume is earth reading from lock door connector as he wired it..
Attachments
Forget all the info you have read. its mostly early catsd
connect the live to 18 and earth to 19 in the large white conector and it should be fine if you have coded it. 18 and 19 will be empty at the moment
connect the live to 18 and earth to 19 in the large white conector and it should be fine if you have coded it. 18 and 19 will be empty at the moment
P
Peto Pedro
Guest
So coding is the same as he showed ok?Forget all the info you have read. its mostly early catsd
connect the live to 18 and earth to 19 in the large white conector and it should be fine if you have coded it. 18 and 19 will be empty at the moment
Ok thanks will do tomorrow ..
P
Peto Pedro
Guest
So coding is the same as he showed ?Forget all the info you have read. its mostly early catsd
connect the live to 18 and earth to 19 in the large white conector and it should be fine if you have coded it. 18 and 19 will be empty at the moment
Ok thanks will do tomorrow ..
P
Peto Pedro
Guest
But I need those little metal pins where I solder wires and insert in that main connectoryes coding is as shown
P
Peto Pedro
Guest
No I didn't buy anyting from nobody all home madeYes you do,if you bought your loom from Robin A3 the will be already attached. its plug and play.

P
Peto Pedro
Guest
TaDaaaaForget all the info you have read. its mostly early catsd
connect the live to 18 and earth to 19 in the large white conector and it should be fine if you have coded it. 18 and 19 will be empty at the moment
Attachments
P
Peto Pedro
Guest
Haha yeah I know I had to disasemble it to check which pin is + and which - .. They already positioned itWelldone,don't forget with the logo lights you need to put one round the other way or one side will be upside down...
and I did turn it right way tooOne thing ; so I removed ignition key and the light still lits ? is it normal ? Will this light turn off after door shut ?
Last edited by a moderator:
P
Peto Pedro
Guest


P
Peto Pedro
Guest
Guys ..!
I just encountered problems with rear doors.. I cannot lock the car (well sort of I can )becuse suddenly there is no communication to rear doors?? WTF ? I have central locking system intemitent .. because rear doors malfunction ? I haven't disassembled rear doors at all just driver door ...
There is fuel tank flap error shorted to the ground .. jeesus ...
Anybody knows what caused this? hopefuly not that light underneath door ..
Attachments
P
Peto Pedro
Guest


Reviving a semi old thread?? Doing the same mod the weekend, but also have an issue where i think pins 18 and 19 are empty both ways.
I know top side should be empty to insert new wires/connectors, but appears nothing is in pins 18 and 19 anyways, so led wiring would be connecting to nothingness? Making sure as driver puddle light already installed, just needs to be wired up. Have VAGCOM fyi.
Thanks
I know top side should be empty to insert new wires/connectors, but appears nothing is in pins 18 and 19 anyways, so led wiring would be connecting to nothingness? Making sure as driver puddle light already installed, just needs to be wired up. Have VAGCOM fyi.
Thanks
What year is your car Ashraf?
Hi. Apologies for not giving details
Mine is the 2009 facelift 3 door manual ( 100% stock... for now ).
I will only have an opportunity the weekend again to remove panel and double check the connector in question, but im very certain it has absolutely no wiring both ways at pins 18 and 19, but at the same time praying i am wrong
And thanks for the quick reply
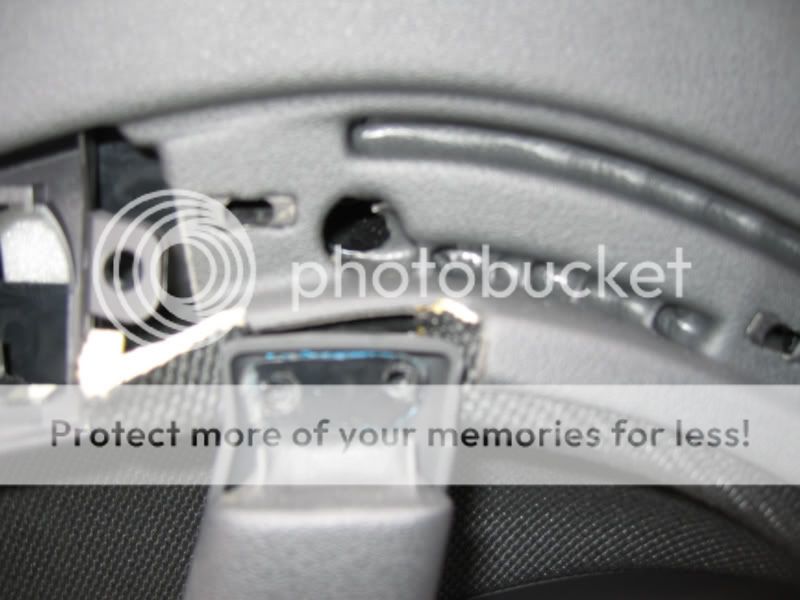
The biggest problem I had was taking off the door card, main reason being I did not have the right trim tool. You'll need a long metal fastener removal tool. And where are the fasteners? See my photo, where I've circled the fastener locations for the driver's door. (The arrow at the bottom right points to the 7th fastener, which was obscured by the angle of my photo.) They are different color because I screwed them up using the wrong tool. Don't be me, lol. Haven't yet tackled the other doors, but will post when I do. Oh, and one more thng: When you're reinstalling the door card, it's easy for the cable to unhook itself from door handle, so watch it. If it's attached, you'll feel a slight tension from it when you're lining up the upper right corner into the window sill. Ask me how I know (sigh...).
Never had a problem with the fasteners but normally lube them up so it’s easier to pull off next time.
This wiring is correct for 2013 USA A3 Sportback as well.Hi Guys,
To confirm for 2005 A3 sportback the pins are:
Front -
Pin 18 = Live
Pin 19 = Ground
Rear -
Pin 1 = Live
Pin 2 = Ground.
I had a try at the door card removal earlier and it's a right nightmare. But at least I know how to take it off now...
Hi guys, i have a question ,does work that coding to a4 b8.5 FL? I know,for me front doors are + pin 16 and - pin 5, rear doors + pin 12 and - pin 13. Have anyone idea that the coding are the same for me or is diffrent?
Thanks guys
Thanks guys
Ron Rahman
Registered User
Hi Robin
I've an Audi A3 2010 2.0 TDI
I had ordered those projector type puddle lights but later on I realised I don't have no puddle lights .
Is there anyway you can fit it for me . I don't know if you live in London
I will pay for the kit you're selling and your charge for fixing the whole thing
Thanks
Ron
I get quite a few enquires regarding the kits I offer so I have recently created website showing the kits I can offer.
https://rocketwires.co.uk
https://rocketwires.co.uk

If not is there anyone with vag com in london preferably near hackney can also come to you pm me
Sent from my SM-N960F using Tapatalk
I’m happy to help you. I’m in Archway. Drop me a PM.
Ill keep that in mind bud manage to sort it through obeleven but if i wake up to a dead battery tomorrow morningI’m happy to help you. I’m in Archway. Drop me a PM.
 then ill drop you a message, and yes i know its upside for anyone else that comments on its ebays **** up not mine

Sent from my SM-N960F using Tapatalk
Looking good is it fixed in that position or can you not just rotate the filter/lens to the correct orientation?
is it fixed in that position or can you not just rotate the filter/lens to the correct orientation?