As you know in the 2009 facelift A3 / S3 Audi has opted to fit the cardholder instead of a cupholder.
Searching for cupholder on the forum, I found boggyms excellent retrofitted cupholder write up.
This got me thinking, could this mod be done on the new 2009 facelift switch assembly?

I took the switch surround off and discovered that the height and width of the 2009 cardholder enclosure is the same as the cupholder, so it does fit. The problem is with the new curved shape of the card holder front and the switch surround. Because the cupholder was designed with a square front there is an obvious clearance issue, but with a bit of modifying to the front and the right-hand side of the cupholder, it can be made to fit properly.
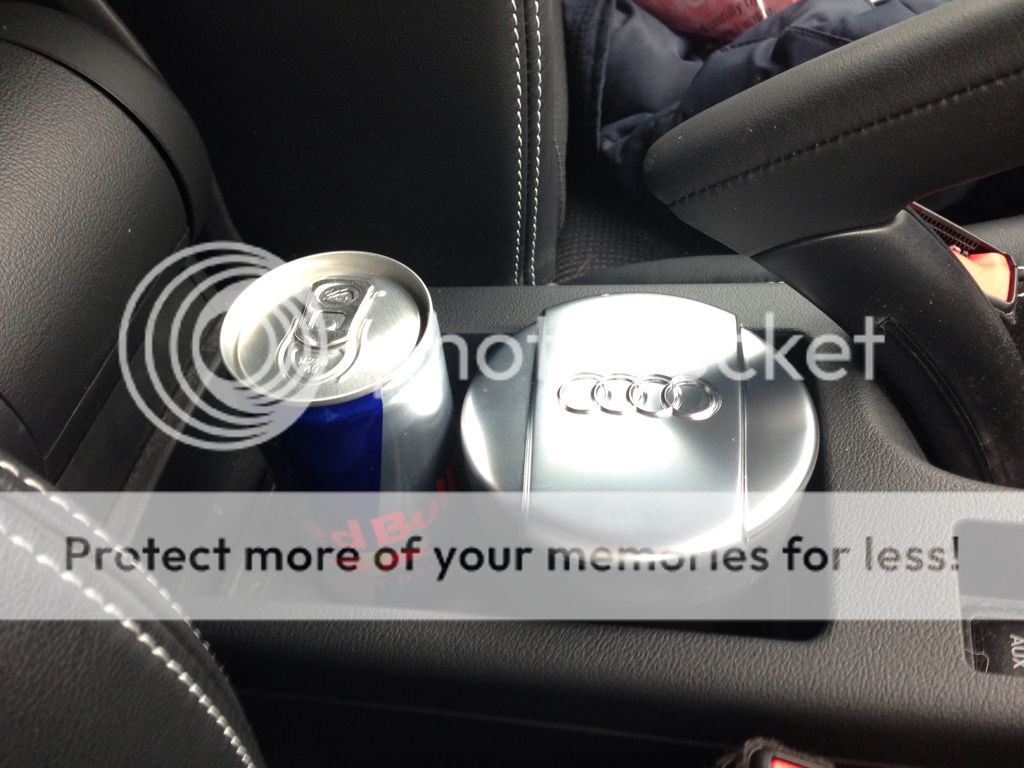
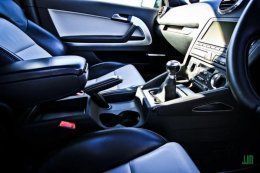
It took awhile figuring out what to do but here is my modified cupholder in a 2009 S3.
Ok so its not the best mod you can do but its my first ever mod and I am rather pleased with the result.

Here is a list of parts and what had to be modified.
Parts:-
Illuminated Cupholder Part number: - 8P0 862 534C 5PR
Approx £27 inc VAT from Audi Parts Dept. or find a cheap one on ebay
Tools used:
Mobile phone fascia removal tool. ( Or be careful with flat bladed screw driver)
Sharp bladed Knife
Metal ruler
Dremel
Wet and dry sandpaper to tidy up edges.
1. REMOVE CARDHOLDER
The switch surround is just clipped on so gently prise it off using removal tool. Be ready to catch the hazard warning switch as it will ping off as you remove the surround.

Eject the cardholder then remove it by pressing down on the two tabs and pull out. Unclip the wire for the LED on the back

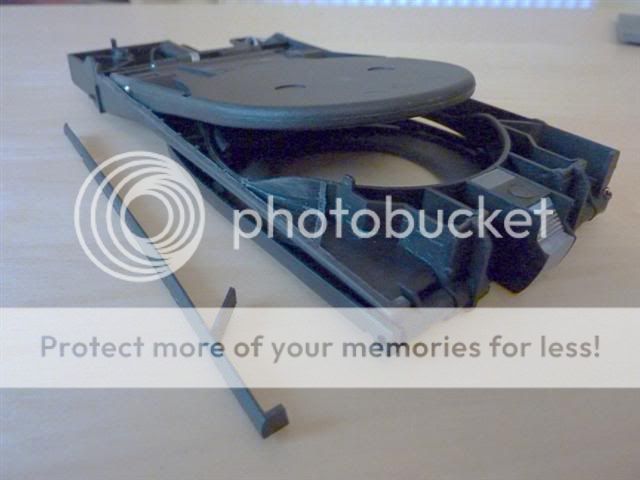
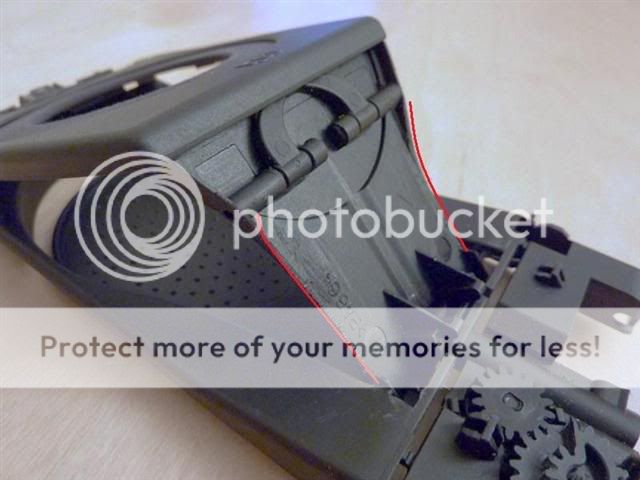
2. CREATE CLEARANCE FOR CUPHOLDER
Although the cupholder will fit when the switch surround is put back, it will not eject. So you need to trim part of the right hand side of the cupholder to allow it to eject properly past the curved switch surround. Score a line with the knife to mark what needs removing. You can use a dremel or a knife to remove the excess plastic. I found the dremel started to melt the plastic so I used the knife to get a clean cut. It is tough plactic but scoring back and forth you will eventually cut through. Tidy up the edge with wet and dry sandpaper
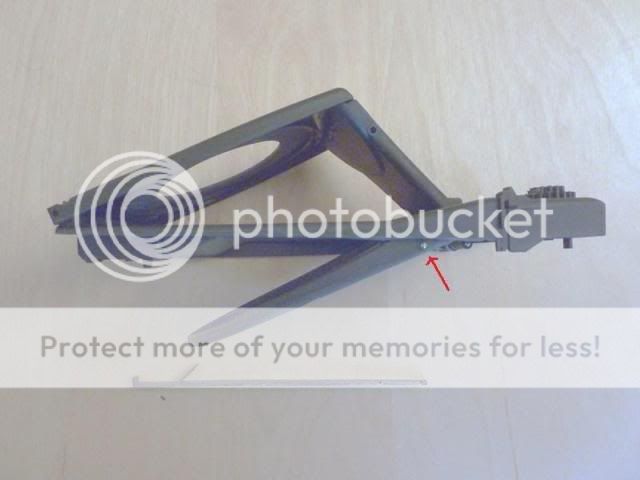
The arrow in the picture shows the locating pin for the bottom flap is no longer held by the side arm. Dont worry the side arm is not the support for the pin.
Fit it back in the car and check that it ejects past the switch surround without catching.
3. FITTING THE CARDHOLDER FRONT.
Getting the cardholder front to fit on the cupholder requires a fair bit of modifying and patience.
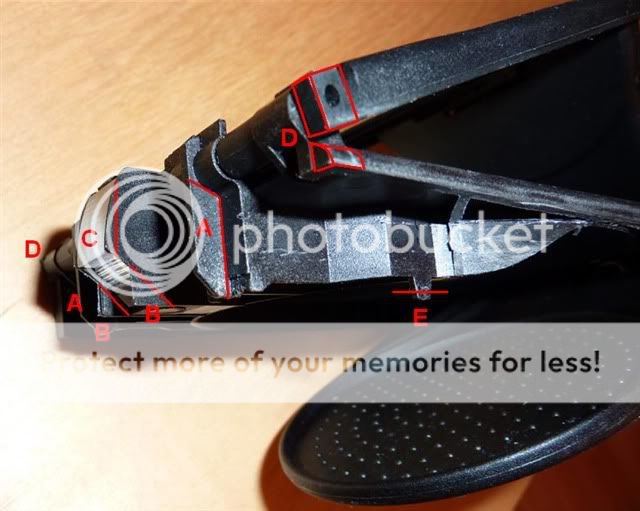
Trim the following parts.
A Cut away until they are flush
B Cut away so they follow the angle of the clear plastic
C File down the clear plastic and black sides to the red line
D On the right hand side, cut away the 2 sections illustrated. On the left just cut away the top section.
E - This sometimes caused mine to stick when ejecting so you might need to cut 1mm off the little tab.
Next trim down the top and make two slots so the cardholder front will sit at the right height when located in the switch surround.
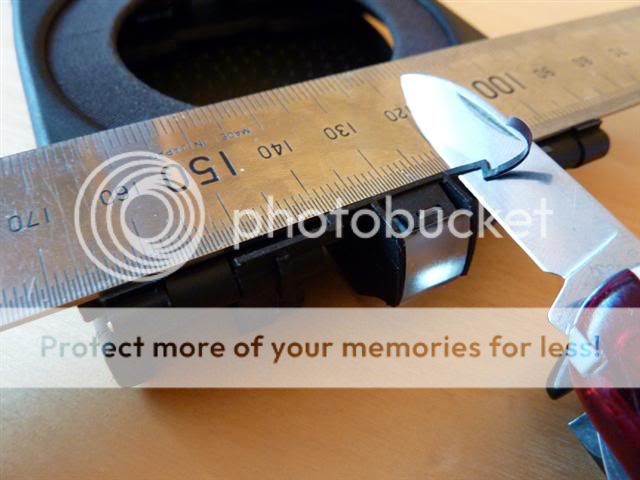
I found that a metal ruler placed on the top will allow you to cut away the required 1 mm.
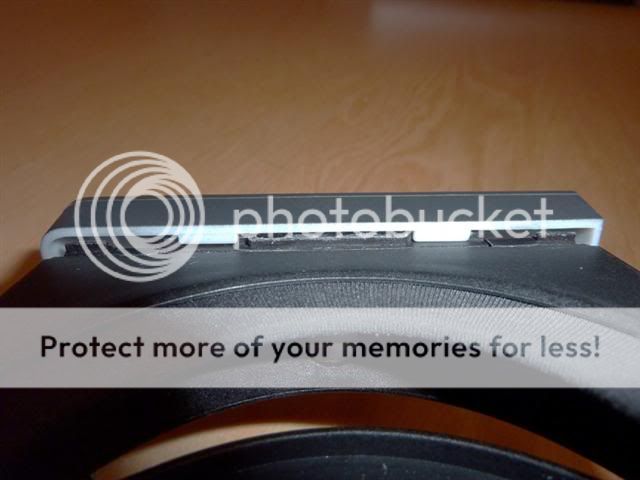
Work out where the slots need to be made. The dremel was ideal for cutting the slots
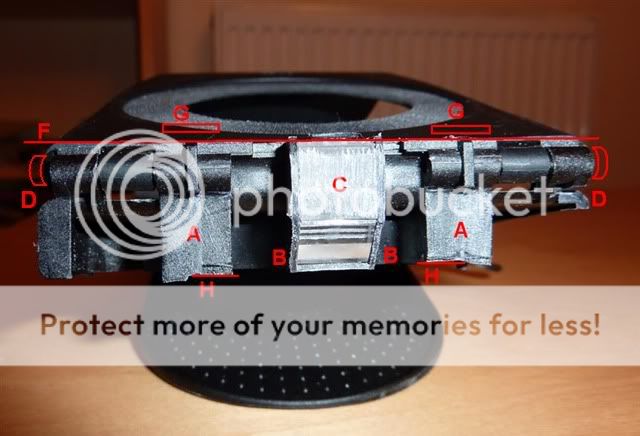
Once all the modifications shown above are done, the cardholder front should fit.
A Tabs trimmed down flush.
B Tabs trimmed following angle of clear plastic
C Clear plastic / Black tabs filed back
D On the Left top section removed, on the right top and bottom sections removed
F 1 mm trimmed off the top
G Slots cut to locate tabs in cardholder front
H Put the cardholder front on and see how much needs to be trimmed so it clicks in place properly.
4. MAKING THE CUPHOLDER LOCK IN PLACE
At this point, the cupholder with the cardholder front should fit properly in the switch surround and it should eject without catching. Now, just like in boggyms "Retrofitted cupholder guide you need to trim the back of the cupholder where it hits the switch surround.
I tapered both sides and tidied up with wet and dry sandpaper.
So thats it. Admittedly there is a lot more work required than the preface lift mod, but if you really want a cup holder then these are the lengths you have to go to ...
[FONT="]
[/FONT]
Searching for cupholder on the forum, I found boggyms excellent retrofitted cupholder write up.
This got me thinking, could this mod be done on the new 2009 facelift switch assembly?
I took the switch surround off and discovered that the height and width of the 2009 cardholder enclosure is the same as the cupholder, so it does fit. The problem is with the new curved shape of the card holder front and the switch surround. Because the cupholder was designed with a square front there is an obvious clearance issue, but with a bit of modifying to the front and the right-hand side of the cupholder, it can be made to fit properly.
It took awhile figuring out what to do but here is my modified cupholder in a 2009 S3.
Ok so its not the best mod you can do but its my first ever mod and I am rather pleased with the result.
Here is a list of parts and what had to be modified.
Parts:-
Illuminated Cupholder Part number: - 8P0 862 534C 5PR
Approx £27 inc VAT from Audi Parts Dept. or find a cheap one on ebay
Tools used:
Mobile phone fascia removal tool. ( Or be careful with flat bladed screw driver)
Sharp bladed Knife
Metal ruler
Dremel
Wet and dry sandpaper to tidy up edges.
1. REMOVE CARDHOLDER
The switch surround is just clipped on so gently prise it off using removal tool. Be ready to catch the hazard warning switch as it will ping off as you remove the surround.
Eject the cardholder then remove it by pressing down on the two tabs and pull out. Unclip the wire for the LED on the back
2. CREATE CLEARANCE FOR CUPHOLDER
Although the cupholder will fit when the switch surround is put back, it will not eject. So you need to trim part of the right hand side of the cupholder to allow it to eject properly past the curved switch surround. Score a line with the knife to mark what needs removing. You can use a dremel or a knife to remove the excess plastic. I found the dremel started to melt the plastic so I used the knife to get a clean cut. It is tough plactic but scoring back and forth you will eventually cut through. Tidy up the edge with wet and dry sandpaper
The arrow in the picture shows the locating pin for the bottom flap is no longer held by the side arm. Dont worry the side arm is not the support for the pin.
Fit it back in the car and check that it ejects past the switch surround without catching.
3. FITTING THE CARDHOLDER FRONT.
Getting the cardholder front to fit on the cupholder requires a fair bit of modifying and patience.
Trim the following parts.
A Cut away until they are flush
B Cut away so they follow the angle of the clear plastic
C File down the clear plastic and black sides to the red line
D On the right hand side, cut away the 2 sections illustrated. On the left just cut away the top section.
E - This sometimes caused mine to stick when ejecting so you might need to cut 1mm off the little tab.
Next trim down the top and make two slots so the cardholder front will sit at the right height when located in the switch surround.
I found that a metal ruler placed on the top will allow you to cut away the required 1 mm.
Work out where the slots need to be made. The dremel was ideal for cutting the slots
Once all the modifications shown above are done, the cardholder front should fit.
A Tabs trimmed down flush.
B Tabs trimmed following angle of clear plastic
C Clear plastic / Black tabs filed back
D On the Left top section removed, on the right top and bottom sections removed
F 1 mm trimmed off the top
G Slots cut to locate tabs in cardholder front
H Put the cardholder front on and see how much needs to be trimmed so it clicks in place properly.
4. MAKING THE CUPHOLDER LOCK IN PLACE
At this point, the cupholder with the cardholder front should fit properly in the switch surround and it should eject without catching. Now, just like in boggyms "Retrofitted cupholder guide you need to trim the back of the cupholder where it hits the switch surround.
I tapered both sides and tidied up with wet and dry sandpaper.
So thats it. Admittedly there is a lot more work required than the preface lift mod, but if you really want a cup holder then these are the lengths you have to go to ...
[FONT="]
[/FONT]


 ^^^
^^^