I'll also run vcds tomorrow just to check the timing and phasing blocks/specs to make sure they are with expected paramaters. 


What about the oil filter housing??I'll leave the oil cooler gasket until I do the clutch and probably fit a new cooler at the same time, just saves doubling up on same job really.
That first picture had me thinking of an operating theatre with the patient anesthetised, prepped and readied. Nurse, hand me the breaker bar...Just getting organized this afternoon to do the top-end work, then what do I see, a small friend has taken up residency again, at least not in the pollen filter housing this time.
Little sods ..lol
View attachment 274870View attachment 274871
Now that is engine porn all day long. Can I say that on a public forum???A bit further on by the end of this afternoon.
managed to get the cam adjuster bolt out in a oner, took the extra precautions of using a snug piece of packing wood between the head of the wrench and the bulkhead to ensure the splined bit stayed put and straight in the head when using some somewhat excessive force to loosen it , which paid dividend as the plan worked a treat.
So off with the old bits, a bit of a struggle getting the new kit on but with patience and several cuppas all went back on.
The cam adjuster cover was refitted with new oil control rings, glad i bought 3 new ones as the old one just fell off.
tomorrow is just refit the cam cover, fuel pump with a new follower, refit the vacuum pump and just small bits .
Then onto the oil pump freewheel task.
View attachment 274881View attachment 274882View attachment 274882View attachment 274883View attachment 274884View attachment 274885


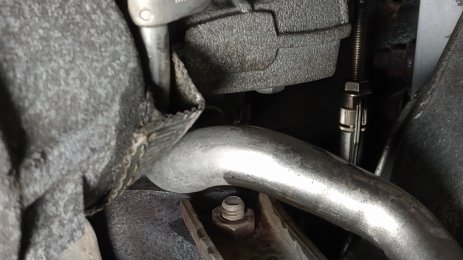
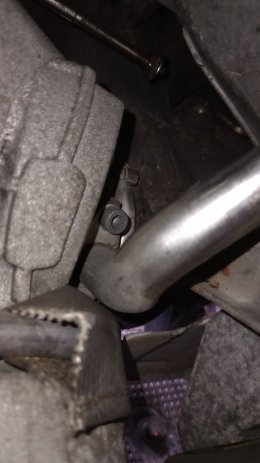
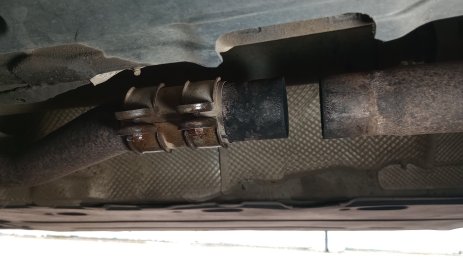
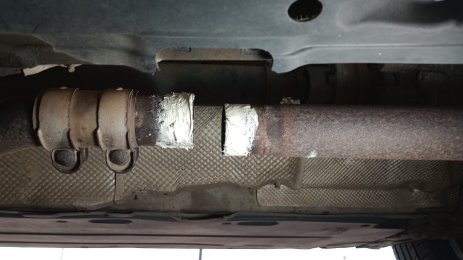
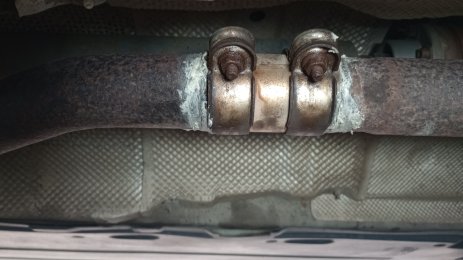
 ... i just now sorted a leak in the rear exhaust box (crack to be exact) and a cracked off pcv pipe.. both are temporary fixes but will address them properly summertime.
Thanks and I remember reading your post, it filled me with dread. But yes, you're right again, the lower suspension arms are straightforward enough.@ttelracs lower suspension arms are easy... it's the top suspension arms that are a pain... also make sure you don't accidently round off the thread or mushroom the studs of the 2 balljoints down there, it happened to me because at a certain point working in the cold you loose the feeling in your fingers and I was so angry when the pichbolt broke the knuckle, i just wacked the 2 bottom ball joints out so i could remove the complete knuckle. But yeah don't be like me... it'll add unneeded costs (had to buy a new tap&die set with various big sizes as I had to search what size the balljoint studs actually is and what the actual thread pitch is) and it'll slow you down for days because the right die size isn't readily available in any shops ( well wasn't around my area) so I had to order online and they didn't do 24 hour delivery.


Lesser desirable but happy ,just a 01217 code to sort
Sent from my iPhone using Tapatalk
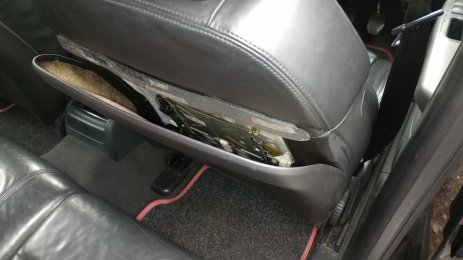
Took some finding unwrapping the black cable wrap they use but I think I’ve found the culprit
Reckon it’s got pinched in the lumbar mech
Sent from my iPhone using Tapatalk


Sent from my iPhone using Tapatalk
Yep, after doing this myself not long ago, it's quite a phaff. Not particularly difficult just time consuming whilst on your back and outside. But you have a heated garage with carpets, cafeteria and bar, so this will be a stroll in the park for you...Dropping the Quattro sump takes a bit longer than 2wd version so wont be before the weekend now, also need to address the oil cooler and seal replacement and filter housing.
getting there slowly.
Yes and I made that mistake on my old E39 as torqued them up before dropping to the ground which led them to squeak and shorten the life expectancy considerably.Just load them up before tightening them up to torque settings.
Well spotted that man.
Sent from my iPhone using Tapatalk


Good tip about the LYE, as i thought i had a can of Mr Muscle about, but i dont, but did find a mr muscle drain unblocker gel, will see if that has the LYE in it, sounds like it will. Will coat the VNT in that and then rinse it off after a bit.@Gmac oke so you've opened it (best way of doing it) now instead of using expensive cleaners... grab the wife's ovencleaner (Mr Muscle or Ovenpride) and cover the VNT mechanism parts with it... let it work for 15 minutes than rinse it off. It'll be almost sterile clean... you can agitate it with a tootbrush using some extra ovencleaner on the hard bits. I actually use a cheap 1 pound ovencleaner because it has LYE in it. But you can also use a drain unblocker ( basically any product with LYE in it) as that is the chemical that breaks down the sticky stuff.
I just like the foaming and sticking action of of the ovencleaner as it means less product gets wasted. but when you take it apart(like you have) you can use a drain unblocker, drop that in a container and submerge the parts.. and if you leave it for an hour when you come back it'll look like new... just make sure you rinse it properly. than just reassemble the lot and put it back on the car.
(i had to do this several times on my VNT equipped TDI's, made it a routine with every mayor service)
Good tip. I did my Mk4 1.9 Golf vanes using this trick. I think it worked pretty well considering I didn't take the turbo off / apart.Oww and one more tip: keep the lye away from the cold side of the turbo... as the product eats(breaksdown) aluminium so if you want to clean the core only use it on the side that gets rotated by the hot exhaust gasses... and hold it upside down so it doesn't get to the other blades.