What have you done to your Audi A4 B7 today?

I took my bottom S Line door blades off earlier to check for anything nasty and clean the hidden area.
3 came off very easily but the driver door one was a sod, there's metal strengthening bars inside the blades and mine had rusted so the bar had layered / swollen up it turned out.

Bit like the third one down on this pic, only mine was actually a ***** sight worse.
Cleaned everything and the driver door one was tricky to slide back on, so sprayed a little bit of silicone on the back of the blade and she slid in a lot better.

You know when you think "Hmmm, why did I bother?" it was a bit like that, but good to clean behind there, and nothing funky on the doors to report which was the main reason for removal, just thick with grime. Pins all ok.

Two tiny screws on the bottom corners of the inside of the doors and slide the blade (gently) towards the back of the car.
These things are pretty solid and I thought they were surprisingly heavy for what they are.

I expected cheap flimsy things,...which these certainly are not.

1711289783870

Here's the video which inspired me!


View: https://www.youtube.com/watch?app=desktop&v=XnThAwyiBh0
 
  • Like
Reactions: B7Tourer, Gmac and Charlie Farley
Well on a bit of a whim, and not much happening around the house, i thought id just go and whip the turbo off the v6, turned out fine, bit trickier than first thought, ended up taking extra bits off when at first it doesn’t look like you need to. Followed a few YouTube’s, but as always not quite detailed enough and didn’t find one in English that was anywhere near useful. I should make one! Anyway got it off eventually. Nice to know that it can be done, and i’d be able to whip it off next time pretty quickly.

Will get round to finish cleaning it today and tomorrow. Need the car back o the road as soon as i can. I think putting it back together might actually be trickier, so many wee bolts that are hard to access.View attachment 275024View attachment 275025View attachment 275026
It's a bit of a sod of a job isn't it :tearsofjoy: Especially with shovel hands. Have you had the underboost fault code by chance?
 
Made a start putting my B7 back together after selling it to a mate a couple of years ago and he unforunately had a bit of an incident in it. I saved it from Copart getting there claws on it and recovered it from the recovery yard just before Xmas after it had sat there for 3 months.
IMG 9399
New painted wing from Lothiam parts on ebay arrived in the week along with a used powerfold mirror and replacement clear lens headlamp. £200 spent so far. Few more little dents to try and pull out. Then assess the lacquer peel and make a plan. Before finally getting it to Bobby Singh to get the Hybrid map sorted!
IMG 0071

IMG 0074
6A1057B2 0442 4195 8646 9043977D3F3E
IMG 0078
 
  • Like
Reactions: northpole, Charlie Farley, Gmac and 2 others
A nice dry sunny day for a change and a chance to give the old bus a long over due shampoo and set...lol
It was a tad mucky to be honest as I've kinda let washing etc slip for a good few weeks but all good now and nice and spanking clean inside and out.:yahoo:
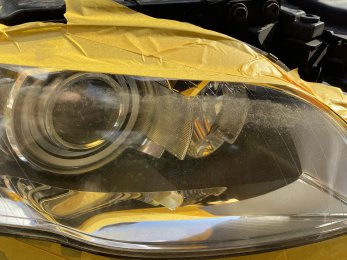
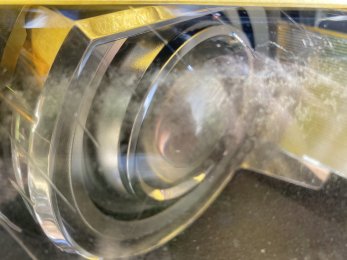
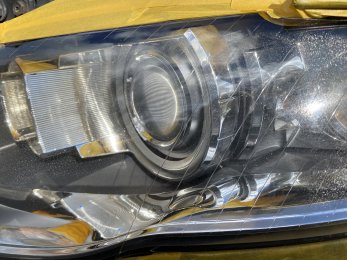
Tackled my somewhat poor murky-looking and chipped headlamp lenses, which , came up very well, I'll give myself 9 out 10 for that one. :yahoo: :thumbs up:.
Did a full vcds scan with no errors/fualts logged so another bonus also ran blocks 091 and 093 to check running timing parameters after last week's project, all good there to and bang on spec and ideal for the impending turbo upgrade etc, always good to start off with an engine that is running to spec.

So all in a very good day for the old bus.

On a side note I managed to find the working limits of my old breaker bar, safe to say it was not going be any further use so splashed out on a new one.

happy days for now.

next week sump off and oil pump freewheel and new oil filter housing/cooler gaskets to stop that pesky weeping oil leak.

then clutch in a few weeks.
before.


IMG 8236IMG 8235IMG 8237

after

IMG 8239
IMG 8238

beyond repair..lol
IMG 8231


IMG 8249
 
Last edited:
  • Like
Reactions: ttelracs, northpole, Gmac and 3 others
Good to see one saved! What are you doing about the windscreen? It might be worth fitting a Seat Exeo one - they were acoustic glass unlike the B7s, helps a bit with road noise.
 
  • Like
Reactions: northpole, Charlie Farley and LloydB7
Good to see one saved! What are you doing about the windscreen? It might be worth fitting a Seat Exeo one - they were acoustic glass unlike the B7s, helps a bit with road noise.
When I owned the car before I had a big long list of mods/retrofits planned. One of which was Auto headlamp/Wipers. I sourced a black headlining kit and rear view mirror with the sensor and eve the wiring to run down to the headlamp switch. Next was to replace the stone chipped windscreen for one with the correct bracket for the mirror. So I'll likely just insure the car and get a new one but tell them it's auto lights etc. the car has the option for acoustic glass, not sure if the windscreen is or not. I know it's genuine tinted with the sunstrip.
 
  • Like
Reactions: northpole, B7Tourer and Charlie Farley
A nice dry sunny day for a change and a chance to give the old bus a long over due shampoo and set...lol
It was a tad mucky to be honest as I've kinda let washing etc slip for a good few weeks but all good now and nice and spanking clean inside and out.:yahoo:
Tackled my somewhat poor murky-looking and chipped headlamp lenses, which , came up very well, I'll give myself 9 out 10 for that one. :yahoo: :thumbs up:.
Did a full vcds scan with no errors/fualts logged so another bonus also ran blocks 091 and 093 to check running timing parameters after last week's project, all good there to and bang on spec and ideal for the impending turbo upgrade etc, always good to start off with an engine that is running to spec.

So all in a very good day for the old bus.

On a side note I managed to find the working limits of my old breaker bar, safe to say it was not going be any further use so splashed out on a new one.

happy days for now.

next week sump off and oil pump freewheel and new oil filter housing/cooler gaskets to stop that pesky weeping oil leak.

then clutch in a few weeks.
before.


View attachment 275038View attachment 275039View attachment 275040

after

View attachment 275041View attachment 275042
beyond repair..lol
View attachment 275044

View attachment 275045
Glad to see you've still got the B7 after all these years Rob, I remember reading your thread through when I purchased this one the first time round over 5years ago.
 
  • Like
Reactions: northpole and Charlie Farley
Glad to see you've still got the B7 after all these years Rob, I remember reading your thread through when I purchased this one the first time round over 5years ago.
Yep, still here and no plans to let it go just yet. :thumbs up:
It has been 10 years in june since I took ownership with many up and downs but worth every penny of the £12,500 it cost me in 2014.:yahoo:
 
  • Like
Reactions: Rob Avant, northpole and LloydB7
It's a bit of a sod of a job isn't it :tearsofjoy: Especially with shovel hands. Have you had the underboost fault code by chance?
Thankfully no codes. Looks like you’ve saved my car’s long lost younger brother! Haha. Happy days.
 
  • Like
Reactions: northpole, LloydB7 and Charlie Farley
So I'll likely just insure the car and get a new one but tell them it's auto lights etc. the car has the option for acoustic glass, not sure if the windscreen is or not. I know it's genuine tinted with the sunstrip
They're all tinted, thermal and with sun strip, I believe, at least on S-Lines. I think you might be right about autolights/rain sensor ones being acoustic too. I've been wanting to change my stone chip hazed windscreen, for a while - it's sometimes a pain in the direct sunlight. Windscreen cover is only 50 quid on my policy, but I don't have a heart to take a hammer to it. The guy who fitted my neighbours was really impressed it was the original factory Audi one too.
 
  • Like
Reactions: northpole and LloydB7
I was temped to get my screen replaced as it has a few less-than-ideal chips, but even with screen cover , once you claim it will have that dreaded knock-on effect to the following years premiums.

I'll wait until it really goes tits up.
 
  • Like
Reactions: northpole and B7Tourer
I took my bottom S Line door blades off earlier to check for anything nasty and clean the hidden area.
3 came off very easily but the driver door one was a sod, there's metal strengthening bars inside the blades and mine had rusted so the bar had layered / swollen up it turned out.

Bit like the third one down on this pic, only mine was actually a ***** sight worse.
Cleaned everything and the driver door one was tricky to slide back on, so sprayed a little bit of silicone on the back of the blade and she slid in a lot better.

You know when you think "Hmmm, why did I bother?" it was a bit like that, but good to clean behind there, and nothing funky on the doors to report which was the main reason for removal, just thick with grime. Pins all ok.

Two tiny screws on the bottom corners of the inside of the doors and slide the blade (gently) towards the back of the car.
These things are pretty solid and I thought they were surprisingly heavy for what they are.

I expected cheap flimsy things,...which these certainly are not.

View attachment 275032
Here's the video which inspired me!


View: https://www.youtube.com/watch?app=desktop&v=XnThAwyiBh0

I rather like the Audi rings logo on the lower door panel, might look nice in silver on a brilliant black bus.
 
  • Like
Reactions: northpole
I'm not a sticker or logo fan... they distract from the bodywork, on the otherhand if choosen properly they can add style and uplift the overall look. I'll remove 4 ring logo on the rear soon and will see if it's going to stay off or replaced with a new black one as the previous owner (or the one before him) spraypainted it gloss black without any clear coat so it has loads of chrome bits showing as the black paint has come off( yes you read it right, they didn't even do that right) Anyway it's something that will wait until it's warm enough.

add the moment the rear has been debaged, the car only has the S-line badges and the front and rear logo the wheel center covers have also been sprayed black (probably in one go with the wheels) I dislike them but will address those summertime... yeah the car has been dechromed I bought it like that.
 
  • Like
Reactions: Charlie Farley
I'm on the fence with decals , if they are subtle and suit the car and positioned right on the bodywork then that's ok with me , otherwise not really keen, like many things its all a very personal choice/preference situation.

Tried the gloss tailgate rings some time ago and it was good while it lasted, but went back to chrome , just like best in all conditions etc.

My old bus was debadged at the factory as an option so very few decal badges to be seen .
 
  • Like
Reactions: northpole
Nice one but mine has been dechromed completely so the black logo's actually do make sense ( no chrome around the windows either, that has been properly done by the way)
But we shall see what way I'll go with that... I might even make my own RS4 look front grill with matching foglight covers... It's just i don't want to buy a set of chrome to just put it on and go nope.. it needs to be black.
 
Well on a bit of a whim, and not much happening around the house, i thought id just go and whip the turbo off the v6, turned out fine, bit trickier than first thought, ended up taking extra bits off when at first it doesn’t look like you need to. Followed a few YouTube’s, but as always not quite detailed enough and didn’t find one in English that was anywhere near useful. I should make one! Anyway got it off eventually. Nice to know that it can be done, and i’d be able to whip it off next time pretty quickly.

Will get round to finish cleaning it today and tomorrow. Need the car back o the road as soon as i can. I think putting it back together might actually be trickier, so many wee bolts that are hard to access.View attachment 275024View attachment 275025View attachment 275026
Another impressive bit of DIY'ing. Love seeing us 'normal folk' doing stuff like this which garages charge an arm, leg then an eye to do (often badly) and we know we'll do the job properly without any short cuts, covering up errors, torqueing up properly etc. So inspiring as I want to whip mine off too (the turbo that is) at some point because of the high mileage.
 
  • Like
Reactions: Gmac and northpole
@ttelracs it's called maintenance done right mate ;) I used to do it every big service, but i didn't remove the whole thing, as long as you can get the ovencleaner in the hot side and spray it all the way in the back until it comes oozing out, you can do it on the car.. I just removed the downpipe and closed it off with either a piece of cardboard or clingfilm. it was so easy to just pull the downpipe off, move it to the side and fill it up than taking it off would be a waste of time and money. I didn't even rinse it out, instead i always took the car for an 80 mile roundtrip motorway run hitting 70mph in 3rd gear... this was to get the turbo hot enough it burns the product off... it was the quickest way to deal with it... just one thing when you do that the car will at some point chuck out a thick black smoke cloud that'll blind others out of the blue but that is the point when the VNT mechanism is completely clean... it doesn't last long but yeah it's not nice for other road users... other than that best and easiest way of keeping the mechanism clean.
 
Last edited:
  • Like
Reactions: ttelracs
Final job of the trilogy was to 'stick' the seat backs using a strong sealant/bond and then clamp tight with a ratchet strap.
This method worked really well on the passenger side, the only difference being that I used some WD40 to lubricate the seat mechanism before sealing up the drivers side.

Now I want do a @Charlie Farley in replacing the cam adjuster and rings and replace the lower suspension arms. I'm scared of taking the infamous wishbone bolts so leaving those well alone until I have to
Did this today on my driver seat. I was vacuuming the rear footwells and happened to notice it had separated at the top. Passenger side is fine for now.

I used Evo-Stik impact glue....Ebay a few quid for a small tube.
Thin evenly spread layer inside the top of the plastic seat back, and a thin layer on the strip at the top of the back of the seat which it bonds to.

Kept the surfaces separate for 5 or so minutes until both surfaces were touch dry, and bang she bonded instantly.
Pressed hard for a few mins to be sure, but I think it's bonded well.....time will tell.

No nasty odour that I could whiff.
 
  • Like
Reactions: northpole and ttelracs
@ttelracs it's called maintenance done right mate ;) I used to do it every big service, but i didn't remove the whole thing, as long as you can get the ovencleaner in the hot side and spray it all the way in the back until it comes oozing out, you can do it on the car.. I just removed the downpipe and closed it off with either a piece of cardboard or clingfilm. it was so easy to just pull the downpipe off, move it to the side and fill it up than taking it off would be a waste of time and money. I didn't even rinse it out, instead i always took the car for an 80 mile roundtrip motorway run hitting 70mph in 3rd gear... this was to get the turbo hot enough it burns the product off... it was the quickest way to deal with it... just one thing when you do that the car will at some point chuck out a thick black smoke cloud that'll blind others out of the blue but that is the point when the VNT mechanism is completely clean... it doesn't last long but yeah it's not nice for other road users... other than that best and easiest way of keeping the mechanism clean.
Have to agree 100% with you again. I had to drive to Liverpool and back from Harrow on Saturday to bring the youngest back from Uni so took the opportunity to fill up with Super and your recommendation of Dipetane as well as trying to drive as long as possible at over 3k rpm and thrashing it on the slip roads wherever possible. Driving it today it does feel less 'clogged' and although I have a TFSI, I like the idea of removing the downpipe and accessing the hot side to give it a clean.
It shouldn't be as dirtied as a TDI but I'm fairly sure it hasn't been removed since assembly. It'll also give me the opportunity to check for play in the wheel, use it as an excuse to justify getting a hybrid one and clear out the CAT. Maybe even knock out the pre-cat as that gave good results on the A3 TFSI.
 
  • Like
Reactions: northpole
Final job of the trilogy was to 'stick' the seat backs using a strong sealant/bond and then clamp tight with a ratchet strap.
This method worked really well on the passenger side, the only difference being that I used some WD40 to lubricate the seat mechanism before sealing up the drivers side.

Now I want do a @Charlie Farley in replacing the cam adjuster and rings and replace the lower suspension arms. I'm scared of taking the infamous wishbone bolts so leaving those well alone until I have to
Doing the cam adjuster,tensioner and chain is probably one of the most worthwhile jobs one can do on the tfsi engine over 80k miles.
if you're doing the chain and tensioner then do the adjuster as well, you have to remove it anyway so best refit a new one.
You would be surprised at how much quieter the engine is, gone is that diesel idling sound. :yahoo:

if you have vcds then worth running it and checking the timing , blocks 91 and 93 will give you a better idea on chain stretch etc and if your timing is out, that aside if the engine is over 80k then it will need doing sooner than later anyway.
 
Last edited:
  • Like
Reactions: ttelracs and northpole
One part I didn't replace was the cam position sensor, i purchased one but it has been mislaid somewhere so will have to rummage through the garage and get it fitted.
The original was working ok anyway but as i have it somewhere may aswell use it.

One noticeable change is the lack of misfire under load, I've been suffering from it for some time, some days worse than others, only when accelerating, checked everything else and all was fine , no faults etc but with the newly fitted cam timing parts the misfire has gone, nothing at all no matter how hard i push it, safe to say the fault was in the variable cam timing under load.
 
  • Like
Reactions: Gmac and northpole
No going back now! Yesterday mornings job! Still to cut the replacement grill to size, will get 30 minutes or so this morning before work.
IMG 3016
 
  • Like
Reactions: Charlie Farley and northpole
A few more bit arrived today.
Some nice new Fuchs ester-based 5w40 oil and an engine support, the new oil cooler/filter, and new coolant should be here tomorrow just in time to get the2 jobs done over easter weekend. :thumbs up:

I've never had the need of an engine support beam before and I doubt it will be used more than once so went with a cheapo item , and to be honest its looks really good quality for £50 .
Most certainly not a flimsy bit of kit and probably way over-engineered for the task I have in mind, still if it makes the job a bit easier then that's fine by me.:yahoo:

So I'm getting their slowly and now its flippin' raining again, is there no end to this wet depressing weather?:grumpy:
IMG 8264
IMG 8275
 
  • Like
Reactions: northpole
@Gmac nice one! what did you use for the honeycomb? RS6 or did you go aftermarket?
Aftermarket one from ebay in some sale It’s for a A6 C6. Cut it down to shape today and glued it in to the original frame, bit of trial fitting then trimming, made all the more difficult when my Dremel 3000 decided randomly to stop working, argghhhh. Bit of tape to hold it in place, the honeycomb was more concave than the frame so was a bit trickier than id hoped. Anyway got there, and hopefully I’ll get this and the turbo back on the car tomorrow during the day.
IMG 3017
 
  • Like
  • Love
Reactions: ttelracs, Charlie Farley and northpole
looks to be ideal chap. :thumbs up:

A few chaps have done the same grille mod and used Tiger seal with good results, I'm looking forward to seeing it all done and completed/fitted.

what are you doing with number plate fixing etc?
 
  • Like
Reactions: northpole
It's ABS plastic right? If so you could simply use acetone and a soldering iron to fix it to the frame... It's what I plan to do when I finally get the right parts to do it. But nothing cheap has popped up yet.. other than those aftermarket abs honeycomb universal slaps. But I didn't look for the c6 aftermarket grills so I started to look again.. hope to find something cheap enough.
 
looks to be ideal chap. :thumbs up:

A few chaps have done the same grille mod and used Tiger seal with good results, I'm looking forward to seeing it all done and completed/fitted.

what are you doing with number plate fixing etc?
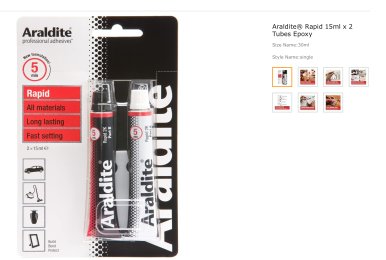
I’m going to go over mine again with tiger seal, the araldite dries hard and a bit brittle I’d say, so I’m not that confident it’s holding that well. So yeh, got it back on the bumper and all back together, but i could hear the honeycomb bit cracking the glue joins in a few places as it was flexing to put back together. It looks cracking though. The plate holder and the rings are aftermarket holders that just have small plates and screws behind the grill holding them on. Work fine.

Annoyingly I was going to replace the orange indicator bulbs whilst the bumper was off, but i forgot! Argh, so will have to get the bumper back off and remove the lights this time to replace for the chrome bulbs from Philips that are waiting to go on. Oh and now need to buy the honeycomb fog light surrounds to finish the job.
IMG 3020
 
  • Like
Reactions: Rob Avant and northpole
I like it but i would go the extra mile of painting the inner bumper black (satin black not gloss black) so it doesn't show that big red inner bumper bar off as a highlighted area, the bits of the outerbumper that you can see through the grill, i'd just tape up with some black isolation tape so it all blends into the background. That way it'll look more OEM. But other than that... this will deffo be copied by me if i can bag a C6 RS6 look aftermarket grill on the cheap.
 
I like it but i would go the extra mile of painting the inner bumper black (satin black not gloss black) so it doesn't show that big red inner bumper bar off as a highlighted area, the bits of the outerbumper that you can see through the grill, i'd just tape up with some black isolation tape so it all blends into the background. That way it'll look more OEM. But other than that... this will deffo be copied by me if i can bag a C6 RS6 look aftermarket grill on the cheap.
Funny, as when i put this photo up i noticed the red area. I’ve got a can of black so yeh, going to do that, and good idea for the wee bits.
 
  • Like
Reactions: northpole
I couldn't get on here for a few days, I think the site was down?
Good Friday was alloy wheel deep clean day. I have the standard 18" Ronals on my S Line.
Wheels off and....

Thorough power rinse first.
Gyeon tyre cleaner.
Garage Therapy One wheel shampoo.
Bilt Hamber Surfex HD for the barrels and a good scrub with a stiff brush.
Autosmart Tardis for the tar spots (and blobs haha)
Bilt Hamber Auto wheel for the iron deposits....the type of cleaner that turns dark purple.
More agitation with a stiff brush.
Lastly Gyeon Wet Coat before final rinse.

I'd been wanting to do that process for months but waited until it got a bit warmer and it was actually nice in the sun that day.
I have some good EZ brushes for inside the barrels so I can now at least keep up with things without taking the wheels off. Plus tons of clearance behind the calipers yaay.

I suspect this was the deepest clean these wheels have seen since 2006 so was time well spent. Very pleased with how they came out.
One has had a refurb definitely but to a pretty decent standard to be fair and a good colour match. The only thing that gave it away was a few specks of dust here and there in the lacquer.

When I finish aching, I've got some GTechniq wheel armour for the wheel faces, kind of a ceramic and had good results from that on my Scoob.
One thing I found very handy was the plastic wheel locator tool in the tool kit. Screws into the top lug not hole, then mount the wheel and all the holes line up. Saves struggling to get the first lug nut in.

All in all it took me about 45 mins per wheel I guess, but the results were well worth it.

Torqued down to 120nm
 
  • Like
Reactions: Gmac and northpole
Looking increasingly unlikely that I’ll get any thing done on the old bus for a few months now.
Currently stuck in cardiology unit waiting for an emergency operation, not ideal but out of my control .
Hopefully be able stay logged in from my bed with laptop.
Allway a challenge in life around every corner.

Lots of stuff to do when I get home.
 
  • Like
Reactions: northpole